Page 516 of 638

Replacing the fog light bulb
CAUTION
• High pressure halogen gas is sealed
inside the halogen bulb. The bulb
may break if the glass envelope is
scratched or the bulb is dropped.
• When handling the bulb, do not touch
the glass envelope.
• Use the same number and wattage
as originally installed as shown in the
chart. •
Do not leave the bulb out of the fog
light for a long period of time as dust,
moisture and smoke may enter the
fog light body and affect the perfor-
mance of the fog light.
NOTE:
The fog light is accessible in front of the
front tire and behind the bumper.
1. Push the ignition switch to the OFF posi- tion and wait 2 minutes.
2. Disconnect the negative (-) battery cable.
3. Disconnect the bulb connector.
4. Rotate the bulb
OAcounterclockwise
and remove.
5. Remove by pulling it straight out of the fog light assembly. Do not shake or ro-
tate the bulb when removing it. Do not
touch the glass envelope.
6. Install in the reverse order of removal.
DAYTIME RUNNING LIGHT (DRL)
(if so equipped)
For additional information on the DRL bulb
replacement, refer to the instructions out-
lined in this section.
LDI2924
Fog light (Type B) (if so equipped)
8-30Do-it-yourself
Page 517 of 638
Replacing the daytime running
light bulb (Canada only)
NOTE:
The daytime running light is accessible
in front of the front tire and behind the
bumper.
1. Push the ignition switch to the OFF posi-tion and wait 2 minutes.
2. Disconnect the negative (-) battery cable. 3. Disconnect the daytime running light
bulb connector.
4. Rotate the daytime running light bulbOAcounterclockwise and remove.
5. Remove by pulling it straight out of the fog light assembly. Do not shake or ro-
tate the bulb when removing it. Do not
touch the glass envelope.
6. Install in the reverse order of removal.
LDI2925
Fog light assembly (Type A)
(if so equipped) (Canada only)
LDI2954
Daytime running light (if so equipped) (Canada only)
Do-it-yourself8-31
Page 520 of 638

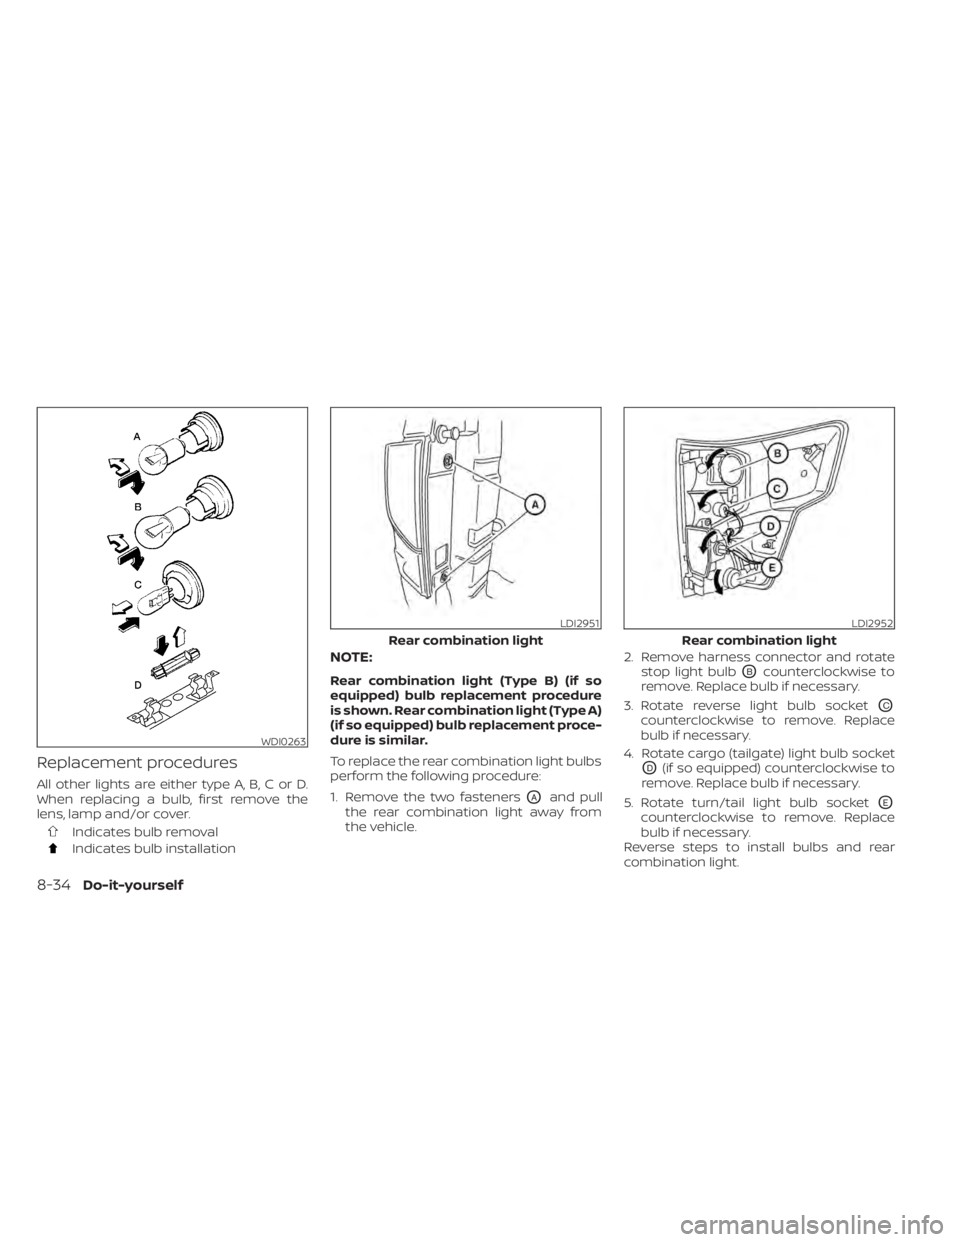
Replacement procedures
All other lights are either type A, B, C or D.
When replacing a bulb, first remove the
lens, lamp and/or cover.
Indicates bulb removal
Indicates bulb installation
NOTE:
Rear combination light (Type B) (if so
equipped) bulb replacement procedure
is shown. Rear combination light (Type A)
(if so equipped) bulb replacement proce-
dure is similar.
To replace the rear combination light bulbs
perform the following procedure:
1. Remove the two fasteners
OAand pull
the rear combination light away from
the vehicle. 2. Remove harness connector and rotate
stop light bulb
OBcounterclockwise to
remove. Replace bulb if necessary.
3. Rotate reverse light bulb socket
OC
counterclockwise to remove. Replace
bulb if necessary.
4. Rotate cargo (tailgate) light bulb socket
OD(if so equipped) counterclockwise to
remove. Replace bulb if necessary.
5. Rotate turn/tail light bulb socket
OE
counterclockwise to remove. Replace
bulb if necessary.
Reverse steps to install bulbs and rear
combination light.
WDI0263
LDI2951
Rear combination light
LDI2952
Rear combination light
8-34Do-it-yourself
Page 593 of 638
3. Insert the cleat into the channel perpen-dicular to the channel as shown. Then
rotate the cleat clockwise 90° and slide it
to the desired location.
4. Position the cleat so the nubs on thebottom fully seat into the channel
detents.
5. There should be no gap between the bottom of the cleat and the top of the
channel. Tighten the center bolt hand
tight (20-40 in-lbs.).
LTI0103
LTI0104
Technical and consumer information10-27