2021 NISSAN MURANO check engine
[x] Cancel search: check enginePage 378 of 508

CAUTION
• Continuously Variable Transmission
(CVT) models cannot be push-
started or tow-started. Attempting
to do so may cause transmission
damage.
• Do not push start this vehicle. The
three-way catalyst may be
damaged.WARNING
• Do not continue to drive if your ve-
hicle overheats. Doing so could cause
engine damage or a vehicle fire.
• To avoid the danger of being scalded,
never remove the radiator or coolant
reservoir cap while the engine is still
hot. When the radiator or coolant res-
ervoir cap is removed, pressurized
hot water will spurt out, possibly
causing serious injury.
• Do not open the hood if steam is
coming out.
If your vehicle is overheating (indicated by
an extremely high temperature gauge
reading), or if you feel a lack of engine
power, detect abnormal noise, etc. take the
following steps:
1. Move the vehicle safely off the road, ap- ply the parking brake and move the shif t
lever to P (Park).
Do not stop the engine.
2. Turn off the air conditioner. Open all the windows, move the heater or air condi-
tioner temperature control to maximum
hot and fan control to high speed. 3. Get out of the vehicle. Look and listen for
steam or coolant escaping from the ra-
diator before opening the hood. If steam
or coolant is escaping, turn off the en-
gine. Do not open the hood further until
no steam or coolant can be seen.
4. Open the engine hood.
WARNING
If steam or water is coming from the
engine, stand clear to prevent getting
burned.
5. Visually check drive belts for damage or looseness. Also check if the cooling fan
is running. The radiator hoses and radia-
tor should not leak water. If coolant is
leaking, the water pump belt is missing
or loose, or the cooling fan does not run,
stop the engine.
WARNING
Be careful not to allow your hands, hair,
jewelry or clothing to come into con-
tact with, or get caught in, engine belts
or the engine cooling fan. The engine
cooling fan can start at any time.
PUSH STARTING IF YOUR VEHICLE OVERHEATS
6-12In case of emergency
Page 379 of 508

6. Af ter the engine cools down, check thecoolant level in the engine coolant res-
ervoir tank with the engine running. Add
coolant to the engine coolant reservoir
tank if necessary. Have your vehicle re-
paired. It is recommended that you visit
a NISSAN dealer for this service. When towing your vehicle, all jurisdictional
and local regulations for towing must be
followed. Incorrect towing equipment
could damage your vehicle. Towing in-
structions are available from a NISSAN
dealer. Local service operators are gener-
ally familiar with the applicable laws and
procedures for towing. To assure proper
towing and to prevent accidental damage
to your vehicle, NISSAN recommends hav-
ing a service operator tow your vehicle. It is
advisable to have the service operator
carefully read the following precautions:
WARNING
• Never ride in a vehicle that is being
towed.
• Never get under your vehicle af ter it
has been lif ted by a tow truck.
CAUTION
• When towing, make sure that the
transmission, axles, steering system
and powertrain are in working condi-
tion. If any of these conditions apply,
dollies or a flatbed tow truck must be
used.
• Always attach safety chains before
towing. For additional information about towing
your vehicle behind a Recreational Vehicle
(RV), see “Flat towing for all-wheel drive ve-
hicle” (P. 10-28).
TOWING RECOMMENDED BY
NISSAN
NISSAN recommends towing your vehicle
based upon the type of drivetrain. For addi-
tional information, refer to the diagrams in
this section to ensure that your vehicle is
properly towed.
TOWING YOUR VEHICLE
In case of emergency6-13
Page 391 of 508

8 Do-it-yourself
Maintenance precautions.......................8-2
Engine compartment check locations ...........8-3
Engine cooling system ..........................8-4
Checking engine coolant level ................8-5
Changing engine coolant ....................8-5
Engine oil .......................................8-6
Checking engine oil level .....................8-6
Changing engine oil and oil filter ..............8-6
Continuously Variable Transmission (CVT)
fluid ............................................ 8-10
Power Steering Fluid (PSF) .......................8-11
Brake fluid ....................................... 8-11
Windshield-washer fluid ........................8-12
Windshield-washer fluid reservoir ...........8-12
Battery......................................... 8-13
Jump starting ............................... 8-14
Drive belt ....................................... 8-15
Spark plugs .................................... 8-15
Replacing spark plugs ....................... 8-15
Air cleaner ..................................... 8-16In-cabin microfilter
.......................... 8-17
Windshield wiper blades ........................8-17
Cleaning .................................... 8-17
Replacing ................................... 8-17
Brakes ......................................... 8-19
Fuses .......................................... 8-19
Engine compartment .......................8-20
Passenger compartment ...................8-21
Battery replacement ........................... 8-23
NISSAN Intelligent Key® ......................8-23
Lights .......................................... 8-25
Headlights .................................. 8-25
Fog lights (if so equipped) ...................8-25
Exterior and interior lights ...................8-25
Wheels and tires ............................... 8-27
Tire pressure ................................ 8-27
Tire labeling ................................. 8-30
Types of tires ................................
8-33
Tir
e chains .................................. 8-34
Changing wheels and tires ..................8-35
Page 393 of 508

3.5L 6 cylinder (VQ35DE engine model)
1. Engine coolant reservoir
2. Drive belt location
3. Engine oil dipstick4. Engine oil filler cap
5. Brake fluid reservoir
6. Air cleaner
7. Fuse box8. Fuse/Fusible link box
9. Battery
10 Radiator cap
11. Power steering fluid reservoir
12. Windshield-washer fluid reservoir
LDI3345
ENGINE COMPARTMENT CHECK
LOCATIONS
Do-it-yourself8-3
Page 395 of 508

CHECKING ENGINE COOLANT
LEVEL
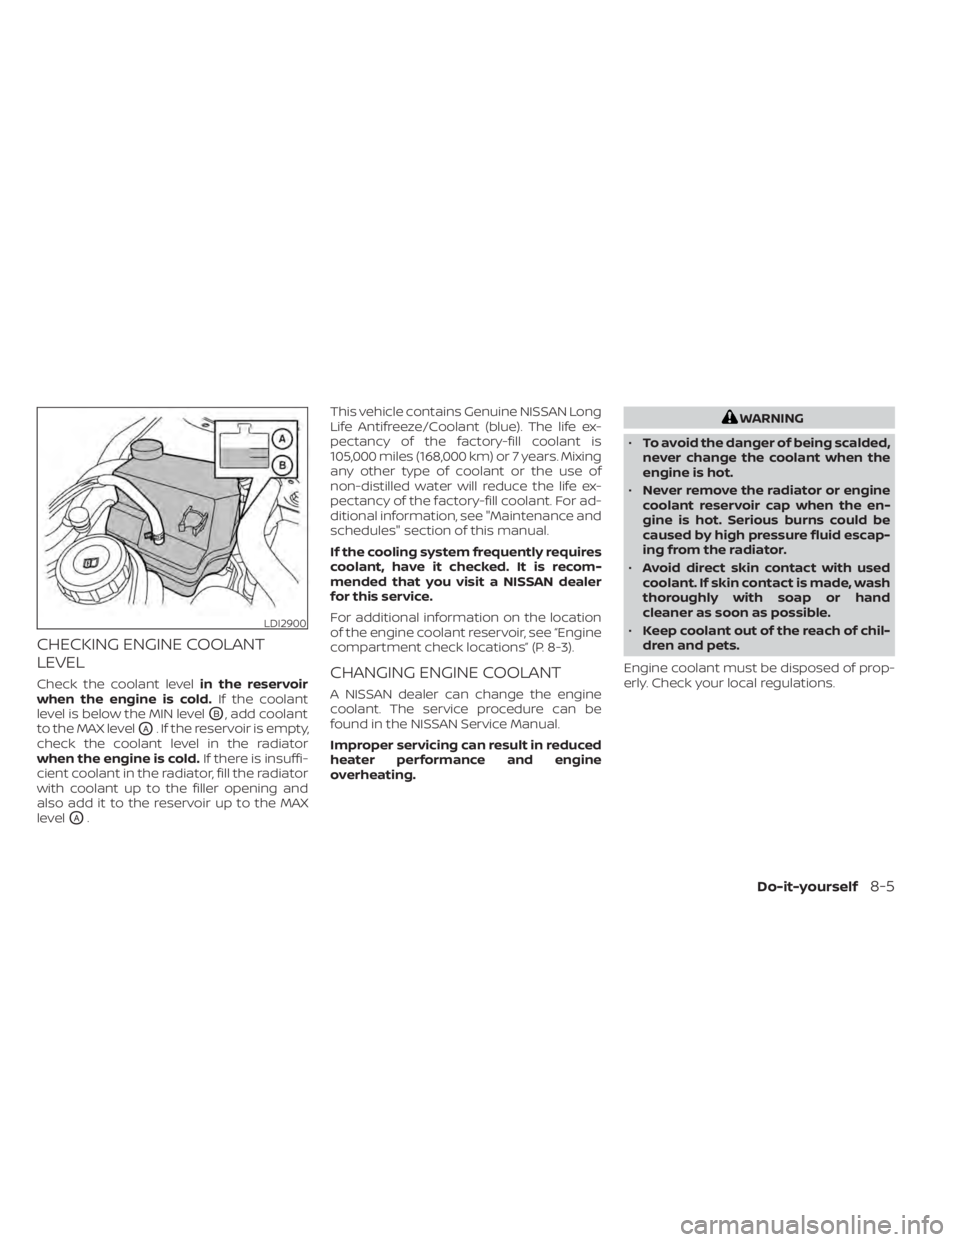
Check the coolant levelin the reservoir
when the engine is cold. If the coolant
level is below the MIN level
OB, add coolant
to the MAX level
OA. If the reservoir is empty,
check the coolant level in the radiator
when the engine is cold. If there is insuffi-
cient coolant in the radiator, fill the radiator
with coolant up to the filler opening and
also add it to the reservoir up to the MAX
level
OA. This vehicle contains Genuine NISSAN Long
Life Antifreeze/Coolant (blue). The life ex-
pectancy of the factory-fill coolant is
105,000 miles (168,000 km) or 7 years. Mixing
any other type of coolant or the use of
non-distilled water will reduce the life ex-
pectancy of the factory-fill coolant. For ad-
ditional information, see "Maintenance and
schedules" section of this manual.
If the cooling system frequently requires
coolant, have it checked. It is recom-
mended that you visit a NISSAN dealer
for this service.
For additional information on the location
of the engine coolant reservoir, see “Engine
compartment check locations” (P. 8-3).
CHANGING ENGINE COOLANT
A NISSAN dealer can change the engine
coolant. The service procedure can be
found in the NISSAN Service Manual.
Improper servicing can result in reduced
heater performance and engine
overheating.
WARNING
• To avoid the danger of being scalded,
never change the coolant when the
engine is hot.
• Never remove the radiator or engine
coolant reservoir cap when the en-
gine is hot. Serious burns could be
caused by high pressure fluid escap-
ing from the radiator.
• Avoid direct skin contact with used
coolant. If skin contact is made, wash
thoroughly with soap or hand
cleaner as soon as possible.
• Keep coolant out of the reach of chil-
dren and pets.
Engine coolant must be disposed of prop-
erly. Check your local regulations.
LDI2900
Do-it-yourself8-5
Page 396 of 508

CHECKING ENGINE OIL LEVEL
1. Park the vehicle on a level surface andapply the parking brake.
2. Start the engine and let it idle until it reaches operating temperature.
3. Turn off the engine. Wait more than 10
minutes for the oil to drain back into
the oil pan.
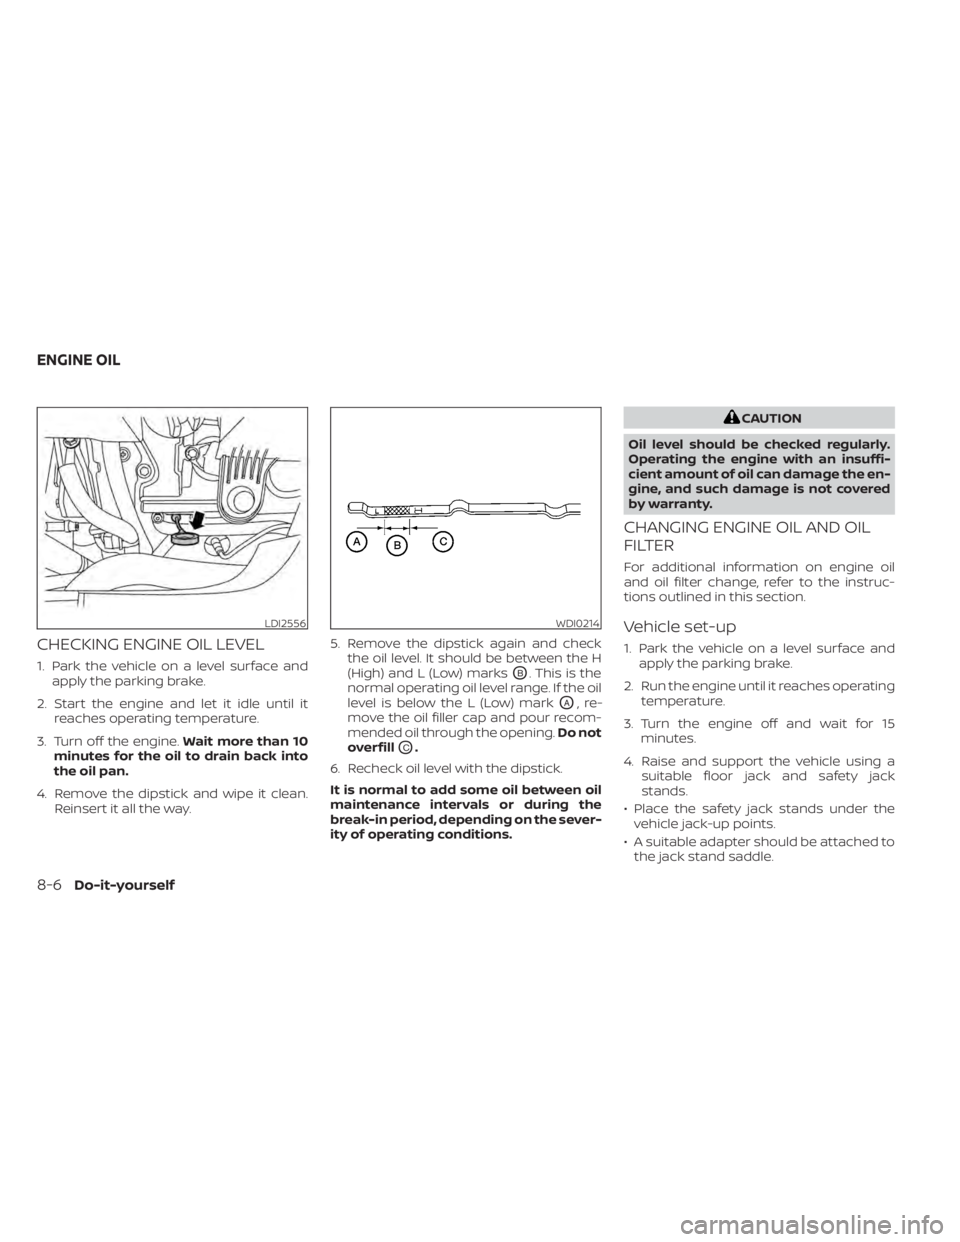
4. Remove the dipstick and wipe it clean. Reinsert it all the way. 5. Remove the dipstick again and check
the oil level. It should be between the H
(High) and L (Low) marksOB. This is the
normal operating oil level range. If the oil
level is below the L (Low) mark
OA,re-
move the oil filler cap and pour recom-
mended oil through the opening. Do not
overfill
OC.
6. Recheck oil level with the dipstick.
It is normal to add some oil between oil
maintenance intervals or during the
break-in period, depending on the sever-
ity of operating conditions.
CAUTION
Oil level should be checked regularly.
Operating the engine with an insuffi-
cient amount of oil can damage the en-
gine, and such damage is not covered
by warranty.
CHANGING ENGINE OIL AND OIL
FILTER
For additional information on engine oil
and oil filter change, refer to the instruc-
tions outlined in this section.
Vehicle set-up
1. Park the vehicle on a level surface and apply the parking brake.
2. Run the engine until it reaches operating temperature.
3. Turn the engine off and wait for 15 minutes.
4. Raise and support the vehicle using a suitable floor jack and safety jack
stands.
• Place the safety jack stands under the vehicle jack-up points.
• A suitable adapter should be attached to the jack stand saddle.
LDI2556WDI0214
ENGINE OIL
8-6Do-it-yourself
Page 400 of 508

6. Coat the gasket on the new filter withclean engine oil.
7. Screw in the oil filter clockwise until a slight resistance is felt, then tighten addi-
tionally more than 2/3 turn.
Oil filter tightening torque: 11 to 15 f t-lb (14.7 to 20.6 N·m)
8. Clean and re-install the drain plug with a new washer. Securely tighten the drain
plug with a wrench. Do not use exces-
sive force.
Drain plug tightening torque: 22 to 29 f t-lb (29.4 to 39.2 N·m)
9. Refill the engine with the recommended oil through the oil filler opening, and in-
stall the oil filler cap securely.
For additional information about drain and
refill capacity, see “Recommended fluids/
lubricants and capacities” (P. 10-2). The
drain and refill capacity depends on the oil
temperature and drain time. Use these
specifications for reference only. Always
use the dipstick to determine the proper
amount of oil in the engine. 10. Start the engine and check for leakage
around the drain plug and the oil filter.
Correct as required. Turn the engine off
and wait more than 15 minutes. Check
the oil level with the dipstick. Add en-
gine oil if necessary.
Af ter the operation
1. Reinstall engine protectors in reverse or-der of removal.
2. Lower the vehicle carefully to the ground.
3. Reset oil and oil filter maintenance re- minder. For additional information, see
“Vehicle information display” (P. 2-17).
• Dispose of waste oil and filter properly.
• Check your local regulations.
CAUTION
• NISSAN recommends using Genuine
NISSAN CVT Fluid NS-3 (or equiva-
lent) ONLY in NISSAN CVTs. Do not mix
with other fluids.
• Do not use Automatic Transmission
Fluid (ATF) or manual transmission
fluid in a NISSAN CVT, as it may dam-
age the CVT. Damage caused by the
use of fluids other than as recom-
mended is not covered under
NISSAN's New Vehicle Limited War-
ranty outlined in your Warranty Infor-
mation Booklet.
• Using fluids that are not equivalent
to Genuine NISSAN CVT Fluid NS-3
may also damage the CVT. Damage
caused by the use of fluids other than
as recommended is not covered un-
der NISSAN's New Vehicle Limited
Warranty outlined in your Warranty
Information Booklet.
When checking or replacement of CVT fluid
is required, we recommend a NISSAN
dealer for servicing.
CONTINUOUSLY VARIABLE
TRANSMISSION (CVT) FLUID
8-10Do-it-yourself
Page 402 of 508

CAUTION
Do not spill the fluid on any painted sur-
faces. This will damage the paint. If fluid
is spilled, immediately wash the sur-
face with water.
Check the fluid level in the reservoir. If the
brake fluid is below the MIN line
OB, the
brake warning light will illuminate. Add
brake fluid up to the MAX line
OA. For addi-
tional information on brake fluid type, see
“Recommended fluids/lubricants and ca-
pacities” (P. 10-2).
If the brake fluid must be added frequently,
the brake system should be thoroughly
checked. It is recommended that you visit a
NISSAN dealer for this service.
WINDSHIELD-WASHER FLUID
RESERVOIR
Fill the windshield-washer fluid reservoir pe-
riodically. Add windshield-washer fluid when
the “Low Washer Fluid” warning message
shows on the vehicle information display.
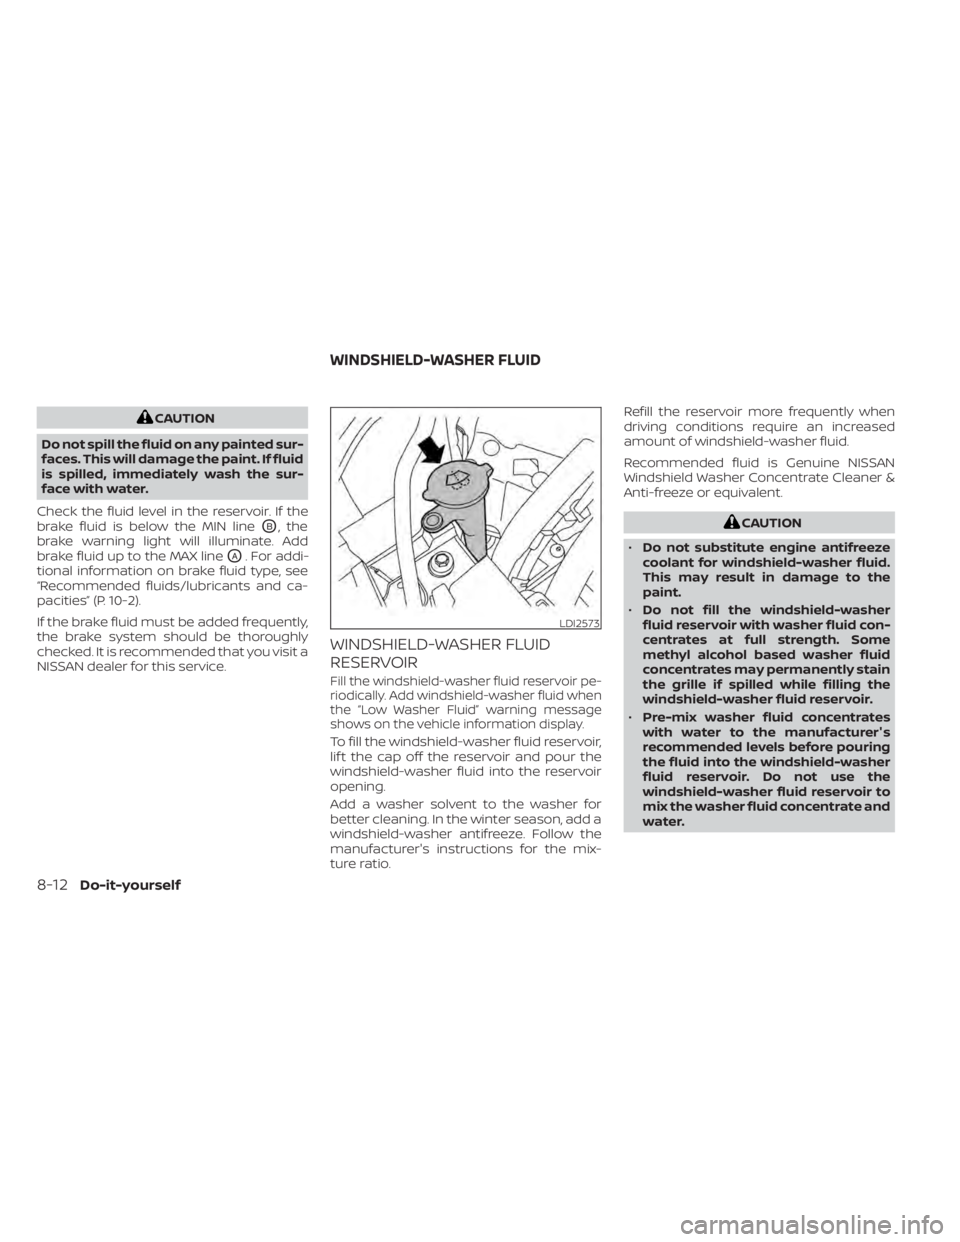
To fill the windshield-washer fluid reservoir,
lif t the cap off the reservoir and pour the
windshield-washer fluid into the reservoir
opening.
Add a washer solvent to the washer for
better cleaning. In the winter season, add a
windshield-washer antifreeze. Follow the
manufacturer's instructions for the mix-
ture ratio. Refill the reservoir more frequently when
driving conditions require an increased
amount of windshield-washer fluid.
Recommended fluid is Genuine NISSAN
Windshield Washer Concentrate Cleaner &
Anti-freeze or equivalent.
CAUTION
• Do not substitute engine antifreeze
coolant for windshield-washer fluid.
This may result in damage to the
paint.
• Do not fill the windshield-washer
fluid reservoir with washer fluid con-
centrates at full strength. Some
methyl alcohol based washer fluid
concentrates may permanently stain
the grille if spilled while filling the
windshield-washer fluid reservoir.
• Pre-mix washer fluid concentrates
with water to the manufacturer's
recommended levels before pouring
the fluid into the windshield-washer
fluid reservoir. Do not use the
windshield-washer fluid reservoir to
mix the washer fluid concentrate and
water.
LDI2573
WINDSHIELD-WASHER FLUID
8-12Do-it-yourself