2021 NISSAN FRONTIER warning light
[x] Cancel search: warning lightPage 354 of 492
•When replacing a wheel without the
TPMS such as the spare tire, the TPMS
will not function and the low tire
pressure warning light will flash for
approximately 1 minute. The light will
remain on af ter 1 minute. Have your
tires replaced and/or TPMS system
reset as soon as possible. It is recom-
mended that you visit a NISSAN
dealer for these services.
• Replacing tires with those not origi-
nally specified by NISSAN could af-
fect the proper operation of the
TPMS.
• Do not inject any tire liquid or aerosol
tire sealant into the tires, as this may
cause a malfunction of the tire pres-
sure sensors.
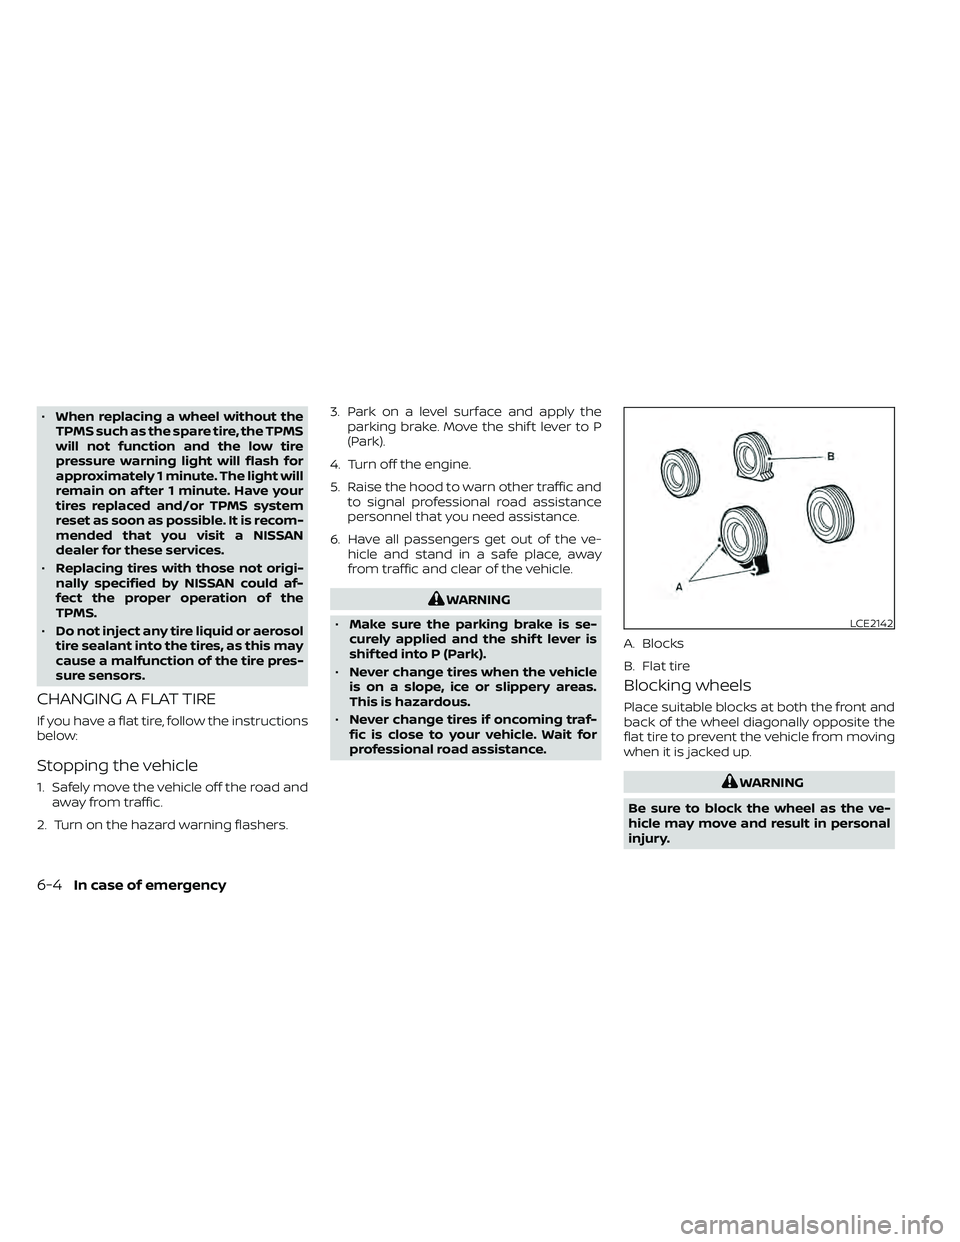
CHANGING A FLAT TIRE
If you have a flat tire, follow the instructions
below:
Stopping the vehicle
1. Safely move the vehicle off the road and away from traffic.
2. Turn on the hazard warning flashers. 3. Park on a level surface and apply the
parking brake. Move the shif t lever to P
(Park).
4. Turn off the engine.
5. Raise the hood to warn other traffic and to signal professional road assistance
personnel that you need assistance.
6. Have all passengers get out of the ve- hicle and stand in a safe place, away
from traffic and clear of the vehicle.
6-4In case of emergency
Page 362 of 492
WARNING
Always follow the instructions below.
Failure to do so could result in damage
to the charging system and cause per-
sonal injury.
1. If the booster battery is in another ve- hicle, position the 2 vehicles to bring their
batteries near each other.
Do not allow the two vehicles to touch.
2. Apply the parking brake. Move the shif t lever to P (Park). Switch off all unneces-
sary electrical systems (lights, heater, air
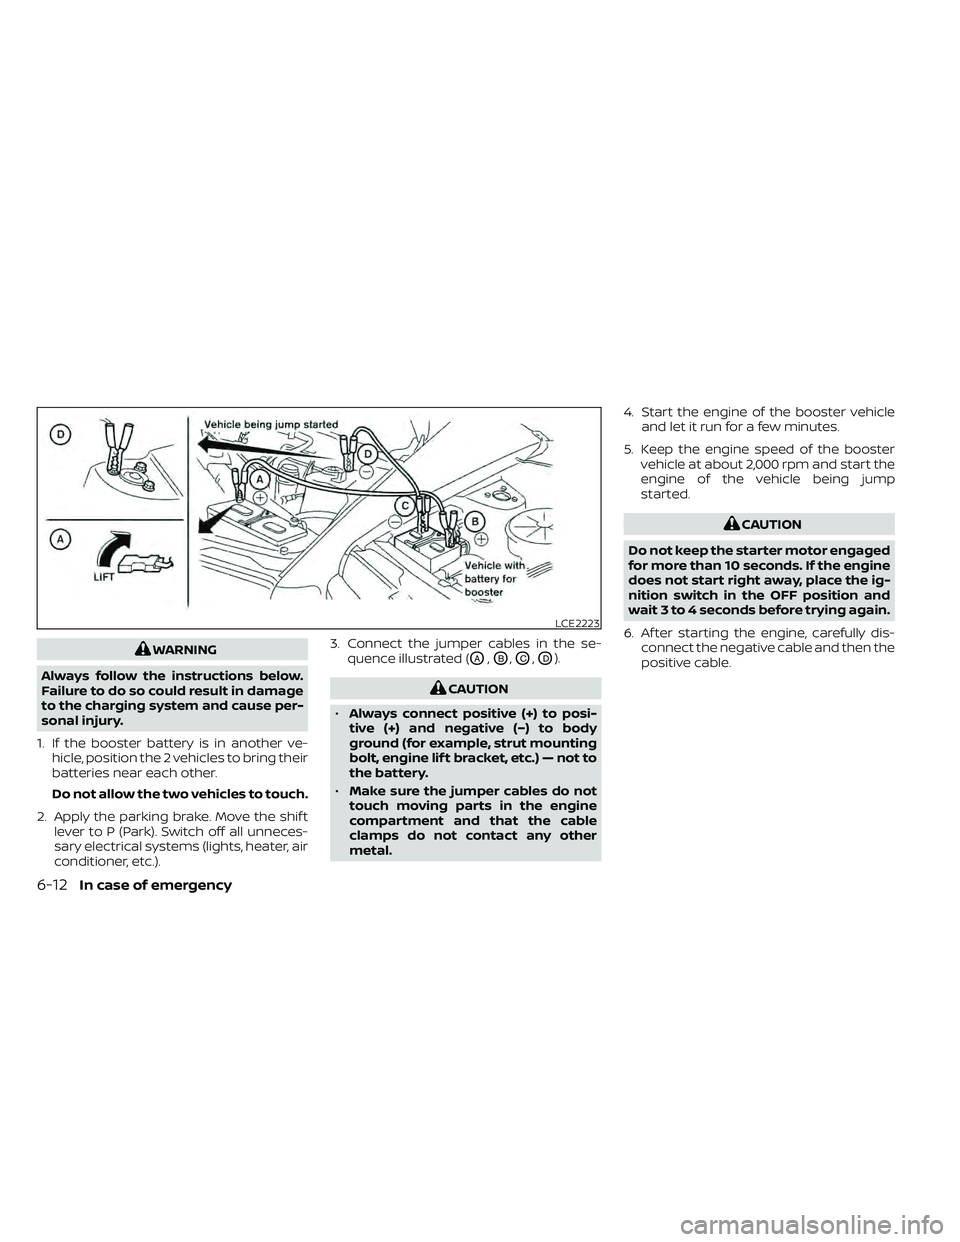
conditioner, etc.). 3. Connect the jumper cables in the se-
quence illustrated (OA,OB,OC,OD).
LCE2223
6-12In case of emergency
Page 387 of 492
If the fluid is cold and is at or below the
COLD MIN line, add Genuine NISSAN PSF-II
or equivalent to the COLD MAX line. If the
fluid is hot and below the HOT MAX line, add
Genuine NISSAN PSF-II or equivalent to the
HOT MAX line. Remove the cap and fill
through the opening.
CAUTION
Do not spill the fluid on any painted sur-
faces. This will damage the paint. If fluid
is spilled, immediately wash the sur-
face with water.
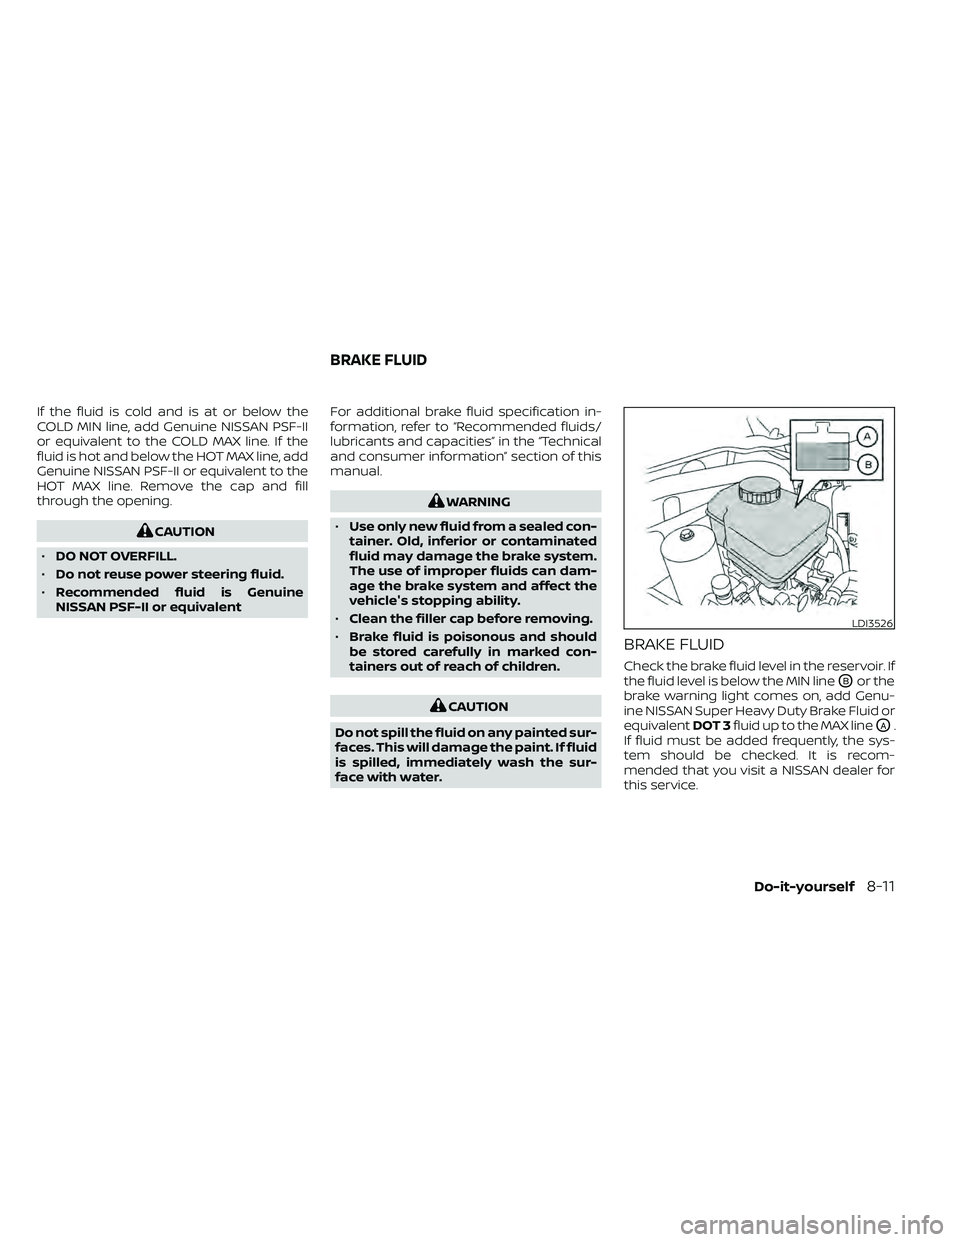
BRAKE FLUID
Check the brake fluid level in the reservoir. If
the fluid level is below the MIN line
OBor the
brake warning light comes on, add Genu-
ine NISSAN Super Heavy Duty Brake Fluid or
equivalent DOT 3fluid up to the MAX line
OA.
If fluid must be added frequently, the sys-
tem should be checked. It is recom-
mended that you visit a NISSAN dealer for
this service.
LDI3526
BRAKE FLUID
Do-it-yourself8-11
Page 388 of 492
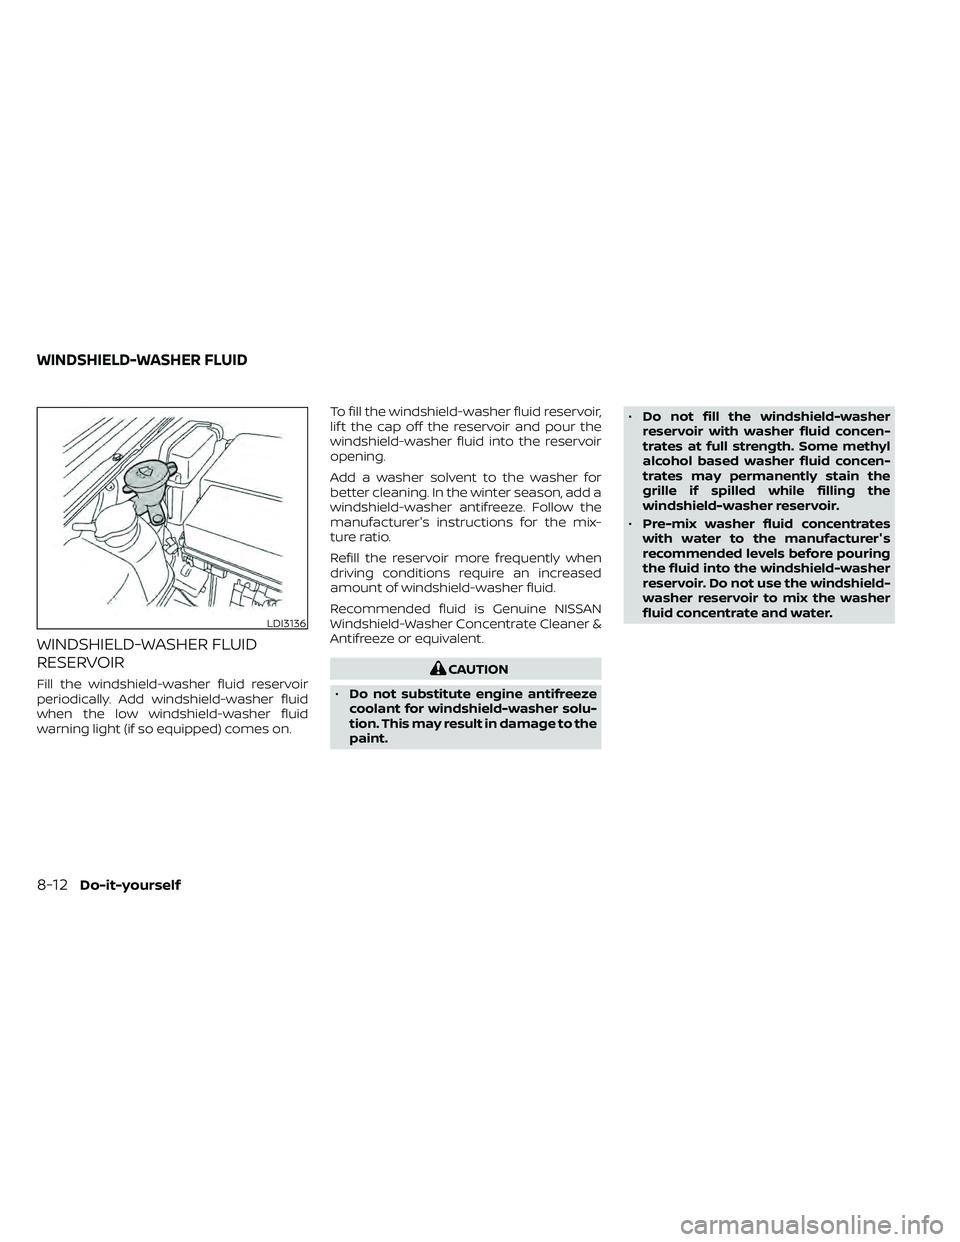
WINDSHIELD-WASHER FLUID
RESERVOIR
Fill the windshield-washer fluid reservoir
periodically. Add windshield-washer fluid
when the low windshield-washer fluid
warning light (if so equipped) comes on.To fill the windshield-washer fluid reservoir,
lif t the cap off the reservoir and pour the
windshield-washer fluid into the reservoir
opening.
Add a washer solvent to the washer for
better cleaning. In the winter season, add a
windshield-washer antifreeze. Follow the
manufacturer's instructions for the mix-
ture ratio.
Refill the reservoir more frequently when
driving conditions require an increased
amount of windshield-washer fluid.
Recommended fluid is Genuine NISSAN
Windshield-Washer Concentrate Cleaner &
Antifreeze or equivalent.
Page 407 of 492
TPMS will activate only when the vehicle is
driven at speeds above 16 mph (25 km/h).
Also, this system may not detect a sudden
drop in tire pressure (for example, a flat tire
while driving).
For additional information, refer to “Low tire
pressure warning light” in the “Instruments
and controls” section, “Tire Pressure Moni-
toring System (TPMS)” in the “Starting and
driving” section, and “Flat tire” in the “In case
of emergency” section of this manual.
Tire inflation pressure
Check the tire pressures (including the
spare) of ten and always prior to long dis-
tance trips. The recommended tire pres-
sure specifications are shown on the
F.M.V.S.S./C.M.V.S.S. certification label or the
Tire and Loading Information label under
the “Cold Tire Pressure” heading. The Tire
and Loading Information label is affixed to
the driver side center pillar. Tire pressures
should be checked regularly because:
• Most tires naturally lose air over time.
• Tires can lose air suddenly when drivenover potholes or other objects or if the
vehicle strikes a curb while parking. The tire pressures should be checked
when the tires are cold. The tires are con-
sidered COLD af ter the vehicle has been
parked for 3 or more hours, or driven less
than 1 mile (1.6 km) at moderate speeds.
Incorrect tire pressure, including under
inflation, may adversely affect tire life
and vehicle handling.
WARNING
• Improperly inflated tires can fail sud-
denly and cause an accident.
• The Gross Vehicle Weight Rating
(GVWR) is located on the F.M.V.S.S./
C.M.V.S.S. certification label. The ve-
hicle weight capacity is indicated on
the Tire and Loading Information la-
bel. Do not load your vehicle beyond
this capacity. Overloading your ve-
hicle may result in reduced tire life,
unsafe operating conditions due to
premature tire failure, or unfavorable
handling characteristics and could
also lead to a serious accident. Load-
ing beyond the specified capacity
may also result in failure of other ve-
hicle components. •
Before taking a long trip, or when-
ever you heavily load your vehicle,
use a tire pressure gauge to ensure
that the tire pressures are at the
specified level.
• For additional information regarding
tires, refer to “Important Tire Safety
Information” (US) or “Tire Safety In-
formation” (Canada) in the Warranty
Information Booklet.
Do-it-yourself8-31
Page 416 of 492
•If the wheels are changed for any
reason, always replace with wheels
which have the same off-set dimen-
sion. Wheels of a different off-set
could cause premature tire wear, de-
grade vehicle handling characteris-
tics, affect the VDC system and/or in-
terference with the brake discs. Such
interference can lead to decreased
braking efficiency and/or early brake
pad wear. For additional information
on wheel off-set dimensions, refer to
“Wheels and tires” in the “Technical
and consumer information” section
of this manual.
• When replacing a wheel without the
TPMS such as the spare tire, the TPMS
will not function and the low tire
pressure warning light will flash for
approximately 1 minute. The light will
remain on af ter 1 minute. Have your
tires replaced and/or TPMS system
reset as soon as possible. It is recom-
mended that you visit a NISSAN
dealer for this service.
• Replacing tires with those not origi-
nally specified by NISSAN could af-
fect the proper operation of the
TPMS. •
The TPMS sensor may be damaged if
it is not handled correctly. Be careful
when handling the TPMS sensor.
• When replacing the TPMS sensor, the
ID registration may be required. It is
recommended that you visit a
NISSAN dealer for ID registration.
• Do not use a valve stem cap that is
not specified by NISSAN. The valve
stem cap may become stuck.
• Be sure that the valve stem caps are
correctly fitted. Otherwise the valve
may be clogged up with dirt and
cause a malfunction or loss of
pressure.
• Do not install a damaged or de-
formed wheel or tire even if it has
been repaired. Such wheels or tires
could have structural damage and
could fail without warning.
• The use of retread tires is not
recommended.
• For additional information regarding
tires, refer to “Important Tire Safety
Information” (US) or “Tire Safety In-
formation” (Canada) in the Warranty
Information Booklet.
Page 422 of 492
brake needs adjustment, it is recom-
mended that you visit a NISSAN dealer for
this service.
Seats:
Check seat position controls such as
seat adjusters, seatback recliner, etc., to en-
sure they operate smoothly and all latches
lock securely in every position. Check that the
head restraints/headrests move up and
down smoothly and the locks (if so equipped)
hold securely in all latched positions.
Seat belts: Check that all parts of the seat
belt system (for example, buckles, anchors,
adjusters and retractors) operate properly
and smoothly, and are installed securely.
Check the belt webbing for cuts, fraying,
wear or damage.
Steering wheel: Check for changes in the
steering system, such as excessive free
play, hard steering or strange noises.
Warning lights and chimes: Make sure all
warning lights and chimes are operating
properly.
Windshield defroster: Check that the air
comes out of the defroster outlets properly
and in sufficient quantity when operating
the heater or air conditioner.
Windshield wiper and washer*: Check
that the wipers and washer operate prop-
erly and that the wipers do not streak.
Under the hood and vehicle
The maintenance items listed here should
be checked periodically (for example, each
time you check the engine oil or refuel).
Battery (for maintenance free batter-
ies)*: This vehicle is equipped with a sealed
maintenance free battery. It is recom-
mended that you visit a NISSAN dealer for
service.
NOTE:
Care should be taken to avoid situations
that can lead to potential battery dis-
charge and potential no-start conditions
such as:
1. Installation or extended use of elec-
tronic accessories that consume bat-
tery power when the engine is not run-
ning (Phone chargers, GPS, DVD
players, etc.).
2. Vehicle is not driven regularly and/or
only driven short distances.
In these cases, the battery may need to
be charged to maintain battery health.
Brake fluid level*: Make sure that the fluid
level is between the MAX and MIN lines on
the reservoir. Engine coolant level*:
Check the coolant
level when the engine is cold.
Engine drive belts*: Make sure the drive
belts are not frayed, worn, cracked or oily.
Engine oil level*: Check the level af ter
parking the vehicle on a level spot and
turning off the engine. Wait more than 15
minutes for the oil to drain back into the oil
pan.
Exhaust system: Make sure there are no
loose supports, cracks or holes. If the
sound of the exhaust seems unusual or
there is a smell of exhaust fumes, immedi-
ately have the exhaust system inspected. It
is recommended that you visit a NISSAN
dealer for this service. For additional infor-
mation, refer to “Exhaust gas (carbon mon-
oxide)” in the “Starting and driving” section
of this manual.
Fluid leaks: Check under the vehicle for
fuel, oil, water or other fluid leaks af ter the
vehicle has been parked for a while. Water
dripping from the air conditioner af ter use
is normal. If you should notice any leaks or if
fuel fumes are evident, check for the cause
and have it corrected immediately.
9-4Maintenance and schedules
Page 448 of 492
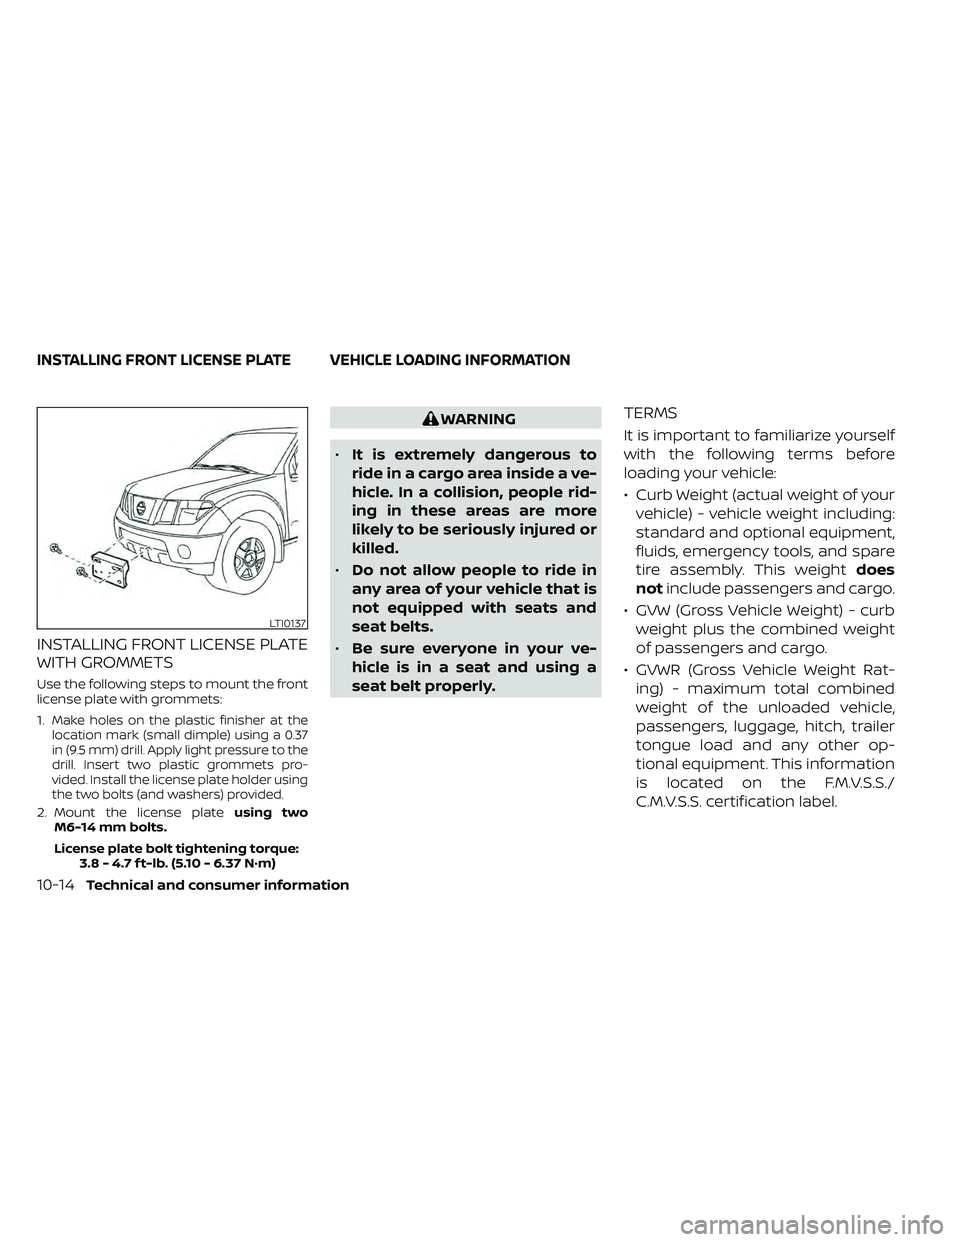
INSTALLING FRONT LICENSE PLATE
WITH GROMMETS
Use the following steps to mount the front
license plate with grommets:
1.
Make holes on the plastic finisher at the
location mark (small dimple) using a 0.37
in (9.5 mm) drill. Apply light pressure to the
drill. Insert two plastic grommets pro-
vided. Install the license plate holder using
the two bolts (and washers) provided.
2. Mount the license plate using two
M6-14 mm bolts.
License plate bolt tightening torque: 3.8 - 4.7 f t-lb. (5.10 - 6.37 N·m)
WARNING
• It is extremely dangerous to
ride in a cargo area inside a ve-
hicle. In a collision, people rid-
ing in these areas are more
likely to be seriously injured or
killed.
• Do not allow people to ride in
any area of your vehicle that is
not equipped with seats and
seat belts.
• Be sure everyone in your ve-
hicle is in a seat and using a
seat belt properly.TERMS
It is important to familiarize yourself
with the following terms before
loading your vehicle:
• Curb Weight (actual weight of your vehicle) - vehicle weight including:
standard and optional equipment,
fluids, emergency tools, and spare
tire assembly. This weight does
not include passengers and cargo.
• GVW (Gross Vehicle Weight) - curb weight plus the combined weight
of passengers and cargo.
• GVWR (Gross Vehicle Weight Rat- ing) - maximum total combined
weight of the unloaded vehicle,
passengers, luggage, hitch, trailer
tongue load and any other op-
tional equipment. This information
is located on the F.M.V.S.S./
C.M.V.S.S. certification label.
LTI0137
INSTALLING FRONT LICENSE PLATE VEHICLE LOADING INFORMATION