2021 NISSAN FRONTIER warning light
[x] Cancel search: warning lightPage 313 of 492
WARNING
• Radio waves could adversely affect
electric medical equipment. Those
who use a pacemaker should contact
the electric medical equipment
manufacturer for the possible influ-
ences before use.
• If the low tire pressure warning light
illuminates while driving, avoid sud-
den steering maneuvers or abrupt
braking, reduce vehicle speed, pull
off the road to a safe location and
stop the vehicle as soon as possible.
Driving with under-inflated tires may
permanently damage the tires and
increase the likelihood of tire failure.
Serious vehicle damage could occur
and may lead to an accident and
could result in serious personal in-
jury. Check the tire pressure for all
four tires. Adjust the tire pressure to
the recommended COLD tire pres-
sure shown on the Tire and Loading
Information label to turn the low tire
pressure warning light off. If you have
a flat tire, replace it with a spare tire
as soon as possible. For additional
information, refer to “Flat tire” in the
“In case of emergency ” section of this
manual for changing a flat tire. •
When replacing a wheel without the
TPMS such as the spare tire, when a
spare tire is mounted or a wheel is
replaced, the TPMS will not function
and the low tire pressure warning
light will flash for approximately 1
minute. The light will remain on af ter
1 minute. Have your tires replaced
and/or TPMS system reset as soon as
possible. It is recommended that you
visit a NISSAN dealer for this service.
• Replacing tires with those not origi-
nally specified by NISSAN could af-
fect the proper operation of the
TPMS.
• Do not inject any tire liquid or aerosol
tire sealant into the tires, as this may
cause a malfunction of the tire pres-
sure sensors.
CAUTION
Do not place metalized film or any
metal parts (antenna, etc.) on the win-
dows. This may cause poor reception of
the signals from the tire pressure sen-
sors, and the TPMS will not function
properly. Some devices and transmitters may tem-
porarily interfere with the operation of the
TPMS and cause the low tire pressure
warning light to illuminate.
Some examples are:
• Facilities or electric devices using similar
radio frequencies are near the vehicle.
• If a transmitter set to similar frequencies is being used in or near the vehicle.
• If a computer (or similar equipment) or a DC/AC converter is being used in or near
the vehicle.
The low tire pressure warning light may
illuminate in the following cases:
• If the vehicle is equipped with a wheel and tire without TPMS.
• If the TPMS has been replaced and the ID has not been registered.
• If the wheel is not originally specified by NISSAN.
Starting and driving5-5
Page 316 of 492
4. Gradually steer the vehicle to a safe lo-cation off the road and away from traffic
if possible.
5. Lightly apply the brake pedal to gradu- ally stop the vehicle.
6. Turn on the hazard warning flashers and contact a roadside emergency service
to change the tire. For additional infor-
mation, refer to “Changing a flat tire” in
the “In case of emergency” section of
this manual.
DRINKING ALCOHOL/DRUGS AND
DRIVING
Page 318 of 492
•Always use tires of the same type,
size, brand, construction (bias, bias-
belted, or radial), and tread pattern
on all four wheels. Install tire chains
on the rear wheels when driving on
slippery roads and drive carefully.
• Be sure to check the brakes immedi-
ately af ter driving in mud or water.
For additional information, refer to
“Wet brakes” in this section.
• Avoid parking your vehicle on steep
hills. If you get out of the vehicle and
it rolls forward, backward or side-
ways, you could be injured.
• Whenever you drive off-road through
sand, mud or water as deep as the
wheel hub, more frequent mainte-
nance may be required. For addi-
tional information, refer to “Mainte-
nance under severe operating
conditions” in the “Maintenance and
schedules” section of this manual.
WARNING
Do not operate the push-button igni-
tion switch while driving the vehicle ex-
cept in an emergency. (The engine will
stop when the ignition switch is pushed
three consecutive times in quick suc-
cession or the ignition switch is pushed
and held for more than 2 seconds.) If
the engine stops while the vehicle is
being driven, this could lead to a crash
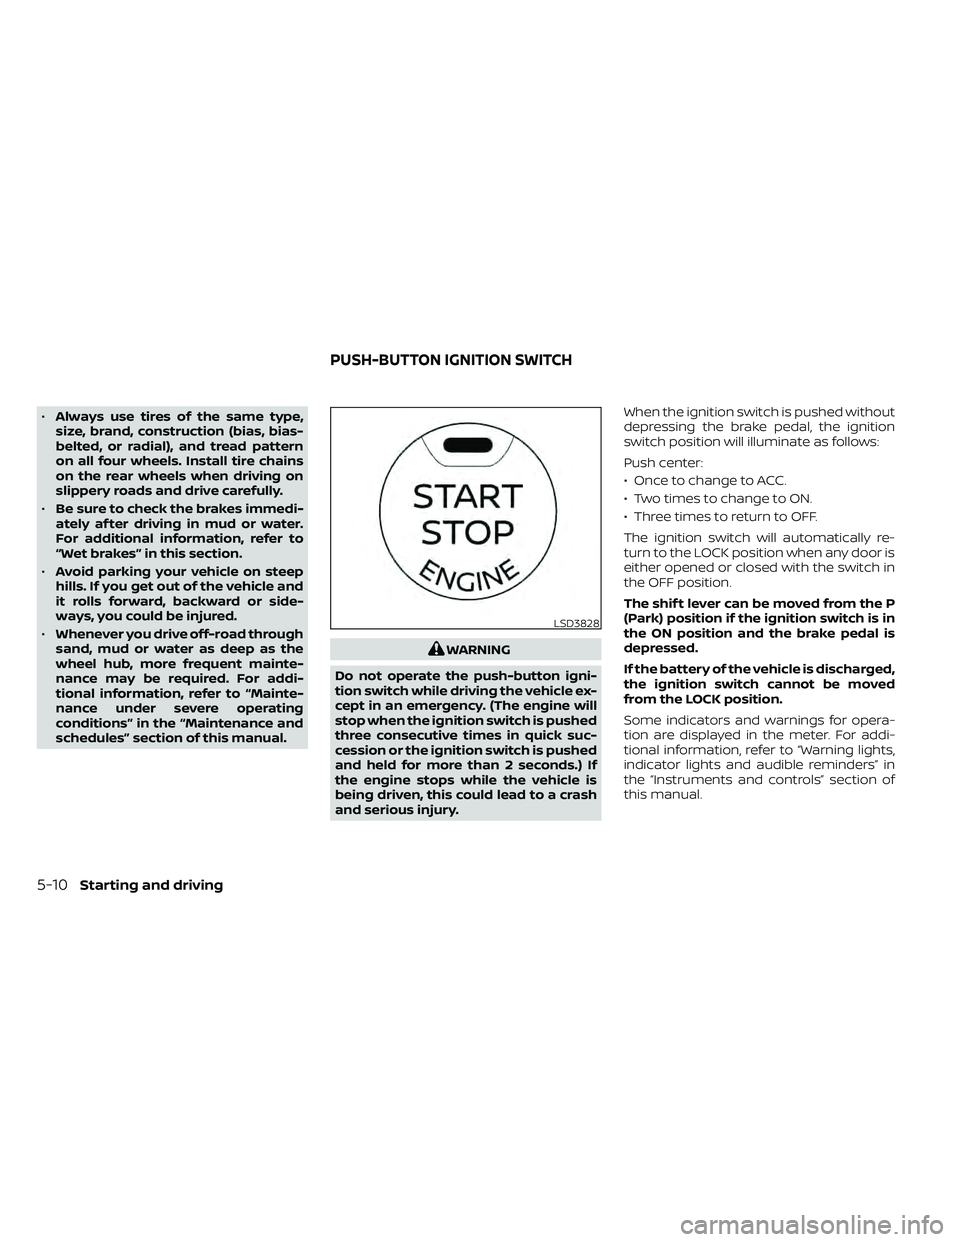
and serious injury. When the ignition switch is pushed without
depressing the brake pedal, the ignition
switch position will illuminate as follows:
Push center:
• Once to change to ACC.
• Two times to change to ON.
• Three times to return to OFF.
The ignition switch will automatically re-
turn to the LOCK position when any door is
either opened or closed with the switch in
the OFF position.
The shif t lever can be moved from the P
(Park) position if the ignition switch is in
the ON position and the brake pedal is
depressed.
If the battery of the vehicle is discharged,
the ignition switch cannot be moved
from the LOCK position.
Some indicators and warnings for opera-
tion are displayed in the meter. For addi-
tional information, refer to “Warning lights,
indicator lights and audible reminders” in
the “Instruments and controls” section of
this manual.
LSD3828
PUSH-BUTTON IGNITION SWITCH
Page 320 of 492
AUTO ACC:
With the vehicle in the P (Park) position, the
Intelligent Key with you, and the ignition
switch placed from the ON to the OFF po-
sition, the radio can still be used for a period
of time, or until the driver’s door is opened.
Af ter a period of time, functions such as
radio, navigation, and Bluetooth® Hands-
Free Phone System may be restarted by
pressing the “ON-OFF button/VOLUME
control knob” or the key fob unlock button.
For additional information, refer to “Monitor,
climate, audio, phone and voice recogni-
tion systems” in this manual.
EMERGENCY ENGINE SHUT OFF
To shut off the engine in an emergency
situation while driving, perform the follow-
ing procedure:
• Rapidly push the ignition switch threeconsecutive times in less than 1.5 sec-
onds, or
• Push and hold the ignition switch for more than 2 seconds.
NISSAN INTELLIGENT KEY®
BATTERY DISCHARGE
If the battery of the NISSAN Intelligent Key®
is discharged or environmental conditions
interfere with the Intelligent Key operation,
start the engine according to the following
procedure:
1. Place the shif t lever in the P (Park) position.
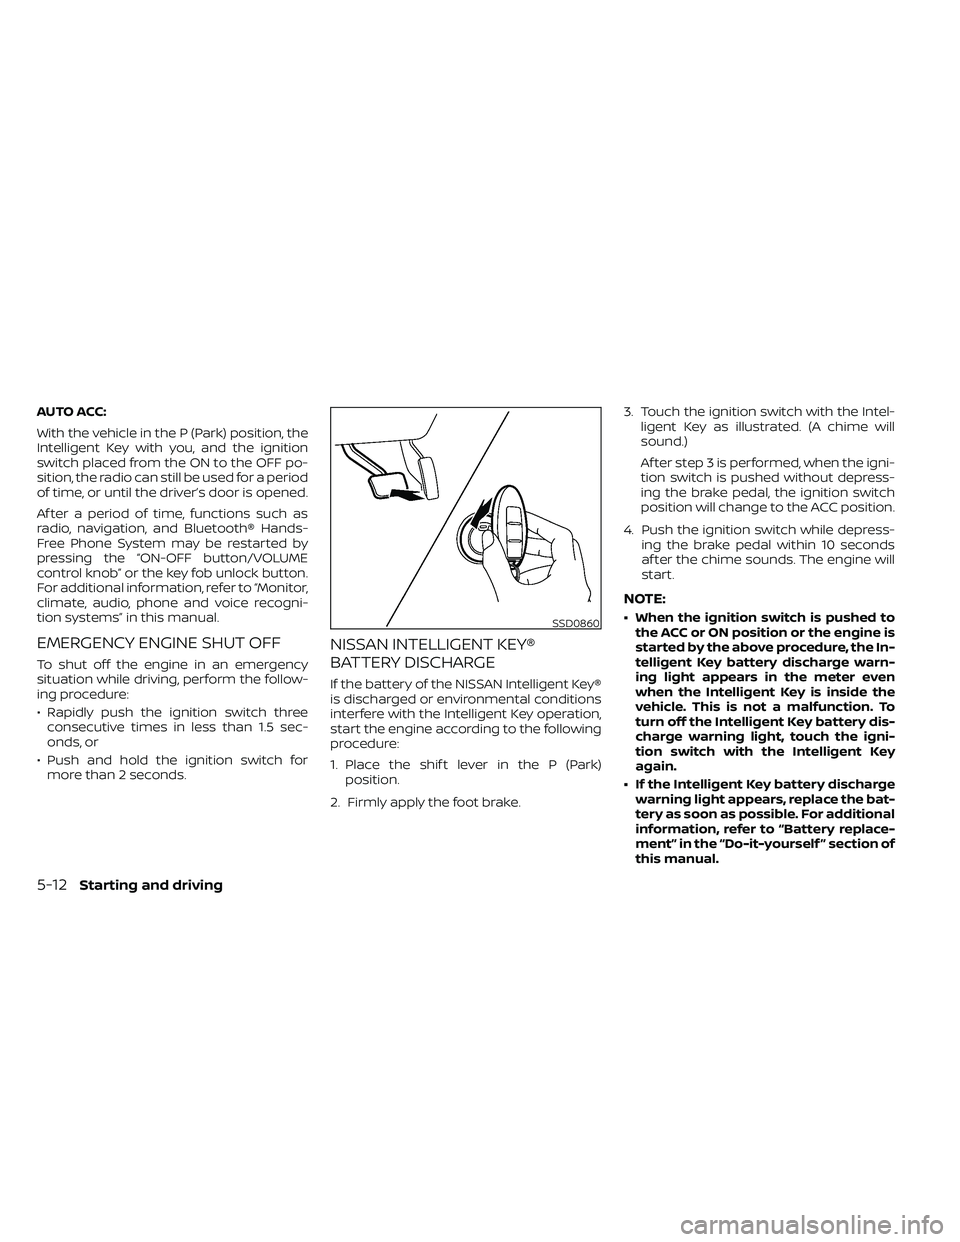
2. Firmly apply the foot brake. 3. Touch the ignition switch with the Intel-
ligent Key as illustrated. (A chime will
sound.)
Af ter step 3 is performed, when the igni-
tion switch is pushed without depress-
ing the brake pedal, the ignition switch
position will change to the ACC position.
4. Push the ignition switch while depress- ing the brake pedal within 10 seconds
af ter the chime sounds. The engine will
start.
NOTE:
• When the ignition switch is pushed tothe ACC or ON position or the engine is
started by the above procedure, the In-
telligent Key battery discharge warn-
ing light appears in the meter even
when the Intelligent Key is inside the
vehicle. This is not a malfunction. To
turn off the Intelligent Key battery dis-
charge warning light, touch the igni-
tion switch with the Intelligent Key
again.
• If the Intelligent Key battery discharge warning light appears, replace the bat-
tery as soon as possible. For additional
information, refer to “Battery replace-
ment” in the “Do-it-yourself ” section of
this manual.
5-12Starting and driving
Page 321 of 492
NISSAN VEHICLE IMMOBILIZER
SYSTEM
The NISSAN Vehicle Immobilizer System
will not allow the engine to start without
the use of the registered key.
If the engine fails to start using a registered
key (for example, when interference is
caused by another registered key, an auto-
mated toll road device or automatic pay-
ment device on the key ring), restart the
engine using the following procedures:
1. Leave the ignition switch in the ON posi-tion for approximately 5 seconds.
2. Place the ignition switch in the OFF or LOCK position, and wait approximately
10 seconds.
3. Repeat steps 1 and 2.
4. Restart the engine while holding the de- vice (which may have caused the inter-
ference) separate from the registered
key.
If the no start condition re-occurs, NISSAN
recommends placing the registered key on
a separate key ring to avoid interference
from other devices. • Make sure the area around the vehicle is
clear.
• Check fluid levels such as engine oil, cool- ant, brake, and windshield-washer fluid
as frequently as possible, or at least
whenever you refuel.
• Check that all windows and lights are clean.
• Visually inspect tires for their appearance and condition. Also check tires for proper
inflation.
• Check that all doors are closed.
• Position seat and adjust head restraints/ headrests.
• Adjust inside and outside mirrors.
• Fasten the seat belt and ask all passen- gers to do likewise.
• Check the operation of warning lights when the ignition switch is placed in the
ON position. For additional information,
refer to “Warning lights, indicator lights
and audible reminders” in the “Instru-
ments and controls” section of this
manual. 1. Apply the parking brake.
2. Move the shif t lever to P (Park) or N (Neu-
tral). P (Park) is recommended.
The starter is designed not to operate
unless the shif t lever is in either P
(Park) or N (Neutral).
3. Push the ignition switch to the ON posi- tion. Depress the brake pedal and push
the ignition switch to start the engine.
To start the engine immediately, push
and release the ignition switch while de-
pressing the brake pedal with the igni-
tion switch in any position.
• If the engine is very hard to start in extremely cold weather or when re-
starting, depress the accelerator
pedal a little (approximately 1/3 to the
floor) and while holding, crank the en-
gine. Release the accelerator pedal
when the engine starts.
• If the engine is very hard to start be- cause it is flooded, depress the accel-
erator pedal all the way to the floor
and hold it. Push the ignition switch to
the ON position to start cranking the
engine. Af ter 5 or 6 seconds, stop
cranking by pushing the ignition
switch to the LOCK position. Af ter
BEFORE STARTING THE ENGINE STARTING THE ENGINE
Starting and driving5-13
Page 327 of 492
WARNING
• Be sure the parking brake is fully re-
leased before driving. Failure to do so
can cause brake failure and lead to
an accident.
• Do not release the parking brake
from outside the vehicle.
• Do not use the shif t lever in place of
the parking brake. When parking, be
sure the parking brake is fully
engaged.
• To help avoid risk of injury or death
through unintended operation of the
vehicle and/or its systems, do not
leave children, people who require
the assistance of others or pets unat-
tended in your vehicle. Additionally,
the temperature inside a closed ve-
hicle on a warm day can quickly be-
come high enough to cause a signifi-
cant risk of injury or death to people
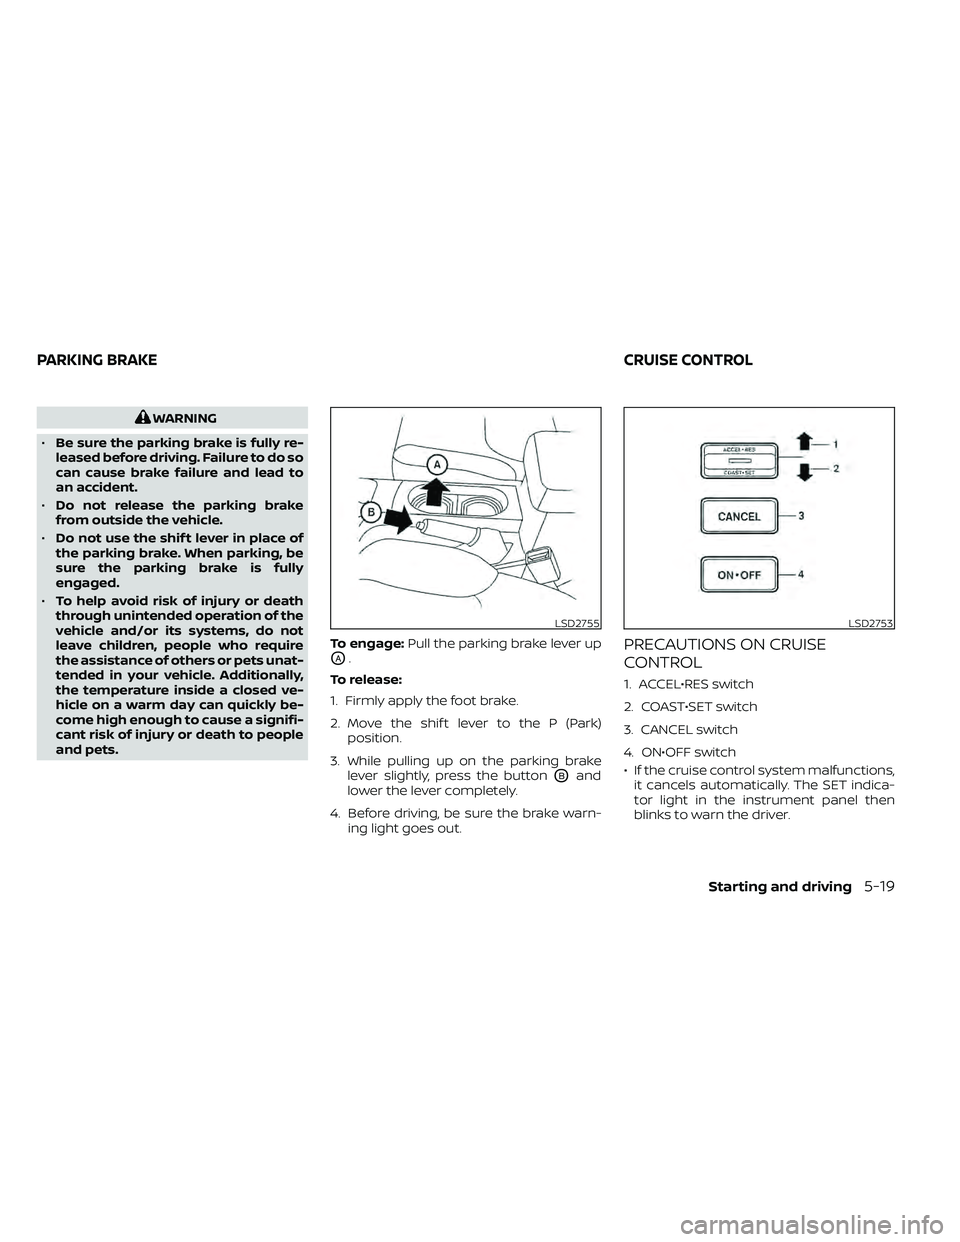
and pets. To engage:
Pull the parking brake lever up
OA.
To release:
1. Firmly apply the foot brake.
2. Move the shif t lever to the P (Park) position.
3. While pulling up on the parking brake lever slightly, press the button
OBand
lower the lever completely.
4. Before driving, be sure the brake warn- ing light goes out.
PRECAUTIONS ON CRUISE
CONTROL
1. ACCEL•RES switch
2. COAST•SET switch
3. CANCEL switch
4. ON•OFF switch
• If the cruise control system malfunctions,it cancels automatically. The SET indica-
tor light in the instrument panel then
blinks to warn the driver.
LSD2755LSD2753
PARKING BRAKE CRUISE CONTROL
Starting and driving5-19
Page 331 of 492
• Keep your engine tuned up.
• Follow the recommended scheduledmaintenance.
• Keep the tires inflated to the correct pres- sure. Low tire pressure increases tire
wear and lowers fuel economy.
• Keep the wheels in correct alignment. Im- proper alignment increases tire wear and
lowers fuel economy.
• For vehicles equipped with
, use 4H
or 4L position only when necessary.
4-Wheel Drive operation lowers fuel
economy.
• Use the recommended viscosity engine oil. For additional information, refer to “En-
gine oil and oil filter recommendations” in
the “Technical and consumer informa-
tion” section of this manual.
CAUTION
• Do not drive the vehicle in the 4H or
4LO position on dry hard surface
roads. Driving on dry, hard surfaces in
4H or 4LO may cause unnecessary
noise, tire wear and increased fuel
consumption.
If the 4WD warning light turns on
when you are driving on dry hard sur-
face roads:
– In the 4H position, shif t the 4WD
shif t switch to 2–Wheel Drive
(2WD).
– In the 4LO position for automatic
transmission vehicles, stop the
vehicle and shif t the shif t lever to
the N (Neutral) position with the
brake pedal depressed and shif t
the 4WD shif t switch to 2WD.
• If the warning light is still on af ter the
above operation, have your vehicle
checked as soon as possible. It is rec-
ommended that you visit a NISSAN
dealer for this service.
INCREASING FUEL ECONOMYUSING 4–WHEEL DRIVE (4WD)
(if so equipped)
Starting and driving5-23
Page 333 of 492
*1: Before moving the shif t lever from N (Neutral), wait until the transfer 4LO position indicator light stays on steady. This indicates that the 4WD shif t procedure
is completed and the transfer gear is correctly set in the 4LO position. If the vehicle is shif ted into gear before the indicator is on steady, the transf er gear
may grind, not engage correctly or stay in the neutral position.
- If the 4WD warning light illuminates, perform the following procedure to return the transfer case to correct operating condition.
1. Turn off the engine by placing the ignition switch in the OFF position.
2. Start the engine.
- Check that the 4WD warning light turns off. If the 4WD warning light illuminates, have the system checked. It is recommended that you visit a NISSAN dea ler
for this service.
3. Apply the parking brake, depress the brake pedal and move the shif t lever to N (Neutral) position.
4. With the brake pedal depressed, move the 4WD shif t switch to the desired mode.
- Be sure to wait until the transfer gear change completes before shif ting the shif t lever from the N (Neutral) position.
*2: While changing in and out of 4LO, the ignition switch must be in the ON position and the vehicle's engine must be running for a shif t to take place and for the indicator lights (4WD shif t and 4LO position indicator) to be operable. Otherwise, the shif t will not take place and no indicator lights will be on o r flashing.
*3: Make sure the transfer 4LO position indicator light turns on when you shif t the 4WD shif t switch to 4LO. The
indicator light will also turn on when 4LO
is selected. For additional information, refer to “Vehicle Dynamic Control (VDC) system” in this section.
When the 4LO position is selected, the VDC system is disabled and the VDC off indicator light illuminates, refer to “Vehicle Dynamic Control (VDC) off indicator
light” in the “Instruments and controls” section of this manual.
Starting and driving5-25