2021 NISSAN FRONTIER ECU
[x] Cancel search: ECUPage 353 of 492
To shut off the engine in an emergency
situation while driving, perform the follow-
ing procedure:
– Rapidly push the push-button ignitionswitch three consecutive times in less
than 1.5 seconds, or
– Push and hold the push-button ignition switch for more than 2 seconds.TIRE PRESSURE MONITORING
SYSTEM (TPMS)
This vehicle is equipped with TPMS. It moni-
tors tire pressure of all tires except the
spare. When the low tire pressure warning
light is lit, and the CHECK TIRE PRES (pres-
sure) warning message is displayed in the
odometer, one or more of your tires is sig-
nificantly under-inflated. If the vehicle is be-
ing driven with low tire pressure, the TPMS
will activate and warn you of it by the low
tire pressure warning light. This system will
activate only when the vehicle is driven at
speeds above 16 mph (25 km/h). For addi-
tional information, refer to “Warning lights,
indicator lights and audible reminders” in
the “Instruments and Controls” section,
and “Tire Pressure Monitoring System
(TPMS)” in the “Starting and driving” section
of this manual.
Page 360 of 492
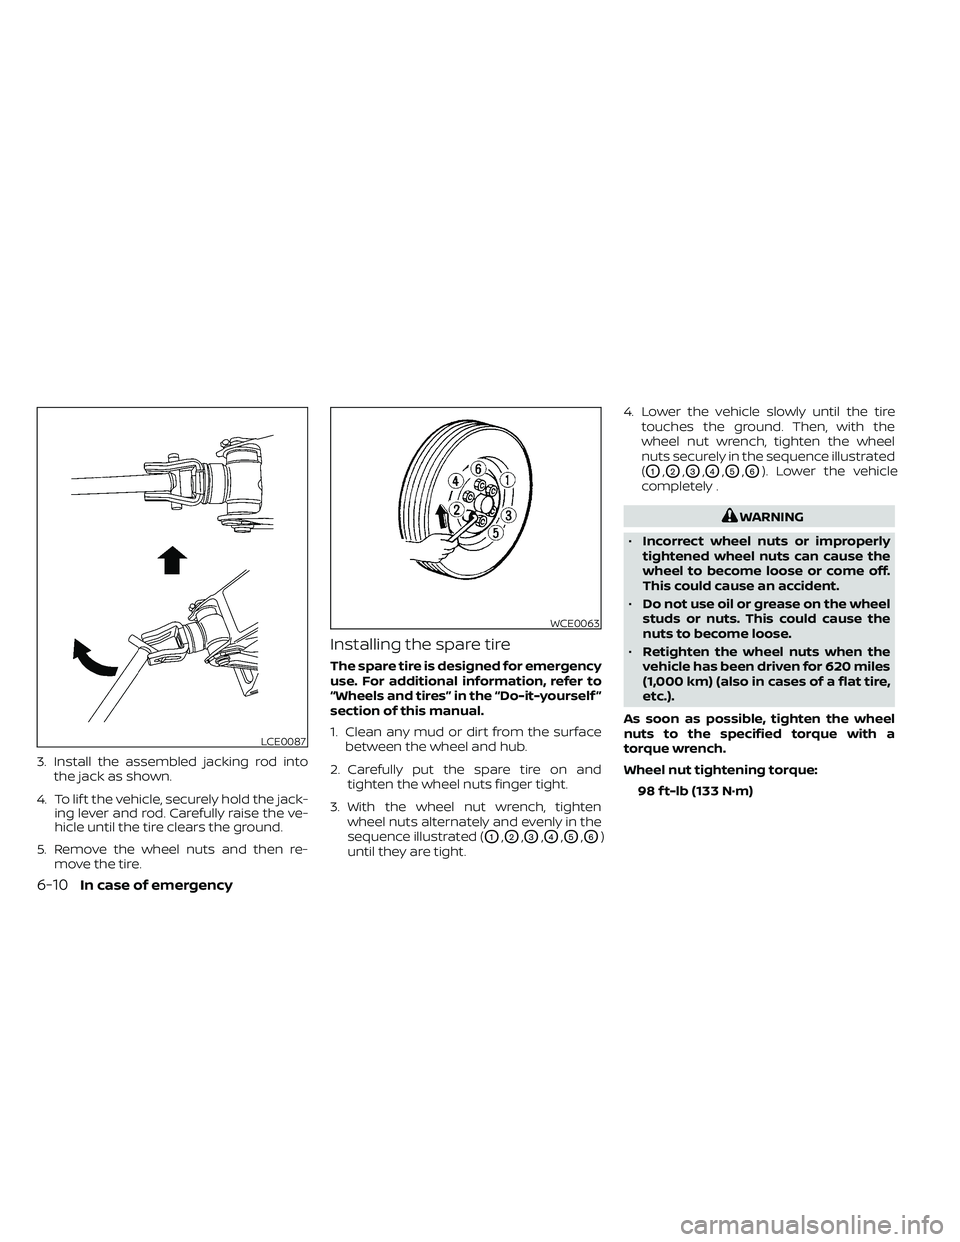
3. Install the assembled jacking rod intothe jack as shown.
4. To lif t the vehicle, securely hold the jack- ing lever and rod. Carefully raise the ve-
hicle until the tire clears the ground.
5. Remove the wheel nuts and then re- move the tire.
Installing the spare tire
The spare tire is designed for emergency
use. For additional information, refer to
“Wheels and tires” in the “Do-it-yourself ”
section of this manual.
1. Clean any mud or dirt from the surfacebetween the wheel and hub.
2. Carefully put the spare tire on and tighten the wheel nuts finger tight.
3. With the wheel nut wrench, tighten wheel nuts alternately and evenly in the
sequence illustrated (
O1,O2,O3,O4,O5,O6)
until they are tight. 4. Lower the vehicle slowly until the tire
touches the ground. Then, with the
wheel nut wrench, tighten the wheel
nuts securely in the sequence illustrated
(
O1,O2,O3,O4,O5,O6). Lower the vehicle
completely .
WCE0063
6-10In case of emergency
Page 361 of 492
The wheel nuts must be kept tightened to
specification at all times. It is recom-
mended that wheel nuts be tightened to
specifications at each lubrication interval.
Adjust tire pressure to the COLD pressure.
COLD pressure: Af ter vehicle has been
parked for 3 hours or more or driven less
than 1 mile (1.6 km).
COLD tire pressures are shown on the
Tire and Loading Information label lo-
cated in the driver's door opening.
5. Securely store the jacking equipment inthe vehicle and the flat tire under the
vehicle. For additional information about
storing the flat tire, refer to “Getting the
spare tire and tools” in this section.
Page 374 of 492
•Properly position the mats in the
floorwell using the floor mat posi-
tioning hook. For additional informa-
tion, refer to "Floor mat installation"
in this section.
• Make sure the floor mat does not in-
terfere with pedal operation.
• Periodically check the floor mats to
make sure they are properly
installed.
• Af ter cleaning the vehicle interior,
check the floor mats to make sure
they are properly installed.
The use of Genuine NISSAN floor mats can
extend the life of your vehicle carpet and
make it easier to clean the interior. Mats
should be maintained with regular clean-
ing and replaced if they become exces-
sively worn.
Floor mat installation
Your vehicle is equipped with floor mat po-
sitioning hook(s). The number and shape of
the floor mat positioning hooks for each
seating position varies depending on the
vehicle. When installing Genuine NISSAN floor mats,
follow the installation instructions provided
with the mat and the following:
1. With the ignition in the OFF position, the
shif t lever in P (Park) position and with
the parking brake fully applied, position
the floor mat in the floorwell so that the
floor mat grommet holes are aligned
with the hook(s).
2. Secure the grommet holes into the hook(s) and ensure that the floor mat is
properly positioned.
3. Make sure the floor mat does not inter- fere with pedal operation. With the igni-
tion still in the OFF position, the shif t le-
ver in the P (Park) position and with the
parking brake applied, fully apply and re-
lease all pedals. The floor mat must not
interfere with pedal operation or prevent
the pedal from returning to its normal
position.
It is recommended that you visit a NISSAN
dealer for details about installing the floor
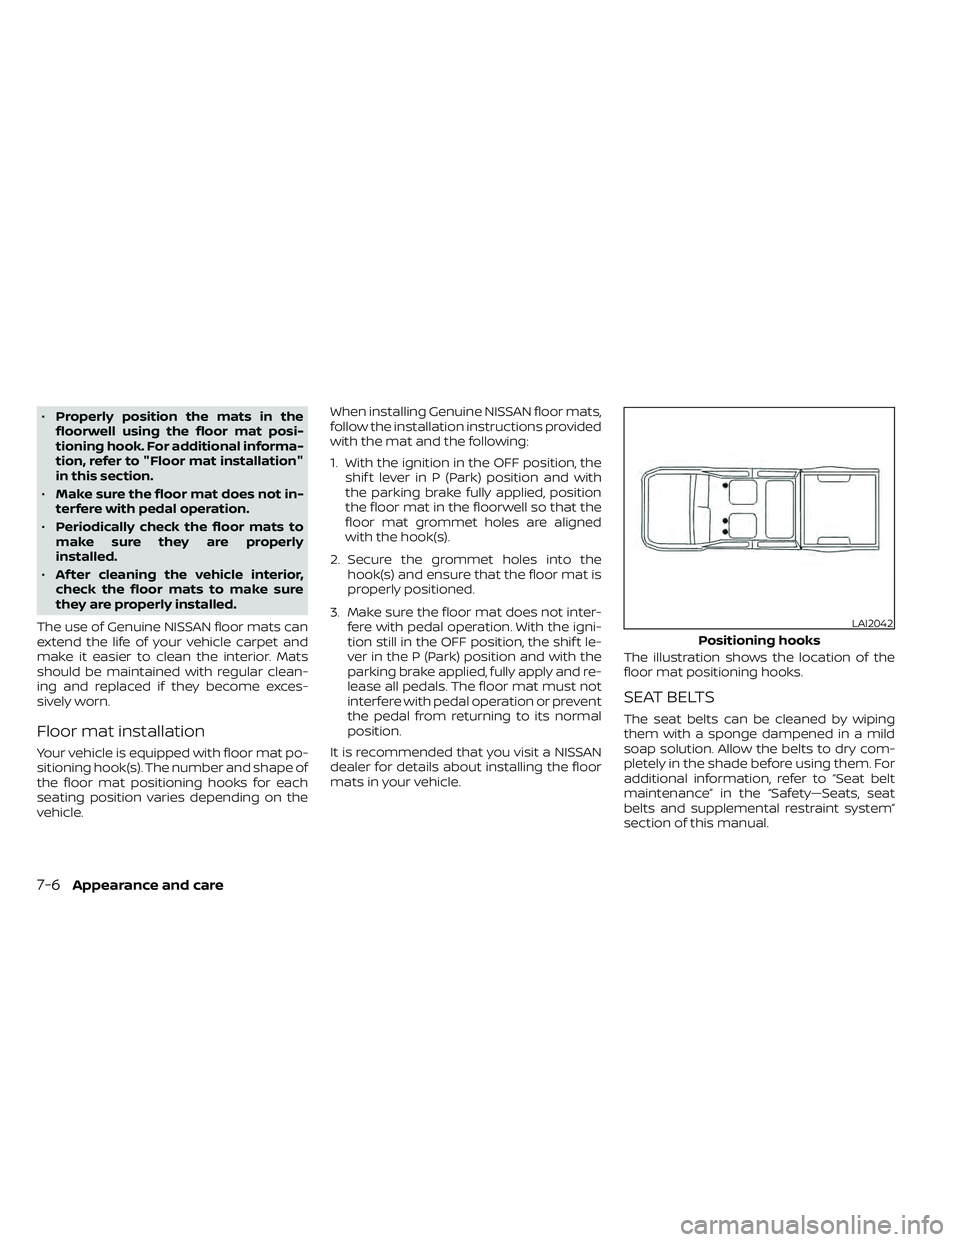
mats in your vehicle. The illustration shows the location of the
floor mat positioning hooks.
SEAT BELTS
The seat belts can be cleaned by wiping
them with a sponge dampened in a mild
soap solution. Allow the belts to dry com-
pletely in the shade before using them. For
additional information, refer to “Seat belt
maintenance” in the “Safety—Seats, seat
belts and supplemental restraint system”
section of this manual.
LAI2042
Positioning hooks
Page 397 of 492
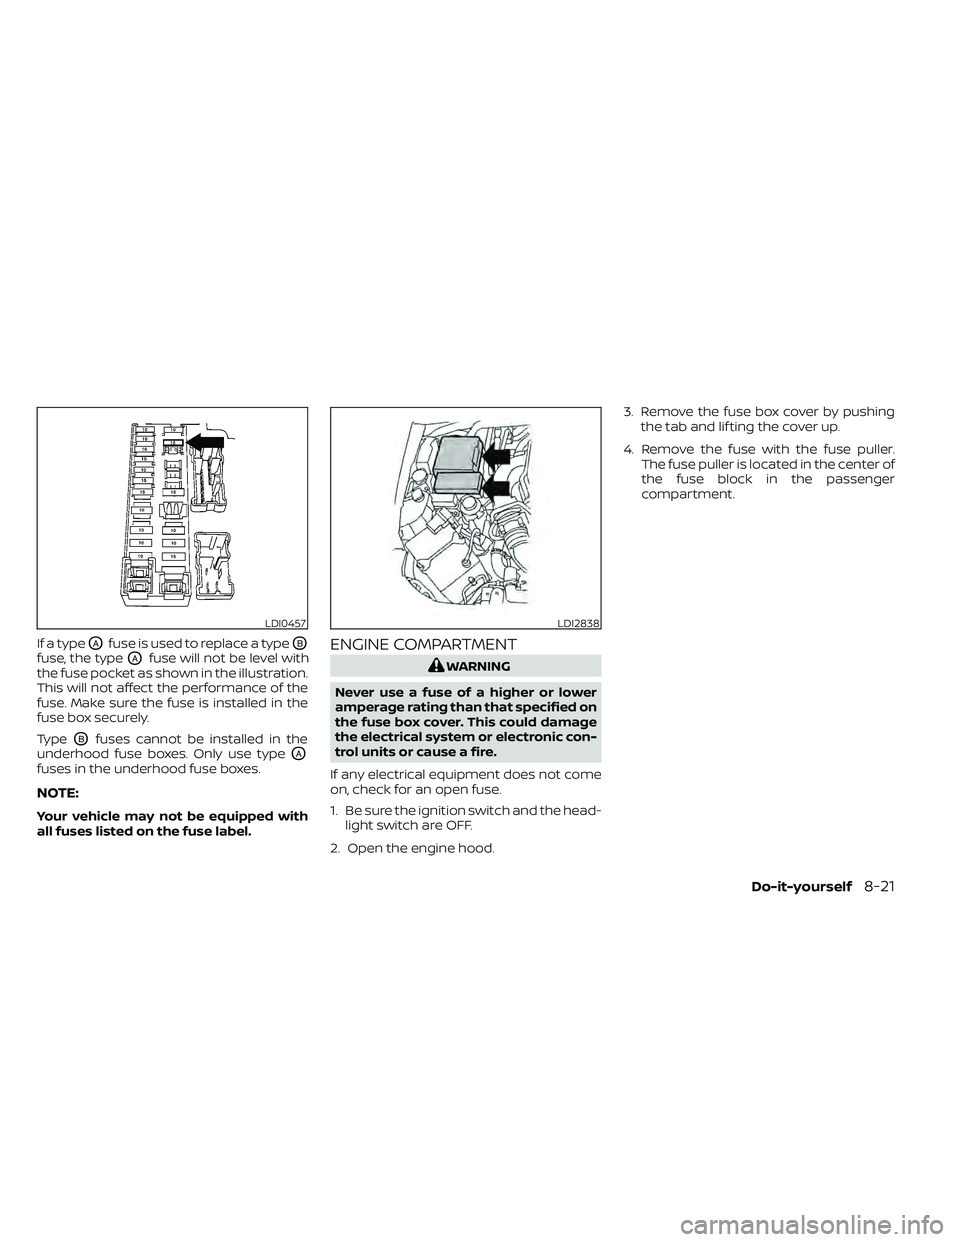
If a typeOAfuse is used to replace a typeOB
fuse, the typeOAfuse will not be level with
the fuse pocket as shown in the illustration.
This will not affect the performance of the
fuse. Make sure the fuse is installed in the
fuse box securely.
Type
OBfuses cannot be installed in the
underhood fuse boxes. Only use type
OA
fuses in the underhood fuse boxes.
NOTE:
Your vehicle may not be equipped with
all fuses listed on the fuse label.
ENGINE COMPARTMENT
LDI0457LDI2838
Page 401 of 492
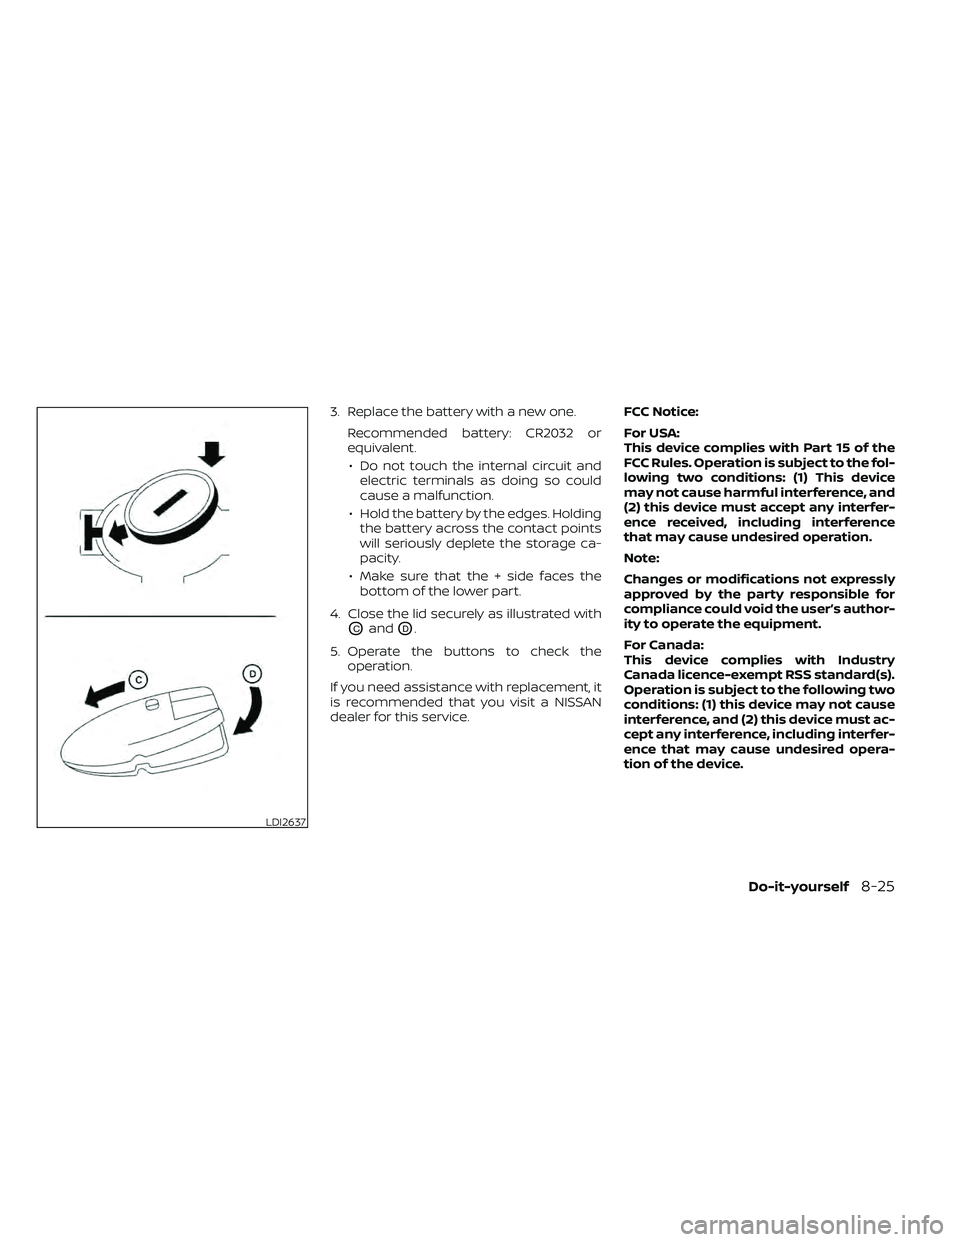
3. Replace the battery with a new one.Recommended battery: CR2032 or
equivalent.• Do not touch the internal circuit and electric terminals as doing so could
cause a malfunction.
• Hold the battery by the edges. Holding the battery across the contact points
will seriously deplete the storage ca-
pacity.
• Make sure that the + side faces the bottom of the lower part.
4. Close the lid securely as illustrated with
OCandOD.
5. Operate the buttons to check the operation.
If you need assistance with replacement, it
is recommended that you visit a NISSAN
dealer for this service. FCC Notice:
For USA:
This device complies with Part 15 of the
FCC Rules. Operation is subject to the fol-
lowing two conditions: (1) This device
may not cause harmful interference, and
(2) this device must accept any interfer-
ence received, including interference
that may cause undesired operation.
Note:
Changes or modifications not expressly
approved by the party responsible for
compliance could void the user’s author-
ity to operate the equipment.
For Canada:
This device complies with Industry
Canada licence-exempt RSS standard(s).
Operation is subject to the following two
conditions: (1) this device may not cause
interference, and (2) this device must ac-
cept any interference, including interfer-
ence that may cause undesired opera-
tion of the device.
Page 413 of 492
Summer tires
NISSAN specifies summer tires on some
models to provide superior performance
on dry roads. Summer tire performance is
substantially reduced in snow and ice.
Summer tires do not have the tire traction
rating “M&S” on the tire sidewall.
If you plan to operate your vehicle in snowy
or icy conditions, NISSAN recommends the
use of SNOW tires or ALL SEASON tires on all
four wheels.
Snow tires
If snow tires are needed, it is necessary to
select tires equivalent in size and load rat-
ing to the original equipment tires. If you do
not, it can adversely affect the safety and
handling of your vehicle.
Generally, snow tires have lower speed rat-
ings than factory equipped tires and may
not match the potential maximum vehicle
speed. Never exceed the maximum speed
rating of the tire.
If you install snow tires, they must be the
same size, brand, construction and tread
pattern on all four wheels.For additional traction on icy roads, stud-
ded tires may be used. However, some U.S.
states and Canadian provinces prohibit
their use. Check local, state and provincial
laws before installing studded tires. Skid
and traction capabilities of studded snow
tires on wet or dry surfaces may be poorer
than that of non-studded snow tires.
TIRE CHAINS
Use of tire chains may be prohibited ac-
cording to location. Check the local laws
before installing tire chains. When installing
tire chains, make sure they are the proper
size for the tires on your vehicle and are
installed according to the chain manufac-
turer's suggestions.
Use only SAE class “S”
chains. Class “S” chains are used on ve-
hicles with restricted tire to vehicle clear-
ance. Vehicles that can use Class “S” chains
are designed to meet the minimum clear-
ances between the tire and the closest ve-
hicle suspension or body component re-
quired to accommodate the use of a
winter traction device (tire chains or
cables). The minimum clearances are de-
termined using the factory equipped tire
size. Other types may damage your vehicle.
Use chain tensioners when recommended
by the tire chain manufacturer to ensure a
tight fit. Loose end links of the tire chain must be secured or removed to prevent
the possibility of whipping action damage
to the fenders or underbody. If possible,
avoid fully loading your vehicle when using
tire chains. In addition, drive at a reduced
speed. Otherwise, your vehicle may be
damaged and/or vehicle handling and
performance may be adversely affected.
Tire chains must be installed only on the
rear wheels and not on the front wheels.
Do not use tire chains on dry roads. Driving
with chains in such conditions can cause
damage to the various mechanisms of the
vehicle due to some overstress.
Use only the 2WD range when driving on
clear paved roads.
Do-it-yourself8-37
Page 420 of 492
Some day-to-day and regular mainte-
nance is essential to maintain your vehicle
good mechanical condition, as well as its
emissions and engine performance.
It is the owner's responsibility to make sure
that the scheduled maintenance, as well as
general maintenance, is performed.
As the vehicle owner, you are the only one
who can ensure that your vehicle receives
proper maintenance. You are a vital link in
the maintenance chain.
GENERAL MAINTENANCE
General maintenance includes those items
which should be checked during normal
day-to-day operation. They are essential
for proper vehicle operation. It is your re-
sponsibility to perform these procedures
regularly as prescribed.
Performing general maintenance checks
requires minimal mechanical skill and only
a few general automotive tools.
These checks or inspections can be done
by yourself, a qualified technician or, if you
prefer, a NISSAN dealer.
SCHEDULED MAINTENANCE
The maintenance items listed in this sec-
tion are required to be serviced at regular
intervals. However under severe driving
conditions, additional or more frequent
maintenance will be required.
WHERE TO GO FOR SERVICE
If maintenance service is required or your
vehicle appears to malfunction, have the
systems checked and serviced. It is recom-
mended that you visit a NISSAN dealer for
this service.
NISSAN technicians are well-trained spe-
cialists and are kept up-to-date with the
latest service information through techni-
cal bulletins, service tips and training pro-
grams. They are fully qualified to work on
NISSAN vehiclesbeforework begins.
If your vehicle is involved in a collision, it is
recommended that you ask your NISSAN
dealer where the nearest NISSAN Certified
Collision Center is located, or go to http://
collision.nissanusa.com.
You can be confident that a NISSAN deal-
er's service department can perform the
service needed to meet the maintenance
requirements on your vehicle. During the normal day-to-day operation of
the vehicle, general maintenance should
be performed regularly as prescribed in
this section. If you detect any unusual
sounds, vibrations or smells, be sure to
check for the cause or have it checked
promptly. In addition, it is recommended
that you visit a NISSAN dealer if you think
that repairs are required.
When performing any checks or mainte-
nance work, closely observe the “Mainte-
nance precautions” in the “Do-it-yourself ”
section of this manual.
EXPLANATION OF GENERAL
MAINTENANCE ITEMS
Additional information on the following
items with“*”isf
ound in the “Do-it-
yourself ” section of this manual.
Outside the vehicle
The maintenance items listed here should
be performed from time to time, unless
otherwise specified.
Doors and engine hood: Check that the
doors and engine hood operate properly.
Also ensure that all latches lock securely.
Lubricate hinges, latches, latch pins, rollers
and links if necessary. Make sure that the
MAINTENANCE REQUIREMENTS GENERAL MAINTENANCE
9-2Maintenance and schedules