2021 NISSAN FRONTIER bluetooth
[x] Cancel search: bluetoothPage 210 of 492

Menu itemResult
Audio For additional information, refer to “Audio system” in this section.
Navigation For additional information, refer to the separate NissanConnect® Owner’s Manual.
Phone & Bluetooth For additional information, refer to “Bluetooth® Hands-Free Phone System with Navigation System” in this section.
System Touch this key to select and/or adjust various functions of this system. A screen with additional options will ap-
pear.
Display Touch this key to adjust the appearance of the display.
Brightness Adjusts the brightness of the display.
Display Mode Adjusts to fit the level of lighting in the vehicle. Touch key to cycle through options. “Day ” and “Night” modes are
suited for the respective times of day while “Auto” controls the display automatically.
Scroll Direction Adjusts the direction of the menu scroll. Choose to either move up or down.
Clock/Date Touch this key to adjust the time and date.
Time Format The clock can be set to 12 hours or 24 hours.
Date Format Select from two possible formats for displaying the day, month, and year.
Clock Mode Adjust the mode for the clock. “Auto” uses the system’s GPS to automatically maintain the time. “Manual” allows
you to set the clock using the “Set Clock Manually ” key. Select a time zone using the “Time Zone” key.
Set Clock Manually Adjust the clock manually, Touch the “+” or “-” keys to adjust the hours, minutes, day, month and year up or down. “Clock Mode” must be set to manual for this option to be available.
Daylight Savings Time Adjusts the daylight savings time on or off.
Time Zone Choose the applicable time zone from the list.
Language Touch this key to change the language on the display.
Camera Settings Touch this key to change the camera settings.
Display Mode Touch this key to select the touch-screen display mode (day, night, or automatic).
Brightness Adjust touch-screen brightness.
Contrast Adjust touch-screen contrast.
Color Adjust touch-screen color.
4-14Monitor, climate, audio, phone and voice recognition systems
Page 239 of 492
Bluetooth® streaming audio
• Some Bluetooth® audio devices may notbe recognized by the in-vehicle audio
system.
• It is necessary to set up the wireless con- nection between a compatible
Bluetooth® audio device and the in-
vehicle Bluetooth® module before using
the Bluetooth® audio.
• Operating procedure of the Bluetooth® audio will vary depending on the devices.
Make sure how to operate your audio de-
vice before using it with this system.
• The Bluetooth® audio may be stopped under the following conditions:– Receiving a call on the Hands-Free Phone System.
– Checking the connection to the hands-free phone.
• Do not place the Bluetooth® audio device in an area surrounded by metal or far
away from the in-vehicle Bluetooth®
module to prevent tone quality degrada-
tion and wireless connection disruption. • While an audio device is connected
through the Bluetooth® wireless connec-
tion, the battery power of the device may
discharge quicker than usual.
• This system supports the Bluetooth® Au- dio Distribution Profile (A2DP, AVRCP).
BLUETOOTH® is a
trademark owned by
Bluetooth SIG, Inc. and
licensed to Visteon
and Bosch.
Monitor, climate, audio, phone and voice recognition systems4-43
Page 240 of 492
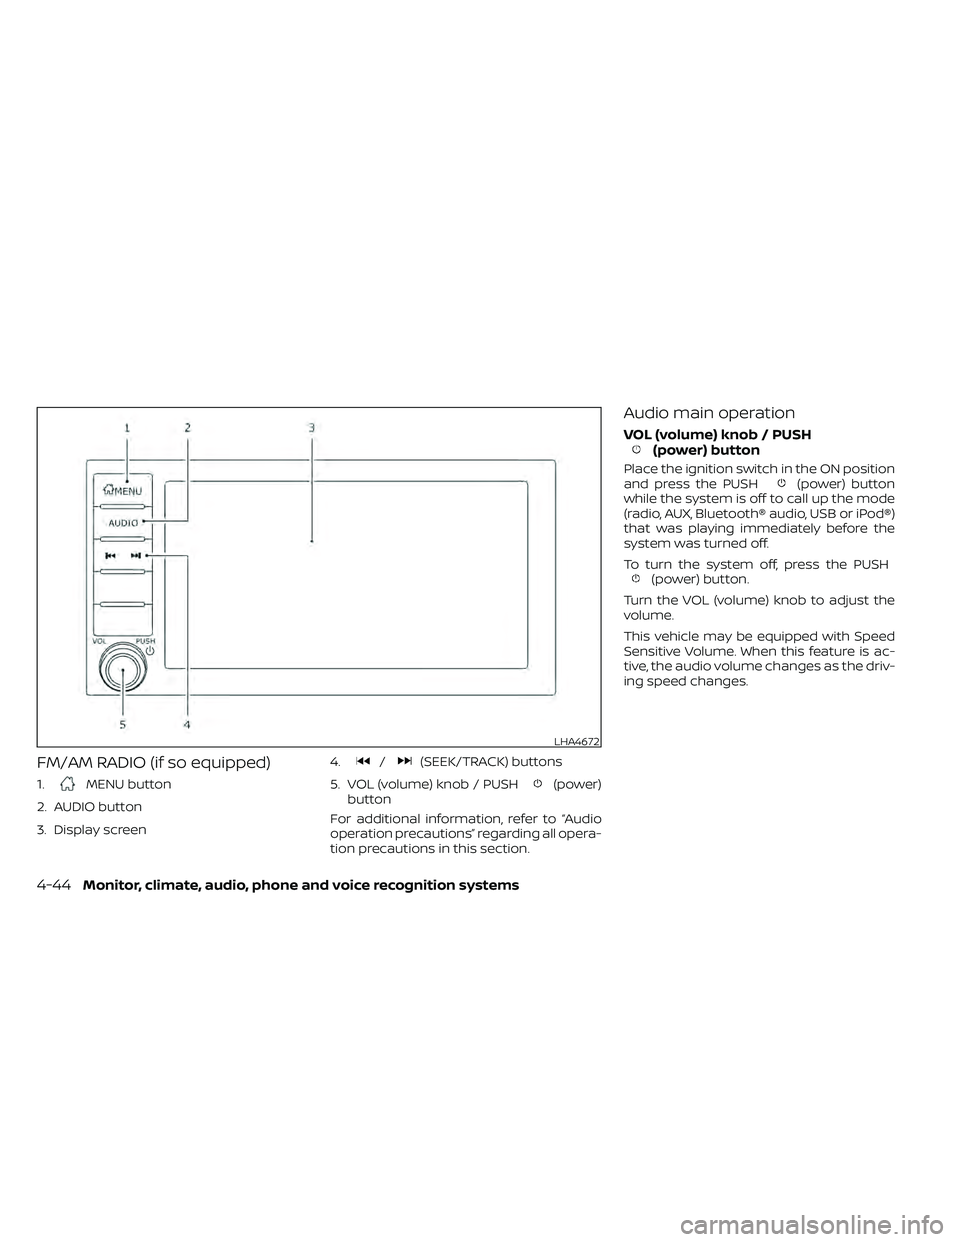
FM/AM RADIO (if so equipped)
1.MENU button
2. AUDIO button
3. Display screen 4.
/(SEEK/TRACK) buttons
5. VOL (volume) knob / PUSH
(power)
button
For additional information, refer to “Audio
operation precautions” regarding all opera-
tion precautions in this section.
Audio main operation
VOL (volume) knob / PUSH(power) button
Place the ignition switch in the ON position
and press the PUSH(power) button
while the system is off to call up the mode
(radio, AUX, Bluetooth® audio, USB or iPod®)
that was playing immediately before the
system was turned off.
To turn the system off, press the PUSH
(power) button.
Turn the VOL (volume) knob to adjust the
volume.
This vehicle may be equipped with Speed
Sensitive Volume. When this feature is ac-
tive, the audio volume changes as the driv-
ing speed changes.
LHA4672
4-44Monitor, climate, audio, phone and voice recognition systems
Page 244 of 492
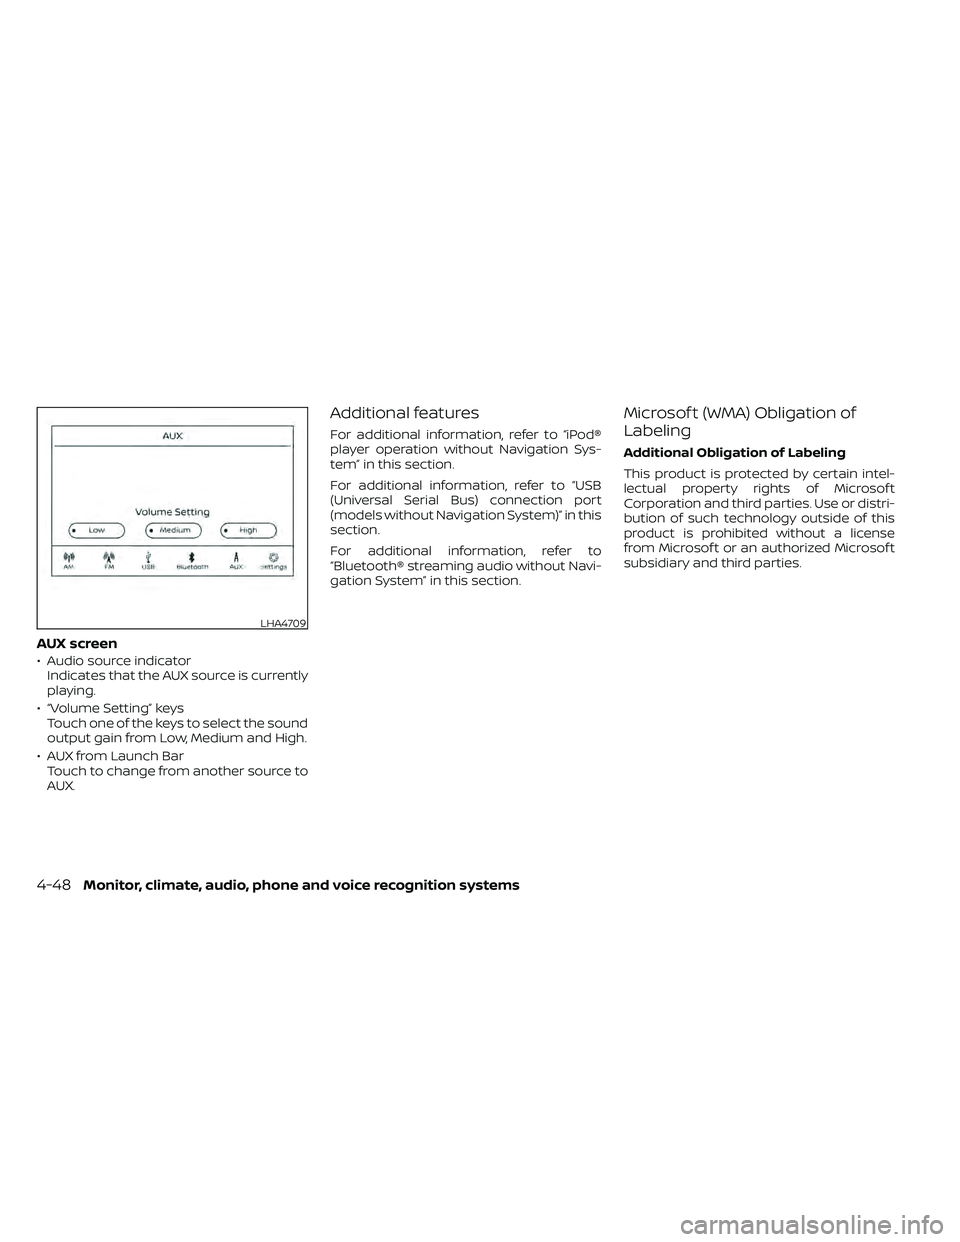
AUX screen
• Audio source indicatorIndicates that the AUX source is currently
playing.
• “Volume Setting” keys Touch one of the keys to select the sound
output gain from Low, Medium and High.
• AUX from Launch Bar Touch to change from another source to
AUX.
Additional features
For additional information, refer to “iPod®
player operation without Navigation Sys-
tem” in this section.
For additional information, refer to “USB
(Universal Serial Bus) connection port
(models without Navigation System)” in this
section.
For additional information, refer to
“Bluetooth® streaming audio without Navi-
gation System” in this section.
Microsof t (WMA) Obligation of
Labeling
Additional Obligation of Labeling
This product is protected by certain intel-
lectual property rights of Microsof t
Corporation and third parties. Use or distri-
bution of such technology outside of this
product is prohibited without a license
from Microsof t or an authorized Microsof t
subsidiary and third parties.
LHA4709
4-48Monitor, climate, audio, phone and voice recognition systems
Page 246 of 492
Audio main operation
ON-OFF button / VOL (volume) control
knob
Place the ignition switch in the ACC or ON
position and press the ON-OFF button
while the system is off to call up the mode
(radio, CD, AUX, Bluetooth® audio, USB or
iPod®) that was playing immediately before
the system was turned off.To turn the system off, press the ON-OFF
button.
Turn the VOL (volume) control knob to ad-
just the volume.
This vehicle may be equipped with Speed
Sensitive Volume. When this feature is ac-
tive, the audio volume changes as the driv-
ing speed changes.
Audio settings
1. Press the [] button.
2. Touch the “Settings” key.
3. Touch the “Audio” key.
Use the touch-screen to adjust the follow-
ing items to the desired setting:
Audio Bass Adjusts the bass to the desired level.
Treble Adjusts the treble to the desired level.
Balance Adjusts the balance to the desired level. Balance adjusts the sound level between the lef t and right speak-
ers.
Fade Adjusts the fade to the desired level. Fade adjusts the sound level between the front and rear speakers.
Speed Sensitive Vol. Adjusts the speed sensitive volume function, which increases the volume of the audio system as the
speed of the vehicle increases. Set to “ 0 ” to disable the feature. The higher the setting, the more the vol-
ume increases in relation to vehicle speed.
AUX Volume Level Controls the volume level of incoming sound when an auxiliary device is connected to the system. Avail-
able options are Low (Quiet), Medium, and High (Loud).
Bass, treble, balance and fade can also be adjusted by pressing the AUDIO button and turning the TUNE knob to select the item to adjust.
When the desired item is shown on the display, turn the tuning to adjust and then press the AUDIO button until the display returns to the
main audio screen. If the button is not pressed for approximately 10 seconds, the radio or CD display will automatically reappear.
4-50Monitor, climate, audio, phone and voice recognition systems
Page 251 of 492
SEEK (Reverse or Fast
Forward) buttons
Press and hold theorseek but-
tons for 1.5 seconds while the compact disc
is playing to reverse or fast forward the
track being played. The compact disc plays
at an increased speed while reversing or
fast forwarding. When the button is re-
leased, the compact disc returns to normal
play speed.
seek button while a CD or
MP3/WMA CD is playing to return to the
beginning of the current track. Press the
seek button several times to skip
backward several tracks.
Press the
seek button while a CD or
MP3/WMA CD is playing to advance one
track. Press the
seek button several
times to skip forward several tracks. If the
last track on a CD is skipped, the first track
on the disc is played. If the last track in a
folder of an MP3/WMA CD is skipped, the
first track of the next folder is played.
AUX button
The AUX IN audio input port accepts any
standard analog audio input such as from
a portable cassette tape/CD player, MP3
player or a laptop computer. Press the AUX
button to play a compatible device
plugged into the AUX IN port.
CD EJECT button is pressed
with a compact disc loaded, the compact
disc will eject and the last source will be
played.
If the disc is not removed within 10 seconds,
the disc will reload.
Additional features
For additional information, refer to “iPod®
player operation with Navigation System”
in this section.
For additional information, refer to “USB
(Universal Serial Bus) connection port
(models with Navigation System)” in this
section.
For additional information, refer to
“Bluetooth® streaming audio with Naviga-
tion System” in this section.
USB (Universal Serial Bus)
CONNECTION PORT (models
without Navigation System) (if so
equipped)
Connecting a device to the USB
connection port
Page 262 of 492
SEEK buttons
Press the SEEK buttonorto skip
backward or forward one track.
Press and hold the SEEK button
orfor 1.5 seconds while a track is playing
to reverse or fast forward the track being
played. The track plays at an increased
speed while reversing or fast forwarding.
When the button is released, the track re-
turns to normal play speed.
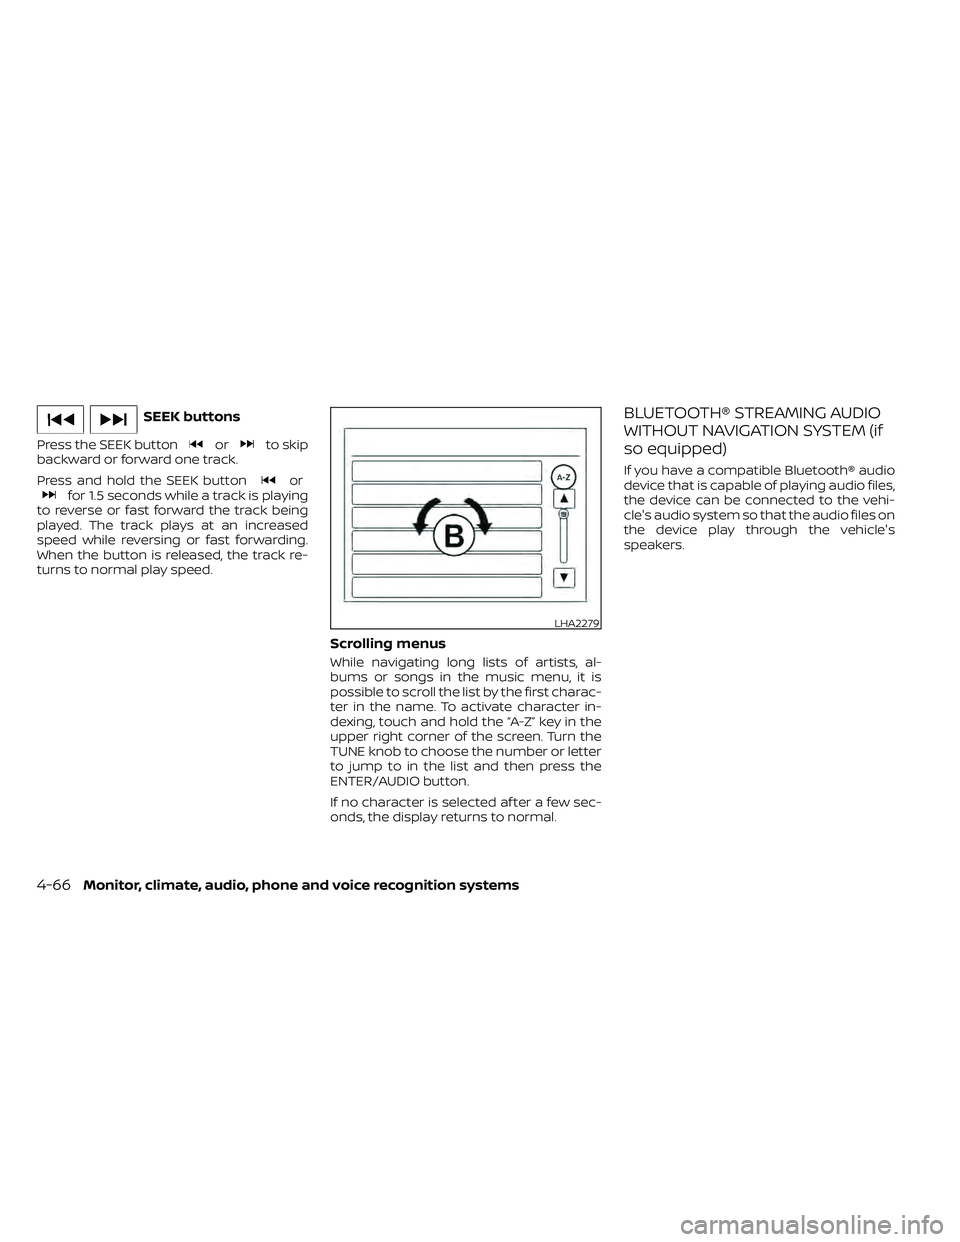
Scrolling menus
While navigating long lists of artists, al-
bums or songs in the music menu, it is
possible to scroll the list by the first charac-
ter in the name. To activate character in-
dexing, touch and hold the “A-Z” key in the
upper right corner of the screen. Turn the
TUNE knob to choose the number or letter
to jump to in the list and then press the
ENTER/AUDIO button.
If no character is selected af ter a few sec-
onds, the display returns to normal.
BLUETOOTH® STREAMING AUDIO
WITHOUT NAVIGATION SYSTEM (if
so equipped)
If you have a compatible Bluetooth® audio
device that is capable of playing audio files,
the device can be connected to the vehi-
cle's audio system so that the audio files on
the device play through the vehicle's
speakers.
LHA2279
4-66Monitor, climate, audio, phone and voice recognition systems
Page 263 of 492
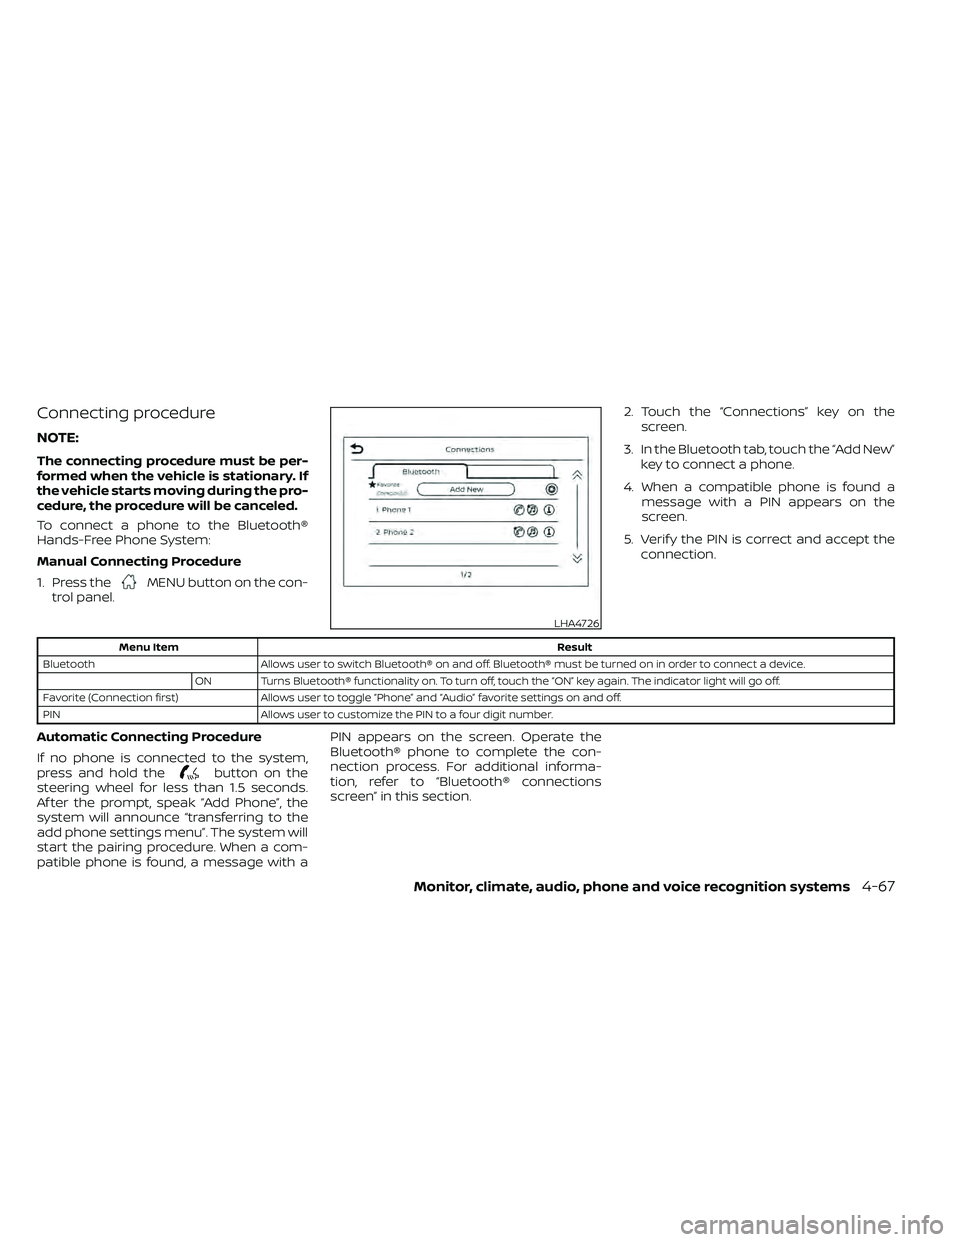
Connecting procedure
NOTE:
The connecting procedure must be per-
formed when the vehicle is stationary. If
the vehicle starts moving during the pro-
cedure, the procedure will be canceled.
To connect a phone to the Bluetooth®
Hands-Free Phone System:
Manual Connecting Procedure
1. Press the
MENU button on the con-
trol panel. 2. Touch the “Connections” key on the
screen.
3. In the Bluetooth tab, touch the “Add New” key to connect a phone.
4. When a compatible phone is found a message with a PIN appears on the
screen.
5. Verif y the PIN is correct and accept the connection.
button on the
steering wheel for less than 1.5 seconds.
Af ter the prompt, speak “Add Phone”, the
system will announce “transferring to the
add phone settings menu”. The system will
start the pairing procedure. When a com-
patible phone is found, a message with a PIN appears on the screen. Operate the
Bluetooth® phone to complete the con-
nection process. For additional informa-
tion, refer to “Bluetooth® connections
screen” in this section.
LHA4726