2021 NISSAN FRONTIER stop start
[x] Cancel search: stop startPage 126 of 492
If an ABS malfunction occurs, the anti-lock
function is turned off. The brake system
then operates normally but without anti-
lock assistance. For additional information,
refer to “Brake system” in the “Starting and
driving” section of this manual.
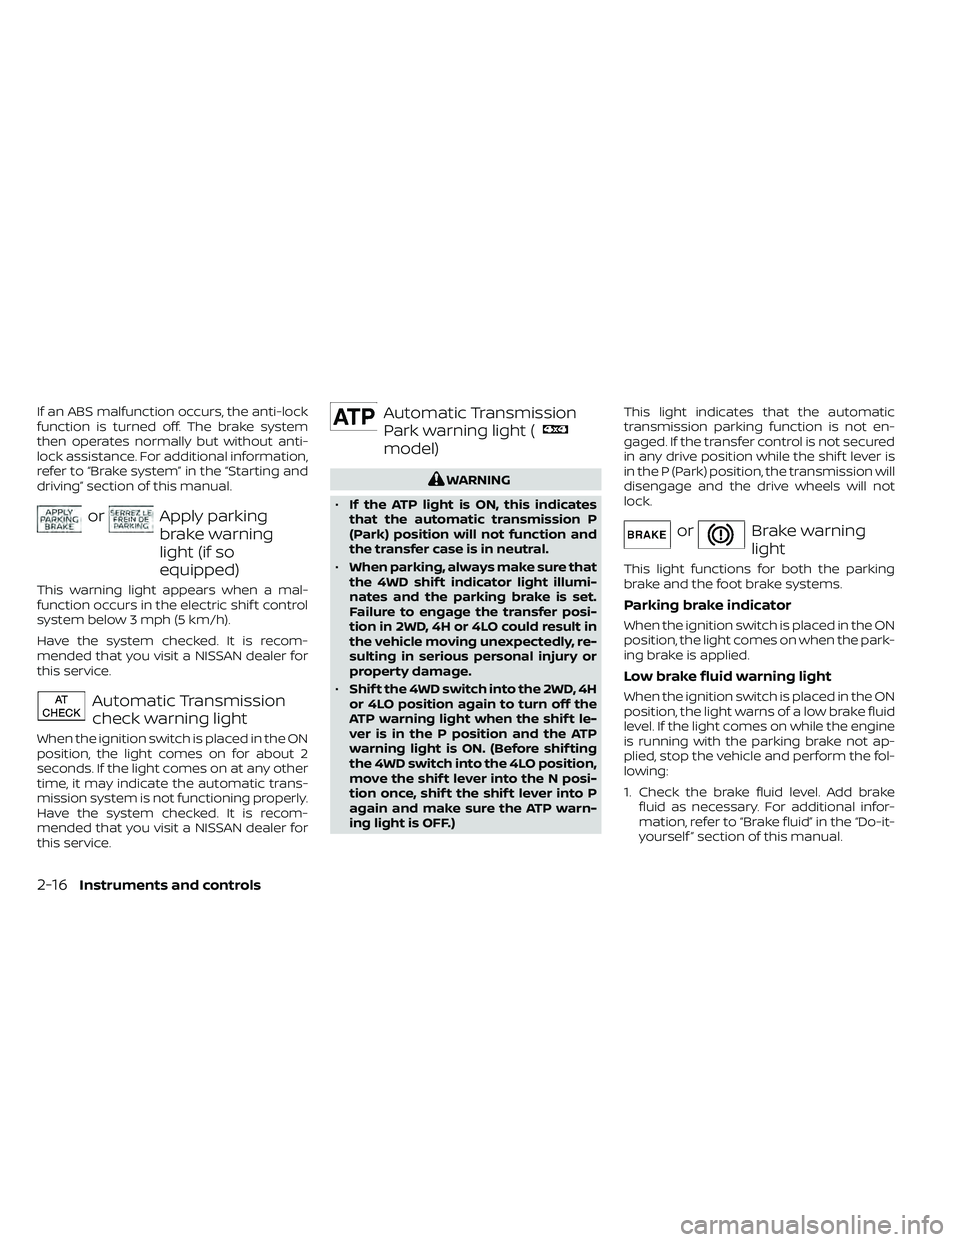
orApply parking
brake warning
light (if so
equipped)
This warning light appears when a mal-
function occurs in the electric shif t control
system below 3 mph (5 km/h).
Have the system checked. It is recom-
mended that you visit a NISSAN dealer for
this service.
Automatic Transmission
check warning light
When the ignition switch is placed in the ON
position, the light comes on for about 2
seconds. If the light comes on at any other
time, it may indicate the automatic trans-
mission system is not functioning properly.
Have the system checked. It is recom-
mended that you visit a NISSAN dealer for
this service.
Automatic Transmission
Park warning light (
model)
orBrake warning
light
This light functions for both the parking
brake and the foot brake systems.
Parking brake indicator
When the ignition switch is placed in the ON
position, the light comes on when the park-
ing brake is applied.
Low brake fluid warning light
When the ignition switch is placed in the ON
position, the light warns of a low brake fluid
level. If the light comes on while the engine
is running with the parking brake not ap-
plied, stop the vehicle and perform the fol-
lowing:
1. Check the brake fluid level. Add brakefluid as necessary. For additional infor-
mation, refer to “Brake fluid” in the “Do-it-
yourself ” section of this manual.
2-16Instruments and controls
Page 130 of 492
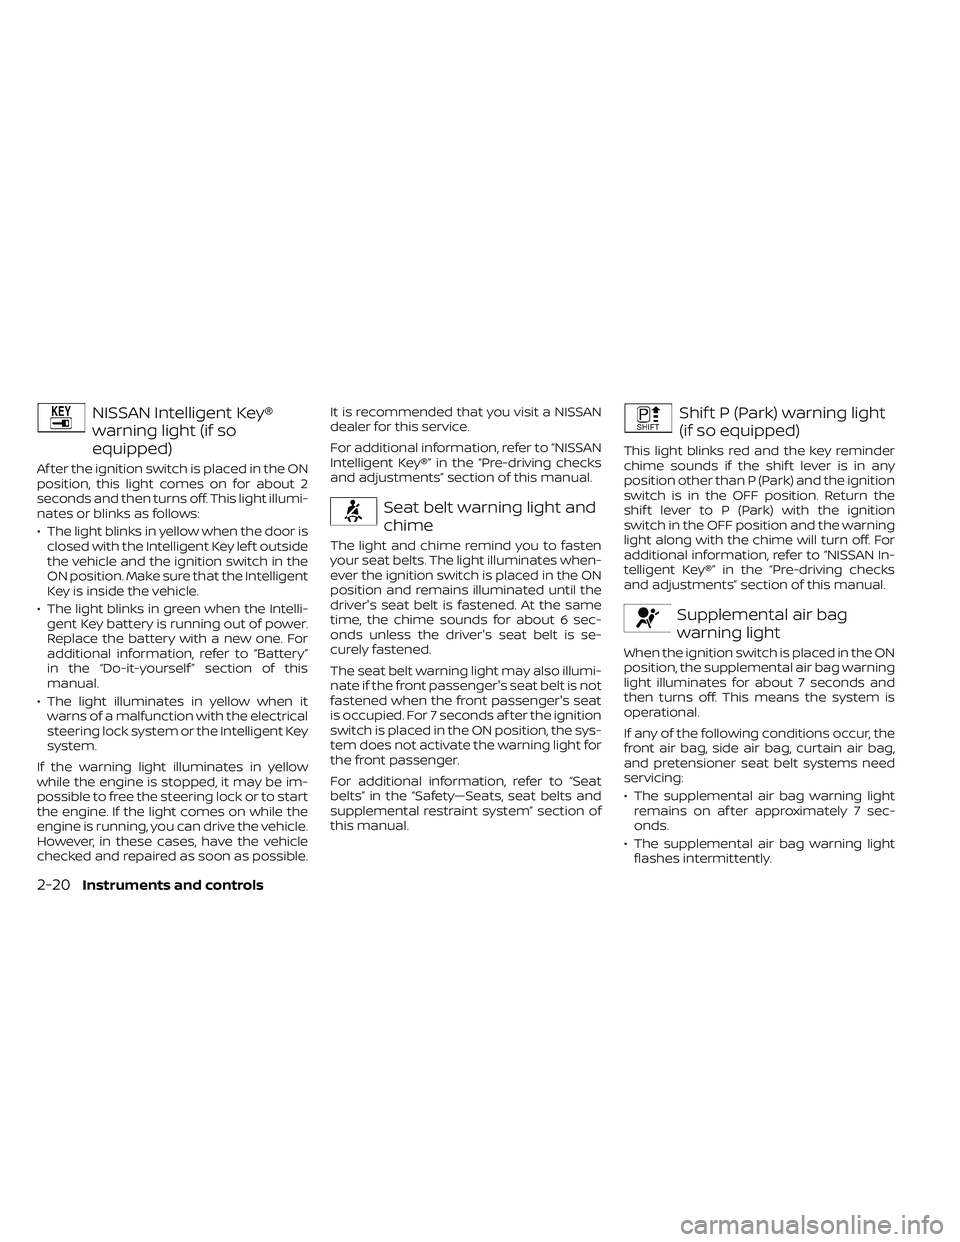
NISSAN Intelligent Key®
warning light (if so
equipped)
Af ter the ignition switch is placed in the ON
position, this light comes on for about 2
seconds and then turns off. This light illumi-
nates or blinks as follows:
• The light blinks in yellow when the door isclosed with the Intelligent Key lef t outside
the vehicle and the ignition switch in the
ON position. Make sure that the Intelligent
Key is inside the vehicle.
• The light blinks in green when the Intelli- gent Key battery is running out of power.
Replace the battery with a new one. For
additional information, refer to “Battery”
in the “Do-it-yourself ” section of this
manual.
• The light illuminates in yellow when it warns of a malfunction with the electrical
steering lock system or the Intelligent Key
system.
If the warning light illuminates in yellow
while the engine is stopped, it may be im-
possible to free the steering lock or to start
the engine. If the light comes on while the
engine is running, you can drive the vehicle.
However, in these cases, have the vehicle
checked and repaired as soon as possible. It is recommended that you visit a NISSAN
dealer for this service.
For additional information, refer to “NISSAN
Intelligent Key®” in the “Pre-driving checks
and adjustments” section of this manual.
Seat belt warning light and
chime
The light and chime remind you to fasten
your seat belts. The light illuminates when-
ever the ignition switch is placed in the ON
position and remains illuminated until the
driver's seat belt is fastened. At the same
time, the chime sounds for about 6 sec-
onds unless the driver's seat belt is se-
curely fastened.
The seat belt warning light may also illumi-
nate if the front passenger's seat belt is not
fastened when the front passenger's seat
is occupied. For 7 seconds af ter the ignition
switch is placed in the ON position, the sys-
tem does not activate the warning light for
the front passenger.
For additional information, refer to “Seat
belts” in the “Safety—Seats, seat belts and
supplemental restraint system” section of
this manual.
Shif t P (Park) warning light
(if so equipped)
This light blinks red and the key reminder
chime sounds if the shif t lever is in any
position other than P (Park) and the ignition
switch is in the OFF position. Return the
shif t lever to P (Park) with the ignition
switch in the OFF position and the warning
light along with the chime will turn off. For
additional information, refer to “NISSAN In-
telligent Key®” in the “Pre-driving checks
and adjustments” section of this manual.
Supplemental air bag
warning light
When the ignition switch is placed in the ON
position, the supplemental air bag warning
light illuminates for about 7 seconds and
then turns off. This means the system is
operational.
If any of the following conditions occur, the
front air bag, side air bag, curtain air bag,
and pretensioner seat belt systems need
servicing:
• The supplemental air bag warning light
remains on af ter approximately 7 sec-
onds.
• The supplemental air bag warning light flashes intermittently.
2-20Instruments and controls
Page 134 of 492
You cannot move the transfer 4WD shif t
switch between 4H and 4LO unless you
stop the vehicle and move the shif t lever to
the N (Neutral) position with the brake
pedal depressed.
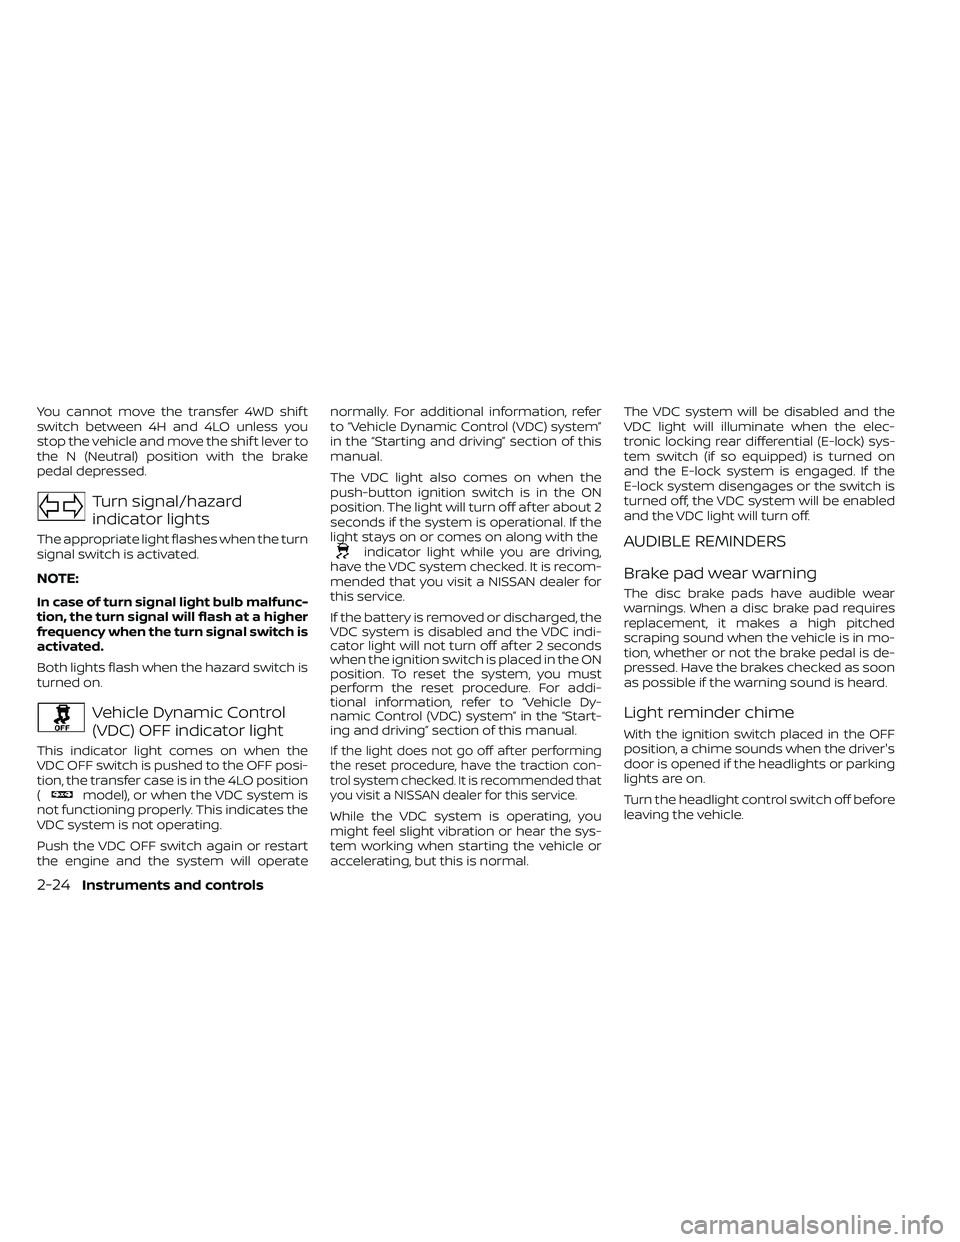
Turn signal/hazard
indicator lights
The appropriate light flashes when the turn
signal switch is activated.
NOTE:
In case of turn signal light bulb malfunc-
tion, the turn signal will flash at a higher
frequency when the turn signal switch is
activated.
Both lights flash when the hazard switch is
turned on.
Vehicle Dynamic Control
(VDC) OFF indicator light
This indicator light comes on when the
VDC OFF switch is pushed to the OFF posi-
tion, the transfer case is in the 4LO position
(
model), or when the VDC system is
not functioning properly. This indicates the
VDC system is not operating.
Push the VDC OFF switch again or restart
the engine and the system will operate normally. For additional information, refer
to “Vehicle Dynamic Control (VDC) system”
in the “Starting and driving” section of this
manual.
The VDC light also comes on when the
push-button ignition switch is in the ON
position. The light will turn off af ter about 2
seconds if the system is operational. If the
light stays on or comes on along with the
indicator light while you are driving,
have the VDC system checked. It is recom-
mended that you visit a NISSAN dealer for
this service.
If the battery is removed or discharged, the
VDC system is disabled and the VDC indi-
cator light will not turn off af ter 2 seconds
when the ignition switch is placed in the ON
position. To reset the system, you must
perform the reset procedure. For addi-
tional information, refer to “Vehicle Dy-
namic Control (VDC) system” in the “Start-
ing and driving” section of this manual.
If the light does not go off af ter performing
the reset procedure, have the traction con-
trol system checked. It is recommended that
you visit a NISSAN dealer for this service.
While the VDC system is operating, you
might feel slight vibration or hear the sys-
tem working when starting the vehicle or
accelerating, but this is normal. The VDC system will be disabled and the
VDC light will illuminate when the elec-
tronic locking rear differential (E-lock) sys-
tem switch (if so equipped) is turned on
and the E-lock system is engaged. If the
E-lock system disengages or the switch is
turned off, the VDC system will be enabled
and the VDC light will turn off.
AUDIBLE REMINDERS
Brake pad wear warning
The disc brake pads have audible wear
warnings. When a disc brake pad requires
replacement, it makes a high pitched
scraping sound when the vehicle is in mo-
tion, whether or not the brake pedal is de-
pressed. Have the brakes checked as soon
as possible if the warning sound is heard.
Light reminder chime
With the ignition switch placed in the OFF
position, a chime sounds when the driver's
door is opened if the headlights or parking
lights are on.
Turn the headlight control switch off before
leaving the vehicle.
2-24Instruments and controls
Page 147 of 492
•The hill descent control may not con-
trol the vehicle speed on a hill under
all load or road conditions. Always be
prepared to depress the brake pedal
to control vehicle speed. Failure to do
so may result in a collision or serious
personal injury.
CAUTION
When the hill descent control system op-
erates continuously for a long time, the
temperature of the brake pads may in-
crease and the hill descent control sys-
tem may be temporarily disabled (the in-
dicator light will blink). If the indicator
light does not come on continuously af-
ter blinking, stop using the system.
The hill descent control system is designed
to reduce driver workload when going down
steep hills. The hill descent control system
helps to control vehicle speed so the driver
can concentrate on steering the vehicle.
To activate the hill descent control system:
• The shif t lever must be in forward or re- verse gear,
• The 4WD switch must be in the 4L posi- tion and the vehicle speed must be under
15 mph (25 km/h) or • The 4WD switch must be in the 4H posi-
tion and the vehicle speed must be under
21 mph (35 km/h), and
• The hill descent control system switch must be ON.
The hill descent control system ON indica-
tor light will come on when the system is
activated. Also, the stop/tail lights illumi-
nate while the hill descent control system
applies the brakes to control vehicle speed.
If the accelerator or brake pedal is depressed
while the hill descent control system is on,
the system will stop operating temporarily.
As soon as the accelerator or brake pedal is
released, the hill descent control system be-
gins to function again if the hill descent con-
trol operating conditions are fulfilled.
The hill descent control system ON indica-
tor light blinks if the switch is on and all
conditions for system activation are not
met or if the system becomes disengaged
for any reason.
To turn off the hill descent control system,
push the switch to the OFF position.
For additional information, refer to “Hill de-
scent control system ON indicator light” in
this section and “Hill descent control sys-
tem” in the “Starting and driving” section of
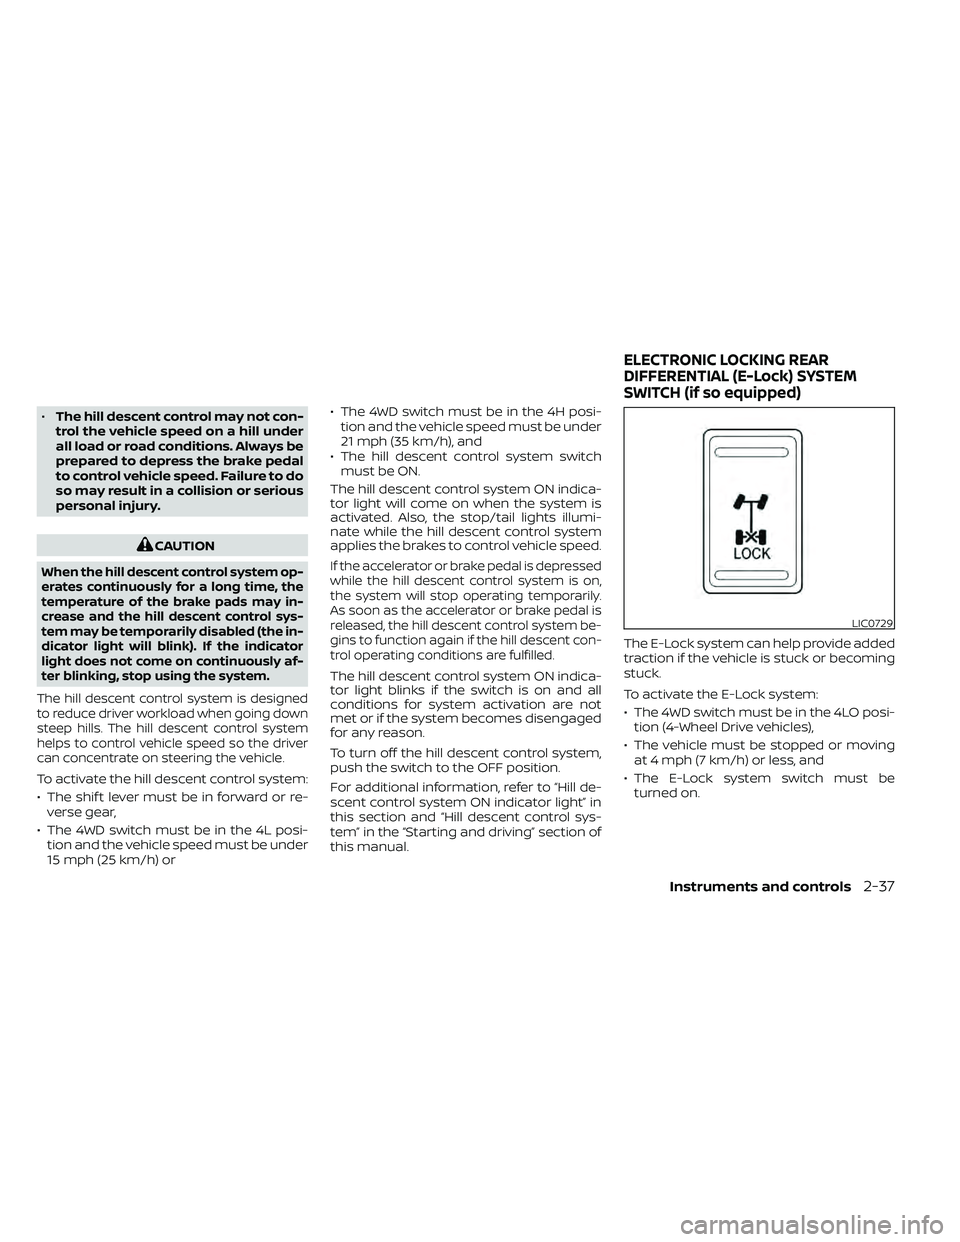
this manual. The E-Lock system can help provide added
traction if the vehicle is stuck or becoming
stuck.
To activate the E-Lock system:
• The 4WD switch must be in the 4LO posi-
tion (4-Wheel Drive vehicles),
• The vehicle must be stopped or moving at 4 mph (7 km/h) or less, and
• The E-Lock system switch must be turned on.
LIC0729
ELECTRONIC LOCKING REAR
DIFFERENTIAL (E-Lock) SYSTEM
SWITCH (if so equipped)
Instruments and controls2-37
Page 166 of 492
The HomeLink® Universal Transceiver pro-
vides a convenient way to consolidate the
functions of up to three individual hand-
held transmitters into one built-in device.
HomeLink® Universal Transceiver:
• Will operate most radio frequency de-vices such as garage doors, gates, home
and office lighting, entry door locks and
security systems.
• Is powered by your vehicle's battery. No separate batteries are required. If the ve-
hicle's battery is discharged or is discon-
nected, HomeLink® will retain all pro-
gramming.
When the HomeLink® Universal Trans-
ceiver is programmed, retain the original
transmitter for future programming pro-
cedures (Example: new vehicle pur-
chases). Upon sale of the vehicle, the
programmed HomeLink® Universal
Transceiver buttons should be erased for
security purposes. For additional infor-
mation, refer to “Programming
HomeLink®” in this section.WARNING
• Your vehicle's engine should be
turned off while programming the
HomeLink® Universal Transceiver. Do
not breathe exhaust gases; they con-
tain colorless and odorless carbon
monoxide. Carbon monoxide is dan-
gerous. It can cause unconscious-
ness or death.
• Do not use the HomeLink® Universal
Transceiver with any garage door
opener that lacks safety stop and re-
verse features as required by federal
safety standards. (These standards
became effective for opener models
manufactured af ter April 1, 1982). A
garage door opener which cannot
detect an object in the path of a clos-
ing garage door and then automati-
cally stop and reverse, does not meet
current federal safety standards. Us-
ing a garage door opener without
these features increases the risk of
serious injury or death. •
During the programming procedure
your garage door or security gate will
open and close (if the transmitter is
within range). Make sure that people
or objects are clear of the garage
door, gate, etc. that you are
programming.
PROGRAMMING HOMELINK®
If you have any questions or are having
difficulty programming your HomeLink®
buttons, refer to the HomeLink® web site at:
www.homelink.com or call 1-800-355-3515.
NOTE:
Place the ignition switch in the ON posi-
tion (without starting the engine) when
programming HomeLink®. It is also rec-
ommended that a new battery be placed
in the hand-held transmitter of the de-
vice being programmed to HomeLink®
for quicker programming and accurate
transmission of the radio frequency.
HOMELINK® UNIVERSAL
TRANSCEIVER (if so equipped)
2-56Instruments and controls
Page 182 of 492
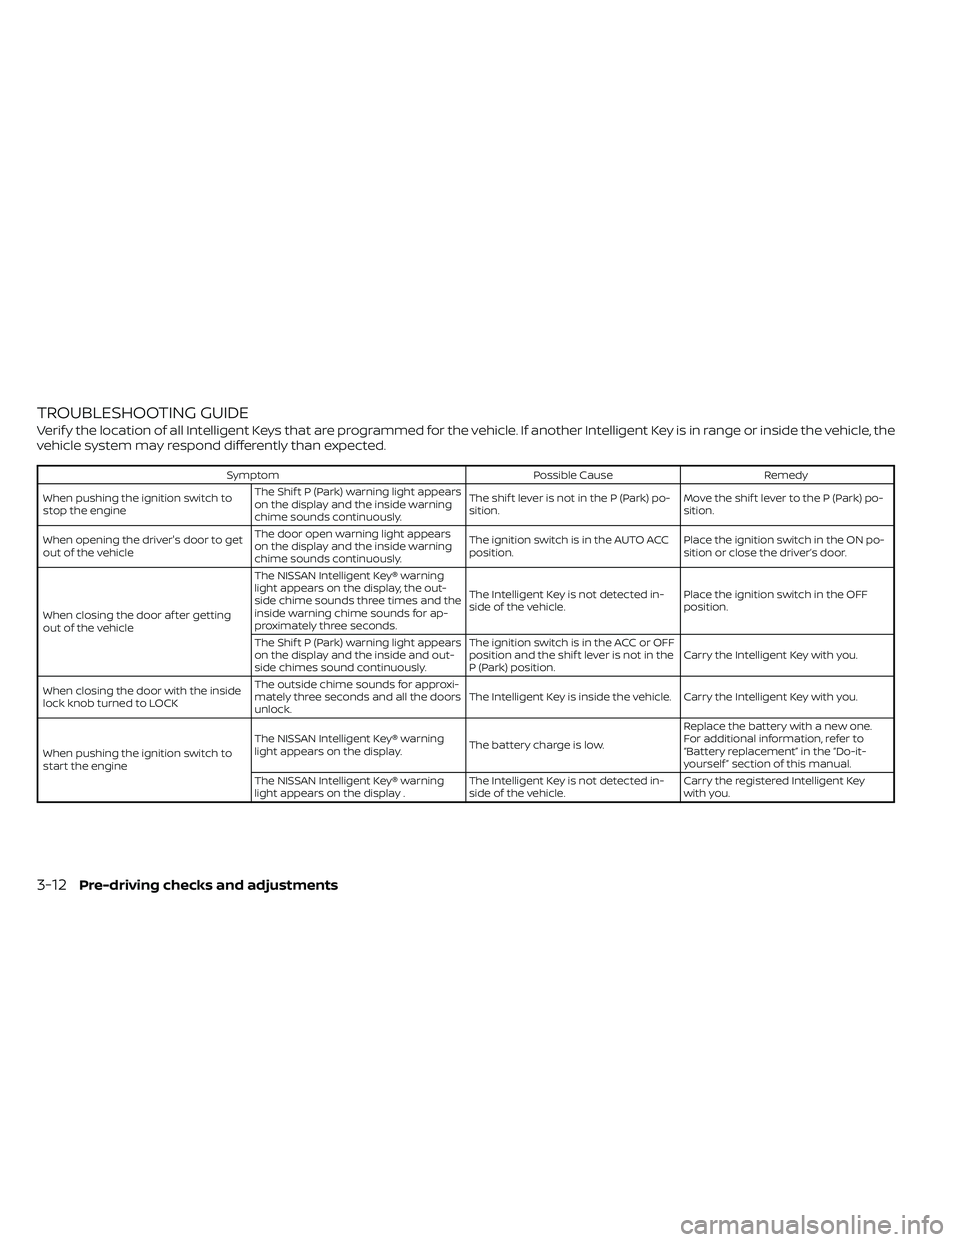
TROUBLESHOOTING GUIDE
Verif y the location of all Intelligent Keys that are programmed for the vehicle. If another Intelligent Key is in range or inside the vehicle, the
vehicle system may respond differently than expected.
SymptomPossible CauseRemedy
When pushing the ignition switch to
stop the engine The Shif t P (Park) warning light appears
on the display and the inside warning
chime sounds continuously. The shif t lever is not in the P (Park) po-
sition.
Move the shif t lever to the P (Park) po-
sition.
When opening the driver's door to get
out of the vehicle The door open warning light appears
on the display and the inside warning
chime sounds continuously. The ignition switch is in the AUTO ACC
position.
Place the ignition switch in the ON po-
sition or close the driver’s door.
When closing the door af ter getting
out of the vehicle The NISSAN Intelligent Key® warning
light appears on the display, the out-
side chime sounds three times and the
inside warning chime sounds for ap-
proximately three seconds.
The Intelligent Key is not detected in-
side of the vehicle.
Place the ignition switch in the OFF
position.
The Shif t P (Park) warning light appears
on the display and the inside and out-
side chimes sound continuously. The ignition switch is in the ACC or OFF
position and the shif t lever is not in the
P (Park) position.
Carry the Intelligent Key with you.
When closing the door with the inside
lock knob turned to LOCK The outside chime sounds for approxi-
mately three seconds and all the doors
unlock.
The Intelligent Key is inside the vehicle. Carry the Intelligent Key with you.
When pushing the ignition switch to
start the engine The NISSAN Intelligent Key® warning
light appears on the display.
The battery charge is low.Replace the battery with a new one.
For additional information, refer to
“Battery replacement” in the “Do-it-
yourself ” section of this manual.
The NISSAN Intelligent Key® warning
light appears on the display . The Intelligent Key is not detected in-
side of the vehicle.Carry the registered Intelligent Key
with you.
3-12Pre-driving checks and adjustments
Page 275 of 492
When installing a CB, ham radio or car
phone in your vehicle, be sure to observe
the following precautions; otherwise, the
new equipment may adversely affect the
engine control system and other electronic
parts.CAUTION
• Keep the antenna as far away as pos-
sible from the electronic control
modules.
• Keep the antenna wire more than 8 in
(20 cm) away from the electronic
control system harnesses. Do not
route the antenna wire next to any
harness.
• Adjust the antenna standing-wave
ratio as recommended by the
manufacturer.
• Connect the ground wire from the CB
radio chassis to the body.
• For additional information, it is rec-
ommended that you visit a NISSAN
dealer.
• Do not ground electrical accessories
directly to the battery terminal. Do-
ing so will bypass the variable volt-
age control system and the vehicle
battery may not charge completely.
For additional information, refer to
“Variable voltage control system” in
the “Do-it-yourself ” section of this
manual.
• Use electrical accessories with the
engine running to avoid discharging
the vehicle battery.WARNING
• Use a phone af ter stopping your ve-
hicle in a safe location. If you have to
use a phone while driving, exercise
extreme caution at all times so full
attention may be given to vehicle
operation.
• If you are unable to devote full atten-
tion to vehicle operation while talk-
ing on the phone, pull off the road to
a safe location and stop your vehicle.
CAUTION
To avoid discharging the vehicle bat-
tery, use a phone af ter starting the
engine.
CAR PHONE OR CB RADIO BLUETOOTH® HANDS-FREE PHONE
SYSTEM WITHOUT NAVIGATION
SYSTEM (if so equipped)
Monitor, climate, audio, phone and voice recognition systems4-79
Page 295 of 492
VOICE COMMANDS
You can use voice commands to operate
various Bluetooth® Hands-Free Phone Sys-
tem features using the NISSAN Voice Rec-
ognition system. For additional informa-
tion, refer to “NISSAN Voice Recognition
System” in this section.
Voice Prompt Interrupt
While using the Voice Recognition system,
the system voice can be interrupted to al-
low the user to speak commands. While
the system is speaking, press the
button on the steering wheel. The system
voice will stop and a tone will be heard.
Af ter the tone, speak desired command
(displayed on the touch-screen).
One Shot Call (if so equipped)
To use the system faster, you may speak
the second level commands with the main
menu command on the main menu. For
example, press the
button and af ter
the tone say, “Call Redial”.
CONNECTING PROCEDURE
NOTE:
The connecting procedure must be per-
formed when the vehicle is stationary. If
the vehicle starts moving during the pro-
cedure, the procedure will be canceled.
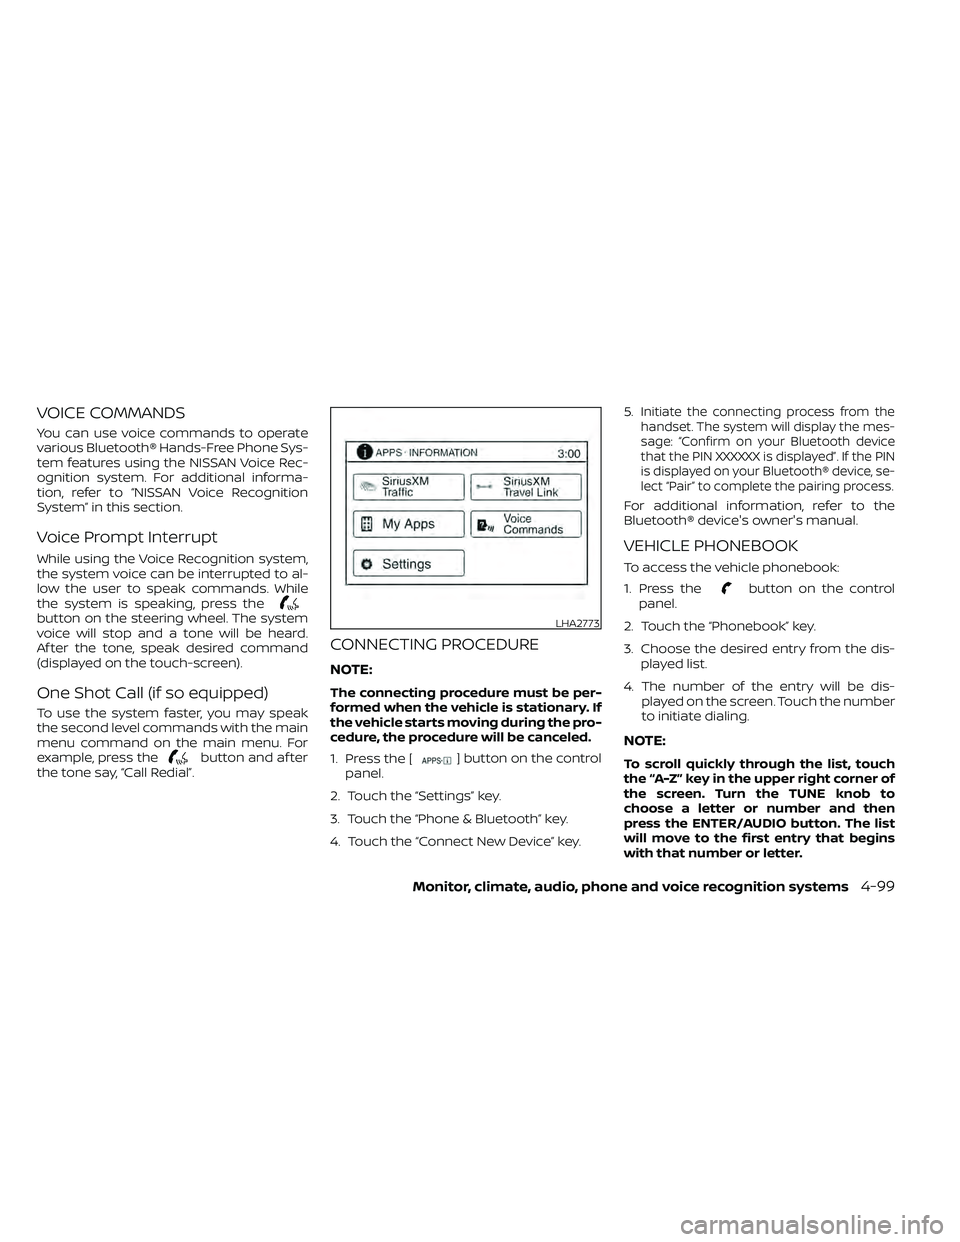
1. Press the [
] button on the control
panel.
2. Touch the “Settings” key.
3. Touch the “Phone & Bluetooth” key.
4. Touch the “Connect New Device” key. 5.
Initiate the connecting process from the
handset. The system will display the mes-
sage: “Confirm on your Bluetooth device
that the PIN XXXXXX is displayed”. If the PIN
is displayed on your Bluetooth® device, se-
lect “Pair” to complete the pairing process.
For additional information, refer to the
Bluetooth® device's owner's manual.
VEHICLE PHONEBOOK
To access the vehicle phonebook:
1. Press the
button on the control
panel.
2. Touch the “Phonebook” key.
3. Choose the desired entry from the dis- played list.
4. The number of the entry will be dis- played on the screen. Touch the number
to initiate dialing.
NOTE:
To scroll quickly through the list, touch
the “A-Z” key in the upper right corner of
the screen. Turn the TUNE knob to
choose a letter or number and then
press the ENTER/AUDIO button. The list
will move to the first entry that begins
with that number or letter.