2021 NISSAN ARMADA air condition
[x] Cancel search: air conditionPage 261 of 603
and fan speed are also controlled
automatically.
NOTE:
. Do not set the temperature lower
than the outside air temperature or
the system may not work properly.
. Not recommended if windows fog
up.
Dehumidified defrosting or defogging:
1. Push the
button. (The indicator
light on the button will illuminate.)
2. Turn the temperature control dial on the corresponding side to set the
desired temperature.
.To quickly remove ice from theoutside of the windows, use the
button to set the fan speed to
maximum.
.As soon as possible after the wind- shield is cleared, push the AUTO
button to return to the automatic
mode.
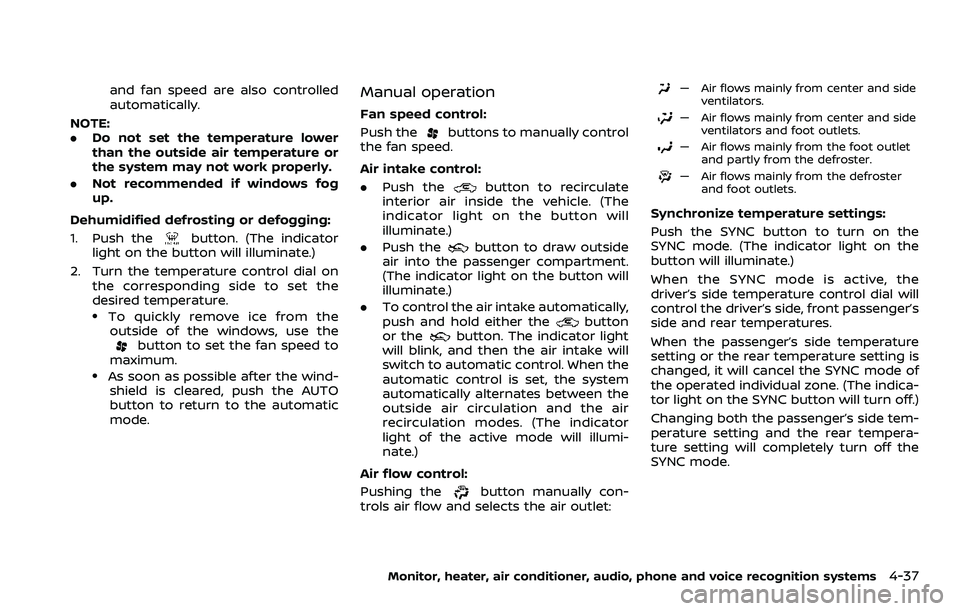
Manual operation
Fan speed control:
Push the
buttons to manually control
the fan speed.
Air intake control:
. Push the
button to recirculate
interior air inside the vehicle. (The
indicator light on the button will
illuminate.)
. Push the
button to draw outside
air into the passenger compartment.
(The indicator light on the button will
illuminate.)
. To control the air intake automatically,
push and hold either the
button
or thebutton. The indicator light
will blink, and then the air intake will
switch to automatic control. When the
automatic control is set, the system
automatically alternates between the
outside air circulation and the air
recirculation modes. (The indicator
light of the active mode will illumi-
nate.)
Air flow control:
Pushing the
button manually con-
trols air flow and selects the air outlet:
— Air flows mainly from center and side ventilators.
— Air flows mainly from center and sideventilators and foot outlets.
— Air flows mainly from the foot outletand partly from the defroster.
— Air flows mainly from the defrosterand foot outlets.
Synchronize temperature settings:
Push the SYNC button to turn on the
SYNC mode. (The indicator light on the
button will illuminate.)
When the SYNC mode is active, the
driver’s side temperature control dial will
control the driver’s side, front passenger’s
side and rear temperatures.
When the passenger’s side temperature
setting or the rear temperature setting is
changed, it will cancel the SYNC mode of
the operated individual zone. (The indica-
tor light on the SYNC button will turn off.)
Changing both the passenger’s side tem-
perature setting and the rear tempera-
ture setting will completely turn off the
SYNC mode.
Monitor, heater, air conditioner, audio, phone and voice recognition systems4-37
Page 262 of 603
4-38Monitor, heater, air conditioner, audio, phone and voice recognition systems
Turning the system on/off
Push the ON·OFF button.
WAE0641X
REAR AUTOMATIC AIR CONDITION-
ING SYSTEM
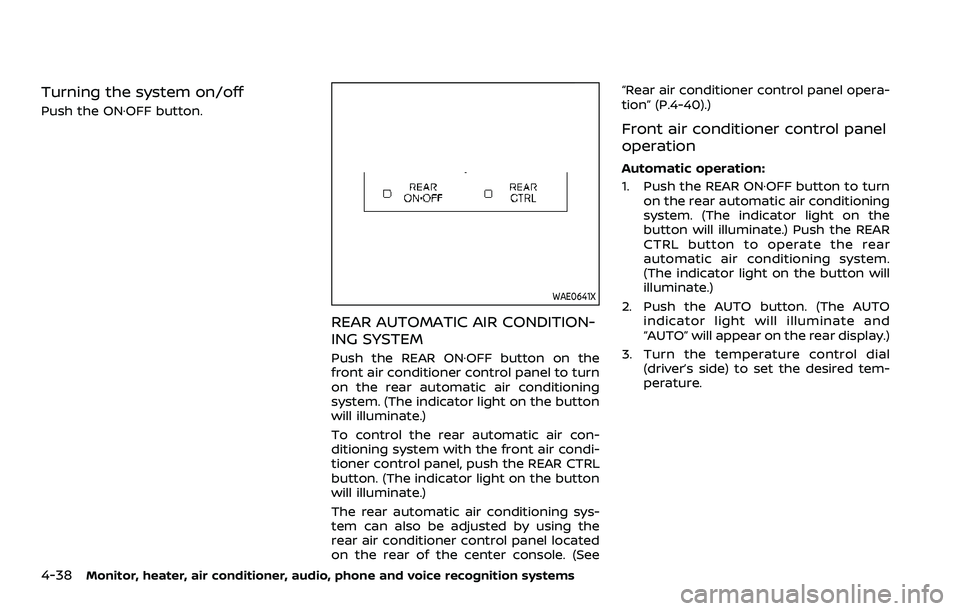
Push the REAR ON·OFF button on the
front air conditioner control panel to turn
on the rear automatic air conditioning
system. (The indicator light on the button
will illuminate.)
To control the rear automatic air con-
ditioning system with the front air condi-
tioner control panel, push the REAR CTRL
button. (The indicator light on the button
will illuminate.)
The rear automatic air conditioning sys-
tem can also be adjusted by using the
rear air conditioner control panel located
on the rear of the center console. (See“Rear air conditioner control panel opera-
tion” (P.4-40).)
Front air conditioner control panel
operation
Automatic operation:
1. Push the REAR ON·OFF button to turn
on the rear automatic air conditioning
system. (The indicator light on the
button will illuminate.) Push the REAR
CTRL button to operate the rear
automatic air conditioning system.
(The indicator light on the button will
illuminate.)
2. Push the AUTO button. (The AUTO indicator light will illuminate and
“AUTO” will appear on the rear display.)
3. Turn the temperature control dial (driver’s side) to set the desired tem-
perature.
Page 263 of 603
Cooling and dehumidified heating:
1. Push the REAR ON·OFF button to turnon the rear automatic air conditioning
system. (The indicator light on the
button will illuminate.) Push the REAR
CTRL button to operate the rear
automatic air conditioning system.
(The indicator light on the button will
illuminate.)
2. Turn the temperature control dial (driver’s side) to set the desired tem-
perature.
3. Switch the air flow mode to
by
pushing thebutton.
4. Push the A/C button. (The indicator light on the button will illuminate.)
NOTE:
When the front air conditioner is off, the
rear automatic air conditioning system
only operates the fan. When you would
like to use the air conditioner, be sure to
push the A/C button on the front air
conditioner control panel to turn on the
A/C indicator light.
Manual operation:
Perform the following when the indicator
lights on the REAR ON·OFF button and the
REAR CTRL button are illuminated.
. Temperature control
Turn the temperature control dial (driver’s side) to set the desired tem-
perature.
. Fan speed control
Push the fan speed control
but-
tons to manually control the fan
speed.
. Air flow control
Push the
button to change the air
flow mode.
: The air outlet is fixed at foot level.
: The air outlet is fixed at both the head and foot levels.
: The air outlet is fixed at the head level.
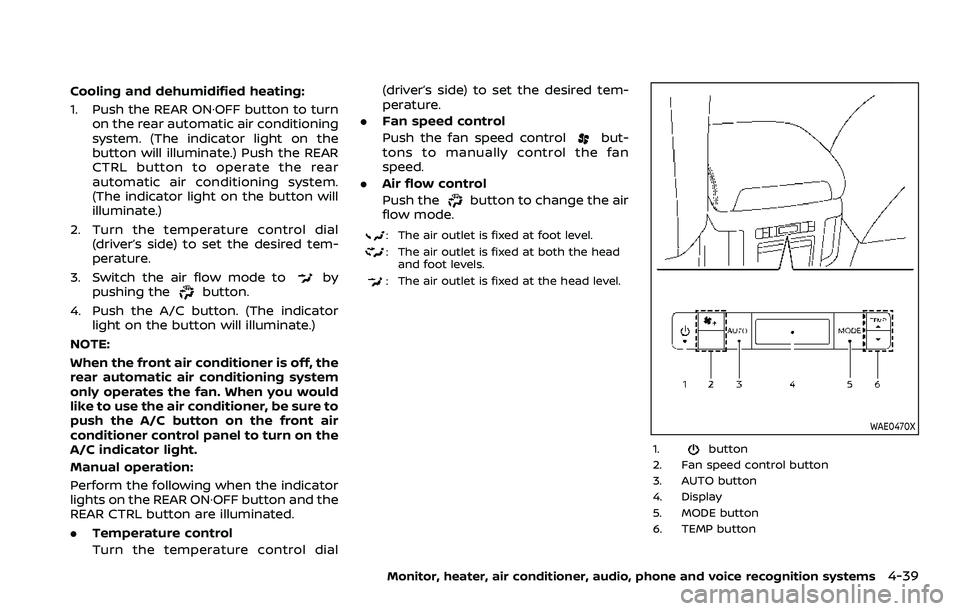
WAE0470X
1.button
2. Fan speed control button
3. AUTO button
4. Display
5. MODE button
6. TEMP button
Monitor, heater, air conditioner, audio, phone and voice recognition systems4-39
Page 264 of 603
4-40Monitor, heater, air conditioner, audio, phone and voice recognition systems
Rear air conditioner control panel
operation
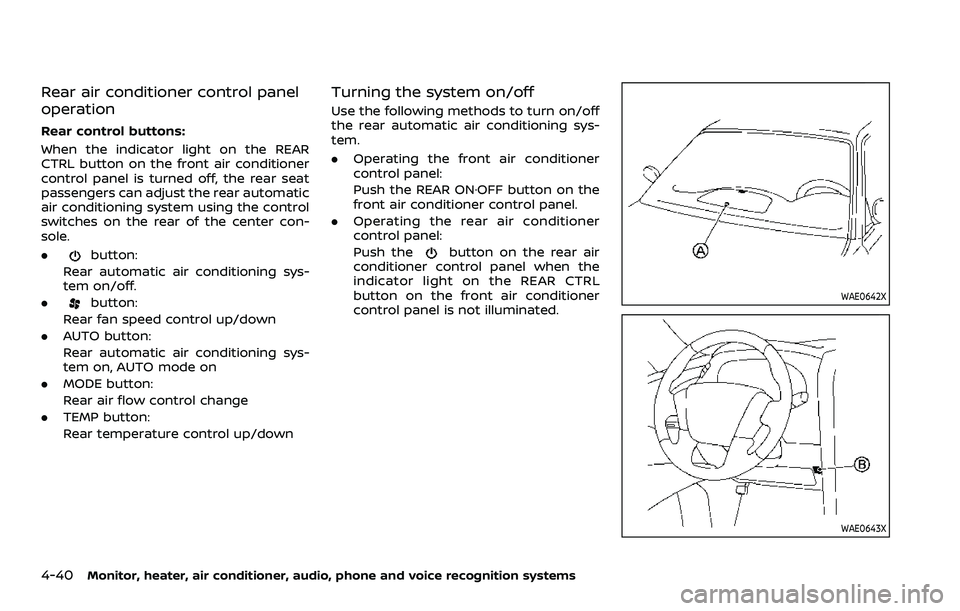
Rear control buttons:
When the indicator light on the REAR
CTRL button on the front air conditioner
control panel is turned off, the rear seat
passengers can adjust the rear automatic
air conditioning system using the control
switches on the rear of the center con-
sole.
.
button:
Rear automatic air conditioning sys-
tem on/off.
.
button:
Rear fan speed control up/down
. AUTO button:
Rear automatic air conditioning sys-
tem on, AUTO mode on
. MODE button:
Rear air flow control change
. TEMP button:
Rear temperature control up/down
Turning the system on/off
Use the following methods to turn on/off
the rear automatic air conditioning sys-
tem.
.Operating the front air conditioner
control panel:
Push the REAR ON·OFF button on the
front air conditioner control panel.
. Operating the rear air conditioner
control panel:
Push the
button on the rear air
conditioner control panel when the
indicator light on the REAR CTRL
button on the front air conditioner
control panel is not illuminated.
WAE0642X
WAE0643X
Page 265 of 603

OPERATING TIPS
When the engine coolant temperature
and outside air temperature are low, the
air flow from the foot outlets may not
operate. However, this is not a malfunc-
tion. After the coolant temperature
warms up, the air flow from the foot
outlets will operate normally.
The sensors
andlocated on the
instrument panel help maintain a con-
stant temperature. Do not put anything
on or around the sensors.
LINKING INTELLIGENT KEY (if so
equipped)
The air conditioner system settings can
be memorized for each Intelligent Key.
For more details, see “Setting memory
function” (P.3-42).
IN-CABIN MICROFILTER
The air conditioner system is equipped
with an in-cabin microfilter which collects
dirt, pollen, dust, etc.
To make sure the air conditioner heats,
defogs, and ventilates efficiently, replace
the filter in accordance with the specified
maintenance intervals listed in the “9.
Maintenance and schedules” section. It is
recommended to see a NISSAN dealer to
replace the filter.
The filter should be replaced if the air flow decreases significantly or if win-
dows fog up easily when operating the
heater or air conditioner.
SERVICING AIR CONDITIONER
The air conditioner system in your NISSAN
is charged with a refrigerant designed
with the environment in mind.
This re-
frigerant will not harm the earth’s
ozone layer. However, special charging
equipment and lubricant are required
when servicing your NISSAN air condi-
tioner. Using improper refrigerants or
lubricants will cause severe damage to
your air conditioner system. (See “Capa-
cities and recommended fluids/lubri-
cants” (P.10-2) for air conditioner system
refrigerant and lubricant recommenda-
tions.)
Your NISSAN dealer will be able to service
your environmentally friendly air condi-
tioner system.
WARNING
The system contains refrigerant un-
der high pressure. To avoid personal
injury, any air conditioner service
should be done only by an experi-
enced technician with the proper
equipment.
WINDOW ANTENNA
The antenna pattern is printed inside the
rear side glass.
CAUTION
. Do not place metalized film near
the 3rd row seat window or at-
tach any metal parts to it. This
may cause poor reception or
noise.
. When cleaning the inside of the
rear side window, be careful not
to scratch or damage the rear
side window antenna. Lightly
wipe along the antenna with a
dampened soft cloth.
Monitor, heater, air conditioner, audio, phone and voice recognition systems4-41
ANTENNA
Page 266 of 603
4-42Monitor, heater, air conditioner, audio, phone and voice recognition systems
SAA3602
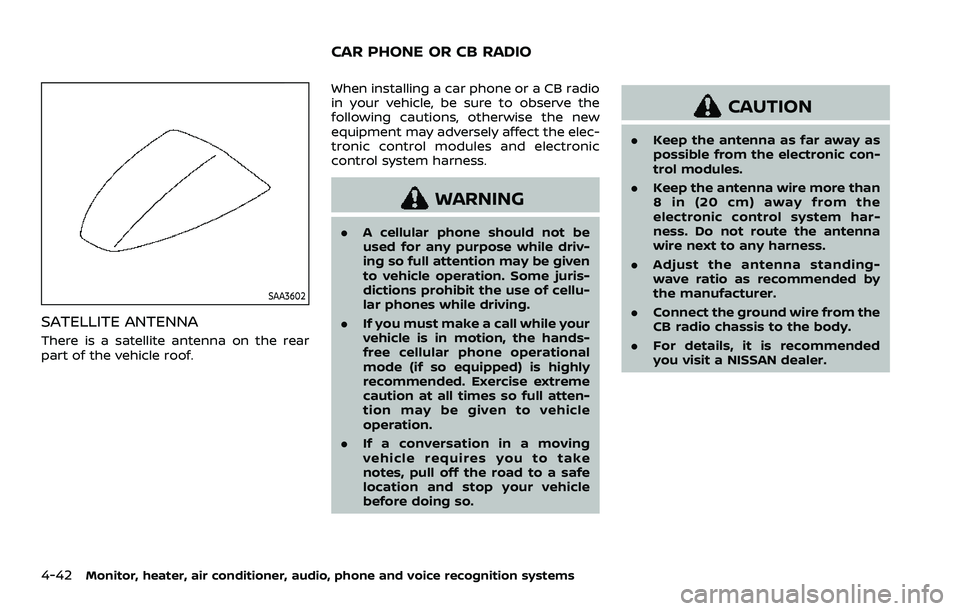
SATELLITE ANTENNA
There is a satellite antenna on the rear
part of the vehicle roof.When installing a car phone or a CB radio
in your vehicle, be sure to observe the
following cautions, otherwise the new
equipment may adversely affect the elec-
tronic control modules and electronic
control system harness.
WARNING
.
A cellular phone should not be
used for any purpose while driv-
ing so full attention may be given
to vehicle operation. Some juris-
dictions prohibit the use of cellu-
lar phones while driving.
. If you must make a call while your
vehicle is in motion, the hands-
free cellular phone operational
mode (if so equipped) is highly
recommended. Exercise extreme
caution at all times so full atten-
tion may be given to vehicle
operation.
. If a conversation in a moving
vehicle requires you to take
notes, pull off the road to a safe
location and stop your vehicle
before doing so.
CAUTION
.Keep the antenna as far away as
possible from the electronic con-
trol modules.
. Keep the antenna wire more than
8 in (20 cm) away from the
electronic control system har-
ness. Do not route the antenna
wire next to any harness.
. Adjust the antenna standing-
wave ratio as recommended by
the manufacturer.
. Connect the ground wire from the
CB radio chassis to the body.
. For details, it is recommended
you visit a NISSAN dealer.
CAR PHONE OR CB RADIO
Page 275 of 603

person is significantly more likely to be
injured or killed than a person properly
wearing a seat belt.
ON-PAVEMENT AND OFF-ROAD
DRIVING PRECAUTIONS
Utility vehicles have a significantly high-
er rollover rate than other types of
vehicles.
They have higher ground clearance than
passenger cars to make them capable of
performing in a variety of on-pavement
and off-road applications. This gives them
a higher center of gravity than ordinary
cars. An advantage of higher ground
clearance is a better view of the road,
allowing you to anticipate problems.
However, they are not designed for cor-
nering at the same speeds as conven-
tional passenger cars any more than low-
slung sports cars are designed to perform
satisfactorily under off-road conditions. If
at all possible, avoid sharp turns or abrupt
maneuvers, particularly at high speeds. As
with other vehicles of this type, failure to
operate this vehicle correctly may result
in loss of control or vehicle rollover. Seat
belts help reduce the risk of injury in
collisions and rollovers. In a rollover crash,
an unbelted or improperly belted person
is significantly more likely to be injured or
killed than a person properly wearing a
seat belt.Be sure to read “Driving safety precau-
tions” (P.5-10).
OFF-ROAD RECOVERY
While driving, the right side or left side
wheels may unintentionally leave the
road surface. If this occurs, maintain
control of the vehicle by following the
procedure below. Please note that this
procedure is only a general guide. The
vehicle must be driven as appropriate
based on the conditions of the vehicle,
road and traffic.
1. Remain calm and do not overreact.
2. Do not apply the brakes.
3. Maintain a firm grip on the steering
wheel with both hands and try to hold
a straight course.
4. When appropriate, slowly release the accelerator pedal to gradually slow
the vehicle.
5. If there is nothing in the way, steer the vehicle to follow the road while the
vehicle speed is reduced. Do not
attempt to drive the vehicle back onto
the road surface until vehicle speed is
reduced.
6. When it is safe to do so, gradually turn the steering wheel until both tires
return to the road surface. When all
tires are on the road surface, steer the vehicle to stay in the appropriate
driving lane.
.If you decide that it is not safe to
return the vehicle to the road sur-
face based on vehicle, road or
traffic conditions, gradually slow
the vehicle to a stop in a safe place
off the road.
RAPID AIR PRESSURE LOSS
Rapid air pressure loss or a “blow-out” can
occur if the tire is punctured or is
damaged due to hitting a curb or pothole.
Rapid air pressure loss can also be caused
by driving on under-inflated tires.
Rapid air pressure loss can affect the
handling and stability of the vehicle,
especially at highway speeds.
Help prevent rapid air pressure loss by
maintaining the correct air pressure and
visually inspect the tires for wear and
damage. See “Wheels and tires” (P.8-28).
If a tire rapidly loses air pressure or
“blows-out” while driving maintain control
of the vehicle by following the procedure
below. Please note that this procedure is
only a general guide. The vehicle must be
driven as appropriate based on the con-
ditions of the vehicle, road and traffic.
Starting and driving5-9
Page 276 of 603
5-10Starting and driving
WARNING
The following actions can increase
the chance of losing control of the
vehicle if there is a sudden loss of tire
air pressure. Losing control of the
vehicle may cause a collision and
result in personal injury.
.The vehicle generally moves or
pulls in the direction of the flat
tire.
. Do not rapidly apply the brakes.
. Do not rapidly release the accel-
erator pedal.
. Do not rapidly turn the steering
wheel.
1. Remain calm and do not overreact.
2. Maintain a firm grip on the steering wheel with both hands and try to hold
a straight course.
3. When appropriate, slowly release the accelerator pedal to gradually slow
the vehicle.
4. Gradually steer the vehicle to a safe location off the road and away from
traffic if possible. 5. Lightly apply the brake pedal to gra-
dually stop the vehicle.
6. Turn on the hazard warning flashers and either contact a roadside emer-
gency service to change the tire or see
“Changing a flat tire” (P.6-4).
ABOUT LOWERING OF THE REAR OF
THE VEHICLE
If the loaded vehicle is not moved for a
long time, the vehicle rear body may be to
lower. But it is normal. Once the engine
starts, It will automatically adjust vehicle
height.
DRINKING ALCOHOL/DRUGS AND
DRIVING
WARNING
Never drive under the influence of
alcohol or drugs. Alcohol in the
bloodstream reduces coordination,
delays reaction time and impairs
judgement. Driving after drinking
alcohol increases the likelihood of
being involved in an accident injuring
yourself and others. Additionally, if
you are injured in an accident, alco-
hol can increase the severity of the
injury. NISSAN is committed to safe driving.
However, you must choose not to drive
under the influence of alcohol. Every year
thousands of people are injured or killed
in alcohol-related accidents. Although the
local laws vary on what is considered to
be legally intoxicated, the fact is that
alcohol affects all people differently and
most people underestimate the effects of
alcohol.
Remember, drinking and driving don’t
mix! And that is true for drugs, too (over-
the-counter, prescription, and illegal
drugs). Don’t drive if your ability to oper-
ate your vehicle is impaired by alcohol,
drugs, or some other physical condition.
DRIVING SAFETY PRECAUTIONS
Your NISSAN is designed for both normal
and off-road use. However, avoid driving
in deep water or mud as your NISSAN is
mainly designed for leisure use, unlike a
conventional off-road vehicle.
Remember that Two-Wheel Drive (2WD)
models are less capable than Four-Wheel
Drive (4WD) models for rough road driving
and extrication when stuck in deep snow,
mud, or the like.
Please observe the following precautions: