2021 NISSAN ARMADA display
[x] Cancel search: displayPage 143 of 603
WAC0256X
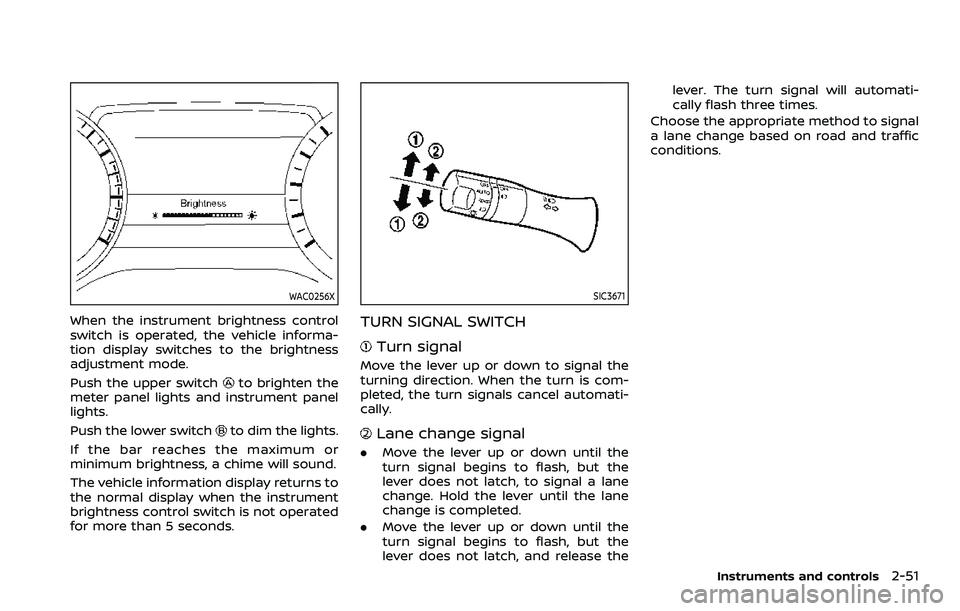
When the instrument brightness control
switch is operated, the vehicle informa-
tion display switches to the brightness
adjustment mode.
Push the upper switch
to brighten the
meter panel lights and instrument panel
lights.
Push the lower switch
to dim the lights.
If the bar reaches the maximum or
minimum brightness, a chime will sound.
The vehicle information display returns to
the normal display when the instrument
brightness control switch is not operated
for more than 5 seconds.
SIC3671
TURN SIGNAL SWITCH
Turn signal
Move the lever up or down to signal the
turning direction. When the turn is com-
pleted, the turn signals cancel automati-
cally.
Lane change signal
. Move the lever up or down until the
turn signal begins to flash, but the
lever does not latch, to signal a lane
change. Hold the lever until the lane
change is completed.
. Move the lever up or down until the
turn signal begins to flash, but the
lever does not latch, and release the lever. The turn signal will automati-
cally flash three times.
Choose the appropriate method to signal
a lane change based on road and traffic
conditions.
Instruments and controls2-51
Page 148 of 603

2-56Instruments and controls
.Do not use the climate controlled
seat for extended periods or
when no one is using the seat.
. Do not put anything on the seat
which insulates heat, such as a
blanket, cushion, seat cover, etc.
Otherwise, the seat may become
overheated.
. Do not place anything hard or
heavy on the seat or pierce it with
a pin or similar object. This may
result in damage to the climate
controlled seat.
. Any liquid spilled on the seat
should be removed immediately
with a dry cloth.
. The climate controlled seat has
an air filter. Do not operate cli-
mate controlled seat without an
air filter. This may result in da-
mage to the system.
. When cleaning the seat, never use
gasoline, thinner, or any similar
materials.
. If any malfunctions are found or
the climate controlled seat does
not operate, turn the switch off
and have the system checked. It
is recommended you visit a
NISSAN dealer for this service.
SSD0956
The warning systems switch is used to
turn on and off the warning systems
(Lane Departure Warning (LDW) and Blind
Spot Warning (BSW) systems) that are
activated using the “Driver Assistance”
menu displayed in the vehicle information
display. (See “Driver Assistance” (P.2-21).)
When the warning systems switch is
turned off, the indicator
on the switch
is off. The indicator will also be off if all of
the warning systems are deactivated
using the settings menu.
The LDW system will vibrate the steering
wheel and blink the Lane Departure
Warning (LDW) indicator light (orange) to
alert the driver if the vehicle is traveling close to either the left or the right of a
traveling lane with detectable lane mar-
kers. (See “Lane Departure Warning (LDW)”
(P.5-26).)
The BSW system will turn on the side
indicator lights, on the outside mirrors, if
the radar sensors detect a vehicle in the
detection zone. If the turn signal is
activated in the direction of the detected
vehicle, a chime sounds twice and the
side indicator light will flash. (See “Blind
Spot Warning (BSW)” (P.5-38).)
WARNING SYSTEMS SWITCH (if so
equipped)
Page 150 of 603
2-58Instruments and controls
(P.5-144).)
WAC0619X
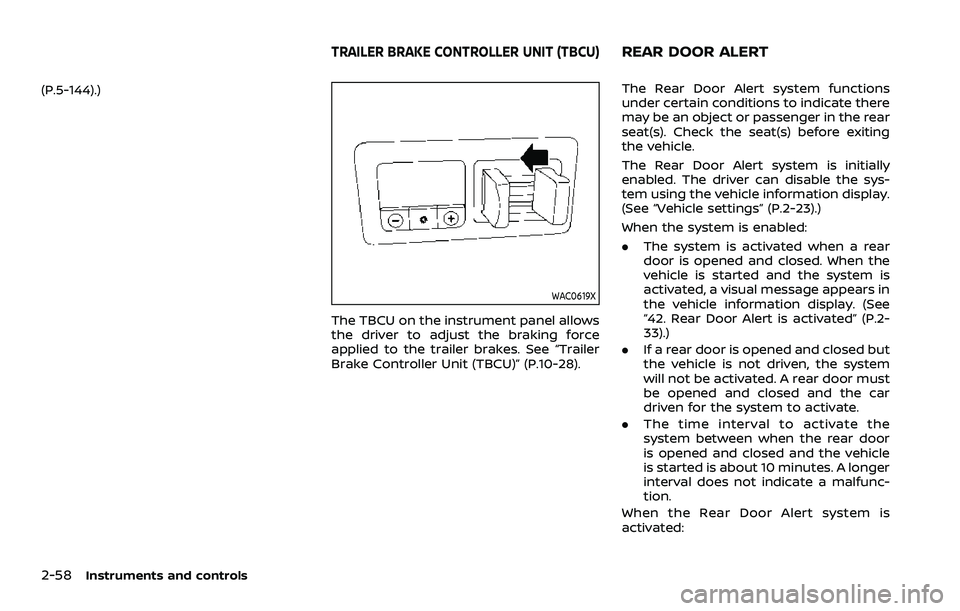
The TBCU on the instrument panel allows
the driver to adjust the braking force
applied to the trailer brakes. See “Trailer
Brake Controller Unit (TBCU)” (P.10-28).
The Rear Door Alert system functions
under certain conditions to indicate there
may be an object or passenger in the rear
seat(s). Check the seat(s) before exiting
the vehicle.
The Rear Door Alert system is initially
enabled. The driver can disable the sys-
tem using the vehicle information display.
(See “Vehicle settings” (P.2-23).)
When the system is enabled:
.The system is activated when a rear
door is opened and closed. When the
vehicle is started and the system is
activated, a visual message appears in
the vehicle information display. (See
“42. Rear Door Alert is activated” (P.2-
33).)
. If a rear door is opened and closed but
the vehicle is not driven, the system
will not be activated. A rear door must
be opened and closed and the car
driven for the system to activate.
. The time interval to activate the
system between when the rear door
is opened and closed and the vehicle
is started is about 10 minutes. A longer
interval does not indicate a malfunc-
tion.
When the Rear Door Alert system is
activated:
TRAILER BRAKE CONTROLLER UNIT (TBCU)REAR DOOR ALERT
Page 151 of 603
.When the driver puts the vehicle in the
P (Park) position, a notification mes-
sage appears in the vehicle informa-
tion display with the options to
“Dismiss Message” or “Disable Alert” if
desired.
— Select “Disable Alert” to temporarily
disable for that stop.
— No selection or ‘Dismiss Message” will keep the alert enabled for that
stop.
. If the alert is enabled when a driver
exits the vehicle, a message will ap-
pear in the vehicle information display
that states “Check Rear Seat for All
Articles.”
If “Horn & Alert” setting is selected:
— An audible horn sound will occur
after a short time unless a rear
door is opened and closed within a
short time to deactivate the alert.
— If the doors are locked before the alert is deactivated by opening a
rear door, the horn will sound.
— If the liftgate is opened before a rear door is opened, the horn will be
delayed until after the liftgate is
closed.
NOTE:
If “Alert Only” setting is selected, the
message alert will still be shown in the vehicle information display but the horn
will not sound.
WARNING
.
If the driver selects “Disable
Alert”, no audible alert will be
provided regardless of rear door
open/close status.
. There may be times when there is
an object or passenger in the rear
seat(s) but the audible alert does
not sound. For example, this may
occur if rear seat passengers
enter or exit the vehicle during a
trip.
. The system does not directly
detect objects or passengers in
the rear seat(s). Instead, it can
detect when a rear door is
opened and closed, indicating
that there may be something in
the rear seat(s).
NOTE:
There may be times when the horn
sounds but there are no objects or
passengers in the rear seat(s).
(See “42. Rear Door Alert is activated” (P.2-
33).)
CAUTION
. Use power outlet with the engine
running to avoid discharging the
vehicle battery.
. Avoid using power outlet when
the air conditioner, headlights or
rear window defroster is on.
. Before inserting or disconnecting
a plug, be sure the electrical
accessory being used is turned
OFF.
. When not in use, be sure to close
the cap. Do not allow water or any
liquid to contact the outlet.
Instruments and controls2-59
POWER OUTLET
Page 178 of 603
2-86Instruments and controls
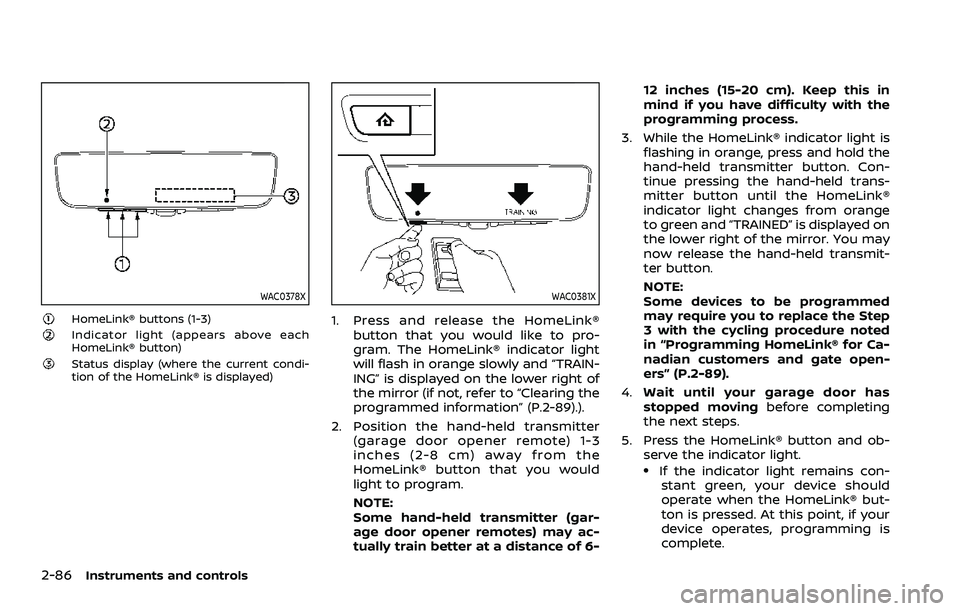
WAC0378X
HomeLink® buttons (1-3)Indicator light (appears above each
HomeLink® button)
Status display (where the current condi-
tion of the HomeLink® is displayed)
WAC0381X
1. Press and release the HomeLink®button that you would like to pro-
gram. The HomeLink® indicator light
will flash in orange slowly and “TRAIN-
ING” is displayed on the lower right of
the mirror (if not, refer to “Clearing the
programmed information” (P.2-89).).
2. Position the hand-held transmitter (garage door opener remote) 1-3
inches (2-8 cm) away from the
HomeLink® button that you would
light to program.
NOTE:
Some hand-held transmitter (gar-
age door opener remotes) may ac-
tually train better at a distance of 6- 12 inches (15-20 cm). Keep this in
mind if you have difficulty with the
programming process.
3. While the HomeLink® indicator light is flashing in orange, press and hold the
hand-held transmitter button. Con-
tinue pressing the hand-held trans-
mitter button until the HomeLink®
indicator light changes from orange
to green and “TRAINED” is displayed on
the lower right of the mirror. You may
now release the hand-held transmit-
ter button.
NOTE:
Some devices to be programmed
may require you to replace the Step
3 with the cycling procedure noted
in “Programming HomeLink® for Ca-
nadian customers and gate open-
ers” (P.2-89).
4. Wait until your garage door has
stopped moving before completing
the next steps.
5. Press the HomeLink® button and ob- serve the indicator light.
.If the indicator light remains con-stant green, your device should
operate when the HomeLink® but-
ton is pressed. At this point, if your
device operates, programming is
complete.
Page 180 of 603
2-88Instruments and controls
NOTE:
A ladder and/or second person may
simplify the following steps. Do not
stand on your vehicle to perform the
next steps.
2. On your garage door opener in your garage, locate the “Learn” or “Set”
button (usually near where the hang-
ing antenna wire is attached to the
garage door opener). If there is diffi-
culty locating this button, refer to the
device’s owner’s manual.
3. Press and release the “Learn” or “Set” button.
4. A light on your garage door opener may flash, and your two-way
HomeLink® indicators in your vehicle
may flash, confirming completion of
the process.
5. Pressing the trained HomeLink® but- ton will now activate your garage
door. The status indicators will show
when the door is moving.
6. Your two-way enrollment is now com- plete.USING THE GARAGE DOOR TWO-
WAY COMMUNICATION
HomeLink® has the function of commu-
nicating with garage door opener sys-
tems. If your garage door openers are
compatible with HomeLink®, the
HomeLink® can:
.receive and display “closing” or “open-
ing” status from your garage door
opener.
. recall and display the garage door
being “closed” or “opened”.
HomeLink® can receive the status from a
garage door opener at a range up to 820
ft (250 m), but it varies depending on the
environment. You may need to reduce
vehicle speed to successfully receive the
garage door opener communication.
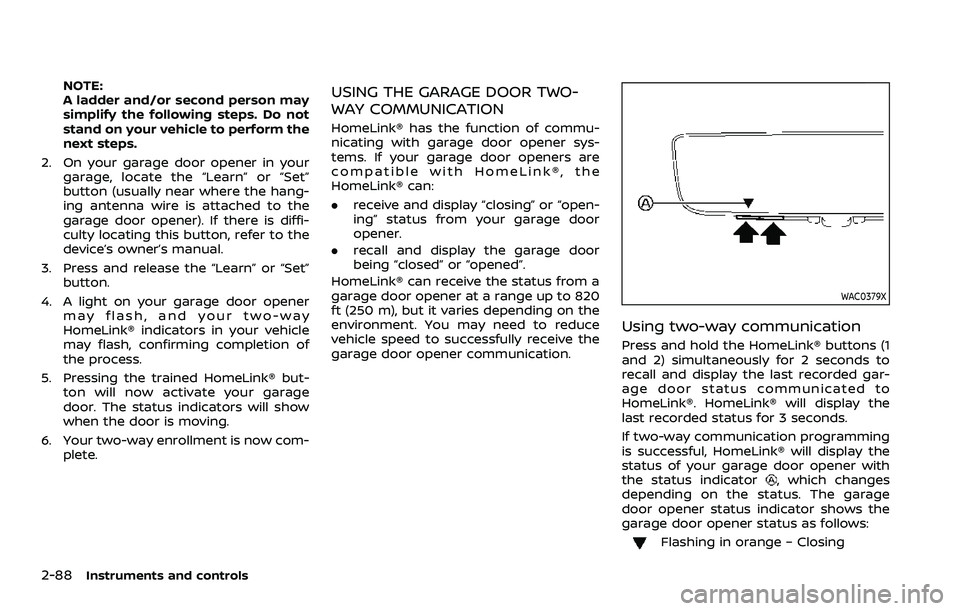
WAC0379X
Using two-way communication
Press and hold the HomeLink® buttons (1
and 2) simultaneously for 2 seconds to
recall and display the last recorded gar-
age door status communicated to
HomeLink®. HomeLink® will display the
last recorded status for 3 seconds.
If two-way communication programming
is successful, HomeLink® will display the
status of your garage door opener with
the status indicator
, which changes
depending on the status. The garage
door opener status indicator shows the
garage door opener status as follows:
Flashing in orange – Closing
Page 182 of 603
2-90Instruments and controls
To clear all programming
1. Press and hold the two outerHomeLink® buttons until the indicator
light begins to flash in green and
“CLEARED” is displayed on the mirror,
in approximately 10 seconds. Do not
hold for longer than 20 seconds.
2. Release both buttons.
HomeLink® is now in the programming
mode and can be programmed at any
time beginning with “Programming
HomeLink®” - Step 1.
REPROGRAMMING A SINGLE
HomeLink® BUTTON
To reprogram a HomeLink® button, com-
plete the following.
1. Press and hold the desired HomeLink® button. DO NOT release the button.
2. The indicator light will illuminate in green, and after 20 seconds it will
begin to flash in orange and “TRAIN-
ING” is displayed on the mirror.
3. Release the HomeLink® button and proceed with “Programming
HomeLink®” — Step 3.
For questions or comments, contact
HomeLink® at: www.homelink.com/
nissan or 1-800-355-3515.
The HomeLink® button has now been
reprogrammed. The new device can be activated by pressing the HomeLink®
button that was just programmed. This
procedure will not affect any other pro-
grammed HomeLink® buttons.
If a new device is not programmed to the
HomeLink® button, it will revert to the
previously stored programming.
IF YOUR VEHICLE IS STOLEN
If your vehicle is stolen, you should
change the codes of any non-rolling code
device that has been programmed into
HomeLink®. Consult the Owner’s Manual
of each device or call the manufacturer or
dealer of those devices for additional
information.
When your vehicle is recovered, you will
need to reprogram the HomeLink® Uni-
versal Transceiver with your new trans-
mitter information.
FCC Notice:
For USA:
This device complies with Part 15 of the
FCC Rules. Operation is subject to the
following two conditions: (1) This device
may not cause harmful interference,
and (2) this device must accept any
interference received, including inter-
ference that may cause undesired op-
eration.
NOTE:
Changes or modifications not expressly
approved by the party responsible for
compliance could void the user’s
authority to operate the equipment.
For Canada:
This device complies with Industry Ca-
nada licence-exempt RSS standard(s).
Operation is subject to the following
two conditions: (1) this device may not
cause interference, and (2) this device
must accept any interference, including
interference that may cause undesired
operation of the device.
Page 193 of 603
When you carry the Intelligent Key with
you, you can lock or unlock all doors by
pushing the door handle request switch
(driver’s or front passenger’s)
or the
liftgate request switchwithin the range
of operation.
When you lock or unlock the doors or the
liftgate, the hazard indicator will flash and
the horn (or the outside chime) will sound
as a confirmation. For details, see “Setting
hazard indicator and horn mode” (P.3-17).
Welcome light and farewell light
function
When you lock or unlock the doors
including the liftgate, the parking lights,
tail lights, side marker light and the
license plate light will illuminate for a
period of time. The welcome light and
farewell light function can be disabled.
For information about disabling the wel-
come light and farewell light function, it is
recommended you see a NISSAN dealer.
Locking doors
1. Move the shift lever to the P (Park) position, push the ignition switch to
the OFF position and make sure you
carry the Intelligent Key with you.*1
2. Close all the doors.*2 3. Push the door handle request switch
(driver’s or front passenger’s)
or the
liftgate request switchwhile carry-
ing the Intelligent Key with you.*3
4. All the doors will lock.
5. The hazard indicator flashes twice and the outside chime sounds twice.
*1: Doors will lock with the Intelligent Key
while the ignition switch is in the ACC or
ON position.
*2: Doors will not lock with the Intelligent
Key while any door is open.
*3: Doors will not lock by pushing the door
handle request switch with the Intelligent
Key inside the vehicle.
However, when an Intelligent Key is inside
the vehicle, doors can be locked with
another registered Intelligent Key.
NOTE:
Request switches for all doors can be
deactivated when the “Ext. Door Switch”
is turned off in the Vehicle Settings of
the vehicle information display. See
“Vehicle settings” (P.2-23).
CAUTION
. After locking the doors using the
request switch, make sure that
the doors have been securely locked by operating the door
handles.
. When locking the doors using the
request switch, make sure to
have the Intelligent Key in your
possession before operating the
request switch to prevent the
Intelligent Key from being left in
the vehicle.
. The request switch is operational
only when the Intelligent Key has
been detected by the Intelligent
Key system.
Lockout protection:
To prevent the Intelligent Key from being
accidentally locked in the vehicle, lockout
protection is equipped with the Intelligent
Key system.
When the driver’s side door is open, the
doors are locked, and then the Intelligent
Key is put inside the vehicle and all the
doors are closed; the lock will automati-
cally unlock and the door buzzer sounds.
NOTE:
The doors may not lock when the
Intelligent Key is in the same hand that
is operating the request switch to lock
the door. Put the Intelligent Key in a
purse, pocket or your other hand.
Pre-driving checks and adjustments3-11