Page 412 of 603

5-146Starting and driving
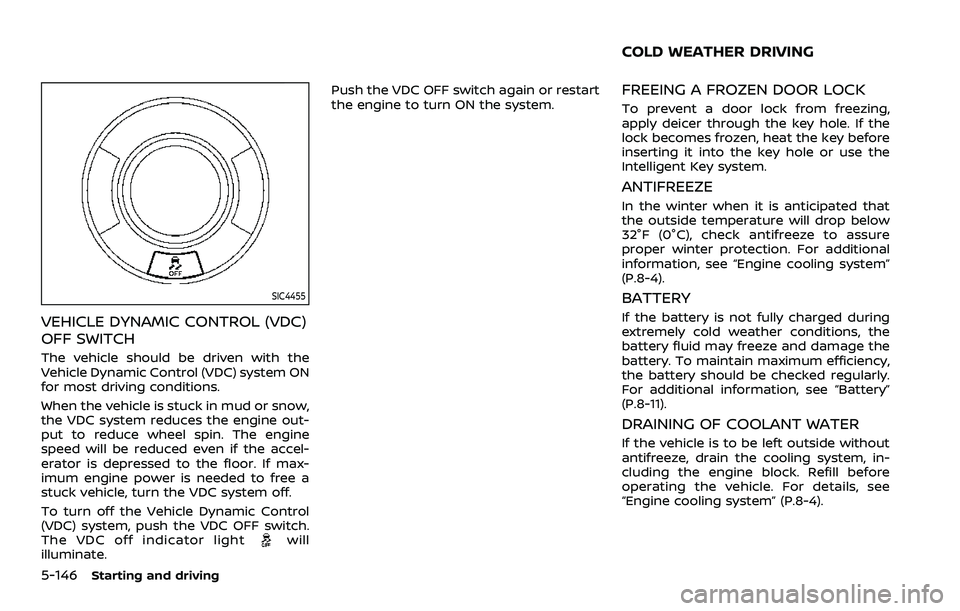
SIC4455
VEHICLE DYNAMIC CONTROL (VDC)
OFF SWITCH
The vehicle should be driven with the
Vehicle Dynamic Control (VDC) system ON
for most driving conditions.
When the vehicle is stuck in mud or snow,
the VDC system reduces the engine out-
put to reduce wheel spin. The engine
speed will be reduced even if the accel-
erator is depressed to the floor. If max-
imum engine power is needed to free a
stuck vehicle, turn the VDC system off.
To turn off the Vehicle Dynamic Control
(VDC) system, push the VDC OFF switch.
The VDC off indicator light
will
illuminate. Push the VDC OFF switch again or restart
the engine to turn ON the system.
FREEING A FROZEN DOOR LOCK
To prevent a door lock from freezing,
apply deicer through the key hole. If the
lock becomes frozen, heat the key before
inserting it into the key hole or use the
Intelligent Key system.
ANTIFREEZE
In the winter when it is anticipated that
the outside temperature will drop below
32°F (0°C), check antifreeze to assure
proper winter protection. For additional
information, see “Engine cooling system”
(P.8-4).
BATTERY
If the battery is not fully charged during
extremely cold weather conditions, the
battery fluid may freeze and damage the
battery. To maintain maximum efficiency,
the battery should be checked regularly.
For additional information, see “Battery”
(P.8-11).
DRAINING OF COOLANT WATER
If the vehicle is to be left outside without
antifreeze, drain the cooling system, in-
cluding the engine block. Refill before
operating the vehicle. For details, see
“Engine cooling system” (P.8-4).
COLD WEATHER DRIVING
Page 414 of 603

5-148Starting and driving
ENGINE BLOCK HEATER (if so
equipped)
Engine block heaters are used to assist in
cold temperature starting.
The engine block heater should be used
when the outside temperature is 20°F
(−7°C) or lower.
To use the engine block heater
1. Turn the engine off.
2. Open the hood and unwrap the en-gine block heater cord.
3. Plug the engine block heater cord into a grounded 3-wire, 3-pronged exten-
sion cord.
4. Plug the extension cord into a Ground Fault Interrupt (GFI) protected,
grounded 110-volt AC (VAC) outlet.
5. The engine block heater must be plugged in for at least 2 - 4 hours,
depending on outside temperatures,
to properly warm the engine coolant.
Use an appropriate timer to turn the
engine block heater on.
6. Before starting the engine, unplug and properly store the cord to keep it
away from moving parts.
WARNING
.Do not use your engine block
heater with an ungrounded elec-
trical system or a 2-pronged
adapter. You can be seriously
injured by an electrical shock if
you use an ungrounded connec-
tion.
. Disconnect and properly store the
engine block heater cord before
starting the engine. Damage to
the cord could result in an elec-
trical shock and can cause ser-
ious injury.
. Use a heavy-duty 3-wire, 3-
pronged extension cord rated
for at least 10A. Plug the exten-
sion cord into a Ground Fault
Interrupt (GFI) protected,
grounded 110-VAC outlet. Failure
to use the proper extension cord
or a grounded outlet can result in
a fire or electrical shock and
cause serious personal injury.
Page 418 of 603

6-4In case of emergency
could affect the proper operation
of the TPMS.
. Do not inject any tire liquid or
aerosol tire sealant into the tires,
as this may cause a malfunction
of the tire pressure sensors.
CHANGING A FLAT TIRE
If you have a flat tire, follow the instruc-
tions below.
Stopping the vehicle
1. Safely move the vehicle off the road
and away from traffic.
2. Turn on the hazard warning flashers.
3. Park on a level surface and apply the parking brake. Move the shift lever to
the P (Park) position.
4. Turn off the engine.
5. Raise the hood to warn other traffic, and to signal professional road assis-
tance personnel that you need assis-
tance.
6. Have all passengers get out of the vehicle and stand in a safe place, away
from traffic and clear of the vehicle.
WARNING
.Make sure the parking brake is
securely applied and the auto-
matic transmission is in the P
(Park) position.
. Never change tires when the ve-
hicle is on a slope, ice or slippery
areas. This is hazardous.
. Never change tires if oncoming
traffic is close to your vehicle.
Wait for professional road assis-
tance.
MCE0001A
Blocking wheels
Place suitable blocksat both the front
and back of the wheel diagonally oppo-
site the flat tire to prevent the vehicle
from moving when it is jacked up.
WARNING
Be sure to block the wheel as the
vehicle may move and result in
personal injury.
Page 420 of 603
6-6In case of emergency
JVE0423X
5. Securely screw to connect the T-shaped end of the jack rod and the
extension bar
as illustrated.
6. Fit the square end of the jack rod into the square hole of the wheel nut
wrench to form a handle
. 7. Locate the oval opening above the
middle of the rear bumper.
8. Place the T-shaped end of the jack rod through the opening and direct it
towards the spare wheel winch as-
sembly, located directly above the
spare wheel.
SCE0916
CAUTION
Do not insert the jack rod straight as
it is designed to be inserted at an
angle as shown.
9. Seat the T-shaped end of the jack rod into the T-shaped opening of the
spare wheel winch. Apply pressure to
keep the jack rod engaged in the
spare wheel winch and turn the jack
rod counterclockwise to lower the
spare wheel.
Page 422 of 603

6-8In case of emergency
looseness and dropping of the wheel
while driving. Lower the wheel on the
ground again, and make sure that
the hanging plate is properly set.
Hang the wheel again and make sure
that the wheel is held horizontally,
then store the wheel.
Jacking up the vehicle and remov-
ing the damaged tire
WARNING
.Never get under the vehicle while
it is supported only by the jack. If
it is necessary to work under the
vehicle, support it with safety
stands.
. Use only the jack provided with
your vehicle to lift the vehicle. Do
not use the jack provided with
your vehicle on other vehicles.
The jack is designed for lifting
only your vehicle during a tire
change.
. Use the correct jack-up points.
Never use any other part of the
vehicle for jack support. .
Never jack up the vehicle more
than necessary.
. Never use blocks on or under the
jack.
. Do not start or run the engine
while vehicle is on the jack, as it
may cause the vehicle to move.
. Do not allow passengers to stay
in the vehicle while it is on the
jack.
Carefully read the caution label at-
tached to the jack body and the follow-
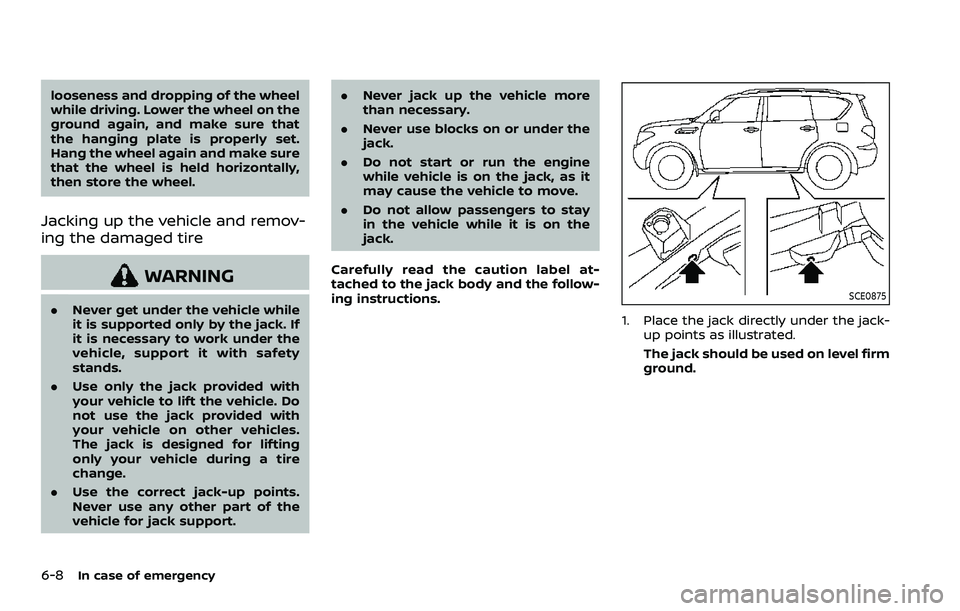
ing instructions.SCE0875
1. Place the jack directly under the jack- up points as illustrated.
The jack should be used on level firm
ground.
Page 423 of 603
SCE0876
2. Loosen each wheel nut one or twoturns by turning counterclockwise
with the wheel nut wrench. Do not
remove the wheel nuts until the tire
is off the ground.
NCE130
3. Install the assembled jack rod into the
jack as shown.
4. Carefully raise the vehicle until the clearance between the tire and
ground is achieved.
5. To lift the vehicle, securely hold the jack lever and rod with both hands
and turn the jack lever.
NOTE:
Before jacking up the vehicle, make
sure the ignition switch is placed in
the OFF position. If the vehicle is lifted
up with the engine running, the auto-
leveling suspension will become dis-
abled after 120 seconds. To reset the
auto-leveling suspension, cycle the
In case of emergency6-9
Page 435 of 603
OPERATING PROCEDURE
Place the ignition switch in the OFF
position and apply the parking brake. Let
the vehicle cool down before performing
the following procedure.
SCE0959
4WD shift motor assembly
1. Check that the ignition switch is in theOFF position.
CAUTION
The following procedure includes the
removal of the electrical system
components. Therefore, make sure
that the ignition switch is in the OFF
position before proceeding.
SCE0960
4WD shift motor harness connector
2. Unlock the upper lockof the har-
ness connector of the 4WD shift motor
assembly, then remove the harness
connector.
3. Cover the connector to prevent it from getting dirty, and then fasten
the connector to the vehicle using a
suitable rope so that the connector
does not contact the exhaust muffler,
etc.
In case of emergency6-21
Page 436 of 603
6-22In case of emergency
CAUTION
The connector must be fastened
securely. Not doing so may result in
damage to the connector due to
interference with other parts.
SCE0961
4. Remove the 4 boltsthat secure the
4WD shift motor using the wrench
that is equipped in the vehicle.
5. Remove the 4WD shift motor assem- bly.
CAUTION
Be careful not to allow the assembly
to contact water, dirt or sand.
SCE0962
6. Completely insert the wrench into the
internal gearof the transfer.
7. Fully turn the wrench clockwise
as
far as it will go. This shifts the transfer
to the 4L position.
8. Install the 4WD shift motor assembly. Securely tighten the 4 bolts using the
wrench.
CAUTION
.Do not connect the harness con-
nector of the 4WD shift motor
after the above procedure has
been performed.