Page 574 of 603
WIRELESS HEADPHONE
OPERATIONInstalling the batteries
Before attempting to operate the head-
phones, install the batteries as described
below:
1. Remove the headphone battery cover.2. Install two “AAA” batteries into the head-
phones. Make sure that proper polarity
(+ or -) is observed.
3. Reinstall headphone battery cover.
Headphone operation
Press the power button on the head-
phones to turn on and off the headphones.
The red LED will illuminate when the head-
phone is turned on. Set the select switch to
“A” or “B” for use with the “A” monitor or “B”
monitor respectively. Use the volume
thumb wheel to adjust the volume level for
the headphone audio.
NOTE:
If the headphones are accidentally lef t
on and system is powered off, a bat-
tery saver feature will automatically
turn off the headphones af ter ap-
proximately 3 minutes.
LHA5997
Page 575 of 603

CAUTION
•Always ensure that the batteries are
inserted with the positive and nega-
tive terminals in the correct direction
as shown in the battery
compartment.
•Different types of batteries have dif-
ferent characteristics. Do not mix dif-
ferent types.
•Do not mix old and new batteries.
Mixing old and new batteries will
shorten battery life and/or cause
chemical leaks from the old
batteries.
•When batteries fail to function, re-
place them immediately.
•Keep the batteries out of the reach of
children. In case the batteries are ac-
cidentally swallowed, immediately
consult a doctor. Also, when dispos-
ing of used batteries, please comply
with governmental regulations or
environmental public institution
rules that apply in your country/area.
•Remove the batteries if the head-
phones are not used for a month or
longer.
GENERAL OPERATION
Navigating menus
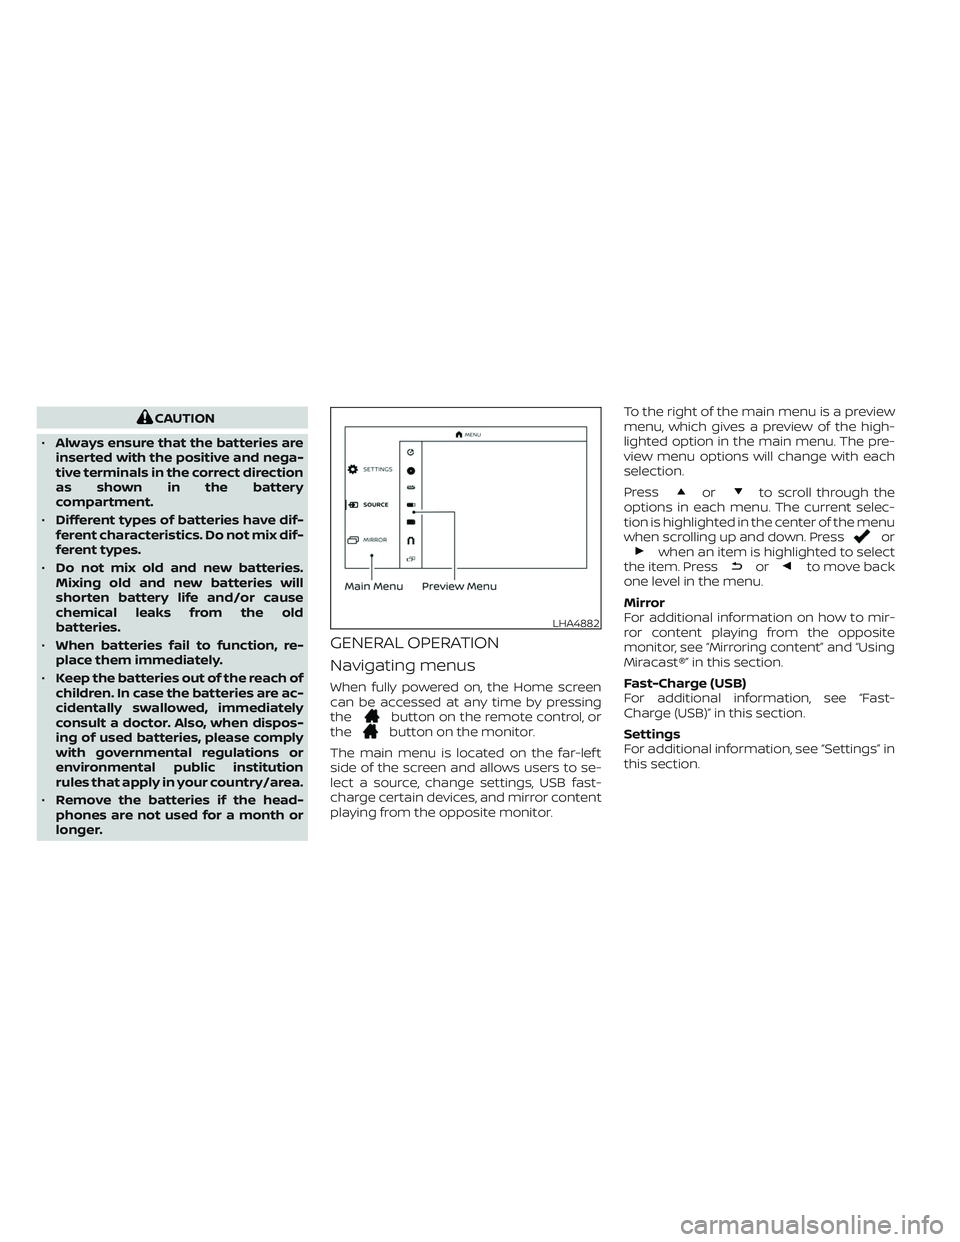
When fully powered on, the Home screen
can be accessed at any time by pressing
the
button on the remote control, or
thebutton on the monitor.
The main menu is located on the far-lef t
side of the screen and allows users to se-
lect a source, change settings, USB fast-
charge certain devices, and mirror content
playing from the opposite monitor.To the right of the main menu is a preview
menu, which gives a preview of the high-
lighted option in the main menu. The pre-
view menu options will change with each
selection.
Press
orto scroll through the
options in each menu. The current selec-
tion is highlighted in the center of the menu
when scrolling up and down. Press
orwhen an item is highlighted to select
the item. Pressorto move back
one level in the menu.
Mirror
For additional information on how to mir-
ror content playing from the opposite
monitor, see “Mirroring content” and “Using
Miracast®” in this section.
Fast-Charge (USB)
For additional information, see “Fast-
Charge (USB)” in this section.
Settings
For additional information, see “Settings” in
this section.
LHA4882
Page 587 of 603

MIRACAST®
About Miracast®
Miracast® is a dedicated wireless connec-
tion technology that allows content
streaming between a mobile device and
the RSI system. The connection is made
without cables or a network connection. It
provides the ability to “cast” (display) con-
tent, such as images or videos from the
mobile device to the RSI system. There is no
need for an external internet connection
and the ability to connect is inside
Miracast-certified devices.
Using Miracast®
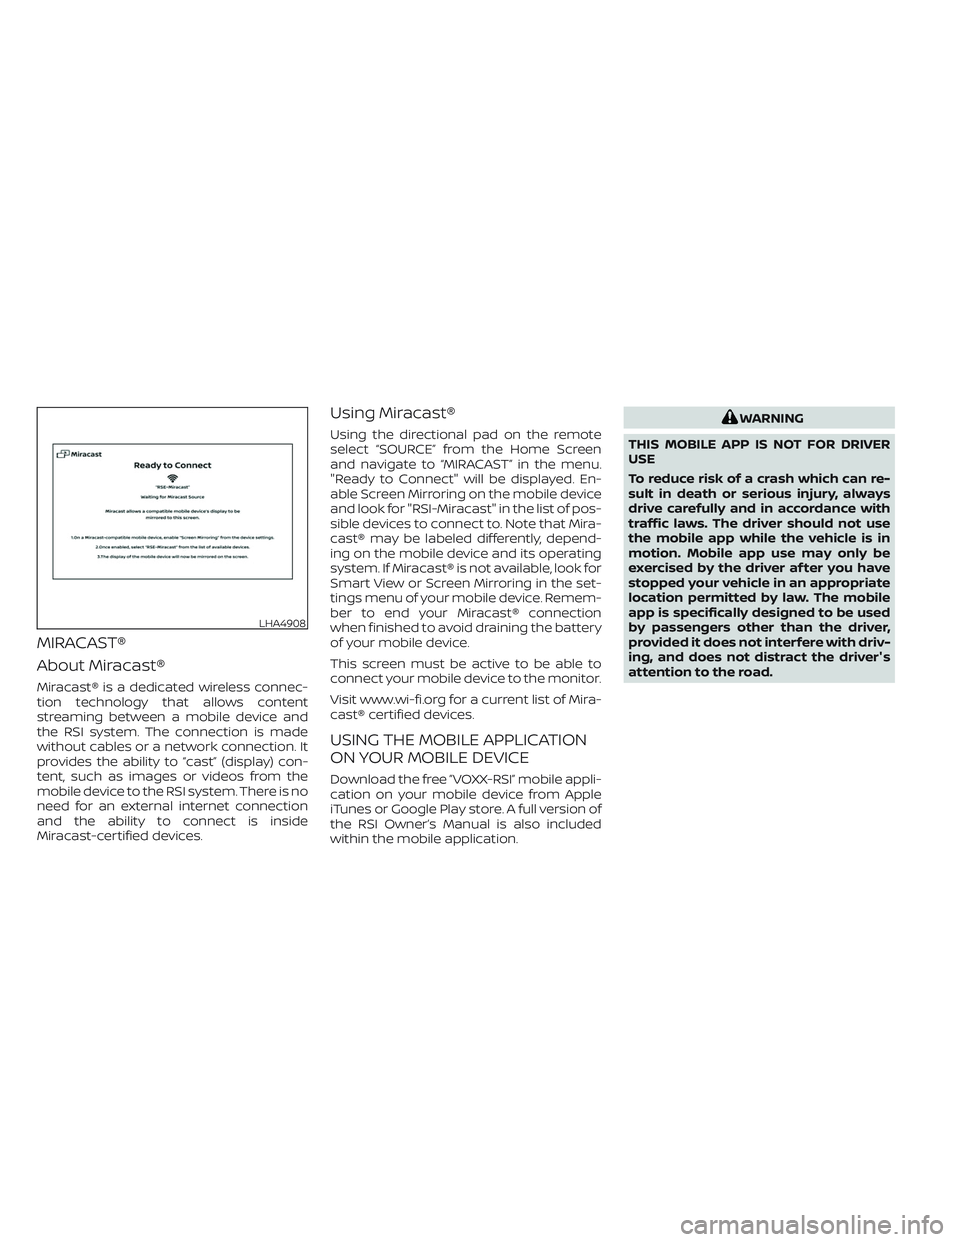
Using the directional pad on the remote
select “SOURCE” from the Home Screen
and navigate to “MIRACAST” in the menu.
"Ready to Connect" will be displayed. En-
able Screen Mirroring on the mobile device
and look for "RSI-Miracast" in the list of pos-
sible devices to connect to. Note that Mira-
cast® may be labeled differently, depend-
ing on the mobile device and its operating
system. If Miracast® is not available, look for
Smart View or Screen Mirroring in the set-
tings menu of your mobile device. Remem-
ber to end your Miracast® connection
when finished to avoid draining the battery
of your mobile device.
This screen must be active to be able to
connect your mobile device to the monitor.
Visit www.wi-fi.org for a current list of Mira-
cast® certified devices.
USING THE MOBILE APPLICATION
ON YOUR MOBILE DEVICE
Download the free ”VOXX-RSI” mobile appli-
cation on your mobile device from Apple
iTunes or Google Play store. A full version of
the RSI Owner’s Manual is also included
within the mobile application.
WARNING
THIS MOBILE APP IS NOT FOR DRIVER
USE
To reduce risk of a crash which can re-
sult in death or serious injury, always
drive carefully and in accordance with
traffic laws. The driver should not use
the mobile app while the vehicle is in
motion. Mobile app use may only be
exercised by the driver af ter you have
stopped your vehicle in an appropriate
location permitted by law. The mobile
app is specifically designed to be used
by passengers other than the driver,
provided it does not interfere with driv-
ing, and does not distract the driver's
attention to the road.
LHA4908
Page 597 of 603

For example, to set the ratings limit for PG
and below, select “RATINGS” then “3” using
the directional pad and press
, based
on the rating levels. For additional informa-
tion, see “About parental lock” in this sec-
tion.To change password, select “SETTINGS”
then “PARENTAL” from the home screen.
Enter the current password, select “PASS-
WORD” then “MODIFY” to set new password,
press
once to enter, and select again
to confirm. To exit “PARENTAL” menu press
.To remove the parental lock password, se-
lect “SETTINGS” then “PARENTAL” from the
home screen. Enter the current password.
Select “PASSWORD” then “REMOVE”, press
to enter, and select again to confirm.
To exit Parental menu press.
TROUBLESHOOTING
SymptomRemedy
Monitor does not power onVerif y the vehicle is in the ON or ACC position.
Verif y the battery is installed correctly in the remote control.
Verif y the in-line fuse protection is good. Refer to the RSI system installation instructions for vehicle-specific fuse location.
Monitor front panel controls
flash redFor further diagnosis, it is recommended that you visit a NISSAN dealer.
System frozen - will not re-
spondSof t reset the system by pressing and holding the power button on the top of the driver side monitor for 5 seconds.
Hard reset the system by turning the ignition off, then back on.
No pictureCheck that the signal source is connected.
Check the menu source setting. Match your monitor mode with the source correctly.
No sound or distorted soundMake sure that the external media device is connected properly, and all cables are securely inserted into the appropriate jacks.
Verif y that the batteries in the headphones are fresh.
If you are using the wireless headphones, make sure you turn on the power and select the correct monitor (A or B).
Verif y the volume is turned up on headphones and the system.
Verif y nothing is blocking the path between the monitor IR sensor and headphones.
When placing the headphones on your head, make sure to observe the Lef t and Right orientation. The headphones must be ori-
ented correctly (facing forward) to receive the audio signal.
Monitor feels warm When the monitor is in use for a long period of time, the surface will be warm. This is normal.