2021 MERCEDES-BENZ GT 4-DOOR COUPE display
[x] Cancel search: displayPage 233 of 450
Dep
endingontheve hicle's equipment, youcan
sele ctfur ther AMG displa ysinaddition tothe
st andar ddispla yson theDisplay Contentmenu.
In vehicles withAMG TRACKPACE, youcan dis‐
pla yfur ther con tent dependi ng on these tting,
e.g. :
R Speed andgear displa y
R Lap and sectortimes
R Accel erati on and braki ng
R Trac klayo ut graphics
% The conten tth at can bedispla yedwill vary
dependin gon these ttings.
When youre cei veacall, the0061 Incoming Call
messag ewill appear ontheHead-up Display.
In aud iomode, thest atio nnam eor trac kwill be
sho wntemp orarily when theaudio sourceis
being activelyoper ated.
Sy stem limit s
The visib ilityisinf luenc edbythefo llo wing condi‐
tion s:
R Seat position R
Imag eposit ionsetting
R Ambient light
R Wetro ad sur faces
R Obje ctsonthedispla yco ver
R Polar izat ion insung lasses
% Inextreme sunli ght, sectio nsofthedispla y
ma yappear washed out.Youcan correct this
by switc hingtheHead-up Displayof fand on
ag ain. Se
tting theHead -upDispla yusing theon-
boar dcom puter On-boar
dcom puter:
4 HEAD-UP DISPLA Y
The follo wing Head- upDisp lay se ttings ordis‐
pla yscan beselect edorsho wn:
R Position
R Brightness
R Messag es
R Assis tance status
R Telephon e R
Audio
R Voice Cont rolSy stem #
Toselect theSe ttings menu :swipe tothe
ri ght onthelef t-hand Touc hCon trol.
The Setting smen u5 will besele cted. #
Tocall uptheSe ttings menu :pr ess the
lef t-hand Touc hCon trol. #
Toadjus tth eposit ion:swipin gup ordown
on thelef t-hand Touc hCon trol. #
Toadjus tth ebr ight ness: swipe tothelef t
or right onthelef t-hand Touc hCon trol.
Se tting mes sages,assistance status, tele‐
phone, audioand theVo ice Contr olSy stem #
Press thelef t-hand Touc hCon trol.
The listof setting optio ns will bedispl ayed. #
Swipe upwards ordown wardson thelef t-
hand Touc hCon trol and selectase tting by
pr essing thelef t-hand Touc hCon trol. In
stru ment Displa yand on-boar dcom puter 23
1
Page 234 of 450
Selec
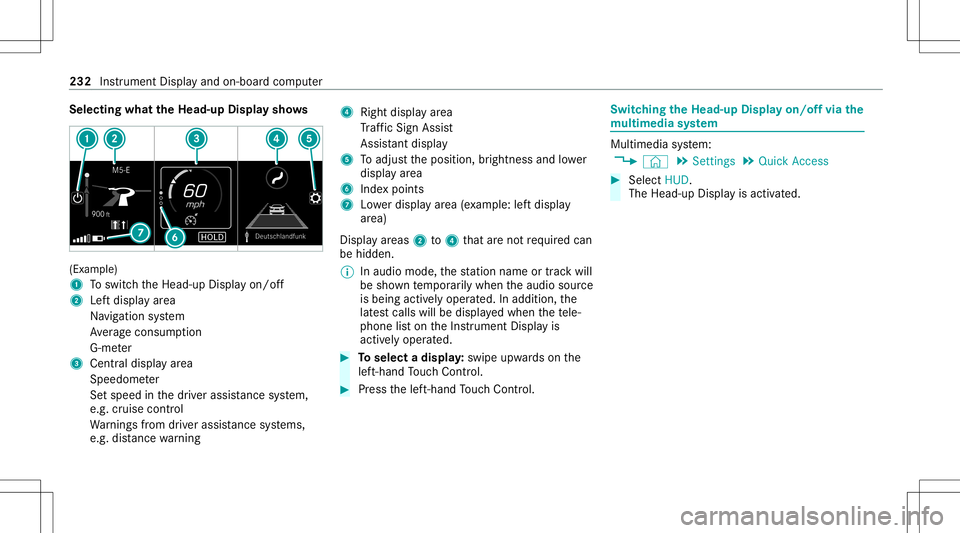
tingwhat theHead -upDispla ysho ws (Ex
am ple)
1 Toswitc hth eHead-up Displayon/ off
2 Leftdispla yar ea
Na vig ation system
Av erag econ sum ption
G-me ter
3 Centraldispl ayarea
Spe edom eter
Se tspeed inthedr iver assis tance system,
e.g. cruise control
Wa rnings from driver assis tance systems,
e.g. distance warning 4
Right displa yar ea
Tr af fic Sign Assist
Assi stant displa y
5 Toadjus tth eposition ,br ightn essand lowe r
displa yar ea
6 Inde xpoint s
7 Lowe rdisp lay ar ea (exa mp le:leftdispla y
ar ea)
Disp lay ar eas 2to4 that areno tre qu ired can
be hidden .
% Inaudio mode, thest atio nnam eor trac kwill
be sho wntemp orarily when theaudio source
is being activelyoper ated. Inaddition, the
lat estcalls willbedispla yedwhen thete le‐
phon elis ton theIns trument Displayis
activ elyoper ated. #
Toselect adispla y:swipe upwards on the
lef t-hand Touc hCon trol. #
Press thelef t-hand Touc hCon trol. Swit
ching theHead -upDispla yon/of fvia the
mu ltim edia system Multi
media system:
4 © 5
Set ting s5
Quick Access #
Select HUD.
The Head-up Displayis activ ated. 232
Instrument Displayand on-boar dcom puter
Page 235 of 450
Ov
ervie wand oper ation No
teson theMB UX multim edia system &
WARNIN GRisk ofdist ra ction from infor‐
mati onsystems andcomm unication s
eq uipment
If yo uoper ateinf ormat ionand comm unic a‐
tio neq uipme ntintegratedin theve hicle
when driving, youwill bedistract ed from the
tr af fic situ ation. Thiscou ldalso cau seyouto
lose control of theve hicle. #
Onlyoper ateth is eq uipmen twhen the
tr af fic situ ation per mits. #
Ifyo ucan notbe sur eof this, stop the
ve hicle whilstpa ying attention toroad
and traffic condi tions andoperate the
eq uipment withth eve hicle statio nary. Yo
umus tobse rveth eleg alrequ iremen tsforth e
cou ntryin whi chyouar ecur rentl ydr ivi ng when
op erati ng themultimedia system. Ov
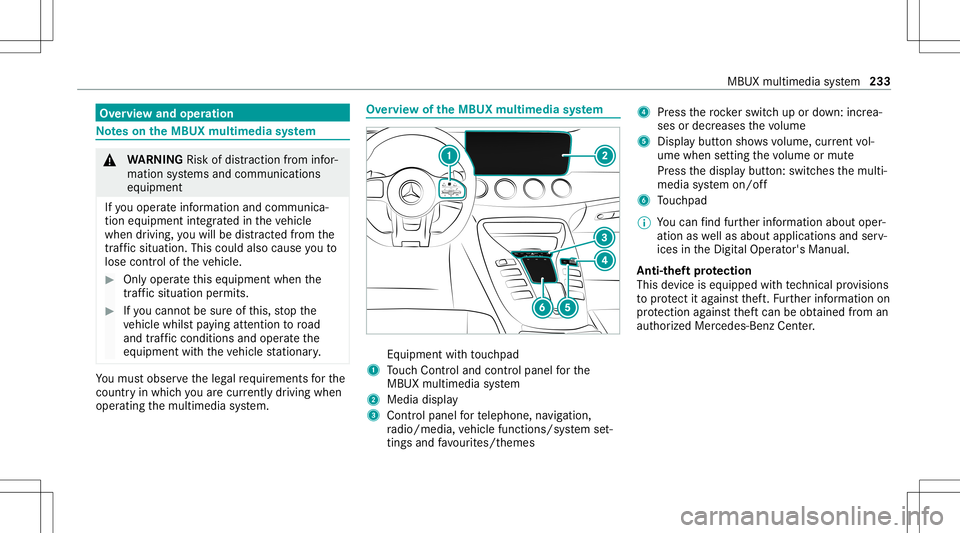
ervie wof theMB UX multim edia system Eq
uipmen twit hto uc hpad
1 Touc hCon trol and contro lpanel forth e
MBUX multimedia system
2 Media display
3 Contr olpanel forte lephon e,navig ation ,
ra dio/media, vehicle functions/sy stem set‐
ting sand favo urites/ themes 4
Press thero ck er switc hup ordown: increa‐
ses ordecr eases thevo lume
5 Disp lay butt onsho wsvolume, current vol‐
ume when setting thevo lume ormut e
Pr ess thedispla ybutt on:switc hesthemulti‐
media system on/ off
6 Touc hpad
% Youcan find further information aboutoper‐
ation aswellas about applicat ionsandserv‐
ices intheDigit alOper ator's Manual.
Anti-t heftpr otection
This devic eis eq uipped withte ch nica lpr ov ision s
to protect itag ains tth eft. Fu rther information on
pr otect ion agains tth eftcan beobt ained from an
aut hor ized Mercedes- BenzCenter. MBUX
multimedia system 233
Page 239 of 450
St
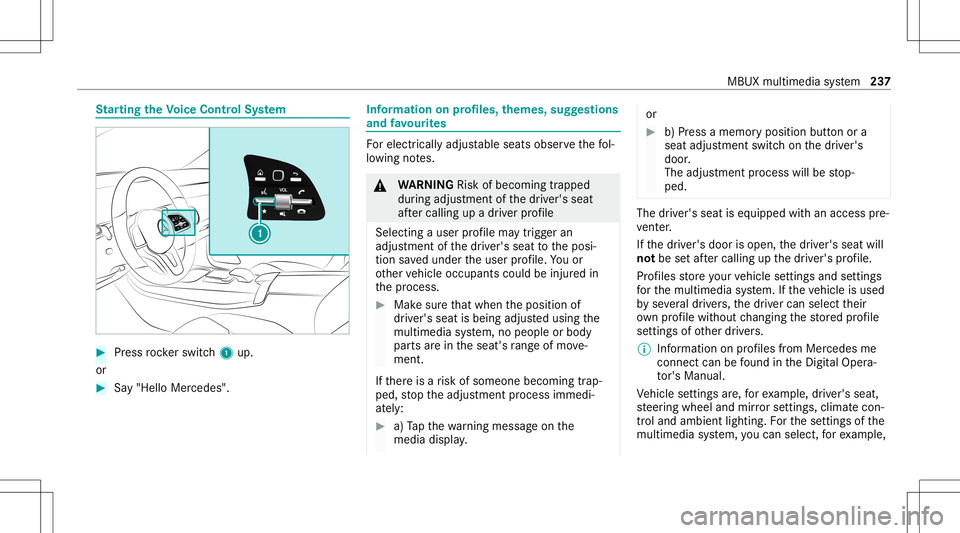
arting theVo ice Contr olSystem #
Press rock er switc h1 up.
or #
Say"Hello Mercedes". Inf
ormat iononprofiles, themes, suggestions
and favo urites Fo
relectr icallyadjus table seats observethefo l‐
lo wing notes. &
WARNIN GRisk ofbeco ming trap ped
du ring adjus tment ofthedr iver's seat
af te rcall ing upadr iver profile
Selecting auser profile ma ytrigg eran
adju stment ofthedr iver's seat totheposi‐
tion save dunder theuser profile. Youor
ot her vehicle occupants couldbeinjur edin
th epr ocess. #
Mak esur eth at when theposition of
dr iver's seat isbeing adjustedusing the
multime diasystem, nopeople orbody
par tsarein theseat's rang eof mo ve‐
ment.
If th er eis arisk ofsomeone becoming trap‐
ped, stop theadjus tmentpr ocess immedi‐
at ely: #
a)Tapth ewa rning mess ageon the
media display. or
#
b)Press amemor yposition buttonora
seat adjus tmentswitc hon thedr iver's
door .
The adjus tmentpr ocess willbestop‐
ped. The
driver's seat iseq uipped withan access pre‐
ve nter.
If th edr iver's door isopen, thedr iver's seat will
no tbe setaf te rcall ing upthedr iver's profile.
Pr ofiles stor eyo ur vehicle settin gsand settin gs
fo rth emultimedia system. Ifth eve hicle isused
by severaldr iver s, thedr iver can select their
ow npr ofile wi thout chang ingthestor ed profile
se ttings ofother driver s.
% Information onprofiles from Mer cedes me
conn ectcan befound intheDigita lOper a‐
to r's Manua l.
Ve hicle settin gsare, forex am ple, driver' sseat ,
st eer ing wheel andmirrorse ttings, climatecon‐
tr ol and amb ient lighti ng.Forth ese ttings ofthe
multime diasystem, youcan select,fo rex am ple, MBU
Xmult imed iasystem 23
7
Page 242 of 450
The
multimedia system prov ides amess age
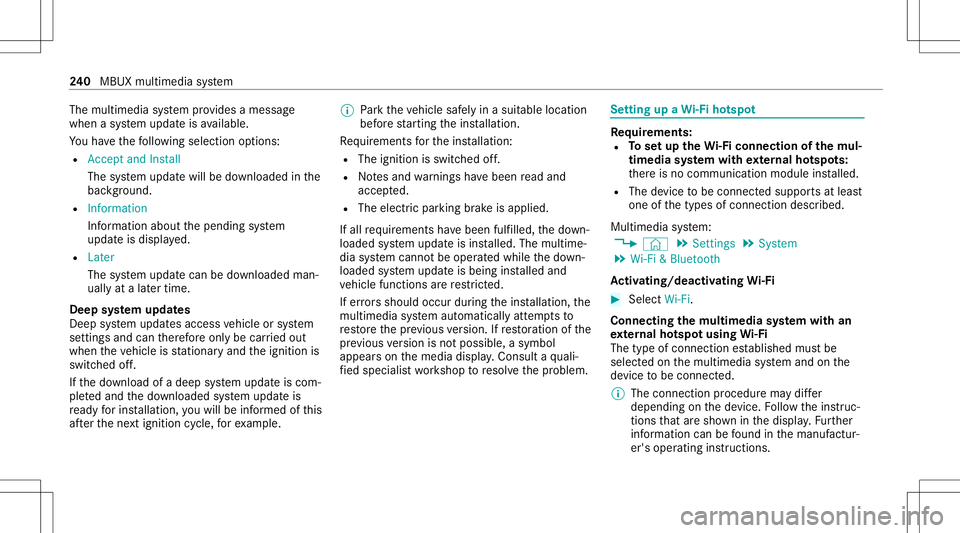
when asy stem updat eis available.
Yo uha ve thefo llo wing selectionoption s:
R Accept andInstall
The system updat ewill bedownloaded inthe
bac kground .
R Infor mat ion
In fo rm atio nabout thepending system
updat eis displa yed.
R Later
The system updat ecan bedownloaded man‐
uall yat alat er time.
Deep system updates
Dee psy stem updat esaccess vehicle orsystem
se ttings andcanther efor eonl ybe car ried out
when theve hicle isstatio naryand theignition is
switc hedoff.
If th edo wnload ofadeep system updat eis com‐
ple tedand thedo wnloaded system updat eis
re ady forins tallation ,yo uwill beinformed ofthis
af te rth ene xt ignition cycle, forex am ple. %
Park theve hicle safely inasuit able location
bef orest ar tin gth eins tallation .
Re quiremen tsforth eins tallation :
R The ignit ionisswitc hedoff.
R Notesand warnings have been read and
acc epted.
R The elect ric pa rking brak eis applied.
If all requ iremen tshave been fulfilled, thedo wn‐
loaded system updat eis ins talled. Themultim e‐
dia system cann otbe oper ated while thedo wn‐
loaded system updat eis being installed and
ve hicle functionsarere strict ed.
If er ro rs should occurduring theins tallation ,th e
multime diasystem automaticall yatt em ptsto
re stor eth epr ev ious version. Ifre stor ation ofthe
pr ev ious version isno tpossible ,a symbol
appear son themedia display.Con sult aqu ali‐
fi ed specialis two rkshop toresolv eth epr oblem. Se
tting upaWi -Fiho tspo t Re
quirement s:
R Tosetup theWi -Fico nne ctio nof themu l‐
tim edia system withex tern al ho tspo ts:
th er eis no comm unication moduleinstalled.
R The device tobe con nectedsuppor tsat leas t
one ofthetypes ofcon nect iondescr ibed.
Multimedia system:
4 © 5
Set ting s5
System
5 Wi-Fi &Bluetoot h
Ac tiv atin g/deac tivatin gWi -Fi #
Sele ctWi-Fi .
Co nne ctin gth emu ltim edia system withan
ex tern al ho tspo tusin gWi -Fi
The type ofconnection established mustbe
select edon themultimedia system and onthe
de vice tobe con nected.
% The connection procedur ema ydif fer
dependin gon thede vice. Followtheins truc‐
tion sth at aresho wninthedispla y.Fu rther
inf ormation canbefound inthemanuf actur‐
er's oper ating instruction s. 24
0
MBUX multimedia system
Page 243 of 450
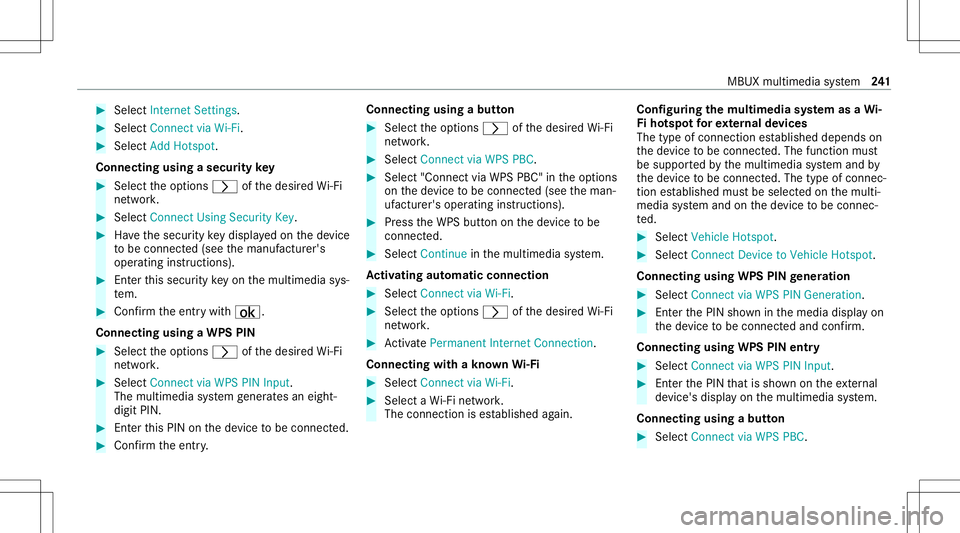
#
Select Interne tSetting s. #
Select Connect viaWi-Fi. #
Select Add Hotsp ot.
Co nne cting using ase cur itykey #
Select theop tion s0048 ofthedesir edWi-Fi
ne twork. #
Select Connect UsingSecu rityKey. #
Have thesecur itykeydisp laye don thede vice
to be con nected(see themanuf acturer's
oper ating instruction s). #
Enterth is secur itykeyon themultimedia sys‐
te m. #
Conf irm theent rywit h¡.
Connecti ngusing aWPS PIN #
Sele cttheop tion s0048 ofthedesir edWi-Fi
ne twork. #
Select Connect viaWPS PINInpu t.
The multime diasy stem gener ates an eight-
di gitPIN . #
Enterthis PIN onthede vice tobe con nected. #
Conf irm theent ry. Connect
ingusin gabut ton #
Select theop tion s0048 ofthedesir edWi-Fi
ne twork. #
Select Connect viaWPS PBC. #
Select "Connect viaWPS PBC"in theop tion s
on thede vice tobe con nected(see theman‐
uf actur er'soper ating instruction s). #
Press theWPS buttononthede vice tobe
con nected. #
Select Continueinthemultimedia system.
Ac tiv atin gaut omati cco nn ectio n #
Select Connect viaWi-Fi. #
Select theop tion s0048 ofthedesir edWi-Fi
ne twork. #
ActivatePe rma nent InternetConnecti on.
Co nnectin gwi th akno wnWi-Fi #
Sele ctConnect viaWi-Fi . #
Sele ctaWi -Fi network.
The conn ection ises tablished again. Conf
iguringthemu ltim edia system asaWi -
Fi ho tspo tfo rex tern al de vic es
The type ofconnection established depends on
th ede vice tobe con nected. The func tion must
be suppor tedby themultimedia system and by
th ede vice tobe con nected. The type ofcon nec‐
tion established mustbe select edon themulti‐
media system and onthede vice tobe con nec‐
te d. #
Select Vehicle Hotspot. #
Select Connec tDevic eto Vehicle Hotspot.
Connecting usingWPSPINgener ation #
Select Connec tvia WPS PINGeneration. #
Enterth ePIN showninthemedia displayon
th ede vice tobe con nectedand confirm .
Connect ingusin gWPS PINentr y #
Sele ctConn ectviaWPS PINInput. #
Enterth ePIN that issho wnontheex tern al
de vic e's displa yon themultimedia system.
Connecting usingabutt on #
Select Connec tvia WPS PBC. MBUX
multimedia system 24
1
Page 244 of 450
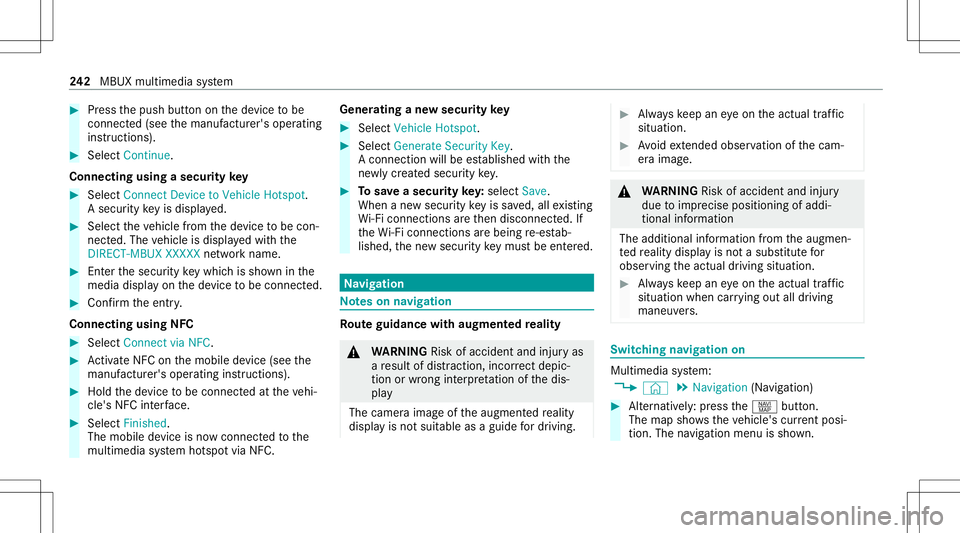
#
Press thepush buttononthede vice tobe
con nected(see themanuf acturer'soper ating
ins truction s). #
Select Continue.
Connecting usingasecur itykey #
Select Connect DevicetoVeh icleHotsp ot.
A secu rity keyis disp laye d. #
Select theve hicle from thede vice tobe con ‐
nec ted. The vehicle isdispla yedwit hth e
DIR ECT -MBU XXXX XXnetworknam e. #
Enterthesecur itykeywhic his sho wninthe
media display on thede vice tobe con nected. #
Conf irm theent ry.
Connect ingusin gNFC #
Sele ctConn ectviaNFC. #
ActivateNFC onthemobile device (see the
manuf acturer'soper ating instructions). #
Hold thede vice tobe con nectedat theve hi‐
cle's NFCinterface. #
Sele ctFini shed.
The mob ile de vice isno wconnect edtothe
multime diasystem hotspo tvia NFC. Gener
atingane wsecur itykey #
Select Veh icleHotsp ot. #
Select Genera teSecu rityKey.
A connecti onwillbe established withth e
ne wly crea tedsecur itykey. #
Tosave asec urity key:select Save.
When ane wsecur itykeyis save d, all existin g
Wi -Fi conne ctionsareth en discon nected.If
th eWi -Fi conne ctionsarebe ing re-es tab‐
lished, thene wsecur itykeymus tbe entere d. Na
vig ation No
teson navig ation Ro
uteguidanc ewith augment edreality &
WARNIN GRisk ofacci dent andinjuryas
a re sult ofdis traction, incorrect dep ic‐
tion orwrong interpr etatio nof thedis‐
pla y
The camer aimag eof theaugment edrealit y
displa yis no tsuit able asaguide fordr iving. #
Alw ayske ep aneyeon theactual traf fic
situation. #
Avoid extende dob ser vatio nof thecam‐
er aimag e. &
WARNIN GRisk ofacci dent andinjury
due toimprecise positioningof addi‐
tion alinf ormatio n
The addition alinf ormatio nfrom theaugmen‐
te dre alit ydispla yis no ta subs titutefo r
obser vingtheactual driving situation . #
Alw ayske ep aneyeon theactual traf fic
situation whencarrying out alldrivin g
mane uvers. Switc
hingnavig ation on Multim
ediasystem:
4 © 5
Navigation (Navigation ) #
Alternat ivel y: press thez button.
The map showstheve hicle's current posi‐
tio n.The navig ation menu issho wn. 24
2
MBUX multimedia system
Page 248 of 450
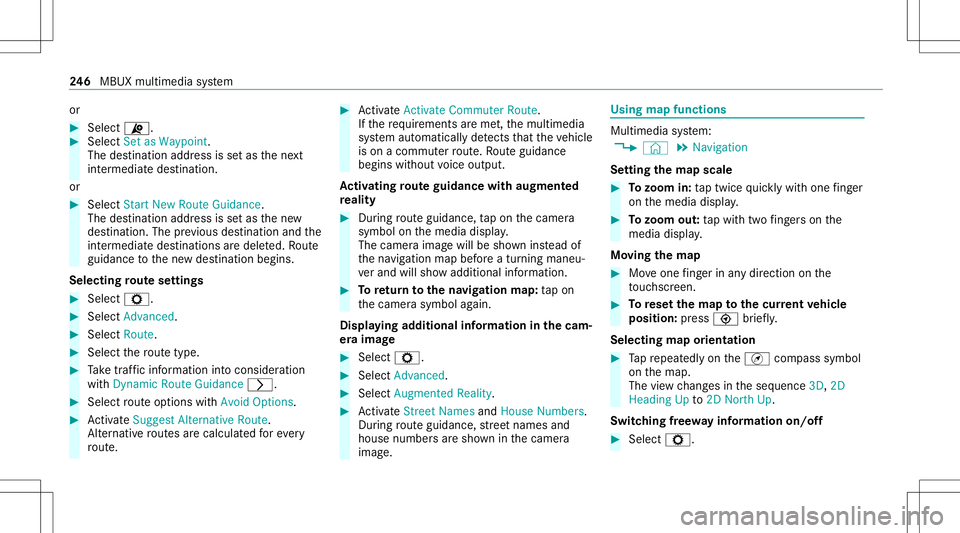
or
#
Select ¦. #
Select SetasWaypoint.
The destinat ionaddr essissetas thene xt
int ermediat edes tinat ion.
or #
Select Start New Route Guidance.
The destinat ionaddr essissetas thene w
des tinat ion.Theprev ious destination andthe
int ermediat edes tination sar edele ted. Ro ute
guidan cetothene wdes tinat ionbegins.
Selecting rout ese ttings #
Select Z. #
Select Advanced . #
Select Route. #
Select thero utetyp e. #
Take traf fic inf ormati onintoconsi deration
wi th Dyna micRoute Guidance 0048. #
Select routeop tio ns withAv oid Options. #
ActivateSug gest Alte rnative Route .
Alt ernati veroutes arecalc ulatedforev ery
ro ute. #
ActivateActiv ateCommu terRoute .
If th ere qu iremen tsareme t,th emultimedia
sy stem automaticall yde tects that theve hicle
is on acommut erroute. Ro uteguidan ce
begin swit hout voice output .
Ac tiv atin gro ut eguidanc ewith augment ed
re ality #
Dur ing routeguidan ce,tapon thecamer a
symbol onthemedia display.
The camer aimag ewill besho wninstead of
th ena vig ation mapbeforeatur ning maneu‐
ve rand willsho wadd itional information. #
Toretur nto thena vig ation map:tap on
th ecamer asymbol again.
Displa yingadditional informat ioninthecam ‐
er aima ge #
Select Z. #
Select Adva nced. #
Select Aug mented Reality. #
ActivateStree tNa mes andHouseNumbe rs.
Dur ing routeguidan ce,stre et nam esand
hou senum bers aresho wninthecamer a
imag e. Using
mapfunctions Multimedia
system:
4 © 5
Navigation
Se tting thema pscale #
Tozoo min: taptwice quickl ywit hone fing er
on themedia display. #
Tozoo mout: tapwit htw ofing erson the
media display.
Mo ving thema p #
Moveone fing er inanydi re ction onthe
to uc hsc reen. #
Torese tth ema pto the current vehicl e
posi tion: press \ brief ly.
Sel ecting map orien tatio n #
Tapre peat edlyon theÄ compass symbol
on themap.
The viewch ang esintheseq uence 3D,2D
Heading Upto2D North Up.
Swi tching free wa yinf ormation on/off #
Select Z. 24
6
MBUX multimedia system