2021 LINCOLN CORSAIR trailer
[x] Cancel search: trailerPage 10 of 638

Drive Mode Control
What Is Drive Mode Control
......................312
Selecting a Drive Mode ..............................
312
Drive Modes ..................................................
312
Speed Sign Recognition
What Is Speed Sign Recognition ..............
315
How Does Speed Sign Recognition Work .......................................................................
315
Speed Sign Recognition Precautions ......
315
Speed Sign Recognition Limitations .......
315
Speed Sign Recognition Indicators .........
316
Setting the Speed Sign Recognition Speed Warning ......................................................
316
Setting the Speed Sign Recognition Speed Tolerance ...................................................
316
Speed Sign Recognition – Troubleshooting .......................................................................
316
Load Carrying
Rear Under Floor Storage ..........................
318
Luggage Covers ...........................................
318
Roof Racks and Load Carriers ..................
318
Load Limit ......................................................
320Towing
Towing a Trailer
............................................
325
Trailer Sway Control ...................................
326
Recommended Towing Weights .............
326
Essential Towing Checks ..........................
328
Towing the Vehicle on Four Wheels - Gasoline, 8-Speed Automatic
Transmission – 8F35/8F40 ..................
330
Towing the Vehicle on Four Wheels - Plug-In Hybrid Electric Vehicle (PHEV),
Automatic Transmission – HF45 ..........
331
Driving Hints
Economical Driving .....................................
333
Breaking-In ....................................................
333
Driving Through Water ...............................
333
Floor Mats ......................................................
334
Roadside Emergencies
Roadside Assistance ..................................
336
Hazard Flashers ...........................................
337
Fuel Shutoff ...................................................
337
Jump Starting the Vehicle .........................
338
Post-Crash Alert System .............................
341Transporting the Vehicle
............................
341
Customer Assistance
Getting the Services You Need ...............
343
In California (U.S. Only) ..............................
344
The Better Business Bureau (BBB) Auto Line Program (U.S. Only) .......................
345
Utilizing the Mediation/Arbitration Program (Canada Only) ..........................................
346
Getting Assistance Outside the U.S. and Canada .......................................................
347
Ordering Additional Owner's Literature ......................................................................
349
Reporting Safety Defects (U.S. Only) ......
350
Reporting Safety Defects (Canada Only) ......................................................................
350
Fuses
Fuse Specification Chart ...........................
352
Changing a Fuse .........................................
363
Maintenance
General Information ...................................
365
Opening and Closing the Hood ..............
365
7
Corsair (CTF) Canada/United States of America, enUSA, Edition date: 202007, First-Printing Table of Contents
Page 90 of 638
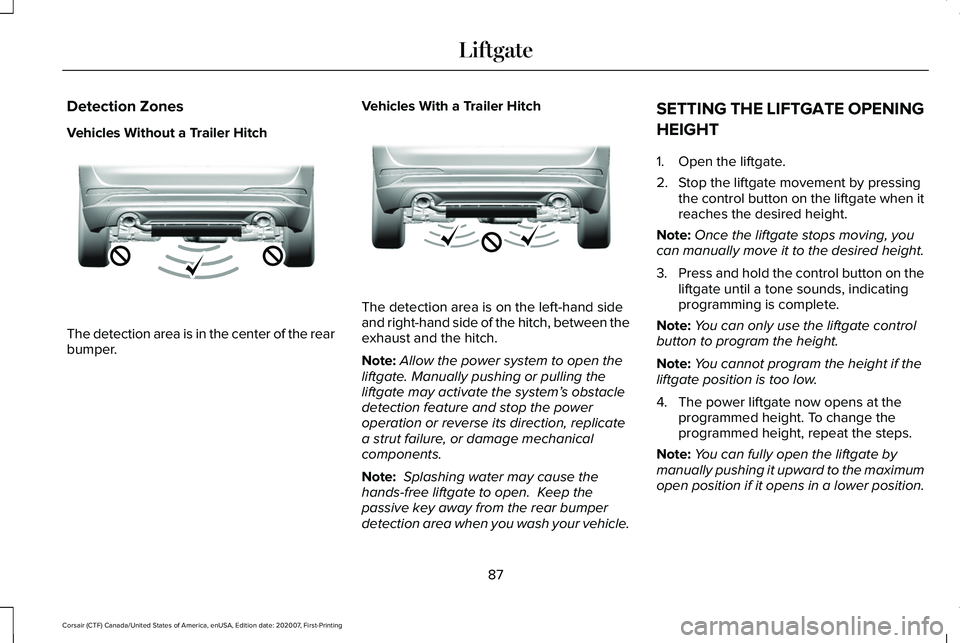
Detection Zones
Vehicles Without a Trailer Hitch
The detection area is in the center of the rear
bumper.
Vehicles With a Trailer Hitch The detection area is on the left-hand side
and right-hand side of the hitch, between the
exhaust and the hitch.
Note:
Allow the power system to open the
liftgate. Manually pushing or pulling the
liftgate may activate the system’ s obstacle
detection feature and stop the power
operation or reverse its direction, replicate
a strut failure, or damage mechanical
components.
Note: Splashing water may cause the
hands-free liftgate to open. Keep the
passive key away from the rear bumper
detection area when you wash your vehicle. SETTING THE LIFTGATE OPENING
HEIGHT
1. Open the liftgate.
2. Stop the liftgate movement by pressing
the control button on the liftgate when it
reaches the desired height.
Note: Once the liftgate stops moving, you
can manually move it to the desired height.
3. Press and hold the control button on the
liftgate until a tone sounds, indicating
programming is complete.
Note: You can only use the liftgate control
button to program the height.
Note: You cannot program the height if the
liftgate position is too low.
4. The power liftgate now opens at the programmed height. To change the
programmed height, repeat the steps.
Note: You can fully open the liftgate by
manually pushing it upward to the maximum
open position if it opens in a lower position.
87
Corsair (CTF) Canada/United States of America, enUSA, Edition date: 202007, First-Printing LiftgateE310717 E310718
Page 92 of 638
Note:
Make sure that you close the liftgate
before operating or moving your vehicle,
especially in an enclosure, like a garage or
a parking structure. This could damage the
liftgate and its components.
Note: Make sure the area behind your
vehicle is free from obstruction and that
there is enough room for you to operate the
liftgate. Objects too close to your vehicle,
for example a wall, garage door or another
vehicle may come into contact with the
moving liftgate This could damage the
liftgate and its components.
Note: Make sure you fully close the liftgate
to prevent cargo from falling out.
Closing the Liftgate Using the Remote
Control Press the remote control button
twice within three seconds. Closing the Hands-Free Liftgate (If
Equipped)
Make sure you have the passive key within
3 ft (1 m)
of the liftgate.
1. Stand behind your vehicle, and face the liftgate.
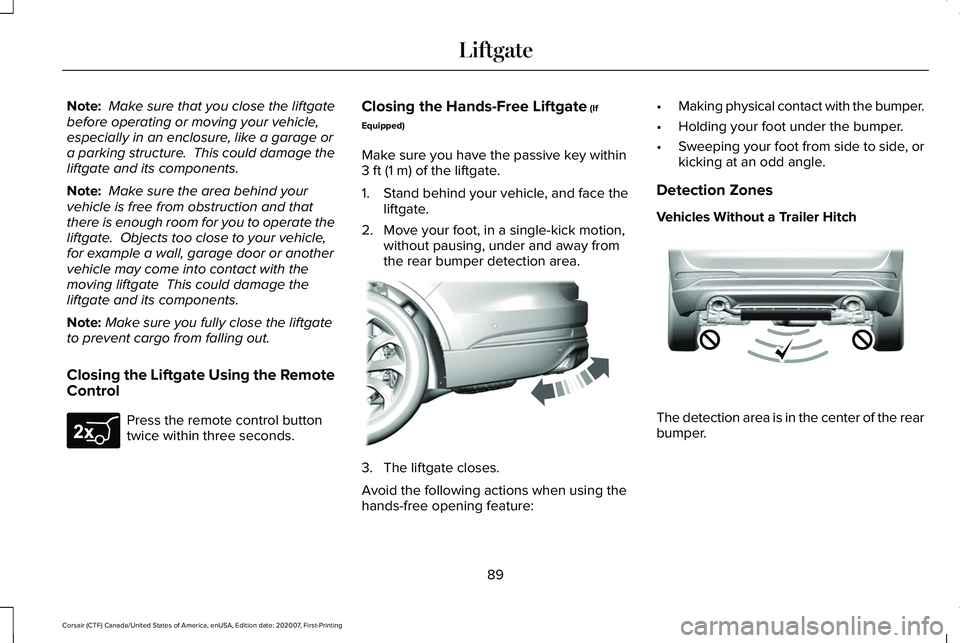
2. Move your foot, in a single-kick motion, without pausing, under and away from
the rear bumper detection area. 3. The liftgate closes.
Avoid the following actions when using the
hands-free opening feature:•
Making physical contact with the bumper.
• Holding your foot under the bumper.
• Sweeping your foot from side to side, or
kicking at an odd angle.
Detection Zones
Vehicles Without a Trailer Hitch The detection area is in the center of the rear
bumper.
89
Corsair (CTF) Canada/United States of America, enUSA, Edition date: 202007, First-Printing LiftgateE267940 E300799 E310717
Page 93 of 638
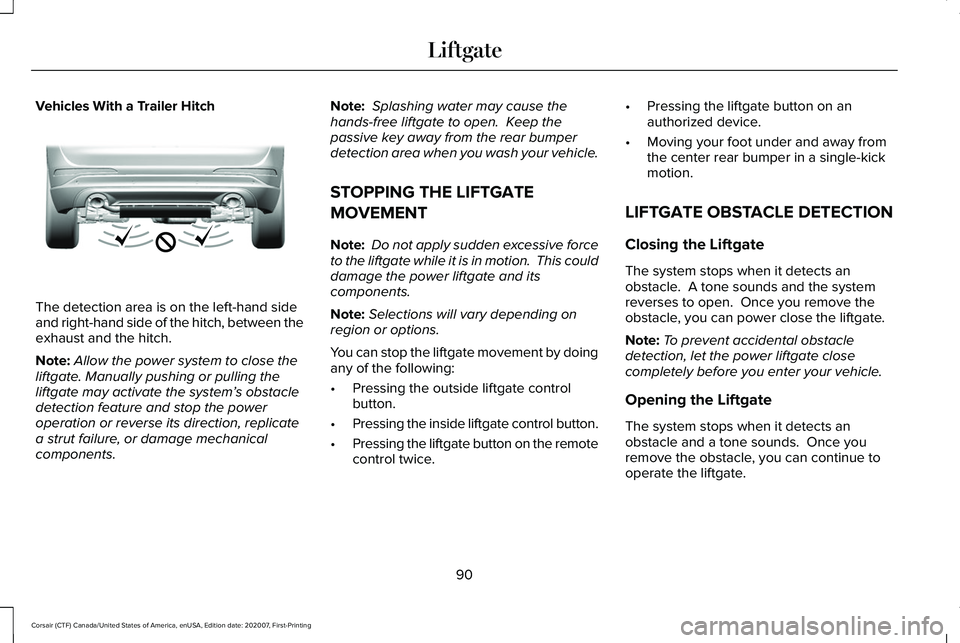
Vehicles With a Trailer Hitch
The detection area is on the left-hand side
and right-hand side of the hitch, between the
exhaust and the hitch.
Note:
Allow the power system to close the
liftgate. Manually pushing or pulling the
liftgate may activate the system’ s obstacle
detection feature and stop the power
operation or reverse its direction, replicate
a strut failure, or damage mechanical
components. Note:
Splashing water may cause the
hands-free liftgate to open. Keep the
passive key away from the rear bumper
detection area when you wash your vehicle.
STOPPING THE LIFTGATE
MOVEMENT
Note: Do not apply sudden excessive force
to the liftgate while it is in motion. This could
damage the power liftgate and its
components.
Note: Selections will vary depending on
region or options.
You can stop the liftgate movement by doing
any of the following:
• Pressing the outside liftgate control
button.
• Pressing the inside liftgate control button.
• Pressing the liftgate button on the remote
control twice. •
Pressing the liftgate button on an
authorized device.
• Moving your foot under and away from
the center rear bumper in a single-kick
motion.
LIFTGATE OBSTACLE DETECTION
Closing the Liftgate
The system stops when it detects an
obstacle. A tone sounds and the system
reverses to open. Once you remove the
obstacle, you can power close the liftgate.
Note: To prevent accidental obstacle
detection, let the power liftgate close
completely before you enter your vehicle.
Opening the Liftgate
The system stops when it detects an
obstacle and a tone sounds. Once you
remove the obstacle, you can continue to
operate the liftgate.
90
Corsair (CTF) Canada/United States of America, enUSA, Edition date: 202007, First-Printing LiftgateE310718
Page 139 of 638

Information Screens
Trailer Light Check Off Road
ECO Behaviors EV Coach
Electric Efficiency
Trip 1 and 2
Provides trip timer, trip average fuel
economy, total trip distance traveled, and
distance traveled on electric power only with
the engine off.
Press and hold the folder button to reset. This Trip
Provides trip timer, trip average fuel
economy, total trip distance traveled, and
distance traveled on electric power only with
the engine off. If the gasoline engine has not
turned on during the trip then trip average
fuel economy is not shown. This trip
automatically resets each time you start your
vehicle.
Fuel Economy
An instant fuel economy gauge is provided
along with average fuel economy. Average
fuel economy is continuously averaged since
the last reset.Both electric only and hybrid operation are
included in the calculation. More electric only
driving will result in greater average fuel
economy.
While viewing this screen you can reset your
average fuel economy by pressing and
holding the folder button.
When the gasoline engine is off the instant
fuel economy gauge is replaced with an
electric driving message.
EV Coach
EV coach can help you to get the most out
of your vehicle's electric driving and
regenerative braking capabilities.
136
Corsair (CTF) Canada/United States of America, enUSA, Edition date: 202007, First-Printing Information Displays
Page 213 of 638
FUEL QUALITY - GASOLINE
Choosing the Right Fuel
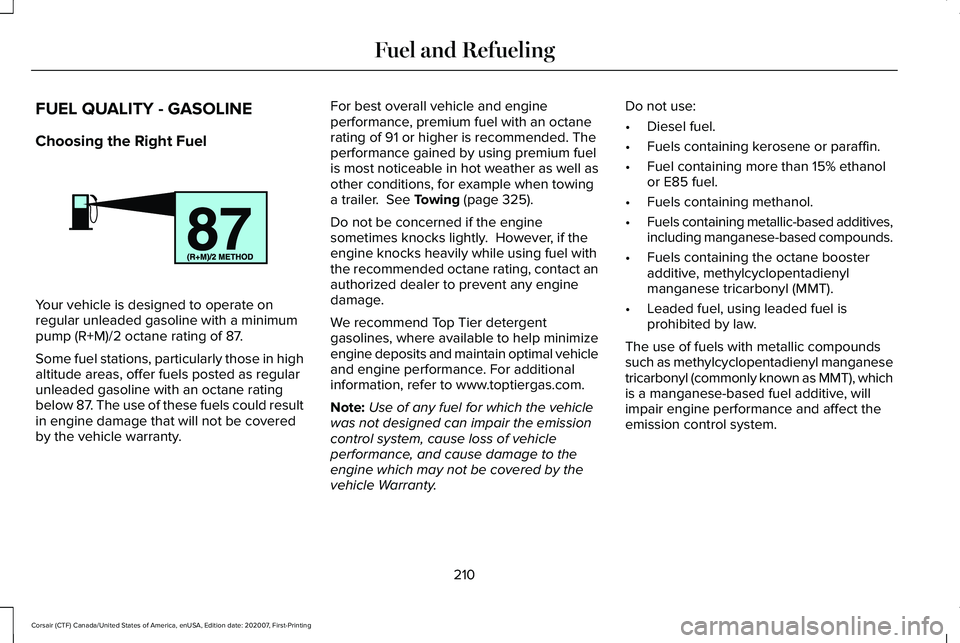
Your vehicle is designed to operate on
regular unleaded gasoline with a minimum
pump (R+M)/2 octane rating of 87.
Some fuel stations, particularly those in high
altitude areas, offer fuels posted as regular
unleaded gasoline with an octane rating
below 87. The use of these fuels could result
in engine damage that will not be covered
by the vehicle warranty. For best overall vehicle and engine
performance, premium fuel with an octane
rating of 91 or higher is recommended. The
performance gained by using premium fuel
is most noticeable in hot weather as well as
other conditions, for example when towing
a trailer. See Towing (page 325).
Do not be concerned if the engine
sometimes knocks lightly. However, if the
engine knocks heavily while using fuel with
the recommended octane rating, contact an
authorized dealer to prevent any engine
damage.
We recommend Top Tier detergent
gasolines, where available to help minimize
engine deposits and maintain optimal vehicle
and engine performance. For additional
information, refer to www.toptiergas.com.
Note: Use of any fuel for which the vehicle
was not designed can impair the emission
control system, cause loss of vehicle
performance, and cause damage to the
engine which may not be covered by the
vehicle Warranty. Do not use:
•
Diesel fuel.
• Fuels containing kerosene or paraffin.
• Fuel containing more than 15% ethanol
or E85 fuel.
• Fuels containing methanol.
• Fuels containing metallic-based additives,
including manganese-based compounds.
• Fuels containing the octane booster
additive, methylcyclopentadienyl
manganese tricarbonyl (MMT).
• Leaded fuel, using leaded fuel is
prohibited by law.
The use of fuels with metallic compounds
such as methylcyclopentadienyl manganese
tricarbonyl (commonly known as MMT), which
is a manganese-based fuel additive, will
impair engine performance and affect the
emission control system.
210
Corsair (CTF) Canada/United States of America, enUSA, Edition date: 202007, First-Printing Fuel and RefuelingE161513
Page 214 of 638
FUEL QUALITY - PLUG-IN HYBRID
ELECTRIC VEHICLE (PHEV)
Choosing the Right Fuel
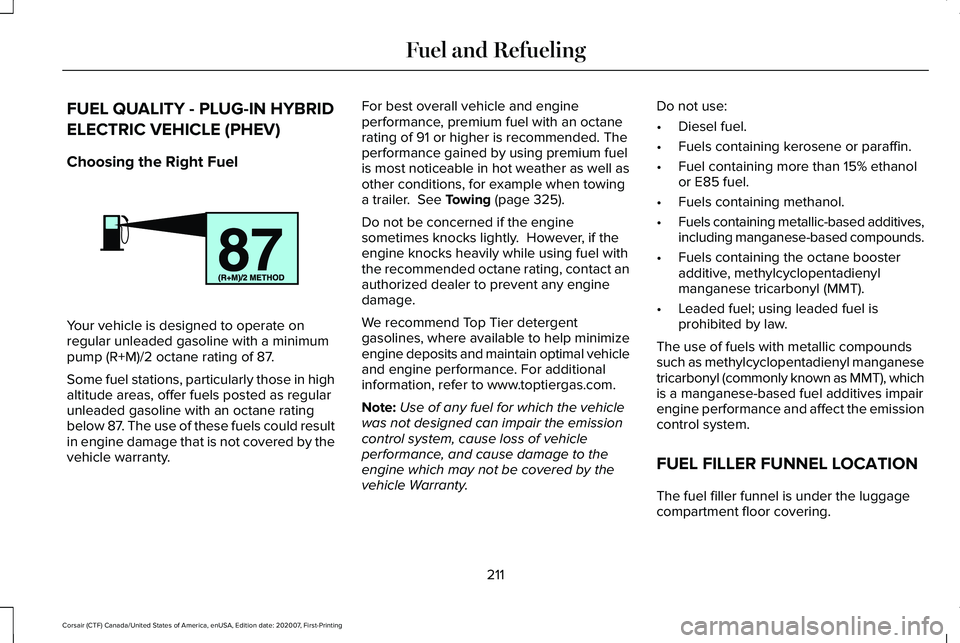
Your vehicle is designed to operate on
regular unleaded gasoline with a minimum
pump (R+M)/2 octane rating of 87.
Some fuel stations, particularly those in high
altitude areas, offer fuels posted as regular
unleaded gasoline with an octane rating
below 87. The use of these fuels could result
in engine damage that is not covered by the
vehicle warranty. For best overall vehicle and engine
performance, premium fuel with an octane
rating of 91 or higher is recommended. The
performance gained by using premium fuel
is most noticeable in hot weather as well as
other conditions, for example when towing
a trailer. See Towing (page 325).
Do not be concerned if the engine
sometimes knocks lightly. However, if the
engine knocks heavily while using fuel with
the recommended octane rating, contact an
authorized dealer to prevent any engine
damage.
We recommend Top Tier detergent
gasolines, where available to help minimize
engine deposits and maintain optimal vehicle
and engine performance. For additional
information, refer to www.toptiergas.com.
Note: Use of any fuel for which the vehicle
was not designed can impair the emission
control system, cause loss of vehicle
performance, and cause damage to the
engine which may not be covered by the
vehicle Warranty. Do not use:
•
Diesel fuel.
• Fuels containing kerosene or paraffin.
• Fuel containing more than 15% ethanol
or E85 fuel.
• Fuels containing methanol.
• Fuels containing metallic-based additives,
including manganese-based compounds.
• Fuels containing the octane booster
additive, methylcyclopentadienyl
manganese tricarbonyl (MMT).
• Leaded fuel; using leaded fuel is
prohibited by law.
The use of fuels with metallic compounds
such as methylcyclopentadienyl manganese
tricarbonyl (commonly known as MMT), which
is a manganese-based fuel additives impair
engine performance and affect the emission
control system.
FUEL FILLER FUNNEL LOCATION
The fuel filler funnel is under the luggage
compartment floor covering.
211
Corsair (CTF) Canada/United States of America, enUSA, Edition date: 202007, First-Printing Fuel and RefuelingE161513
Page 250 of 638
Pull the switch upward and hold it.
The red warning lamp illuminates, a tone
sounds and the stoplamps turn on. The electric parking brake continues to slow
your vehicle down unless you release the
switch.
Manually Releasing the Electric Parking
Brake
Switch the ignition on.
Press and hold the brake pedal.
Push the switch downward.
The red warning lamp turns off. If it remains illuminated or flashes, the system
has malfunctioned. Have your vehicle
checked as soon as possible.
Pulling Away on a Hill When Towing a
Trailer
Press and hold the brake pedal.
Pull the switch upward and hold it.
Shift into gear.
Press the accelerator pedal until engine has
developed sufficient torque to prevent your
vehicle from rolling down the hill. Release the switch and pull away
in a normal manner.
Automatically Releasing the Electric
Parking Brake
Close the driver door. Shift into gear.
Press the accelerator pedal and pull away in
a normal manner. The red warning lamp turns off.
If it remains illuminated or flashes, the electric
parking brake has not released. Manually
release the parking brake.
Releasing the Electric Parking Brake if
the Vehicle Battery is Running Out of
Charge
Note:
The electric parking brake does not
apply or release if the battery is low or has
no charge.
Connect a booster battery to the vehicle
battery to release the electric parking brake
if the vehicle battery is running out of charge.
See Jump Starting the Vehicle (page 338).
247
Corsair (CTF) Canada/United States of America, enUSA, Edition date: 202007, First-Printing BrakesE267156 E270480 E267156 E270480 E267156 E267156 E270480