2021 LINCOLN CORSAIR window
[x] Cancel search: windowPage 117 of 638

To adjust your mirrors, switch your vehicle
on - with the ignition in accessory mode or
the engine running and then:
1.
Select the mirror you want to adjust. The
control light turns on.
2. Use the adjustment control to adjust the
position of the mirror.
3. Press the mirror control again. The control light turns off.
Fold-Away Exterior Mirrors
Push the mirror toward the door window
glass. Make sure that you fully engage the
mirror in its support when returning it to its
original position.
Auto-Folding Mirrors
The exterior mirrors fold in toward the glass
after you place the transmission into park (P),
turn off the vehicle, open and close the driver
side door and lock the vehicle. The exterior
mirrors unfold and return to their driving
position after you unlock the vehicle and
open and close the driver side door. You can switch this feature on and off
through the information display. See General
Information (page 131).
Note: If you switch this feature off through
the information display, the welcome lighting
also switches off.
You can fold the mirrors on demand by
pressing the power-folding mirror control
located on the door. The control lights and
the mirrors fold in toward the glass. Press
the control again to unfold the mirrors. The
control light turns off.
Note: If you use the power-folding control to
fold the mirrors on demand and the auto fold
feature is switched on, the auto-folding
feature becomes disabled. To re-enable the
auto-folding feature, press the control again
to unfold the mirrors. Loose Mirror
If your auto-folding mirrors are manually
folded or unfolded, they may not work
properly even after you re-position them.
You need to reset them if:
•
The mirrors vibrate when you drive.
• The mirrors feel loose.
• The mirrors do not stay in the folded or
unfolded position.
• One of the mirrors is not in its normal
driving position.
To reset the auto-fold feature, use the
power-folding mirror control to fold and
unfold the mirrors. You may hear a loud noise
as you reset the mirrors. This sound is
normal. Repeat this process as needed each
time the mirrors are manually folded or
unfolded.
Heated Exterior Mirrors
See
Heated Exterior Mirrors (page 168).
114
Corsair (CTF) Canada/United States of America, enUSA, Edition date: 202007, First-Printing Windows and Mirrors
Page 118 of 638

Memory Mirrors
You can save and recall the mirror positions
through the memory function. See Memory
Function (page 177).
Signal Indicator Mirrors
(If Equipped)
The outer portion of the appropriate mirror
housing blinks when you switch on the turn
signal.
Auto-Dimming Feature
(If Equipped)
The driver’ s exterior mirror automatically
dims when the interior auto-dimming mirror
turns on.
Lincoln Welcome Mat
(If Equipped)
Projection lights, on the bottom of the mirror
housings, project an image onto the ground
a short distance from the vehicle.
See
Welcome Lighting (page 107).
Blind Spot Monitor
See
Blind Spot Information System (page
299). INTERIOR MIRROR WARNING: Do not adjust the mirrors
when your vehicle is moving. This could
result in the loss of control of your vehicle,
serious personal injury or death.
Note: Do not clean the housing or glass of
any mirror with harsh abrasives, fuel or other
petroleum or ammonia-based cleaning
products.
You can adjust the interior mirror to your
preference. Some mirrors also have a second
pivot point. This lets you move the mirror
head up or down and from side to side.
Auto-Dimming Mirror
(If Equipped)
Do not block the sensors on the front and
back of the mirror. Mirror performance may
be affected. A rear center passenger or
raised rear center head restraint could
prevent light from reaching the sensor. The mirror dims to reduce the effect of bright
light from behind. It returns to normal when
the bright light from behind is no longer
present or if you shift into reverse (R), to
make sure you have a clear view when
backing up.
SUN VISORS
Rotate the sun visor toward the side window
and extend it rearward for extra shade.
115
Corsair (CTF) Canada/United States of America, enUSA, Edition date: 202007, First-Printing Windows and MirrorsE138666
Page 119 of 638

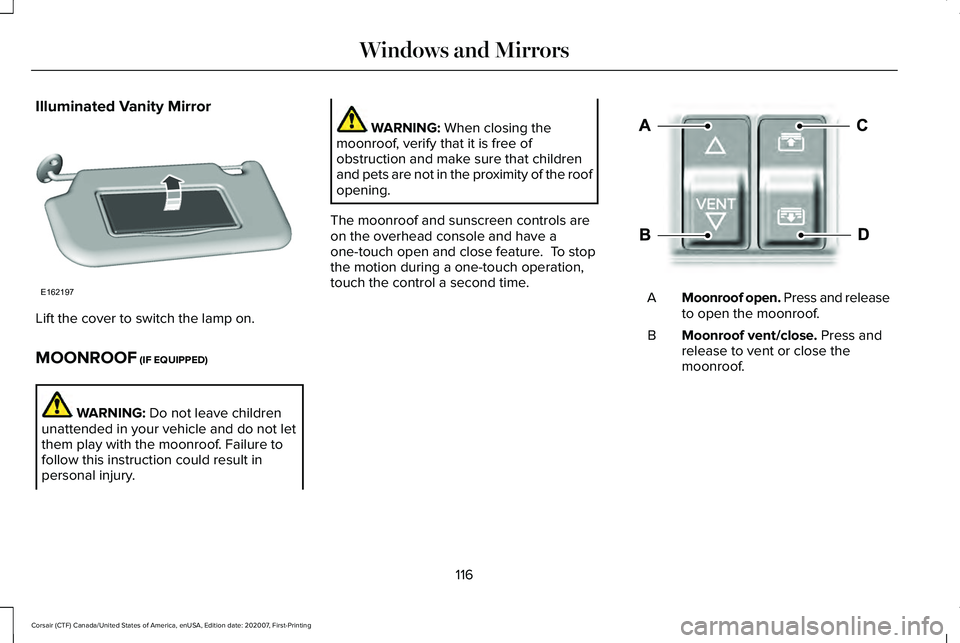
Illuminated Vanity Mirror
Lift the cover to switch the lamp on.
MOONROOF (IF EQUIPPED)
WARNING:
Do not leave children
unattended in your vehicle and do not let
them play with the moonroof. Failure to
follow this instruction could result in
personal injury. WARNING:
When closing the
moonroof, verify that it is free of
obstruction and make sure that children
and pets are not in the proximity of the roof
opening.
The moonroof and sunscreen controls are
on the overhead console and have a
one-touch open and close feature. To stop
the motion during a one-touch operation,
touch the control a second time. Moonroof open. Press and release
to open the moonroof.
A
Moonroof vent/close.
Press and
release to vent or close the
moonroof.
B
116
Corsair (CTF) Canada/United States of America, enUSA, Edition date: 202007, First-Printing Windows and MirrorsE162197 E295253
Page 120 of 638

Sunshade open. Press and release
to open the sunshade. The
sunshade opens automatically with
the moonroof. You can also open
the sunshade with the moonroof
closed.
C
Sunshade close. Press and release
to close the sunshade.
D
Note: The sunshade stops short of its fully
opened position for the comfort of rear
passengers. To open the sunshade fully,
press the control again.
Note: When closing the sunshade stops at
the first panel for the dual panel moonroof.
Press and release again to continue to fully
close sunshade.
Bounce-Back
The moonroof will stop automatically and
reverse some distance if an obstacle is
detected while closing.
Touch and hold (C) within two seconds of a
bounce-back event to override this function.
117
Corsair (CTF) Canada/United States of America, enUSA, Edition date: 202007, First-Printing Windows and Mirrors
Page 148 of 638

Action
Message
The hood is not completely closed.
Hood Ajar
The system has disabled the door switches.
Switches Inhibited Security Mode
Displays when the door lock is turned on and you attempt to open the doo\
r.
Doors Locked Unlock Before Opening
Indicates a driver door fault that requires manually opening the door by\
the override lever. Havethe system checked as soon as possible.
Driver Door Fault Use Inside Override
Lever In Map Pocket
Indicates a fault with the electronic door system. Have the system check\
ed as soon as possible.
Door Fault Service Required
There is a system malfunction with the child locks. Have the system chec\
ked as soon as possible.
Child Lock Malfunction Service Required
Indicates that the rear seat interior door release switches and power wi\
ndows are switched off,preventing rear seat occupants from opening the doors or windows.
Child Lock ON
Indicates that the rear seat interior door release switches and power wi\
ndows are switched on.
Child Lock OFF
The factory keypad code displays in the information display after the system resets t\
he keypad.See What Is the Passive Anti-Theft System (page 93).
Factory Keypad Code {X X X X X}
Driver Alert Action
Message
Stop and rest as soon as it is safe to do so.
Driver Alert Warning Rest Now
Take a rest soon.
Driver Alert Warning Rest Suggested
145
Corsair (CTF) Canada/United States of America, enUSA, Edition date: 202007, First-Printing Information Displays
Page 163 of 638

Signaling and Traffic Indication
Displays direction indicators and blind spot
information (if direction indicators are active).
Navigation Display Area
Displays navigation next turn instructions.
Advanced Driver Assistance Systems
Display Area
Displays adaptive cruise control, lane
centering aid and lane keeping system status
and warnings.
System Message Display Area
Displays system messages and notifications
including an incoming phone call.
Advanced Driver Assistance Systems
Message Display Area
Displays advanced driver assistance systems
messages and image adjustment prompts.
Speed Limit Display Area
Displays your speed limit information if it is
available in the map database or is detected
by the camera.
Speedometer Display Area
Displays your current vehicle speed and your
transmission gear selection.
Status Bar
Displays Distance To Empty (DTE), time and
outside air temperature. Next to DTE, the
fuel gauge fill color changes to yellow in low
fuel conditions. You can switch off the status
bar in the head up display settings menu.
Maintaining Your Head Up Display
•
Do not place objects onto the transparent
cover, as they may block you from seeing
portions of the image. These objects
could also damage the cover and affect
the quality of the projected image.
• The system uses a special windshield
designed to provide the optimum image
quality. You must replace the windshield
in a vehicle with this system with a
certified original equipment
manufactured (OEM) head up display
windshield. Replacing this system's
windshield with a non-head up display
windshield causes a double image or
distorted image. Have an authorized
dealer or authorized repair facility replace
the windshield.
• Light conditions such as oncoming
headlamps, sunrise, sunset or reflections
off road surfaces can affect the driver's
ability to see the head up display image.
• Clean the windshield often for optimal
head up display performance. See
Cleaning the Windows and Wiper
Blades
(page 389).
160
Corsair (CTF) Canada/United States of America, enUSA, Edition date: 202007, First-Printing Information Displays
Page 165 of 638

REMOTELY STOPPING THE
ENGINE
Press the button on the remote
control to stop the engine.
Note: You can also use the Lincoln Way App
to stop the engine.
REMOTE START REMOTE
CONTROL INDICATORS
Remote Control Feedback
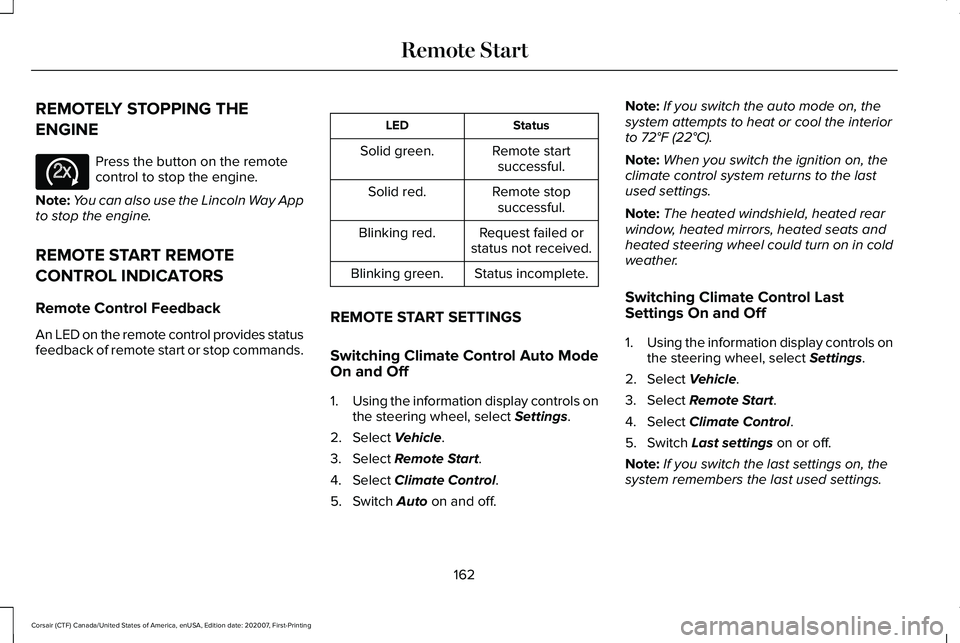
An LED on the remote control provides status
feedback of remote start or stop commands. Status
LED
Remote startsuccessful.
Solid green.
Remote stopsuccessful.
Solid red.
Request failed or
status not received.
Blinking red.
Status incomplete.
Blinking green.
REMOTE START SETTINGS
Switching Climate Control Auto Mode
On and Off
1. Using the information display controls on
the steering wheel, select Settings.
2. Select
Vehicle.
3. Select
Remote Start.
4. Select
Climate Control.
5. Switch
Auto on and off. Note:
If you switch the auto mode on, the
system attempts to heat or cool the interior
to
72°F (22°C).
Note: When you switch the ignition on, the
climate control system returns to the last
used settings.
Note: The heated windshield, heated rear
window, heated mirrors, heated seats and
heated steering wheel could turn on in cold
weather.
Switching Climate Control Last
Settings On and Off
1. Using the information display controls on
the steering wheel, select
Settings.
2. Select
Vehicle.
3. Select
Remote Start.
4. Select
Climate Control.
5. Switch
Last settings on or off.
Note: If you switch the last settings on, the
system remembers the last used settings.
162
Corsair (CTF) Canada/United States of America, enUSA, Edition date: 202007, First-Printing Remote StartE138625
Page 169 of 638

The left-hand and right-hand settings set to
LO, recirculated air flows through the
instrument panel air vents, air conditioning
turns on and the blower motor adjusts to the
highest speed.
Switching Maximum Defrost On and
Off
Press and release the button for
maximum defrosting.
The left-hand and right-hand temperatures
are set to HI, air flows through the windshield
air vents, and the blower motor adjusts to
the highest speed.
You can also use this setting to defog and
clear the windshield of a thin covering of ice.
Note: To prevent window fogging, you
cannot select recirculated air when
maximum defrost is on.
Note: The heated rear window also turns on
when you select maximum defrost. Switching Recirculated Air On and Off Press and release the button to
switch between outside air and
recirculated air.
The air currently in the passenger
compartment recirculates. This may reduce
the time needed to cool the interior, when
used with air conditioning, and reduce
unwanted odors from entering your vehicle.
Note: Recirculated air may turn off, or
prevent you from switching on, in all air flow
modes except maximum air conditioning to
reduce the risk of fogging. Recirculation may
also turn on and off in various air distribution
control combinations during hot weather to
improve cooling efficiency.
HINTS ON CONTROLLING THE
INTERIOR CLIMATE
General Hints
Note: Prolonged use of recirculated air may
cause the windows to fog up. Note:
You may feel a small amount of air
from the footwell air vents regardless of the
air distribution setting.
Note: To reduce humidity build-up inside
your vehicle, do not drive with the system
switched off or with recirculated air always
switched on.
Note: Do not place objects under the front
seats as this may interfere with the airflow
to the rear seats.
Note: Remove any snow, ice or leaves from
the air intake area at the base of the
windshield.
Note: To improve the time to reach a
comfortable temperature in hot weather,
drive with the windows open until you feel
cold air through the air vents.
Automatic Climate Control
Note: Adjusting the settings when your
vehicle interior is extremely hot or cold is not
necessary. Automatic mode is best
recommended to maintain set temperature.
166
Corsair (CTF) Canada/United States of America, enUSA, Edition date: 202007, First-Printing Climate Control