2021 LEXUS LS500 mirror
[x] Cancel search: mirrorPage 324 of 520
3245-3. Using the air conditioning system and defogger
■Changing the air flow mode
P.326
■Switching between outside air and
recirculated air modes
Press the outside/recirculated air
mode switch.
The mode changes as follows each time
the switch is pressed.
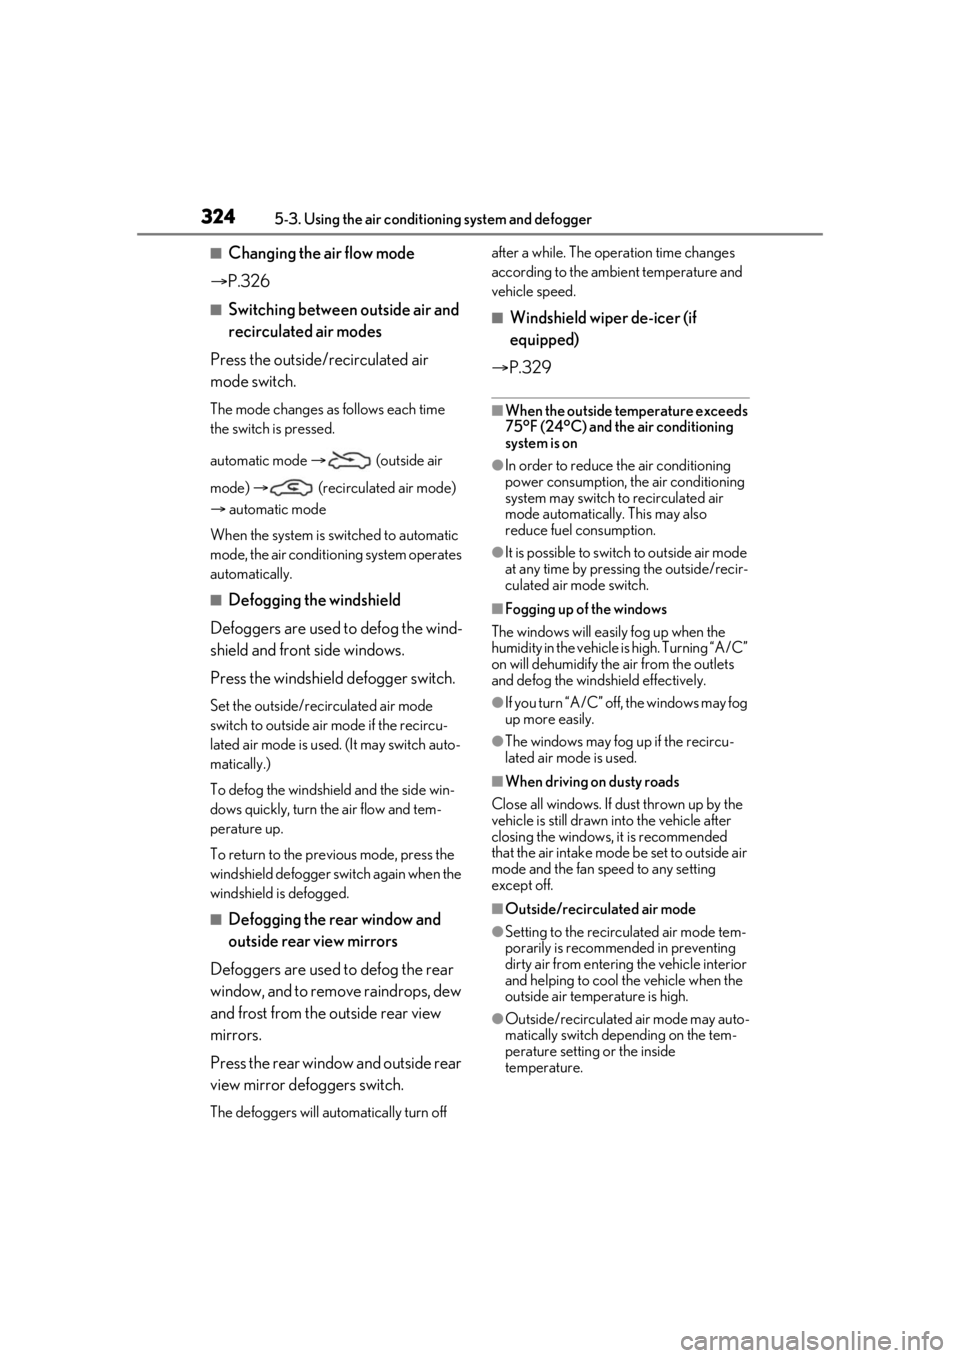
automatic mode (outside air
mode) (recirculated air mode)
automatic mode
When the system is switched to automatic
mode, the air conditioning system operates
automatically.
■Defogging the windshield
Defoggers are used to defog the wind-
shield and front side windows.
Press the windshield defogger switch.
Set the outside/reci rculated air mode
switch to outside air mode if the recircu-
lated air mode is used. (It may switch auto-
matically.)
To defog the windshield and the side win-
dows quickly, turn the air flow and tem-
perature up.
To return to the previous mode, press the
windshield defogger switch again when the
windshield is defogged.
■Defogging the rear window and
outside rear view mirrors
Defoggers are used to defog the rear
window, and to remove raindrops, dew
and frost from the outside rear view
mirrors.
Press the rear window and outside rear
view mirror defoggers switch.
The defoggers will automatically turn off after a while. The operation time changes
according to the ambient temperature and
vehicle speed.
■Windshield wiper de-icer (if
equipped)
P.329
■When the outside temperature exceeds
75°F (24°C) and the air conditioning
system is on
●In order to reduce the air conditioning
power consumption, the air conditioning
system may switch to recirculated air
mode automatically. This may also
reduce fuel consumption.
●It is possible to switch to outside air mode
at any time by pressing the outside/recir-
culated air mode switch.
■Fogging up of the windows
The windows will easily fog up when the
humidity in the vehicle is high. Turning “A/C”
on will dehumidify the air from the outlets
and defog the windshield effectively.
●If you turn “A/C” off, the windows may fog
up more easily.
●The windows may fog up if the recircu-
lated air mode is used.
■When driving on dusty roads
Close all windows. If dust thrown up by the
vehicle is still drawn into the vehicle after
closing the windows, it is recommended
that the air intake mode be set to outside air
mode and the fan speed to any setting
except off.
■Outside/recirculated air mode
●Setting to the recirculated air mode tem-
porarily is recommended in preventing
dirty air from entering the vehicle interior
and helping to cool the vehicle when the
outside air temperature is high.
●Outside/recirculated air mode may auto-
matically switch depending on the tem-
perature setting or the inside
temperature.
Page 326 of 520

3265-3. Using the air conditioning system and defogger
■Customization
Some functions can be customized.
( P.476)
■Main control screen
Using the touchpad of the Remote
Touch, select the button on the screen.
This system can also be operated by the
touch screen.
Vehicles with DUAL-ZONE climate
control
Sub menu
Selecting the sub menu item to switch the
main screen. : Display the air co nditioning control
screen
: Display the heated steering
wheel/front seat heater /front seat ventila-
tor control screen (if equipped)
: Display the rear seat heater/rear seat
ventilator control screen (if equipped)
: Display the Lexus Climate Con-
cierge control screen
: Display the option control screen
Adjust the left side seat tempera-
ture setting
Adjust the fan speed setting
Select the air flow mode
Air conditioning system
lubricant type
Requires registered tech-
nician to service air condi-
tioning system
Flammable refrigerant
WARNING
■To prevent the windshield from fog-
ging up
Do not use the windshield defogger
switch during cool air operation in
extremely humid weather. The difference
between the temperature of the outside
air and that of the windshield can cause
the outer surface of the windshield to fog
up, blocking your vision.
■When the outside rear view mirror
defoggers are operating
Do not touch the outside rear view mir-
ror surfaces, as they can become very
hot and burn you.
NOTICE
■To prevent battery discharge
Do not leave the air conditioning system
on longer than necessary when the
engine is off.
■When repairing/replacing parts of
the air conditioning system
Have repair/replace ment performed by
your Lexus dealer.
When a part of the air conditioning sys-
tem, such as the evaporator, is to be
replaced, it must be replaced with a new
one.
Air conditioning control screen
A
B
C
D
Page 356 of 520
3565-6. Using the other interior features
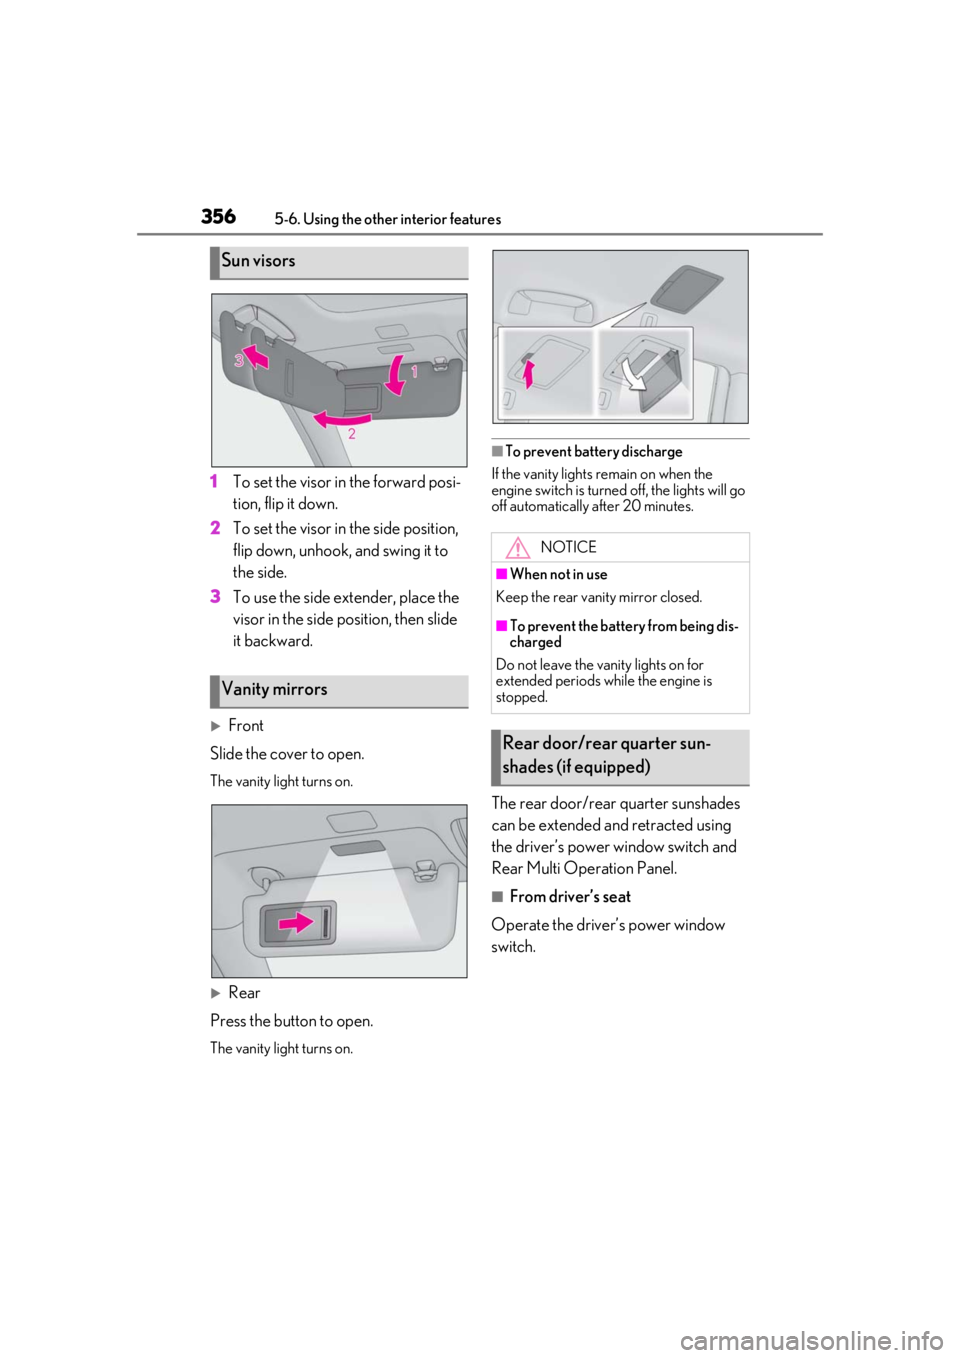
1To set the visor in the forward posi-
tion, flip it down.
2 To set the visor in the side position,
flip down, unhook, and swing it to
the side.
3 To use the side extender, place the
visor in the side position, then slide
it backward.
Front
Slide the cover to open.
The vanity light turns on.
Rear
Press the button to open.
The vanity light turns on.
■To prevent battery discharge
If the vanity lights remain on when the
engine switch is turned off, the lights will go
off automatically after 20 minutes.
The rear door/rear quarter sunshades
can be extended and retracted using
the driver’s power window switch and
Rear Multi Operation Panel.
■From driver’s seat
Operate the driver’s power window
switch.
Sun visors
Vanity mirrors
NOTICE
■When not in use
Keep the rear vanity mirror closed.
■To prevent the battery from being dis-
charged
Do not leave the vanity lights on for
extended periods while the engine is
stopped.
Rear door/rear quarter sun-
shades (if equipped)
Page 360 of 520
3605-6. Using the other interior features
The HomeLink® wireless control sys-
tem in your vehicle has 3 buttons which
can be programmed to operate 3 dif-
ferent devices. Refer to the program-
ming methods on the following pages
to determine the method which is
appropriate for the device.
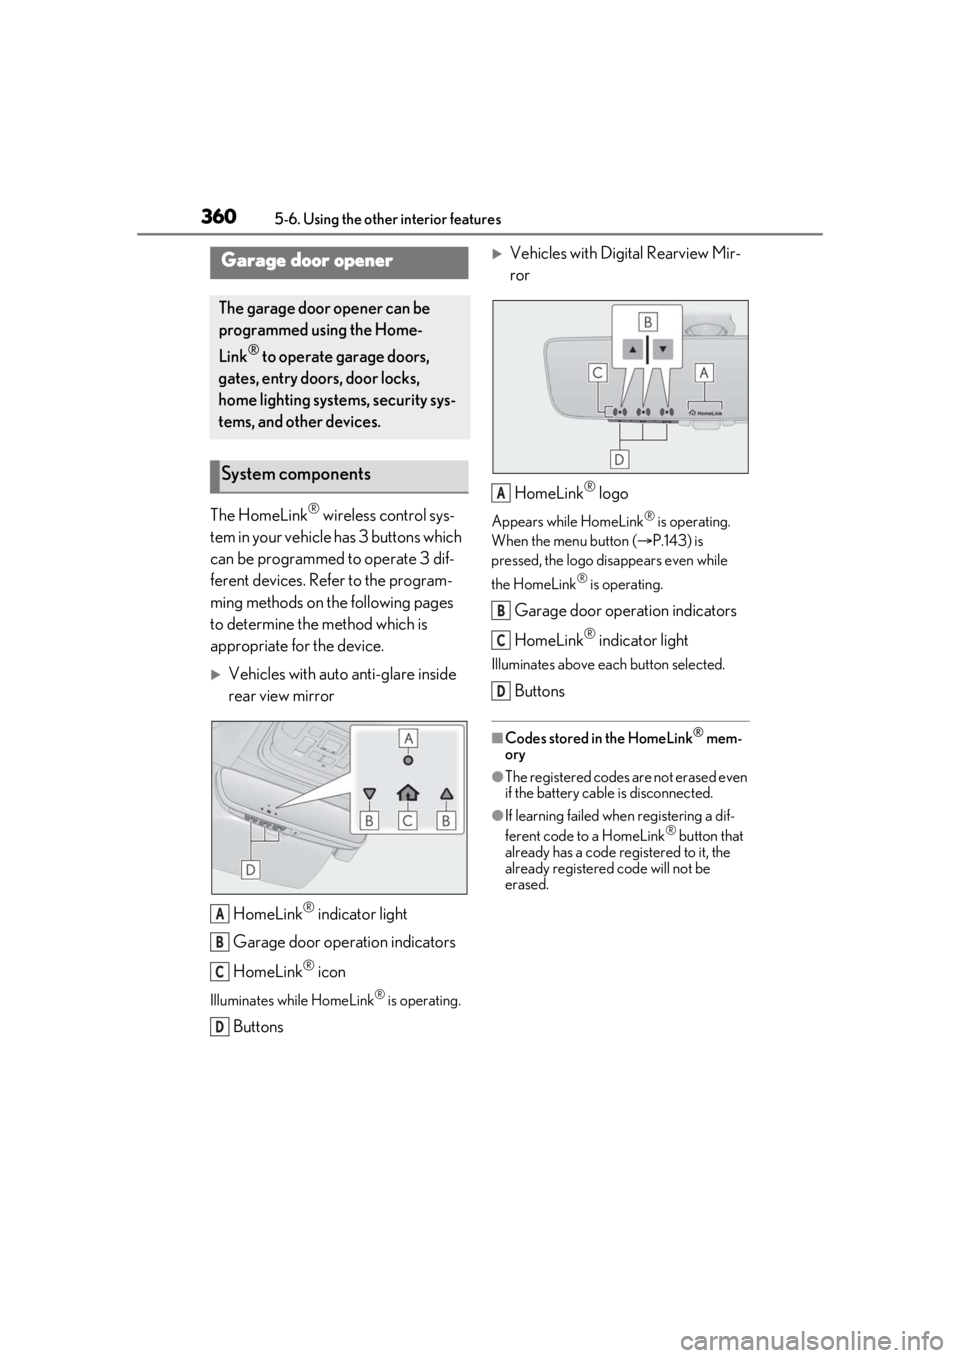
Vehicles with auto anti-glare inside
rear view mirror
HomeLink
® indicator light
Garage door operation indicators
HomeLink
® icon
Illuminates while HomeLink® is operating.
Buttons
Vehicles with Digital Rearview Mir-
ror
HomeLink
® logo
Appears while HomeLink® is operating.
When the menu button ( P.143) is
pressed, the logo disappears even while
the HomeLink
® is operating.
Garage door operation indicators
HomeLink
® indicator light
Illuminates above each button selected.
Buttons
■Codes stored in the HomeLink® mem-
ory
●The registered codes are not erased even
if the battery cable is disconnected.
●If learning failed when registering a dif-
ferent code to a HomeLink® button that
already has a code registered to it, the
already registered code will not be
erased.
Garage door opener
The garage door opener can be
programmed using the Home-
Link
® to operate garage doors,
gates, entry doors, door locks,
home lighting systems, security sys-
tems, and other devices.
System components
A
B
C
D
A
B
C
D
Page 362 of 520
3625-6. Using the other interior features
■Before programming HomeLink®
During programming, it is possible
that garage doors, gates, or other
devices may operate. For this rea-
son, make sure that people and
objects are clear of the garage door
or other devices to prevent injury or
other potential harm.
It is recommended that a new bat-
tery be placed in the remote control
transmitter for more accurate pro-
gramming.
Garage door opener motors manu-
factured after 1995 may be
equipped with rolling code protec-
tion. If this is the case, you may need
a stepladder or other sturdy, safe
device to reach the “Learn” or
“Smart” button on the garage door
opener motor.
■Programming HomeLink®
Steps 1 through 3 must be performed
within 60 seconds, otherwise the
HomeLink
® indicator light will stop
flashing and programming will not be
successfully completed.
1 Press and release the HomeLink
®
button you want to program and
check that the HomeLink
® indica-
tor light flashes (orange).
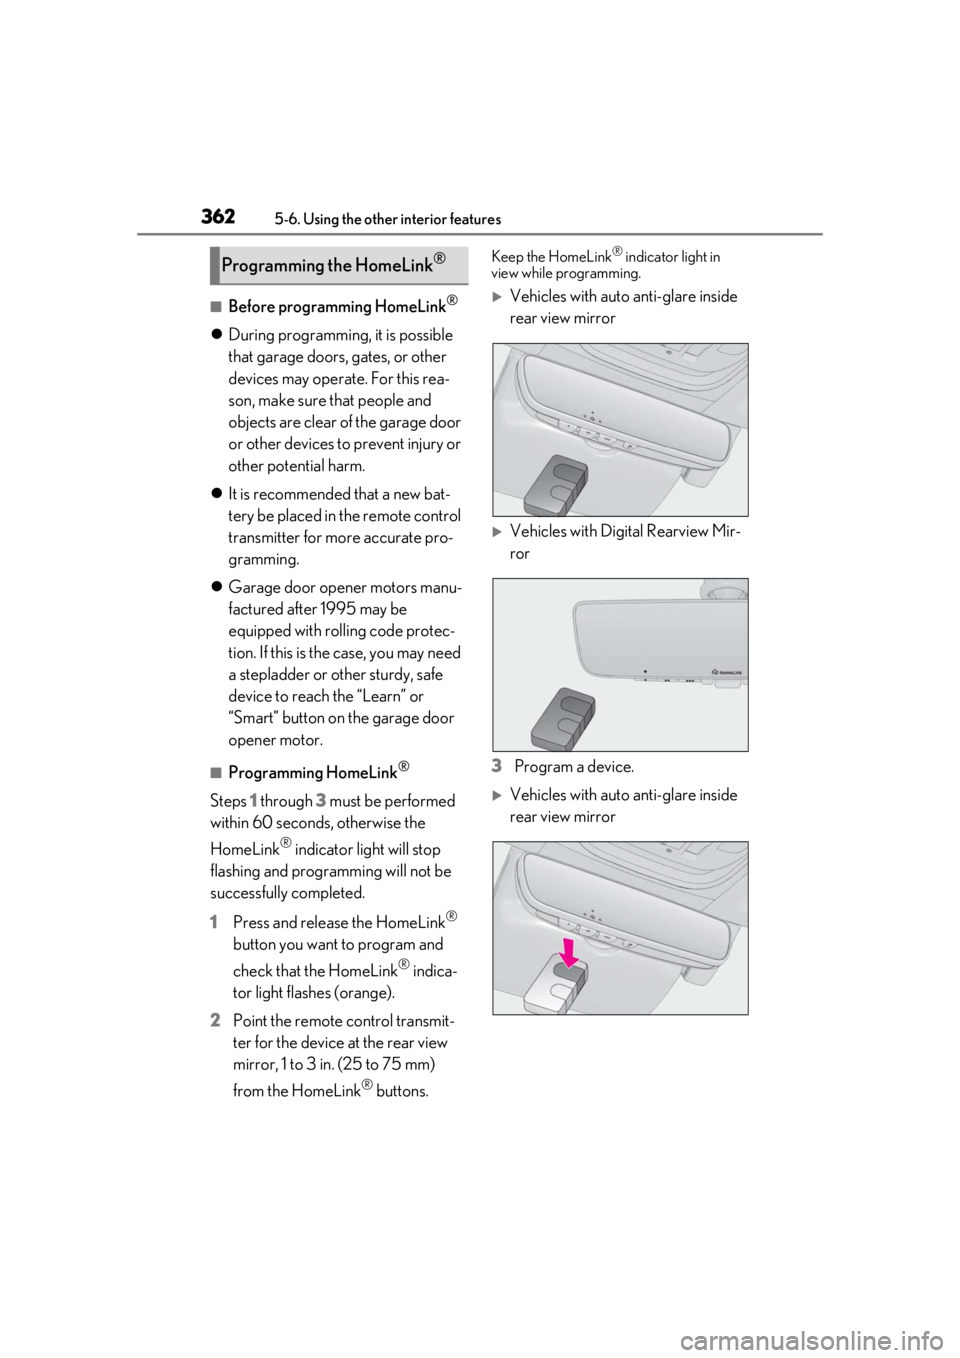
2 Point the remote control transmit-
ter for the device at the rear view
mirror, 1 to 3 in. (25 to 75 mm)
from the HomeLink
® buttons.
Keep the HomeLink® indicator light in
view while programming.
Vehicles with auto anti-glare inside
rear view mirror
Vehicles with Digital Rearview Mir-
ror
3 Program a device.
Vehicles with auto anti-glare inside
rear view mirror
Programming the HomeLink®
Page 364 of 520
3645-6. Using the other interior features
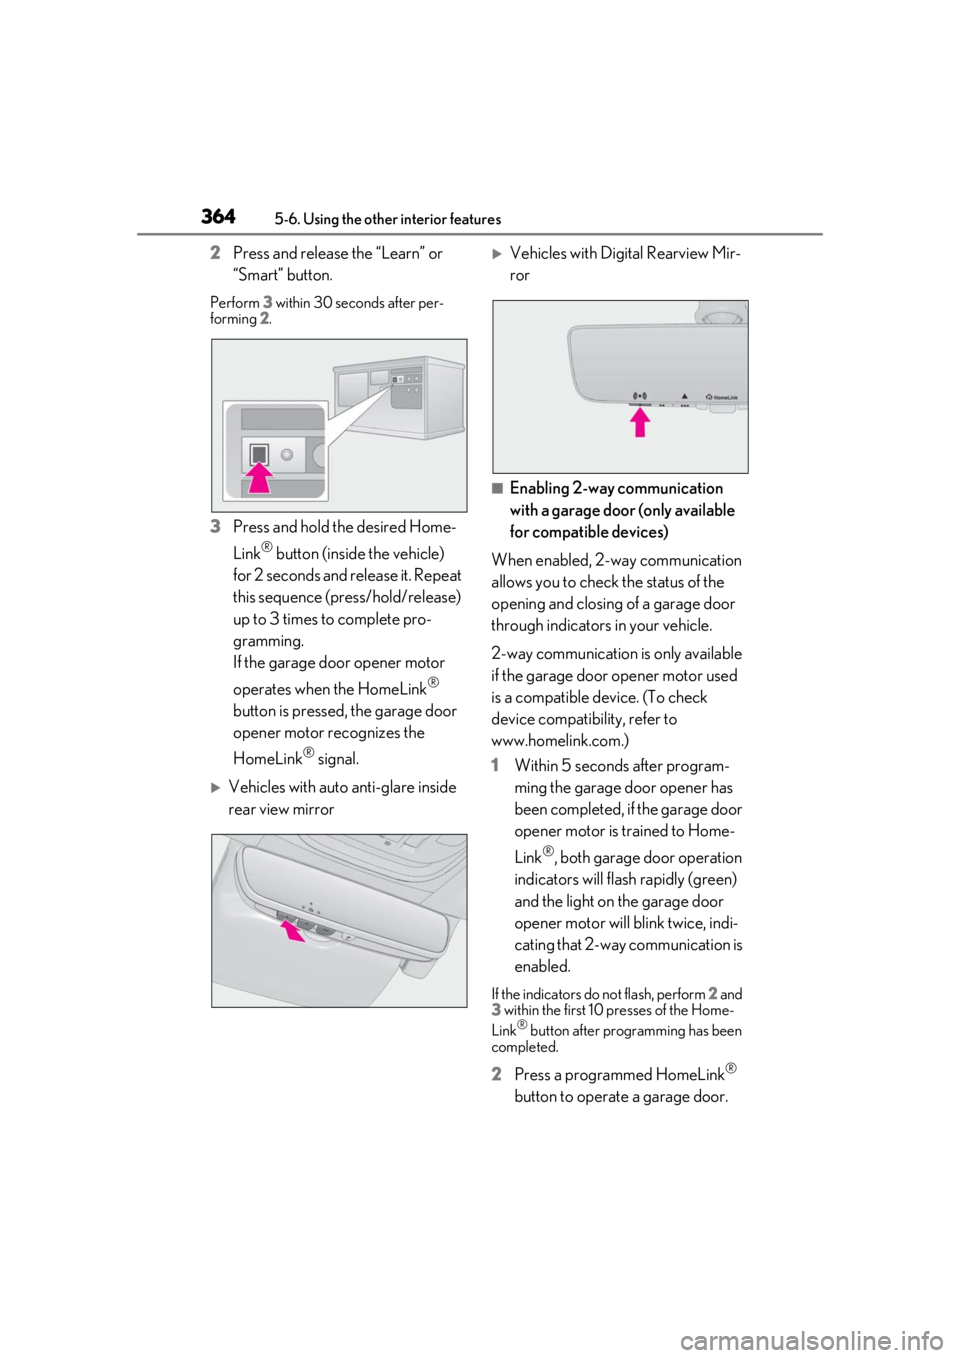
2Press and release the “Learn” or
“Smart” button.
Perform 3 within 30 seconds after per-
forming 2.
3 Press and hold the desired Home-
Link
® button (inside the vehicle)
for 2 seconds and release it. Repeat
this sequence (press/hold/release)
up to 3 times to complete pro-
gramming.
If the garage door opener motor
operates when the HomeLink
®
button is pressed, the garage door
opener motor recognizes the
HomeLink
® signal.
Vehicles with auto anti-glare inside
rear view mirror
Vehicles with Digital Rearview Mir-
ror
■Enabling 2-way communication
with a garage door (only available
for compatible devices)
When enabled, 2-way communication
allows you to check the status of the
opening and closing of a garage door
through indicators in your vehicle.
2-way communication is only available
if the garage door opener motor used
is a compatible device. (To check
device compatibility, refer to
www.homelink.com.)
1 Within 5 seconds after program-
ming the garage door opener has
been completed, if the garage door
opener motor is trained to Home-
Link
®, both garage door operation
indicators will flash rapidly (green)
and the light on the garage door
opener motor will blink twice, indi-
cating that 2-way communication is
enabled.
If the indicators do not flash, perform 2 and
3 within the first 10 presses of the Home-
Link
® button after programming has been
completed.
2 Press a programmed HomeLink®
button to operate a garage door.
Page 365 of 520

3655-6. Using the other interior features
5
Interior features
3Within 1 minute of pressing the
HomeLink
® button, after the
garage door operation has
stopped, press the “Learn” or
“Smart” button on the garage door
opener motor. Within 5 seconds of
the establishment of 2-way com-
munication with the garage door
opener, both garage door opera-
tion indicators in the vehicle will
flash rapidly (green) and the light
on the garage door opener motor
will blink twice, indicating that
2-way communication is enabled.
■Reprogramming a single Home-
Link
® button
When the following procedure is per-
formed, buttons which already have
devices registered to them can be
overwritten:
1 Press and hold the desired Home-
Link
® button.
2 When the HomeLink
® indicator
starts flashing orange, release the
HomeLink
® button and perform
“Programming HomeLink
®” 1 (it
takes 20 seconds for the Home-
Link
® indicator to start flashing).
■Before programming
●Install a new battery in the transmitter.
●The battery side of the transmitter must
be pointed away from the Home-
Link
®buttons.
Press the appropriate HomeLink® button. The HomeLink
® indicator light
should turn on.
The status of the opening and closing
of a garage door is shown by the
garage door opener indicators.
Vehicles with auto anti-glare inside
rear view mirror
Opening
Closing
Vehicles with Digital Rearview Mir-
rorOpening
Closing
This function is only available if the garage
door opener motor used is a compatible
device. (To check device compatibility,
refer to www.homelink.com.)
Operating HomeLink®
A
B
A
B
Page 366 of 520
3665-6. Using the other interior features
The indicators can operate within
approximately 820 ft. (250 m) of the
garage door. However, if there are
obstructions between the garage door
and the vehicle, such as houses and
trees, feedback signals from the
garage door may not be received.
To recall the previous door operation
status, press and release either Home-
Link
® buttons and or and
(vehicles with auto anti-glare
inside rear view mirror), and or and
(vehicles with Digital Rearview Mirror),
simultaneously. The last recorded sta-
tus will be displayed for 3 seconds.
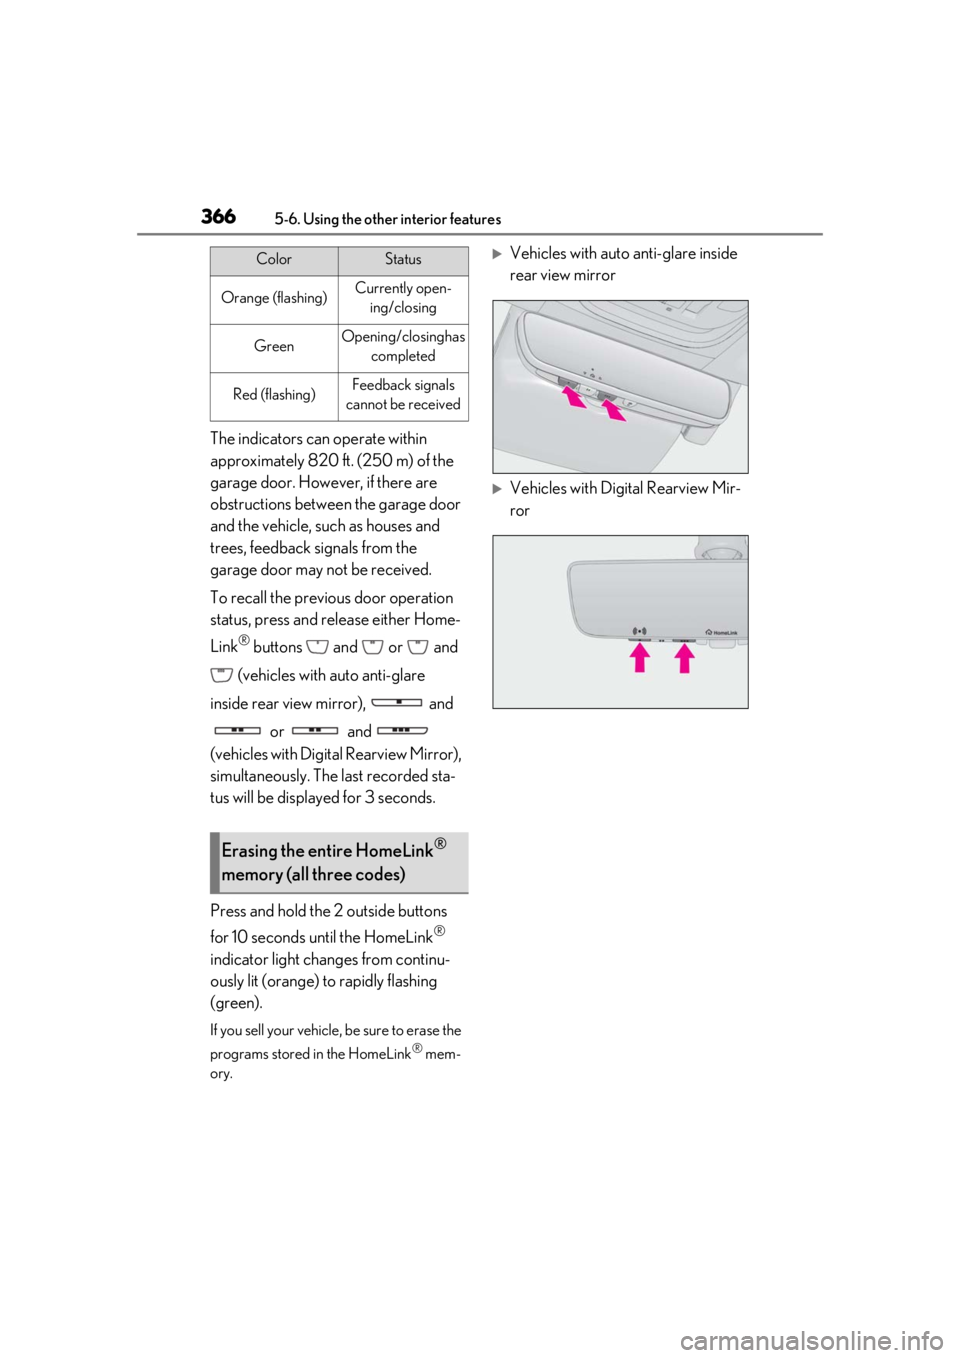
Press and hold the 2 outside buttons
for 10 seconds until the HomeLink
®
indicator light changes from continu-
ously lit (orange) to rapidly flashing
(green).
If you sell your vehicle, be sure to erase the
programs stored in the HomeLink
® mem-
ory.
Vehicles with auto anti-glare inside
rear view mirror
Vehicles with Digital Rearview Mir-
ror
ColorStatus
Orange (flashing)Currently open- ing/closing
GreenOpening/closing has completed
Red (flashing)Feedback signals
cannot be received
Erasing the entire HomeLink®
memory (all three codes)