2021 Lexus LC500C tow
[x] Cancel search: towPage 112 of 410

1103-3. Adjusting the seats
3-3.Adjusting the seats
Seat position adjustment
Seatback angle adjustment
Seat cushion (front) angle adjust-
ment
Vertical height adjustment
Lumbar support adjustment
■When adjusting the seat
●Make sure that any surrounding passen-
gers or objects are not contact the seat.
●Take care when adjusting the seat so that
the head restraint does not touch the ceil-
ing.
■Seat-linked function
This function operates when the seat is
moved forward, backward or in the reclin-
ing direction a certain distance or more.
■Power easy access system
The driver’s seat and steering wheel move
in accordance with engine switch mode and
the driver’s seat belt condition. ( P.112)
■Before entering/exiting the rear
seats
Remove the seat belt from the seat
belt guide. ( P.26)
Stow the sun visor.
Front seats
The seats can be adjusted (longitu-
dinally, vertically, etc.). Adjust the
seat to ensure the correct driving
posture.
Adjustment procedure
A
B
C
D
E
WARNING
■When adjusting the seat position
●Take care when adjusting the seat
position to ensure that other passen-
gers are not injured by the moving
seat.
●Do not put your hands under the seat
or near the moving parts to avoid
injury.
Fingers or hands may become
jammed in the seat mechanism.
●Make sure to leave enough space
around the feet so they do not get
stuck.
■Seat adjustment
To reduce the risk of sliding under the lap
belt during a collision, do not recline the
seat more than necessary.
If the seat is too rec lined, the lap belt may
slide past the hips and apply restraint
forces directly to the abdomen, or your
neck may contact the shoulder belt,
increasing the risk of death or serious
injury in the event of an accident.
Adjustments should not be made while
driving as the seat may unexpectedly
move and cause the driver to lose con-
trol of the vehicle.
Entering/exiting the rear seats
(lever-operated “Front, Fold &
Return” seat)
Page 119 of 410

1173-4. Adjusting the steering wheel and mirrors
3
Before driving
3-4.Adjusting the steering wheel and mirrors
Operating the switch moves the steer-
ing wheel in the following directions:
1
Up
2
Down
3
Toward the driver
4
Away from the driver
■The steering wheel can be adjusted
when
The engine switch is in ACC or ON.
■Automatic adjustment of the steering
position
A desired steering position can be entered
to memory and recalled automatically by
the driving position memory system.
( P.112)
■Power easy access system
The steering wheel and driver’s seat move
in accordance with power switch mode and
the driver’s seat belt condition. ( P.112)
Press on or close to the mark.
Steering wheel
Adjustment procedure
WARNING
■Caution while driving
Do not adjust the steering wheel while
driving.
Doing so may cause the driver to mis-
handle the vehicle and cause an acci-
dent, resulting in death or serious injury.
Sounding the horn
Page 122 of 410

1203-4. Adjusting the steering wheel and mirrors
■Using the switch
Press the switch to fold the mirrors.
Press it again to extend them to the original
position.
■Setting automatic mode
Automatic mode allows the folding or
extending of the mirrors to be linked to
locking/unlocking of the doors.
Press the “AUTO” switch to set auto-
matic mode.
The indicator will come on.
Pressing the switch on ce more will return
to manual mode.
■When disconnecting and reconnecting
battery terminals
The automatic folding/extending mirror
function will return to off as default. To turn
the function on, press the switch again to
select on.
■Using automatic mode in cold weather
When automatic mode is used in cold
weather, the door mirror could freeze up
and automatic stowing and return may not
be possible. In this case, remove any ice and
snow from the door mirror, then either
operate the mirror using manual mode or
move the mirror by hand.
■Customization
The automatic mirror folding and extending
operation can be changed.
(Customizable features: P.367)
When either “L” or “R” of the mirror
select switch is selected, the outside
rear view mirrors will automatically
angle downwards when the vehicle is
reversing in order to give a better view
of the ground.
To disable this function, select neither
“L” nor “R”.
■Adjusting the mirror angle when
the vehicle is reversing
With the shift position in R, adjust the
mirror angle at a desired position.
The adjusted angle will be memorized
and the mirror will automatically tilt to
the memorized angle whenever the
shift position is shifted to R from next
time.
The memorized downward tilt position of
the mirror is linked to the normal position
Folding and extending the mir-
rors
A
WARNING
■When a mirror is moving
To avoid personal injury and mirror mal-
function, be careful not to get your hand
caught by the moving mirror.
Linked mirror function when
reversing
Page 137 of 410

135
4
4
Driving
Driving
4-1. Before drivingDriving the vehicle ..................... 136
Cargo and luggage ................... 142
Vehicle load limits ...................... 144
Trailer towing ............................... 144
Dinghy towing ............................. 145
4-2. Driving procedures Engine (ignition) switch ........... 146
Automatic transmission........... 150
Turn signal lever.......................... 156
Parking brake .............................. 157
Brake Hold.................................... 159
4-3. Operating the lights and wipers Headlight switch .......................... 161
Automatic High Beam ............. 164
Windshield wipers and washer ......................................................... 167
4-4. Refueling Opening the fuel tank cap....... 171
4-5. Using the driving support sys- tems
Lexus Safety System + ............. 173
PCS (Pre-Collision System).. 179
LKA (Lane-Keeping Assist) .. 186
Dynamic radar cruise control with full-speed range....................... 194
Driving mode select switch... 203
Intuitive parking assist ............. 204
BSM (Blind Spot Monitor) .... 209
Driving assist systems ............... 2184-6. Driving tips
Winter driving tips .................... 223
Page 144 of 410

1424-1. Before driving
Cargo capacity depends on the total
weight of the occupants.
(Cargo capacity) = (Total load capac-
ity) (Total weight of occupants)Steps for Determining Correct Load
Limit
(1) Locate the statement “The com-
bined weight of occupants and cargo
should never exceed XXX kg or XXX
lbs.” on your vehicle’s placard.
(2) Determine the combined weight of
the driver and passengers that will be
riding in your vehicle.
(3) Subtract the combined weight of
the driver and passengers from XXX
kg or XXX lbs.
(4) The resulting figure equals the
available amount of cargo and luggage
load capacity.
For example, if the “XXX” amount
equals 1400 lbs. and there will be five
150 lb passengers in your vehicle, the
amount of available cargo and luggage
load capacity is 650 lbs. (1400 − 750
(5 150) = 650 lbs.)
(5) Determine the combined weight of
luggage and cargo being loaded on
the vehicle. That weight may not safely
exceed the available cargo and lug-
gage load capacity calculated in Step
4.
(6) If your vehicle will be towing a
trailer, load from your trailer will be
transferred to your vehicle. Consult
this manual to determine how this
reduces the available cargo and lug-
gage load capacity of your vehicle.
( P.144)Lexus does not recommend towing a
trailer with your vehicle. Your vehicle is not
designed for trailer towing.
Cargo and luggage
Take notice of the following infor-
mation about storage precautions,
cargo capacity and load:
WARNING
■Things that must not be carried in the
trunk
The following things may cause a fire if
loaded in the trunk:
●Receptacles containing gasoline
●Aerosol cans
■Storage precautions
Observe the following precautions.
Failure to do so may prevent the pedals
from being depressed properly, may
block the driver’s vision, or may result in
items hitting the driver or passengers,
possibly causing an accident.
●Stow cargo and luggage in the trunk
whenever possible.
●Do not place cargo or luggage in or on
the following locations.
• At the feet of the driver
• On the front passenger or rear seats (when stacking items)
• On the package tray
• On the instrument panel
• On the dashboard
• In front of the Center Display
●Secure all items in the occupant com-
partment.
Capacity and distribution
Page 146 of 410

1444-1. Before driving
■Total load capacity and seating capacity
These details are also described on the tire
and loading information label. ( P.293)
Vehicle load limits
Vehicle load limits include total
load capacity, seating capacity,
towing capacity and cargo capac-
ity.
Total load capacity (vehicle
capacity weight): P.350
Total load capacity means the com-
bined weight of occupants, cargo
and luggage.
Seating capacity: P.350
Seating capacity means the maxi-
mum number of occupants whose
estimated average weight is 150 lb.
(68 kg) per person.
Towing capacity
Lexus does not recommend towing
a trailer with your vehicle.
Cargo capacity
Cargo capacity may increase or
decrease depending on the weight
and the number of occupants.
WARNING
■Overloading the vehicle
Do not overload the vehicle.
It may not only cause damage to the tires,
but also degrade steering and braking
ability, resulting in an accident.
Trailer towing
Lexus does not recommend towing
a trailer with your vehicle. Lexus
also does not recommend the
installation of a tow hitch or the use
of a tow hitch carrier for a wheel-
chair, scooter, bicycle, etc. Your
vehicle is not designed for trailer
towing or for the use of tow hitch
mounted carriers.
Page 147 of 410

1454-1. Before driving
4
Driving
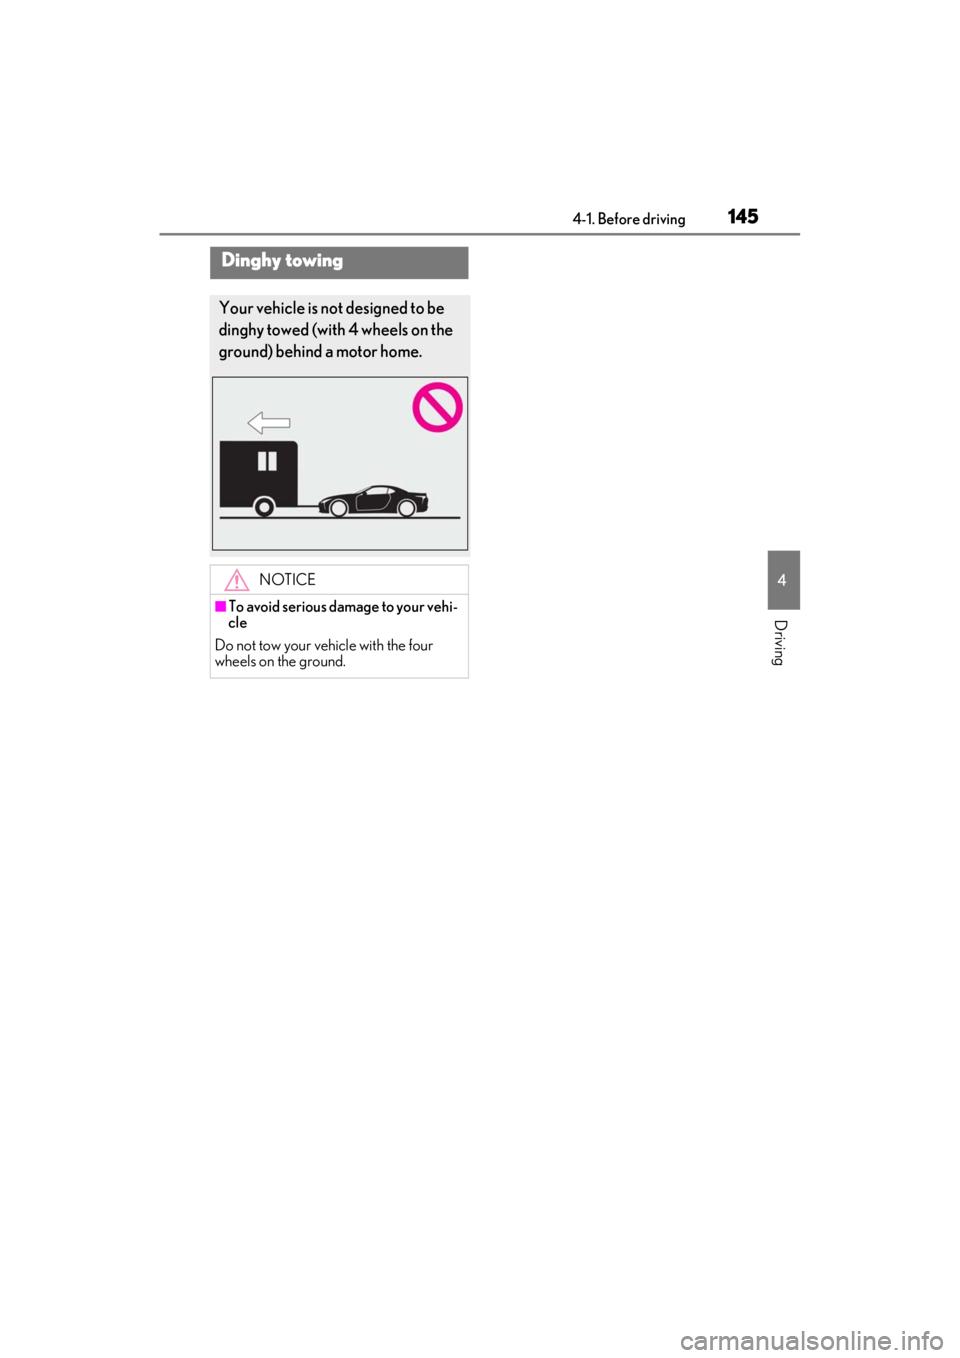
Dinghy towing
Your vehicle is not designed to be
dinghy towed (with 4 wheels on the
ground) behind a motor home.
NOTICE
■To avoid serious damage to your vehi-
cle
Do not tow your vehicle with the four
wheels on the ground.
Page 154 of 410

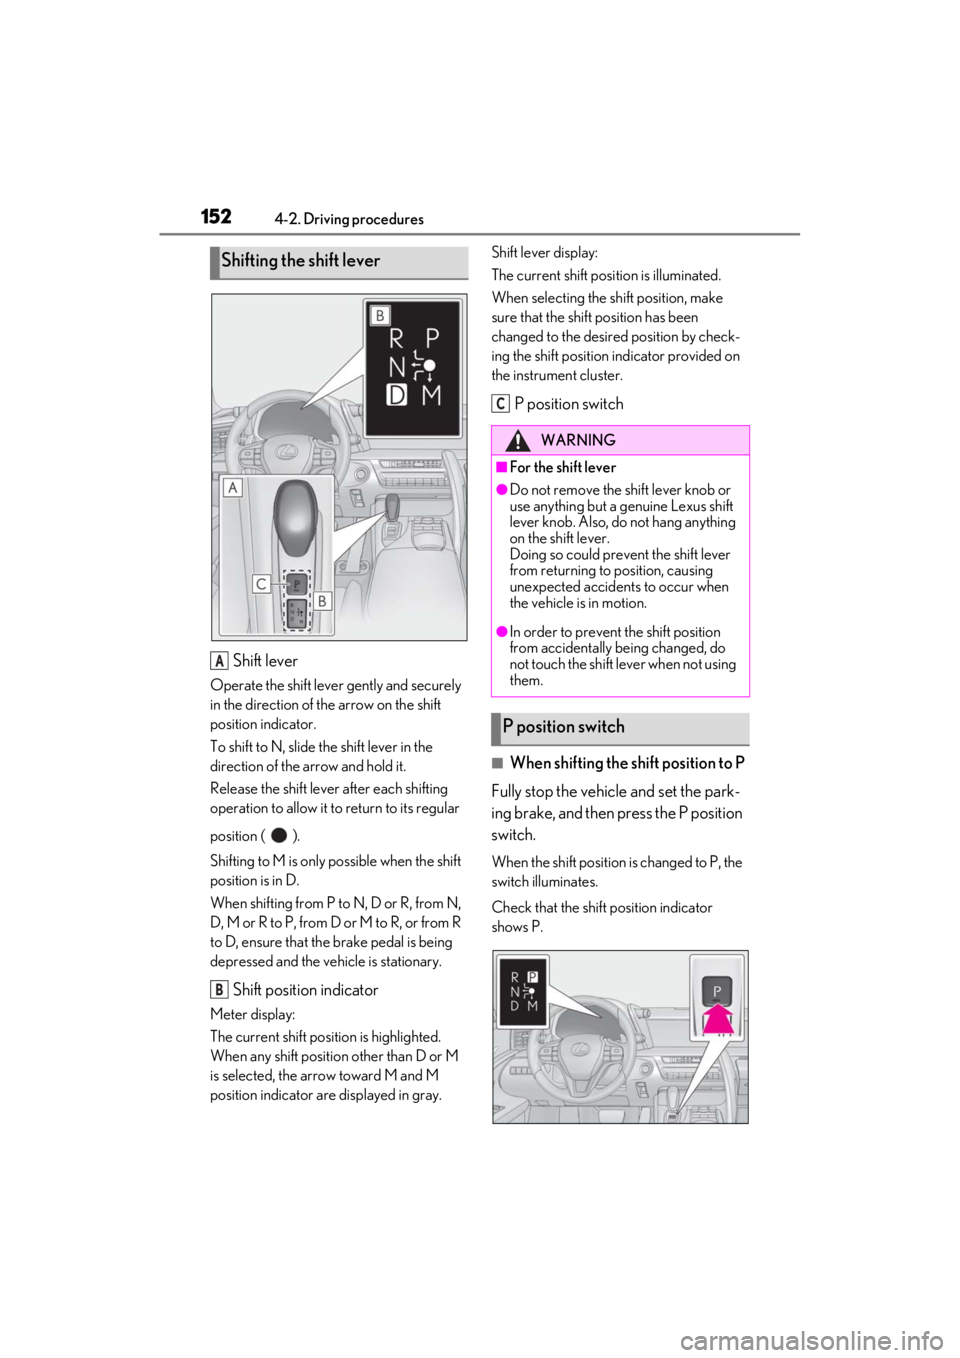
1524-2. Driving procedures
Shift lever
Operate the shift lever gently and securely
in the direction of the arrow on the shift
position indicator.
To shift to N, slide the shift lever in the
direction of the arrow and hold it.
Release the shift lever after each shifting
operation to allow it to return to its regular
position ( ).
Shifting to M is only possible when the shift
position is in D.
When shifting from P to N, D or R, from N,
D, M or R to P, from D or M to R, or from R
to D, ensure that the brake pedal is being
depressed and the vehicle is stationary.
Shift position indicator
Meter display:
The current shift position is highlighted.
When any shift position other than D or M
is selected, the arrow toward M and M
position indicator are displayed in gray. Shift lever display:
The current shift posi
tion is illuminated.
When selecting the shift position, make
sure that the shift position has been
changed to the desired position by check-
ing the shift position indicator provided on
the instrument cluster.
P position switch
■When shifting the shift position to P
Fully stop the vehicle and set the park-
ing brake, and then press the P position
switch.
When the shift position is changed to P, the
switch illuminates.
Check that the shift position indicator
shows P.
Shifting the shift lever
A
B
WARNING
■For the shift lever
●Do not remove the shift lever knob or
use anything but a genuine Lexus shift
lever knob. Also, do not hang anything
on the shift lever.
Doing so could prevent the shift lever
from returning to position, causing
unexpected accidents to occur when
the vehicle is in motion.
●In order to prevent the shift position
from accidentally being changed, do
not touch the shift lever when not using
them.
P position switch
C