2021 Lexus IS350 Remot
[x] Cancel search: RemotPage 251 of 436

2515-1. Remote Touch/Display
5
Interior features
*1: Refer to “NAVIGATION AND MULTI-MEDIA SYSTEM OWNER’S MAN-
UAL”.*2: This function is not available on some models.
■Split-screen display (vehicles with a 10.3-inch display)
Different information can be displayed on the left and right sides of the screen. For
example, air conditioning system screen can be displayed and operated while the
fuel consumption information screen is be ing displayed. The large screen on the
left of the display is called the main display, and the small screen to the right is
called the side display.
■Main display (vehicles with a
10.3-inch display)
For details about the functions and
operation of the main display, refer to
the respective section and “NAVIGA-
TION AND MULTIMEDIA SYSTEM
OWNER’S MANUAL”.
■Side display (vehicles with a
10.3-inch display)
The following functions can be dis-
played and operated on the side dis-
play.
Select or to display the desired
screen. Navigation system
*
Audio*
Vehicle information (
P.83)
Air conditioning system ( P.253)
Show/hide the side display
*
*: Refer to “NAVIGATION AND MULTI- MEDIA SYSTEM OWNER’S MAN-
UAL”.
A
B
C
D
E
Page 252 of 436

2525-1. Remote Touch/Display
■Screen display during low temperatures
When the ambient temperature is
extremely low, screen response may be
delayed even if the Re mote Touch is oper-
ated.
Page 253 of 436

2535-2. Using the air conditioning system and defogger
5
Interior features
5-2.Using the air conditioning system and defogger
Left-hand side temperature control switch
Automatic mode switch
OFF switch
Fan speed decreases switch
Fan speed increases switch
Air flow mode switch
Right-hand side temperature control switch
DUAL switch
A/C switch
Outside air mode switch
Recirculated air mode switch
Automatic air conditioning system
Air outlets and fan speed are automati cally adjusted according to the tem-
perature setting.
Press the “MENU” button on the Remote Touch, then select to display the
air conditioning control screen. For information regarding Remote Touch,
P.248.
Vehicles with a 10.3-inch display: The ai r conditioning system can be displayed
and operated on the side display.
Air conditioning controls
A
B
C
D
E
F
G
H
I
J
K
Page 257 of 436

2575-2. Using the air conditioning system and defogger
5
Interior features
■Main control screen
Using the touchpad of the Remote
Touch, select the button on the screen.
This system can also be operated by
the touch screen. Sub menu
Selecting the sub menu item to switch the
main screen.
: Display the air co nditioning control
screen
: Display the option control screen
Adjust the left side seat tempera-
ture setting
Adjust the fan speed setting
Select the air flow mode
: Air flows to the upper body
: Air flows to the upper body and feet
: Air flows to the feet
: Air flows to the feet and the wind-
shield defogger operates
Adjust the right side seat tempera-
ture setting
Function on/off indicators
When the function is on, the indicator illu-
minates on the control screen.
Sub function menu
When the sub function button on the
Remote Touch is pressed, the following
functions can be switched on and off.
“AUTO”: Set automatic mode on/off
WARNING
■To prevent the windshield from fog-
ging up
Do not use the windshield defogger
switch during cool air operation in
extremely humid weather. The difference
between the temperature of the outside
air and that of the windshield can cause
the outer surface of the windshield to fog
up, blocking your vision.
■When the outside rear view mirror
defoggers are operating
Do not touch the outside rear view mir-
ror surfaces, as they can become very
hot and burn you.
NOTICE
■To prevent battery discharge
Do not leave the air conditioning system
on longer than necessary when the
engine is off.
■When repairing/replacing parts of
the air conditioning system
Have repair/replace ment performed by
your Lexus dealer.
When a part of the air conditioning sys-
tem, such as the evaporator, is to be
replaced, it must be replaced with a new
one.
Air conditioning control screen
A
B
C
D
E
F
G
Page 274 of 436

2745-5. Using the other interior features
■When support is necessary
Visit on the web at
www.homelink.com/lexus
or call
1-800-355-3515.
■Before programming HomeLink®
During programming, it is possible
that garage doors, gates, or other devices may operate. For this rea-
son, make sure that people and
objects are clear of the garage door
or other devices to prevent injury or
other potential harm.
It is recommended that a new bat-
tery be placed in the remote control
transmitter for more accurate pro-
gramming.
Garage door opener motors manu-
factured after 1995 may be
equipped with rolling code protec-
tion. If this is the case, you may need
a stepladder or other sturdy, safe
device to reach the “Learn” or
“Smart” button on the garage door
opener motor.
■Programming HomeLink®
Steps 1 through 3 must be performed
within 60 seconds, otherwise the indi-
cator light will stop flashing and pro-
gramming will not be able to be
completed.
1 Press and release the HomeLink
®
button you want to program and
check that the HomeLink
® indica-
tor light flashes (orange).
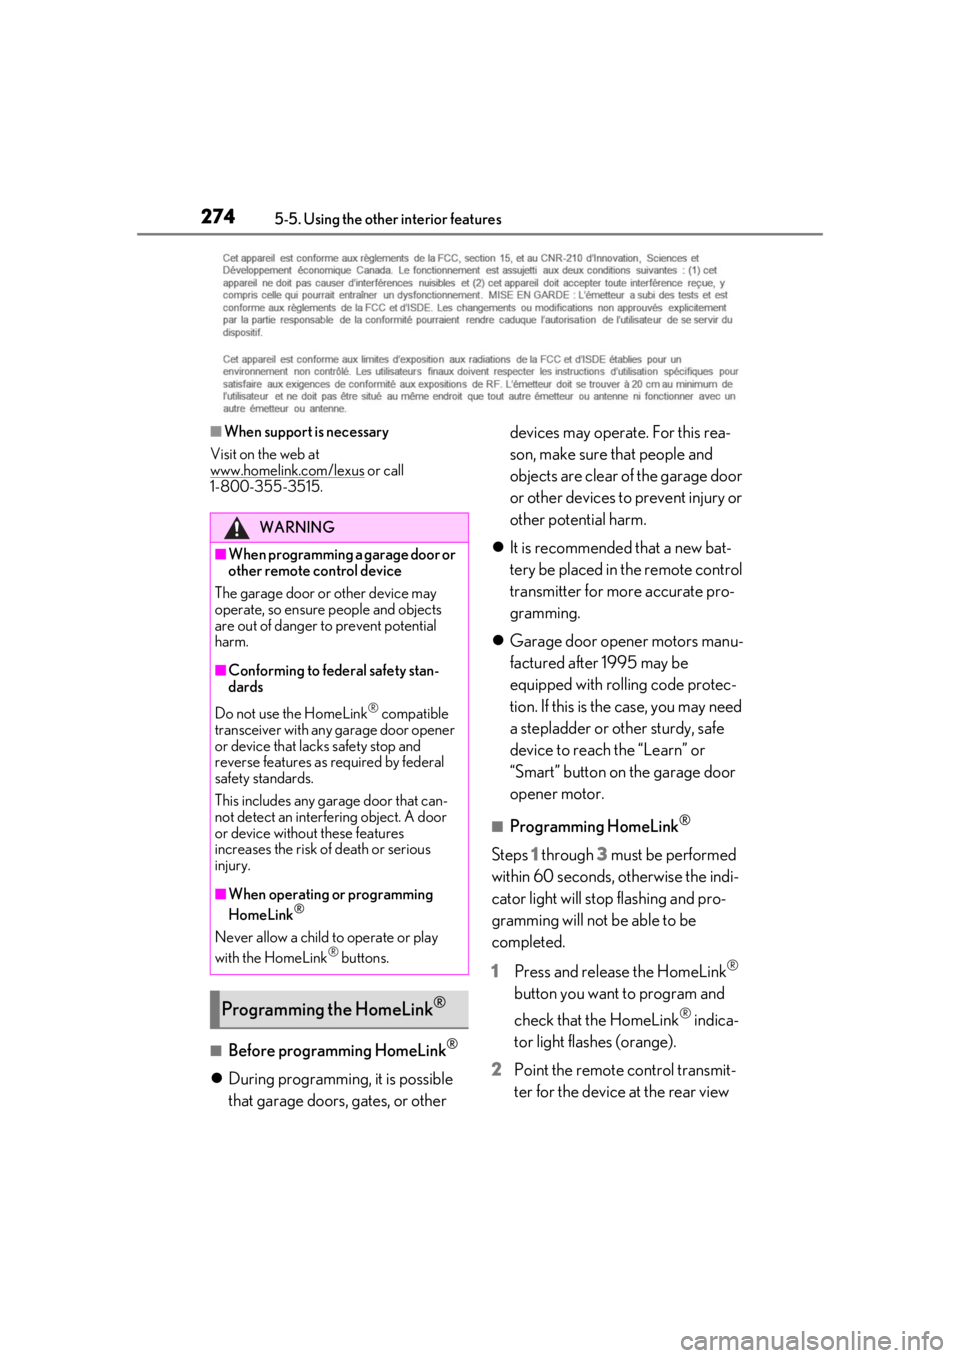
2 Point the remote control transmit-
ter for the device at the rear view
WARNING
■When programming a garage door or
other remote control device
The garage door or other device may
operate, so ensure people and objects
are out of danger to prevent potential
harm.
■Conforming to federal safety stan-
dards
Do not use the HomeLink
® compatible
transceiver with any garage door opener
or device that lacks safety stop and
reverse features as required by federal
safety standards.
This includes any garage door that can-
not detect an interfering object. A door
or device without these features
increases the risk of death or serious
injury.
■When operating or programming
HomeLink®
Never allow a child to operate or play
with the HomeLink® buttons.
Programming the HomeLink®
Page 275 of 436

2755-5. Using the other interior features
5
Interior features
mirror, 1 to 3 in. (25 to 75 mm)
from the HomeLink
® buttons.
Keep the HomeLink® indicator light in
view while programming.
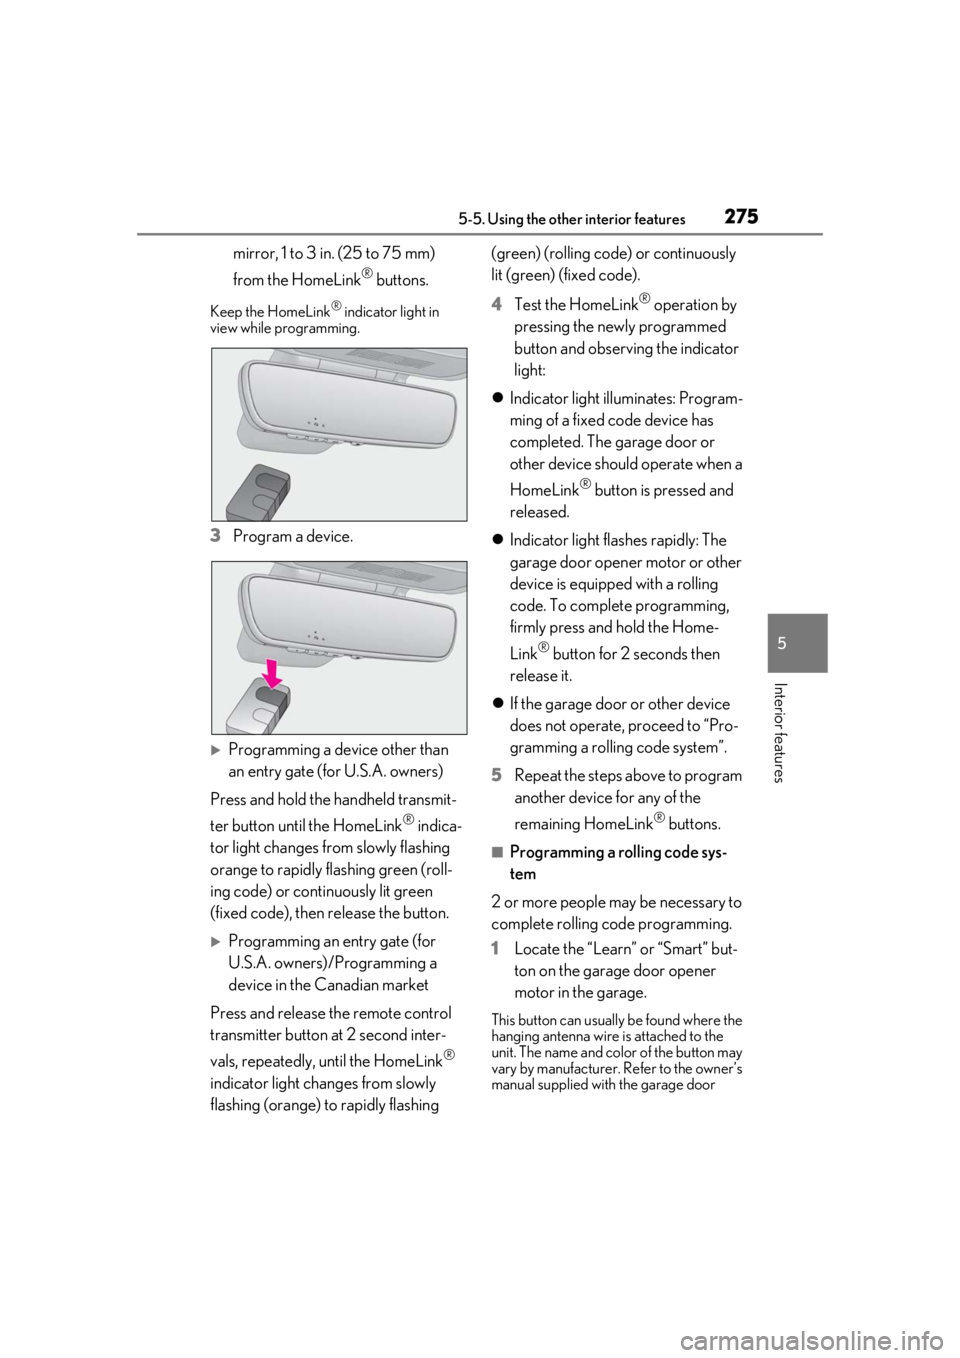
3 Program a device.
Programming a device other than
an entry gate (for U.S.A. owners)
Press and hold the handheld transmit-
ter button until the HomeLink
® indica-
tor light changes from slowly flashing
orange to rapidly flashing green (roll-
ing code) or continuously lit green
(fixed code), then release the button.
Programming an entry gate (for
U.S.A. owners)/Programming a
device in the Canadian market
Press and release th e remote control
transmitter button at 2 second inter-
vals, repeatedly, until the HomeLink
®
indicator light changes from slowly
flashing (orange) to rapidly flashing (green) (rolling code) or continuously
lit (green) (fixed code).
4
Test the HomeLink
® operation by
pressing the newly programmed
button and observing the indicator
light:
Indicator light illuminates: Program-
ming of a fixed code device has
completed. The garage door or
other device should operate when a
HomeLink
® button is pressed and
released.
Indicator light flashes rapidly: The
garage door opener motor or other
device is equipped with a rolling
code. To complete programming,
firmly press and hold the Home-
Link
® button for 2 seconds then
release it.
If the garage door or other device
does not operate, proceed to “Pro-
gramming a rolling code system”.
5 Repeat the steps above to program
another device for any of the
remaining HomeLink
® buttons.
■Programming a rolling code sys-
tem
2 or more people may be necessary to
complete rolling code programming.
1 Locate the “Learn” or “Smart” but-
ton on the garage door opener
motor in the garage.
This button can usually be found where the
hanging antenna wire is attached to the
unit. The name and color of the button may
vary by manufacturer. Refer to the owner’s
manual supplied with the garage door
Page 301 of 436

3016-3. Do-it-yourself maintenance
6
Maintenance and care
Check the battery as follows.
■Battery exterior
Make sure that the battery terminals
are not corroded and that there are no
loose connections, cracks, or loose
clamps.
Terminals
Hold-down clamp
■Before recharging
When recharging, the battery produces
hydrogen gas which is flammable and
explosive. Therefore, observe the following
before recharging:
●If recharging with the battery installed on
the vehicle, be sure to disconnect the
ground cable.
●Make sure the power switch on the char-
ger is off when connecting and discon-
necting the charger cables to the battery.
■After recharging/reconnecting the bat-
tery
The engine may not start. Follow the proce-
dure below to initialize the system.
1 Shift the shift lever to P.
2 Open and close any of the doors.
3 Restart the engine.
●Unlocking the doors using the smart
access system with pu sh-button start may
not be possible immediately after recon-
necting the battery. If this happens, use
the wireless remote control or the
mechanical key to lo ck/unlock the doors.
●Start the engine with the engine switch in
ACCESSORY mode. The engine may
not start with the engine switch turned off.
However, the engine will operate nor-
mally from the second attempt.
●The engine switch mode is recorded by
the vehicle. If the battery is disconnected
and reconnected, the vehicle will return
the engine switch mode to the status it
was in before the battery was discon-
nected. Make sure to turn off the engine
before disconnecting the battery. Take
extra care when connecting the battery if
the engine switch mode prior to the bat-
tery being disconnected is unknown.
If the system will not start even after multiple
attempts, contact your Lexus dealer.
NOTICE
■If the fluid level is low or high
It is normal for the brake fluid level to go
down slightly as the brake pads wear out
or when the fluid level in the accumulator
is high.
If the reservoir need s frequent refilling,
there may be a serious problem.
Battery
A
B
WARNING
■Chemicals in the battery
Batteries contain poisonous and corro-
sive sulfuric acid and may produce
hydrogen gas which is flammable and
explosive. To reduce the risk of death or
serious injury, take the following precau-
tions while working on or near the bat-
tery:
●Do not cause sparks by touching the
battery terminals with tools.
●Do not smoke or light a match near the
battery.
●Avoid contact with eyes, skin and
clothes.
Page 316 of 436

3166-3. Do-it-yourself maintenance
When an air conditioning odor comes out
continuously, replace the air conditioning
filter.
■If the electronic key battery is depleted
The following symptoms may occur:
●The smart access system with push-but-
ton start and wireless remote control will
not function properly.
●The operationa l range will be reduced.
■When the card key battery needs to be
replaced (if equipped)
The battery for the card key is available only
at Lexus dealers. Your Lexus dealer can
replace the battery for you.
Flathead screwdriver
Small flathead screwdriver
Lithium battery CR2032
■Use a CR2032 lithium battery
●Batteries can be purchased at your Lexus
dealer, local electrical appliance shops or
camera stores.
●Replace only with the same or equivalent
type recommended by the manufacturer.
●Dispose of used batteries according to
local laws.
NOTICE
■When using the air conditioning sys-
tem
Make sure that a filter is always installed.
Using the air conditioning system without
a filter may cause damage to the system.
Electronic key battery
Replace the battery with a new one
if it is depleted.
As the key may be damaged if the
following procedure is not per-
formed properly, it is recom-
mended that key battery
replacement be performed by your
Lexus dealer.
Items to prepare