2021 Lexus IS350 warning
[x] Cancel search: warningPage 364 of 436

3647-2. Steps to take in an emergency
●The engine may not start on the first
attempt after the battery has recharged
but will start normally after the second
attempt. This is not a malfunction.
●The engine switch mode is memorized by
the vehicle. When the battery is recon-
nected, the system will return to the
mode it was in before the battery was dis-
charged. Before di sconnecting the bat-
tery, turn the engine switch off. If you are
unsure what mode the engine switch was
in before the battery discharged, be
especially careful when reconnecting the
battery.
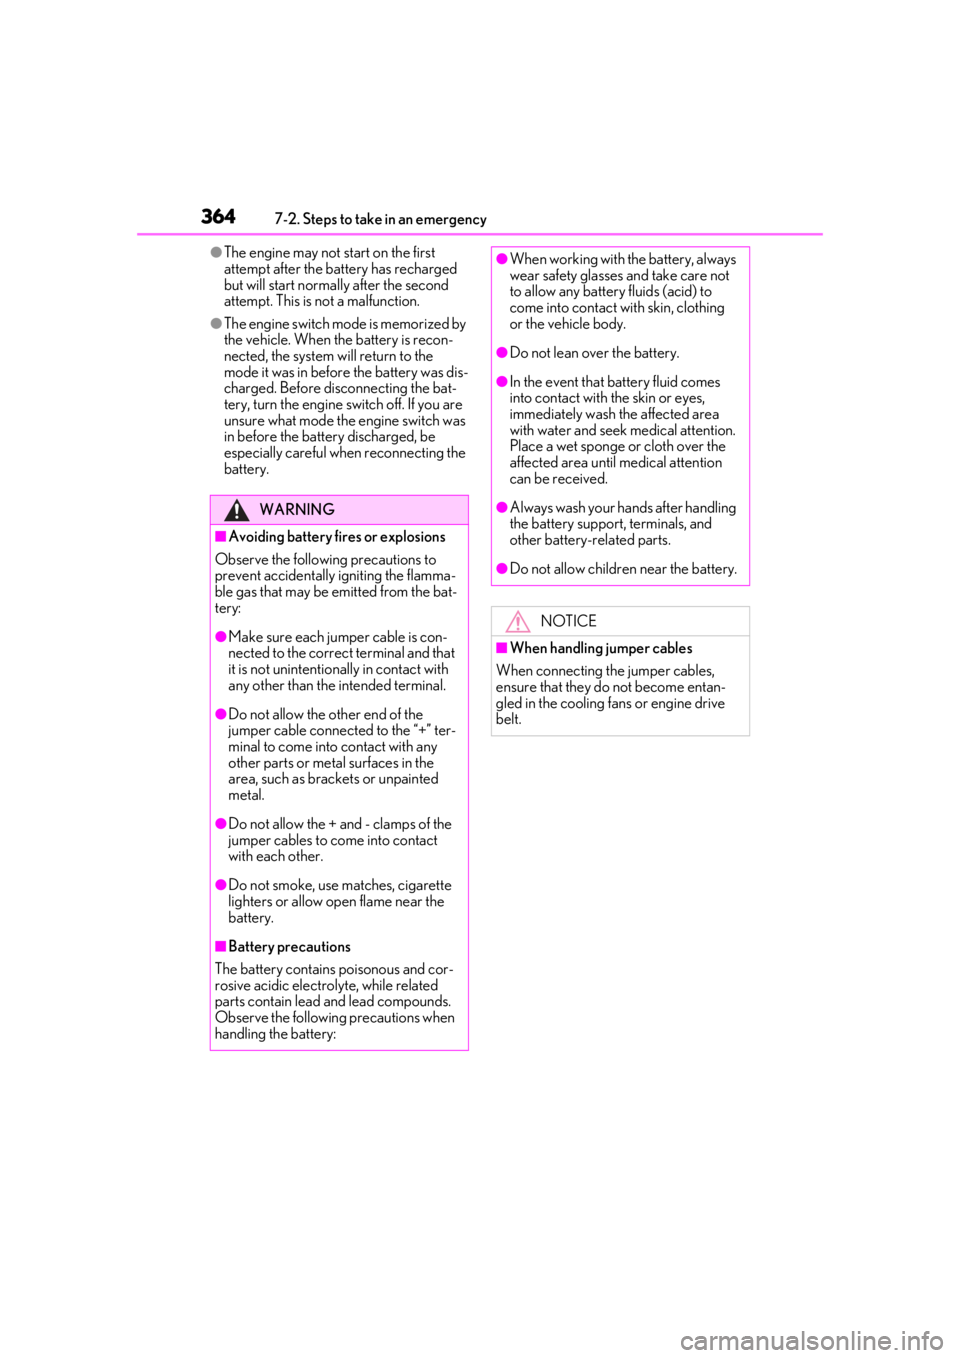
WARNING
■Avoiding battery fires or explosions
Observe the following precautions to
prevent accidentally igniting the flamma-
ble gas that may be emitted from the bat-
tery:
●Make sure each jumper cable is con-
nected to the correct terminal and that
it is not unintentiona lly in contact with
any other than the intended terminal.
●Do not allow the other end of the
jumper cable connected to the “+” ter-
minal to come into contact with any
other parts or metal surfaces in the
area, such as brackets or unpainted
metal.
●Do not allow the + and - clamps of the
jumper cables to come into contact
with each other.
●Do not smoke, use matches, cigarette
lighters or allow open flame near the
battery.
■Battery precautions
The battery contains poisonous and cor-
rosive acidic electrolyte, while related
parts contain lead and lead compounds.
Observe the following precautions when
handling the battery:
●When working with the battery, always
wear safety glasses and take care not
to allow any battery fluids (acid) to
come into contact with skin, clothing
or the vehicle body.
●Do not lean over the battery.
●In the event that battery fluid comes
into contact with the skin or eyes,
immediately wash the affected area
with water and seek medical attention.
Place a wet sponge or cloth over the
affected area until medical attention
can be received.
●Always wash your ha nds after handling
the battery support, terminals, and
other battery-related parts.
●Do not allow children near the battery.
NOTICE
■When handling jumper cables
When connecting the jumper cables,
ensure that they do not become entan-
gled in the cooling fans or engine drive
belt.
Page 367 of 436

3677-2. Steps to take in an emergency
7
When trouble arises
edly. (The fans may not operate in freezing
temperatures.)
7If the fans are not operating:
Stop the engine immediately and
contact your Lexus dealer.
If the fans are operating:
Have the vehicle inspected at the
nearest Lexus dealer.
8 Check if “Engine Coolant Temp
High Stop in a Safe Place See
Owner’s Manual” is shown on the
multi-information display.
If the message does not disappear:
Stop the engine and contact your
Lexus dealer.
If the message is not displayed:
Have the vehicle inspected at the
nearest Lexus dealer.
WARNING
■When inspecting under the hood of
your vehicle
Observe the following precautions.
Failure to do so may result in serious
injury such as burns.
●If steam is seen coming from under the
hood, do not open the hood until the
steam has subsided. The engine com-
partment may be very hot.
●Keep hands and clothing (especially a
tie, a scarf or a muffler) away from the
fans and belts.
Failure to do so may cause the hands
or clothing to be caught, resulting in
serious injury.
●IS350 AWD/IS350/IS300 AWD:
Do not loosen the coolant inlet cap or
coolant reservoir cap while the engine
and radiator are hot. (The coolant inlet
cap is located under the engine cover.)
High temperature steam or coolant
could spray out.
●IS300: Do not loosen the coolant inlet
cap, coolant reservoir cap, or inter-
cooler reservoir cap while the engine
and radiator are hot. High tempera-
ture steam or coolant could spray out.
NOTICE
■When adding engine coolant
Add coolant slowly after the engine has
cooled down sufficiently. Adding cool
coolant to a hot engine too quickly can
cause damage to the engine.
Page 369 of 436

3697-2. Steps to take in an emergency
7
When trouble arises
WARNING
■When attempting to free a stuck vehi-
cle
If you choose to push the vehicle back
and forth to free it, make sure the sur-
rounding area is clear to avoid striking
other vehicles, objects or people. The
vehicle may also lunge forward or lunge
back suddenly as it becomes free. Use
extreme caution.
■When shifting the shift lever
Be careful not to shif t the shift lever with
the accelerator pedal depressed.
This may lead to unexpected rapid accel-
eration of the vehicle that may cause an
accident resulting in death or serious
injury.
NOTICE
■To avoid damaging the transmission
and other components
●Avoid spinning the rear wheels and
depressing the accelerator pedal
more than necessary.
●If the vehicle remains stuck even after
these procedures are performed, the
vehicle may require towing to be freed.
Page 387 of 436

3878-1. Specifications
8
Vehicle specifications
Wheel diameter
Bead
Sidewall
Shoulder
Tread
Belt
Inner liner
Reinforcing rubber
Carcass
Rim lines
Bead wires
Chafer
This information has been prepared in
accordance with regulations issued by
the National Highway Traffic Safety
Administration of the U.S. Department
of Transportation.
It provides the purchasers and/or pro-
spective purchasers of Lexus vehicles
with information on uniform tire quality
grading.
Your Lexus dealer will help answer any questions you may have as you read this
information.
■DOT quality grades
All passenger vehicle tires must con-
form to Federal Safety Requirements in
addition to these grades. Quality
grades can be found where applicable
on the tire sidewall between tread
shoulder and maximum section width.
For example: Treadwear 200 Traction AA
Temperature A
■Treadwear
The treadwear grade is a comparative
rating based on the wear rate of the tire
when tested under controlled condi-
tions on a specified government test
course.
For example, a tire graded 150 would wear
one and a half (1 - 1/2) times as well on the
government course as a tire graded 100.
The relative performance of tires depends
upon the actual conditions of their use.
Performance may differ significantly from
the norm due to variatio ns in driving habits,
service practices and differences in road
characteristics and climate.
■Traction AA, A, B, C
The traction grades, from highest to
lowest, are AA, A, B and C, and they
represent the tire’s ability to stop on
wet pavement as measured under con-
trolled conditions on specified govern-
ment test surfaces of asphalt and
concrete.
A tire marked C may have poor traction
performance.
Warning: The traction grade assigned to
this tire is based on braking (straight
ahead) traction tests and does not include
Tire section names
Uniform Tire Quality Grading
C
A
B
C
D
E
F
G
H
I
J
K
Page 388 of 436

3888-1. Specifications
cornering (turning) traction.
■Temperature A, B, C
The temperature grades are A (the
highest), B, and C, representing the
tire’s resistance to the generation of
heat and its ability to dissipate heat
when tested under controlled condi-
tions on a specified indoor laboratory
test wheel.
Sustained high temperature can cause the
material of the tire to degenerate and
reduce tire life, and excessive temperature
can lead to sudden tire failure. Grade C corresponds to
a level of perfor-
mance which all passenger car tires must
meet under the Fede ral Motor Vehicle
Safety Standard No. 109.
Grades B and A represent higher levels of
performance on the laboratory test wheel
than the minimum required by law.
Warning: The temperature grades of a tire
assume that it is properly inflated and not
overloaded.
Excessive speed, unde rinflation, or exces-
sive loading, either separately or in combi-
nation, can cause heat buildup and
possible tire failure.
Glossary of tire terminology
Tire related termMeaning
Cold tire inflation pressure
Tire pressure when the vehicle has been parked for
three hours or more, or has not been driven more
than 1 mile or 1.5 km under that condition
Maximum inflation pressureThe maximum cold inflated pressure to which a tire
may be inflated, shown on the sidewall of the tire
Recommended inflation pressureCold tire inflation pressure recommended by a
manufacturer
Accessory weight
The combined weight (in excess of those standard
items which may be replaced) of automatic trans-
mission, power steering, power brakes, power win-
dows, power seats, radio and heater, to the extent
that these items are available as factory-installed
equipment (whether installed or not)
Curb weight
The weight of a motor vehicle with standard equip-
ment, including the maximum capacity of fuel, oil
and coolant, and if so equipped, air conditioning
and additional weight optional engine
Page 394 of 436

3948-2. Customization
8-2.Customization
■Changing by using the meter con-
trol switches
1 Press or to select .
2 Operate the switches to select a
desired item.
3 Change the setting by referring to
the message displayed on the
screen.
■Changing by using the Remote
Touch
1 Press the “MENU” button on the
Remote Touch.
2 Select “Setup” on the menu screen
and select “Vehicle”.
3 Select “Vehicle Customization” or
“Drive Mode Customization”.
Various setting can be changed. Refer to
the list of settings th at can be changed for
details.
This system can also be operated by the
touch screen.
For details on the Remote Touch, refer
to the “NAVIGATION AND MULTI-
MEDIA SYSTEM OWNER’S MAN-
UAL”.
■When customizing using the Remote
Touch
Stop the vehicle in a safe place, apply the
parking brake, and shift the shift lever to P.
Also, to prevent battery discharge, leave
the engine running while customizing the
features.
Some function settings are changed simultaneously with other functions being cus-
tomized. Contact your Lexus dealer for further details.
Settings that can be changed using the Remote Touch
Settings that can be changed using the meter control switches
Settings that can be changed by your Lexus dealer
Customizable features
Your vehicle includes a variety of
electronic features that can be per-
sonalized to suit your preferences.
The settings of these features can
be changed by using the meter con-
trol switches, the Remote Touch, or
at your Lexus dealer.
Customizing vehicle features
WARNING
■During customization
As the engine needs to be running
during customization, ensure that the
vehicle is parked in a place with ade-
quate ventilation. In a closed area such as
a garage, exhaust gases including harm-
ful carbon monoxide (CO) may collect
and enter the vehicle. This may lead to
death or a serious health hazard.
NOTICE
■During customization
To prevent battery discharge, ensure that
the engine is running while customizing
features.
Customizable features
A
B
C
Page 397 of 436

3978-2. Customization
8
Vehicle specifications
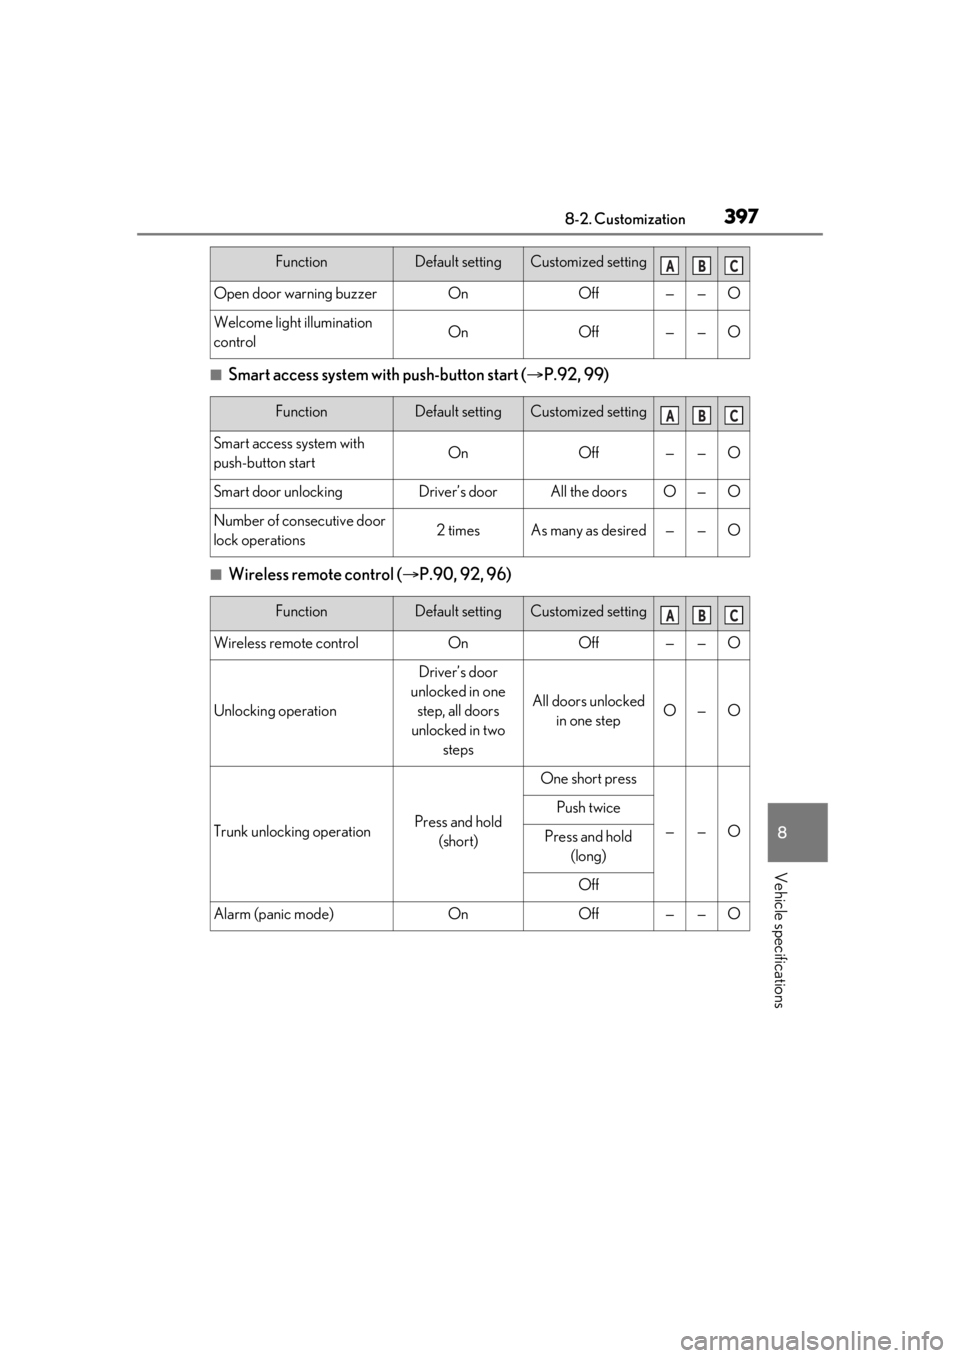
■Smart access system with push-button start (P.92, 99)
■Wireless remote control ( P.90, 92, 96)
Open door warning buzzerOnOff——O
Welcome light illumination
controlOnOff——O
FunctionDefault settingCustomized setting
Smart access system with
push-button startOnOff——O
Smart door unlockingDriver’s doorAll the doorsO—O
Number of consecutive door
lock operations2 timesAs many as desired——O
FunctionDefault settingCustomized setting
Wireless remote controlOnOff——O
Unlocking operation
Driver’s door
unlocked in one step, all doors
unlocked in two steps
All doors unlocked in one stepO—O
Trunk unlocking operationPress and hold (short)
One short press
——O
Push twice
Press and hold (long)
Off
Alarm (panic mode)OnOff——O
FunctionDefault settingCustomized settingABC
ABC
ABC
Page 400 of 436

4008-2. Customization
■LTA (Lane Tracing Assist) (P.180)
■RSA (Road Sign Assist)* ( P.189)
*:If equipped
■Dynamic radar cruise contro l with full-speed range (P.192)
■BSM (Blind Spot Monitor)* ( P.202)
FunctionDefault settingCustomized setting
Lane centering functionOnOff—O—
Alert typeSteering wheel
vibrationBuzzer—O—
Alert sensitivityHighStandard—O—
Vehicle sway warning func-
tionOnOff—O—
Vehicle sway warning sensi-
tivityStandardHigh—O—Low
FunctionDefault settingCustomized setting
RSA (Road Sign Assist)OnOff—O—
Excess speed notification
methodDisplay onlyNo notification—O—Display and buzzer
Excess speed notification
level1 mph (2 km/h)3 mph (5 km/h)—O—5 mph (10 km/h)
Other notifications method
(No-entry notification)Display onlyNo notification—O—Display and buzzer
FunctionDefault settingCustomized setting
Curve speed reduction func-
tion strengthHighLow—O—Off
FunctionDefault settingCustomized setting
BSM (Blind Spot Monitor)OnOff—O—
Outside rear view mirror indi-
cator brightnessBrightDim—O—
ABC
ABC
ABC
ABC