2021 Lexus IS350 warning
[x] Cancel search: warningPage 262 of 436
2625-2. Using the air conditioning system and defogger
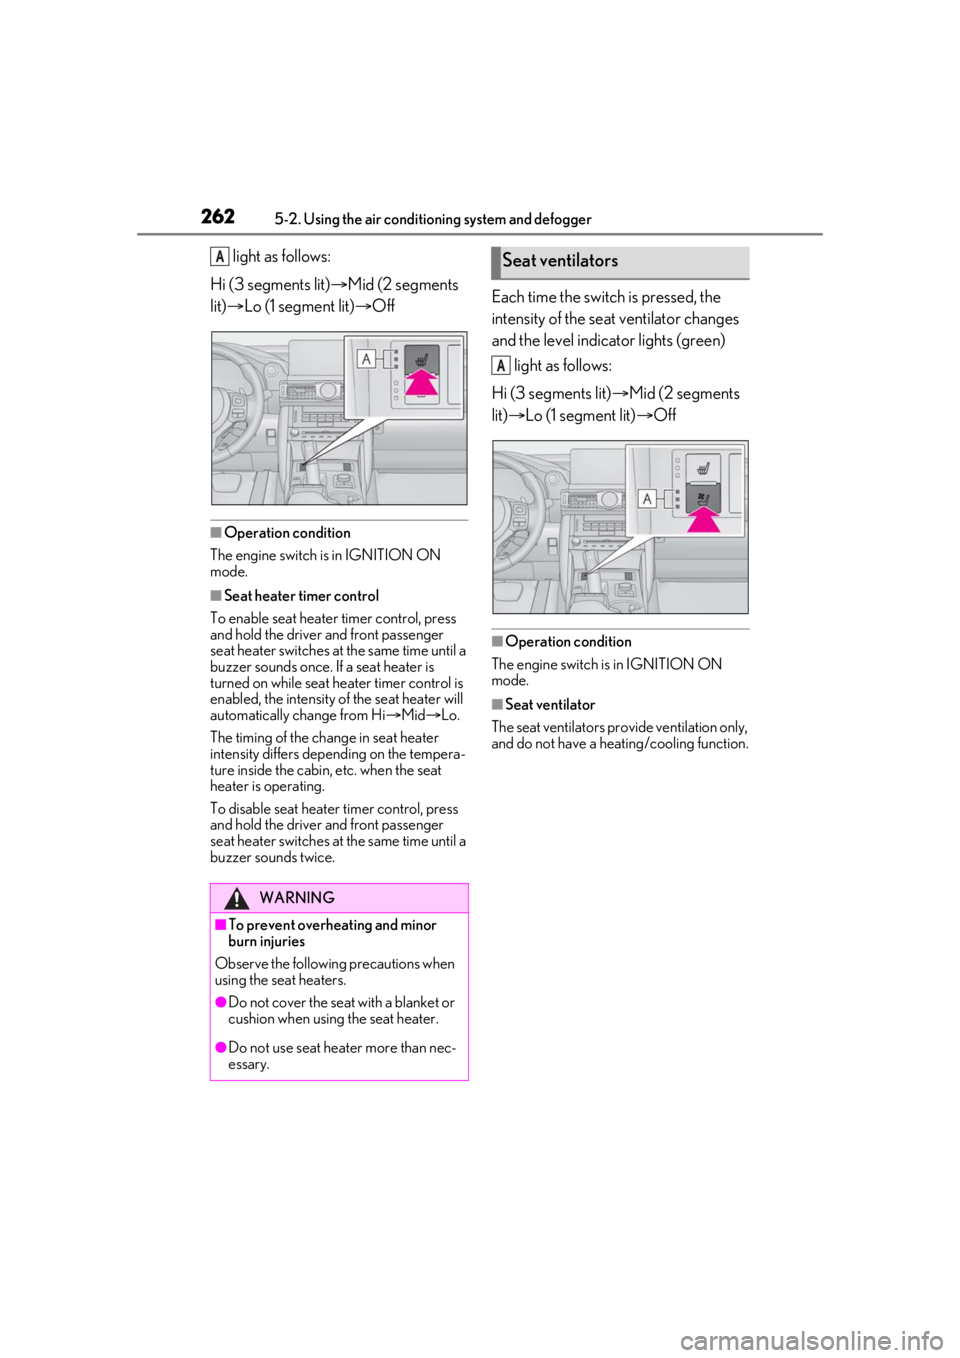
light as follows:
Hi (3 segments lit) Mid (2 segments
lit) Lo (1 segment lit) Off
■Operation condition
The engine switch is in IGNITION ON
mode.
■Seat heater timer control
To enable seat heater timer control, press
and hold the driver and front passenger
seat heater switches at the same time until a
buzzer sounds once. If a seat heater is
turned on while seat he ater timer control is
enabled, the intensity of the seat heater will
automatically change from Hi Mid Lo.
The timing of the change in seat heater
intensity differs depending on the tempera-
ture inside the cabin, etc. when the seat
heater is operating.
To disable seat heater timer control, press
and hold the driver and front passenger
seat heater switches at the same time until a
buzzer sounds twice.
Each time the switch is pressed, the
intensity of the seat ventilator changes
and the level indicator lights (green) light as follows:
Hi (3 segments lit) Mid (2 segments
lit) Lo (1 segment lit) Off
■Operation condition
The engine switch is in IGNITION ON
mode.
■Seat ventilator
The seat ventilators pr ovide ventilation only,
and do not have a heating/cooling function.
WARNING
■To prevent overheating and minor
burn injuries
Observe the following precautions when
using the seat heaters.
●Do not cover the seat with a blanket or
cushion when using the seat heater.
●Do not use seat heater more than nec-
essary.
ASeat ventilators
A
Page 266 of 436
2665-4. Using the storage features
5-4.Using the storage features
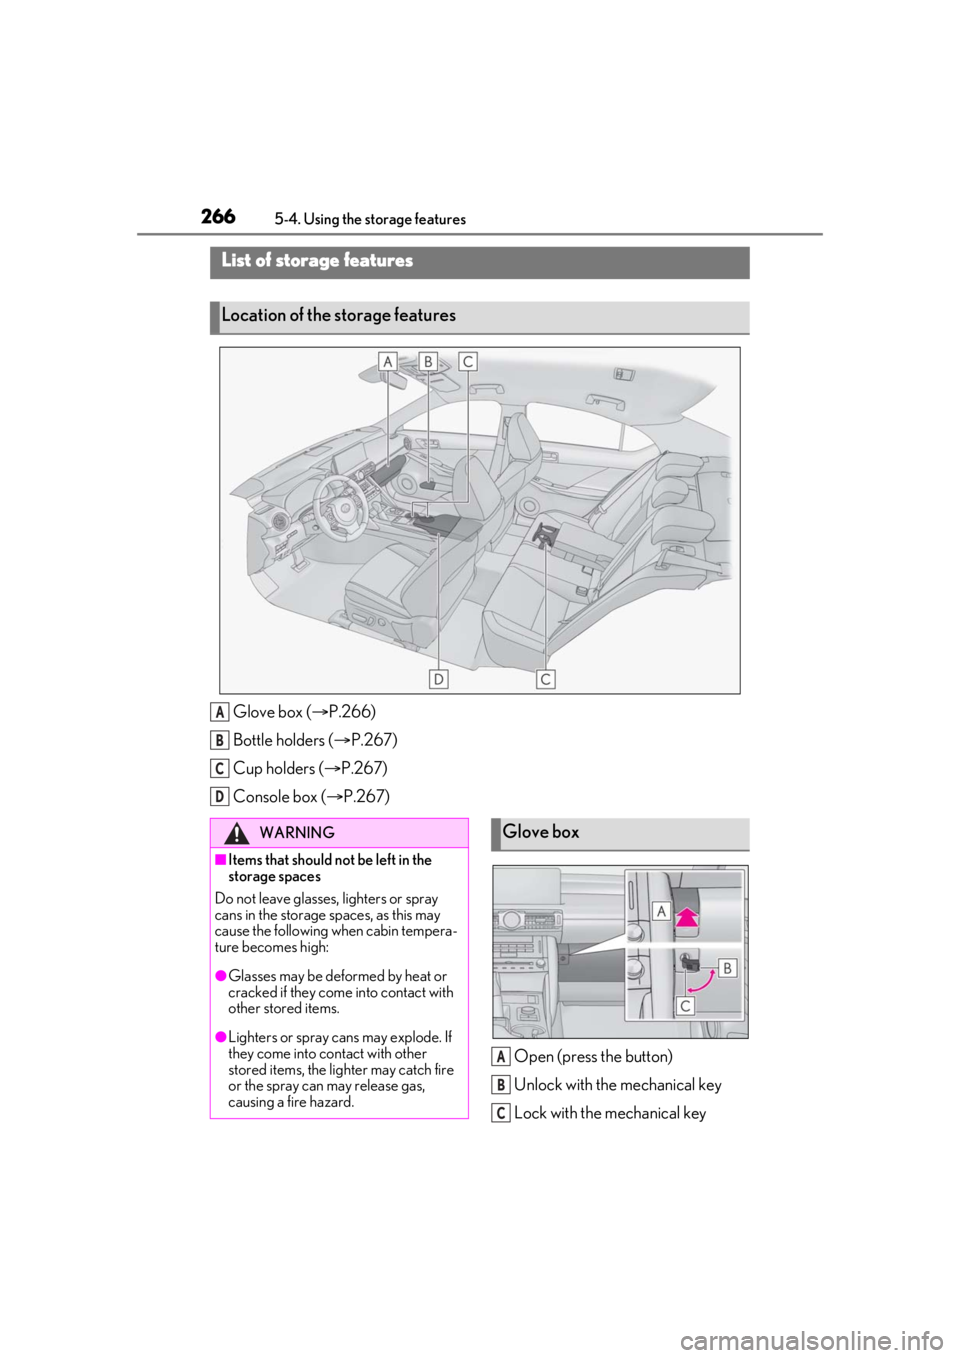
Glove box (P.266)
Bottle holders ( P.267)
Cup holders ( P.267)
Console box ( P.267)
Open (press the button)
Unlock with the mechanical key
Lock with the mechanical key
List of storage features
Location of the storage features
A
B
C
D
WARNING
■Items that should not be left in the
storage spaces
Do not leave glasses, lighters or spray
cans in the storage spaces, as this may
cause the following when cabin tempera-
ture becomes high:
●Glasses may be deformed by heat or
cracked if they come into contact with
other stored items.
●Lighters or spray cans may explode. If
they come into contact with other
stored items, the lighter may catch fire
or the spray can may release gas,
causing a fire hazard.
Glove box
A
B
C
Page 267 of 436
2675-4. Using the storage features
5
Interior features
■Glove box light
The glove box light turns on when the
engine switch is in ACCESSORY or IGNI-
TION ON mode.
■Trunk opener main switch
The trunk opener main switch is located in
the glove box. ( P.98)
■Removing the partition
The insert inside the glove box can be
removed.
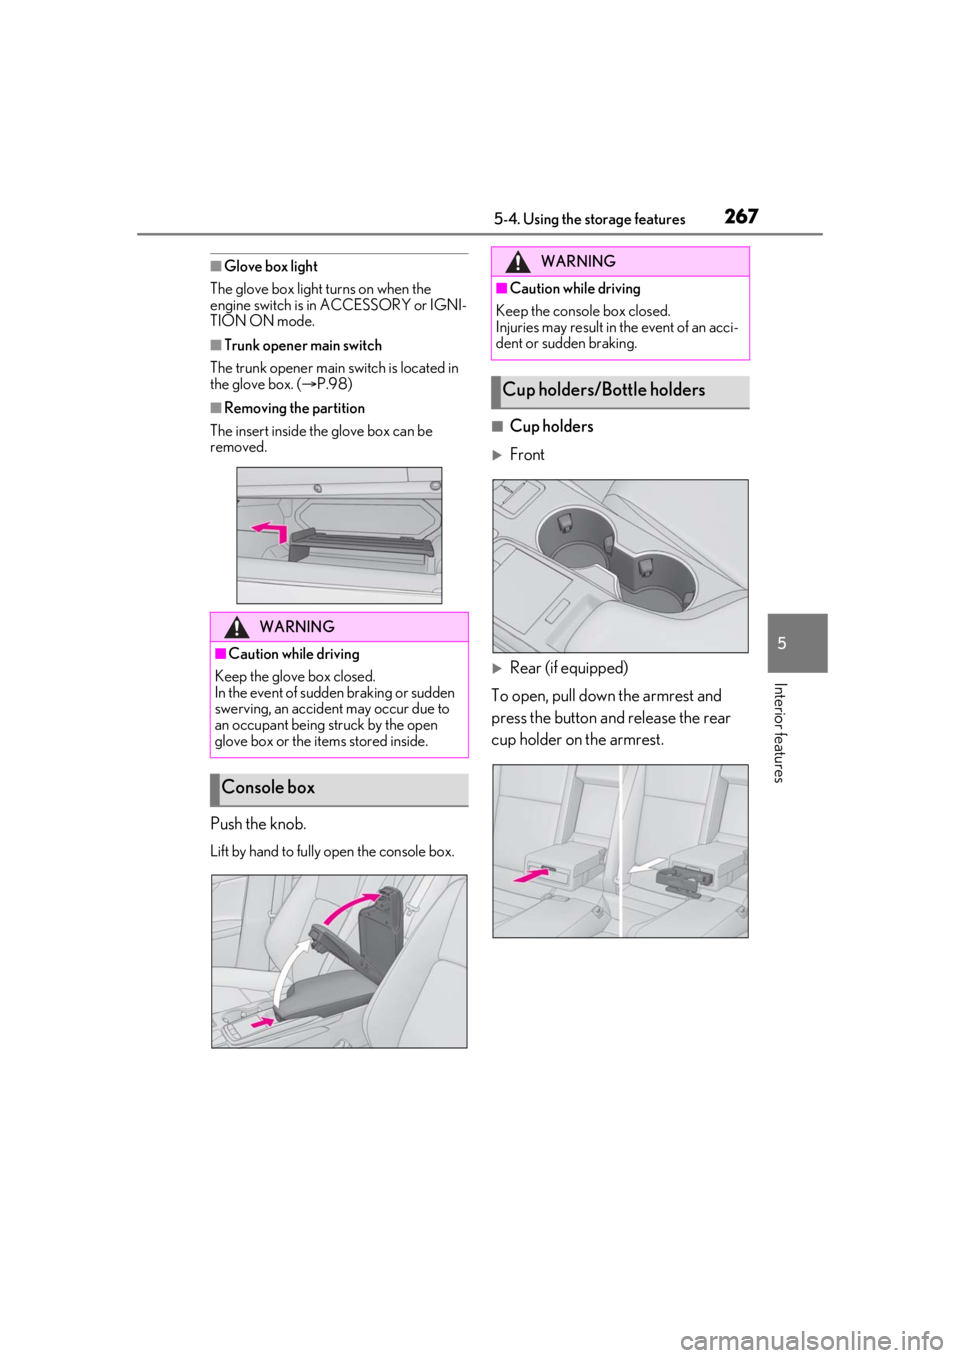
Push the knob.
Lift by hand to fully open the console box.
■Cup holders
Front
Rear (if equipped)
To open, pull down the armrest and
press the button and release the rear
cup holder on the armrest.
WARNING
■Caution while driving
Keep the glove box closed.
In the event of sudden braking or sudden
swerving, an accident may occur due to
an occupant being struck by the open
glove box or the items stored inside.
Console box
WARNING
■Caution while driving
Keep the console box closed.
Injuries may result in the event of an acci-
dent or sudden braking.
Cup holders/Bottle holders
Page 268 of 436
2685-4. Using the storage features
■Bottle holders
■Cup holders/Bottle holders
●When storing a bottle, close the cap.
●The bottle may not be stored depending
on its size or shape.
●The rubber mats at the bottom of the
front cup holders can be removed.
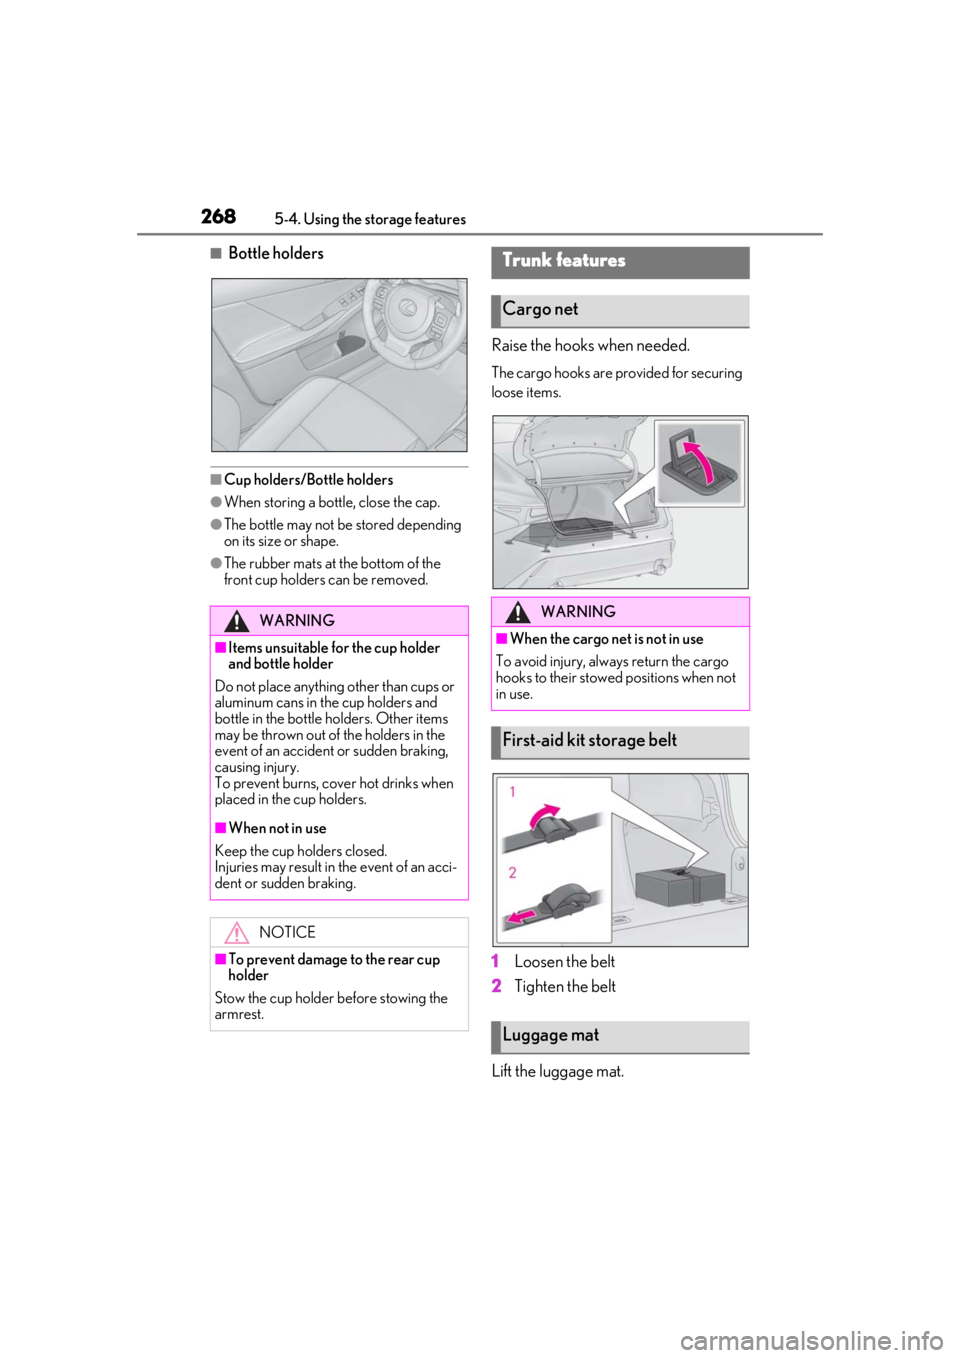
Raise the hooks when needed.
The cargo hooks are provided for securing
loose items.
1Loosen the belt
2 Tighten the belt
Lift the luggage mat.
WARNING
■Items unsuitable for the cup holder
and bottle holder
Do not place anything other than cups or
aluminum cans in the cup holders and
bottle in the bottle holders. Other items
may be thrown out of the holders in the
event of an accident or sudden braking,
causing injury.
To prevent burns, cover hot drinks when
placed in the cup holders.
■When not in use
Keep the cup holders closed.
Injuries may result in the event of an acci-
dent or sudden braking.
NOTICE
■To prevent damage to the rear cup
holder
Stow the cup holder before stowing the
armrest.
Trunk features
Cargo net
WARNING
■When the cargo net is not in use
To avoid injury, always return the cargo
hooks to their stowed positions when not
in use.
First-aid kit storage belt
Luggage mat
Page 270 of 436
2705-5. Using the other interior features
5-5.Using the other interior features
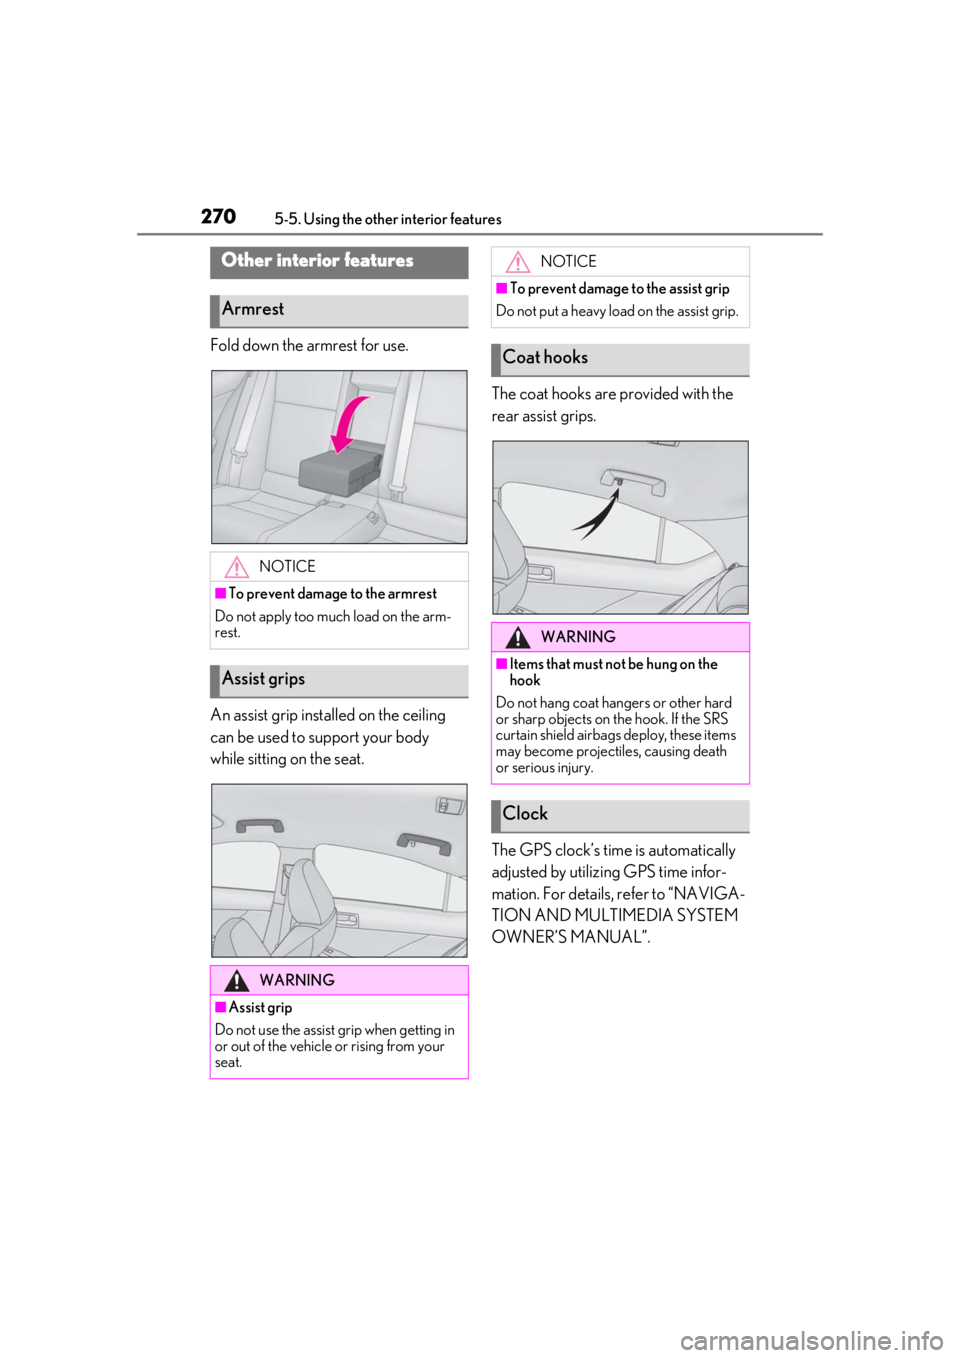
Fold down the armrest for use.
An assist grip installed on the ceiling
can be used to support your body
while sitting on the seat.The coat hooks are provided with the
rear assist grips.
The GPS clock’s time is automatically
adjusted by utilizing GPS time infor-
mation. For details, refer to “NAVIGA-
TION AND MULTIMEDIA SYSTEM
OWNER’S MANUAL”.
Other interior features
Armrest
NOTICE
■To prevent damage to the armrest
Do not apply too much load on the arm-
rest.
Assist grips
WARNING
■Assist grip
Do not use the assist grip when getting in
or out of the vehicle or rising from your
seat.
NOTICE
■To prevent damage to the assist grip
Do not put a heavy load on the assist grip.
Coat hooks
WARNING
■Items that must not be hung on the
hook
Do not hang coat hangers or other hard
or sharp objects on the hook. If the SRS
curtain shield airbag s deploy, these items
may become projectiles, causing death
or serious injury.
Clock
Page 272 of 436
2725-5. Using the other interior features
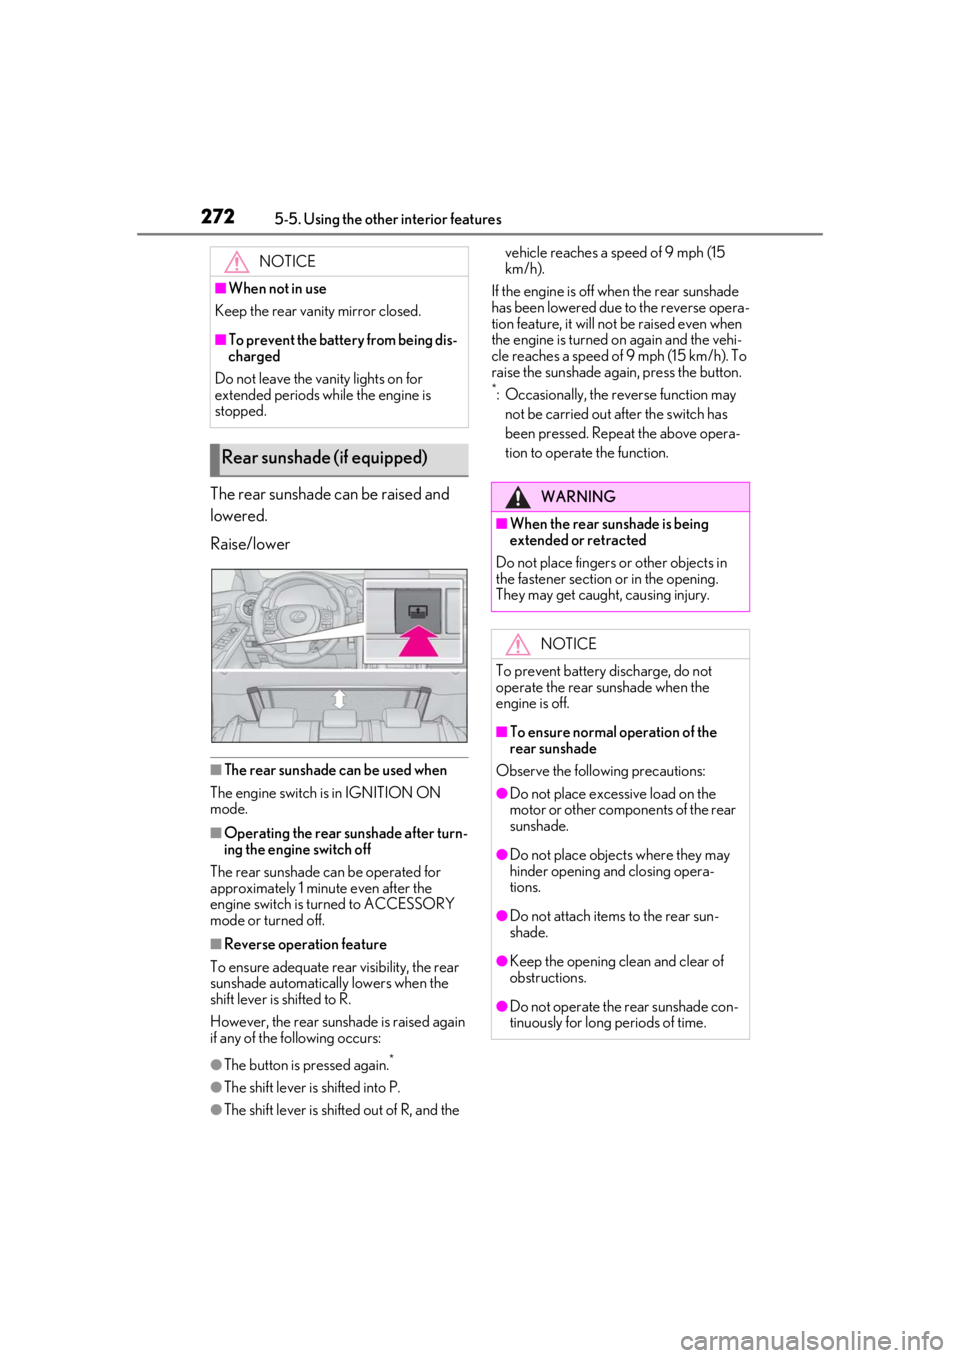
The rear sunshade can be raised and
lowered.
Raise/lower
■The rear sunshade can be used when
The engine switch is in IGNITION ON
mode.
■Operating the rear sunshade after turn-
ing the engine switch off
The rear sunshade can be operated for
approximately 1 minute even after the
engine switch is turned to ACCESSORY
mode or turned off.
■Reverse operation feature
To ensure adequate rear visibility, the rear
sunshade automatically lowers when the
shift lever is shifted to R.
However, the rear suns hade is raised again
if any of the following occurs:
●The button is pressed again.*
●The shift lever is shifted into P.
●The shift lever is shifted out of R, and the vehicle reaches a speed of 9 mph (15
km/h).
If the engine is off when the rear sunshade
has been lowered due to the reverse opera-
tion feature, it will not be raised even when
the engine is turned on again and the vehi-
cle reaches a speed of 9 mph (15 km/h). To
raise the sunshade again, press the button.
*: Occasionally, the reverse function may not be carried out after the switch has
been pressed. Repeat the above opera-
tion to operate the function.
NOTICE
■When not in use
Keep the rear vani ty mirror closed.
■To prevent the battery from being dis-
charged
Do not leave the vanity lights on for
extended periods while the engine is
stopped.
Rear sunshade (if equipped)
WARNING
■When the rear sunshade is being
extended or retracted
Do not place fingers or other objects in
the fastener section or in the opening.
They may get caught, causing injury.
NOTICE
To prevent battery discharge, do not
operate the rear sunshade when the
engine is off.
■To ensure normal operation of the
rear sunshade
Observe the following precautions:
●Do not place excessive load on the
motor or other components of the rear
sunshade.
●Do not place objects where they may
hinder opening and closing opera-
tions.
●Do not attach items to the rear sun-
shade.
●Keep the opening clean and clear of
obstructions.
●Do not operate the rear sunshade con-
tinuously for long periods of time.
Page 274 of 436
2745-5. Using the other interior features
■When support is necessary
Visit on the web at
www.homelink.com/lexus
or call
1-800-355-3515.
■Before programming HomeLink®
During programming, it is possible
that garage doors, gates, or other devices may operate. For this rea-
son, make sure that people and
objects are clear of the garage door
or other devices to prevent injury or
other potential harm.
It is recommended that a new bat-
tery be placed in the remote control
transmitter for more accurate pro-
gramming.
Garage door opener motors manu-
factured after 1995 may be
equipped with rolling code protec-
tion. If this is the case, you may need
a stepladder or other sturdy, safe
device to reach the “Learn” or
“Smart” button on the garage door
opener motor.
■Programming HomeLink®
Steps 1 through 3 must be performed
within 60 seconds, otherwise the indi-
cator light will stop flashing and pro-
gramming will not be able to be
completed.
1 Press and release the HomeLink
®
button you want to program and
check that the HomeLink
® indica-
tor light flashes (orange).
2 Point the remote control transmit-
ter for the device at the rear view
WARNING
■When programming a garage door or
other remote control device
The garage door or other device may
operate, so ensure people and objects
are out of danger to prevent potential
harm.
■Conforming to federal safety stan-
dards
Do not use the HomeLink
® compatible
transceiver with any garage door opener
or device that lacks safety stop and
reverse features as required by federal
safety standards.
This includes any garage door that can-
not detect an interfering object. A door
or device without these features
increases the risk of death or serious
injury.
■When operating or programming
HomeLink®
Never allow a child to operate or play
with the HomeLink® buttons.
Programming the HomeLink®
Page 281 of 436

2816-1. Maintenance and care
6
Maintenance and care
●Remove dirt using water. If the wheels are
excessively dirty, use a sponge or soft
cloth dampened with a diluted neutral
detergent to remove the dirt.
●When using detergent, make sure to
rinse it off with water immediately. Then
use a soft cloth to wipe off the water.
●To prevent the matte black paint from
being damaged, make sure to observe
the following precautions:
• Do not scrub or polish the wheels using a brush or dry cloth.
• Do not use any wheel coatings or
abra-sive detergents.
• When using an automatic car wash, dis-able/do not select the wheel brush
func-tion(if such an option is available).
• Do not use a high pressure pressure washer or steam cleaner.
• Do not use detergent on the wheels when they are hot, such as after driving or
park-ing in hot weather.
■Bumpers
Do not scrub with abrasive cleaners.
■Front side windows water-repellent
coating (if equipped)
●The following precautions can extend the
effectiveness of the water-repellent coat-
ing.
• Remove any dirt, etc. from the front side windows regularly.
• Do not allow dirt and dust to accumulate on the windows for a long period.
Clean the windows with a soft, damp
cloth as soon as possible.
• Do not use wax or glass cleaners that contain abrasives when cleaning the win-
dows.
• Do not use any metallic objects to remove condensation build up.
●When the water-repellent performance
has become insufficie nt, the coating can
be repaired. Contact your Lexus dealer.
■Plated portions
If dirt cannot be removed, clean the parts as
follows:
●Use a soft cloth dampened with an
approximately 5% solution of neutral
detergent and water to clean the dirt off.
●Wipe the surface with a dry, soft cloth to
remove any remaining moisture.
●To remove oily deposits, use alcohol wet
wipes or a similar product.
WARNING
■When washing the vehicle
Do not apply water to the inside of the
engine compartment. Doing so may
cause the electrical components, etc. to
catch fire.
■When cleaning the windshield (vehi-
cles with rain-sensing windshield wip-
ers)
Set the wipers to the intermittent wind-
shield wipers. (
P.154)
If AUTO mode is selected, the wipers
may operate unexpectedly in the follow-
ing situations, and may result in hands
being caught or other serious injuries
and cause damage to the wiper blades.
●When the upper part of the windshield
where the raindrop sensor is located is
touched by hand
●When a wet rag or similar is held close
to the raindrop sensor
●If something bumps against the wind-
shield
●If you directly touch the raindrop sen-
sor body or if something bumps into
the raindrop sensor