Page 6 of 631
Introduction
How to use this manual . . . . . . . . . . . . . . . . . . . . . . 1-2
Fuel requirements . . . . . . . . . . . . . . . . . . . . . . . . . . 1-2
• Gasoline containing alcohol and methanol . . . . . . . . . 1-3
• Do not use methanol . . . . . . . . . . . . . . . . . . . . . . . . . . . 1-4
• Fuel Additives . . . . . . . . . . . . . . . . . . . . . . . . . . . . . . . . 1-4
• Operation in foreign countries . . . . . . . . . . . . . . . . . . . 1-5
Vehicle handling instructions . . . . . . . . . . . . . . . . . 1-5
Vehicle modifications . . . . . . . . . . . . . . . . . . . . . . . . 1-5
Vehicle break-in process . . . . . . . . . . . . . . . . . . . . . 1-6
Vehicle data collection and event data recorders . 1-7
1
Page 11 of 631
Introduction
61
No special break-in period is need-
ed. By following a few simple precau-
tions for the first 600 miles (1,000
km) you may add to the perform-
ance, economy and life of your vehi-
cle.
• Do not race the engine.
• While driving, keep your enginespeed (rpm, or revolutions per
minute) between 2,000 rpm and
4,000 rpm.
• Do not maintain a single speed for long periods of time, either fast or
slow. Varying engine speed is
needed to properly break-in the
engine.
• Avoid hard stops, except in emer- gencies, to allow the brakes to seat
properly.
• Don't tow a trailer during the first 1,200 miles (2,000 km) of opera-
tion.
VEHICLE BREAK-IN
PROCESS
Page 39 of 631
3 21
Safety features of your vehicle
• No modifications or additionsshould be made by the user which
would either prevent the seat belt
adjusting devices from operating to
remove slack, or prevent the seat
belt assembly from being adjusted
to remove slack.
• When you fasten the seat belt, be careful not to latch the seat belt in
buckles of other seat. It's very dan-
gerous and you may not be pro-
tected by the seat belt properly.
• Do not unfasten the seat belt and do not fasten and unfasten the seat
belt repeatedly while driving. This
could result in loss of control, and
an accident causing death, serious
injury, or property damage.
• When fastening the seat belt, make sure that the seat belt does
not pass over objects that are hard
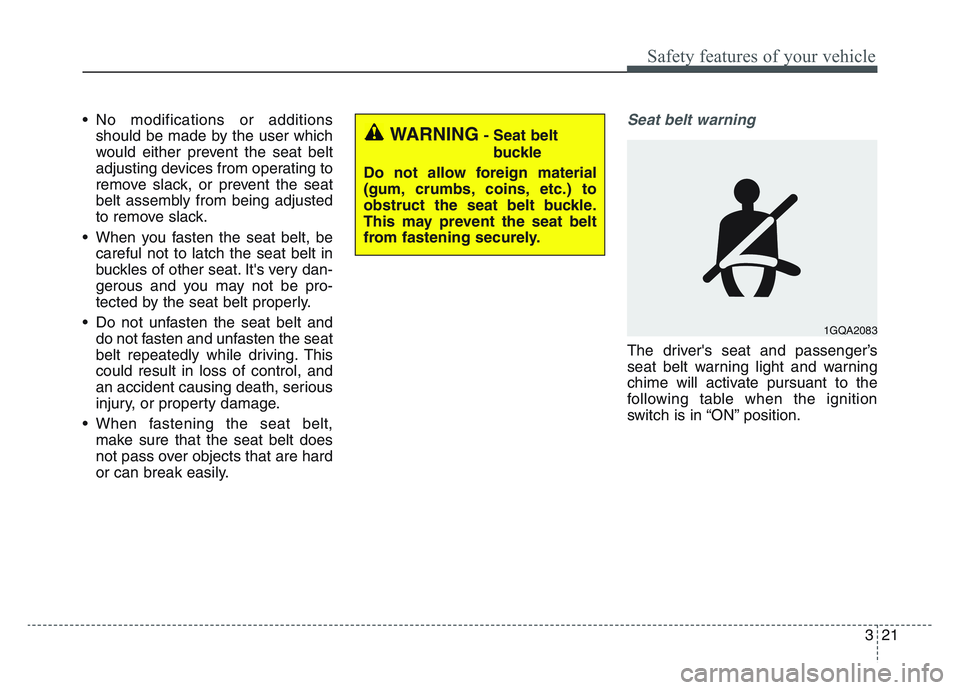
or can break easily.Seat belt warning
The driver's seat and passenger’s
seat belt warning light and warning
chime will activate pursuant to the
following table when the ignition
switch is in “ON” position.
WARNING- Seat belt
buckle
Do not allow foreign material
(gum, crumbs, coins, etc.) to
obstruct the seat belt buckle.
This may prevent the seat belt
from fastening securely.
1GQA2083
Page 57 of 631
3 39
Safety features of your vehicle
Lower Anchors and Tether forChildren (LATCH) System
The LATCH system holds a child
restraint during driving and in an
accident. This system is designed to
make installation of the child restraint
easier and reduce the possibility of
improperly installing your child
restraint. The LATCH system uses
anchors in the vehicle and attach-
ments on the child restraint. The
LATCH system eliminates the need
to use seat belts to secure the child
restraint to the rear seats.
Lower anchors are metal bars built
into the vehicle. There are two lower
anchors for each LATCH seating
position that will accommodate a
child restraint with lower attach-
ments.
To use the LATCH system in your
vehicle, you must have a child
restraint with LATCH attachments.
The child seat manufacturer will pro-
vide you with instructions on how to
use the child seat with its attach-
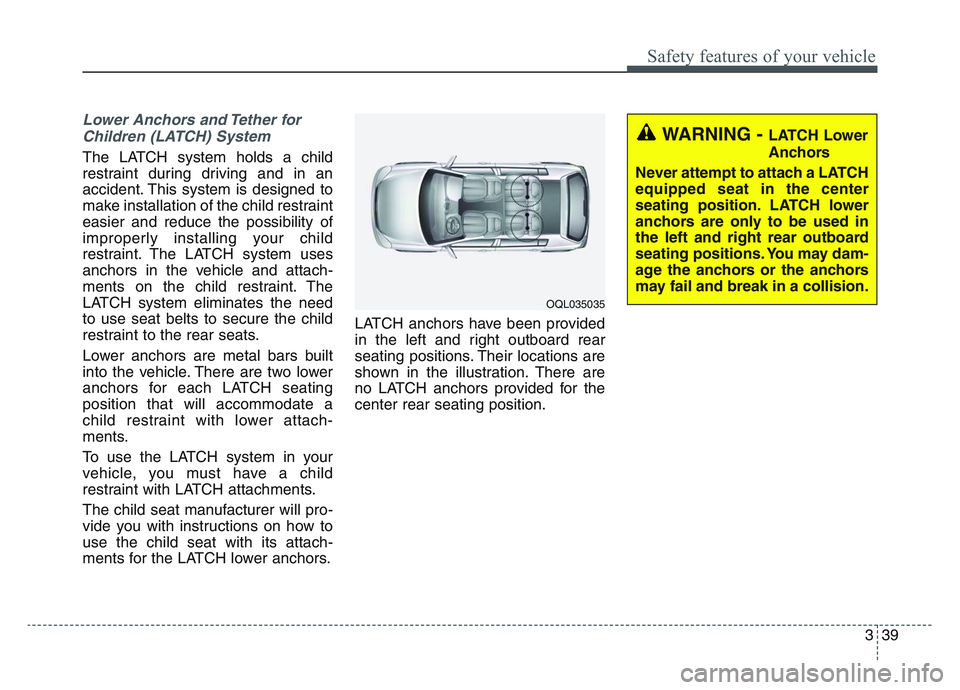
ments for the LATCH lower anchors. LATCH anchors have been provided
in the left and right outboard rear
seating positions. Their locations are
shown in the illustration. There are
no LATCH anchors provided for the
center rear seating position.
OQL035035
WARNING - LATCH Lower
Anchors
Never attempt to attach a LATCH
equipped seat in the center
seating position. LATCH lower
anchors are only to be used in
the left and right rear outboard
seating positions. You may dam-
age the anchors or the anchors
may fail and break in a collision.
Page 58 of 631
Safety features of your vehicle
403
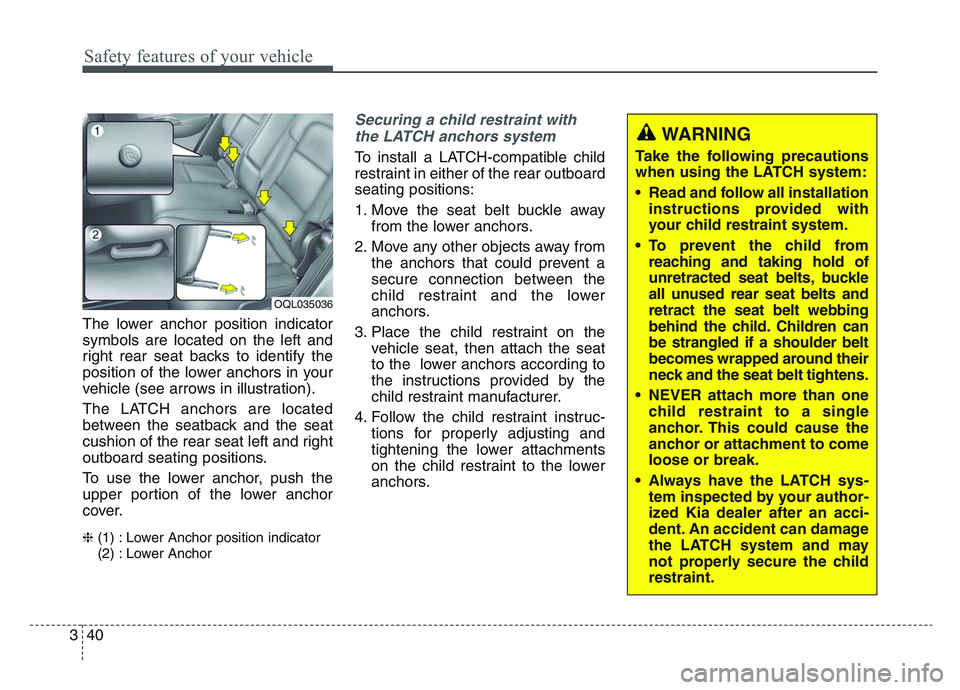
The lower anchor position indicator
symbols are located on the left and
right rear seat backs to identify the
position of the lower anchors in your
vehicle (see arrows in illustration).
The LATCH anchors are located
between the seatback and the seat
cushion of the rear seat left and right
outboard seating positions.
To use the lower anchor, push the
upper portion of the lower anchor
cover.
❈(1) : Lower Anchor position indicator
(2) : Lower Anchor
Securing a child restraint with
the LATCH anchors system
To install a LATCH-compatible child
restraint in either of the rear outboard
seating positions:
1. Move the seat belt buckle away from the lower anchors.
2. Move any other objects away from the anchors that could prevent a
secure connection between the
child restraint and the lower
anchors.
3. Place the child restraint on the vehicle seat, then attach the seat
to the lower anchors according to
the instructions provided by the
child restraint manufacturer.
4. Follow the child restraint instruc- tions for properly adjusting and
tightening the lower attachments
on the child restraint to the lower
anchors.
OQL035036
WARNING
Take the following precautions
when using the LATCH system:
• Read and follow all installationinstructions provided with
your child restraint system.
• To prevent the child from reaching and taking hold of
unretracted seat belts, buckle
all unused rear seat belts and
retract the seat belt webbing
behind the child. Children can
be strangled if a shoulder belt
becomes wrapped around their
neck and the seat belt tightens.
• NEVER attach more than one child restraint to a single
anchor. This could cause the
anchor or attachment to come
loose or break.
• Always have the LATCH sys- tem inspected by your author-
ized Kia dealer after an acci-
dent. An accident can damage
the LATCH system and may
not properly secure the child
restraint.
Page 59 of 631
3 41
Safety features of your vehicle
✽NOTICE
The recommended maximum
weight for the LATCH system is 65
lbs. (30 kg). When selecting a proper
child restraint, consider that the
maximum total weight of the child
plus the child restraint should be
less than 65 lbs (30 kg).
As a guide, the MAX child restraint
weight should be determined by the
following calculation:
Child Restraint Weight = 65 - (child's total weight in lbs.)
Securing a child restraint seat
with "Tether Anchor" system
First secure the child restraint with
the LATCH lower anchors or the seat
belt. If the child restraint manufactur-
er recommends that the top tether
strap be attached, attach and tighten
the top tether strap to the top tether
strap anchor.
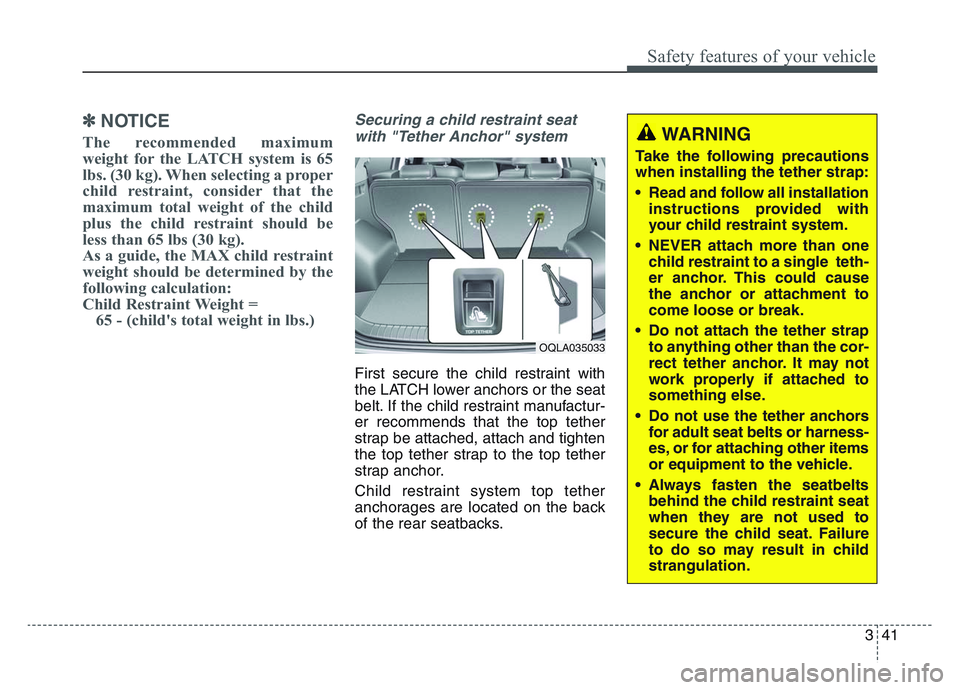
Child restraint system top tether
anchorages are located on the back
of the rear seatbacks.
OQLA035033
WARNING
Take the following precautions
when installing the tether strap:
• Read and follow all installation instructions provided with
your child restraint system.
• NEVER attach more than one child restraint to a single teth-
er anchor. This could cause
the anchor or attachment to
come loose or break.
• Do not attach the tether strap to anything other than the cor-
rect tether anchor. It may not
work properly if attached to
something else.
• Do not use the tether anchors for adult seat belts or harness-
es, or for attaching other items
or equipment to the vehicle.
• Always fasten the seatbelts behind the child restraint seat
when they are not used to
secure the child seat. Failure
to do so may result in child
strangulation.
Page 83 of 631
3 65
Safety features of your vehicle
Do not allow the passengers to lean
their heads or bodies against the
doors, put their arms on the doors,
stretch their arms out of the window
or place objects between the doors
and passengers when they are seat-
ed on seats equipped with side
impact and/or curtain air bags.
✽NOTICE
Never try to open or repair any com-
ponents of the side and curtain air
bag system. This should only be
done by an authorized Kia dealer.
WARNING - No attaching
objects
• Do not place any objects over the air bag. Also, do not attach
any objects around the area
the air bag inflates such as the
door, side door glass, front
and rear pillar, roof side rail.
• Do not hang hard or breakable objects on the coat hook.
Page 138 of 631
Features of your vehicle
484
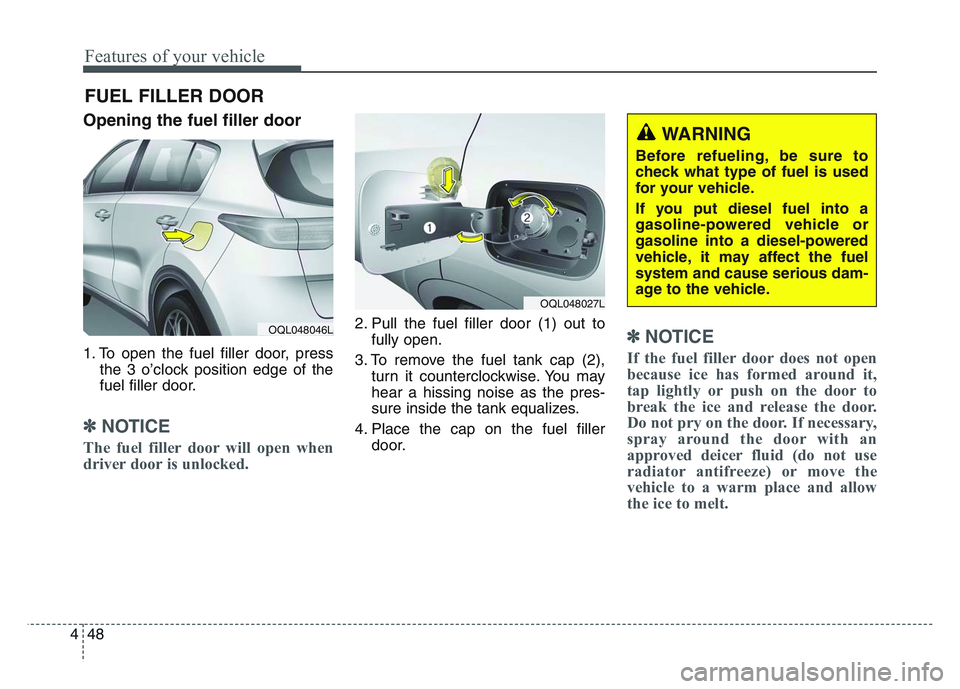
Opening the fuel filler door
1. To open the fuel filler door, pressthe 3 o’clock position edge of the
fuel filler door.
✽NOTICE
The fuel filler door will open when
driver door is unlocked.
2. Pull the fuel filler door (1) out tofully open.
3. To remove the fuel tank cap (2), turn it counterclockwise. You may
hear a hissing noise as the pres-
sure inside the tank equalizes.
4. Place the cap on the fuel filler door.✽NOTICE
If the fuel filler door does not open
because ice has formed around it,
tap lightly or push on the door to
break the ice and release the door.
Do not pry on the door. If necessary,
spray around the door with an
approved deicer fluid (do not use
radiator antifreeze) or move the
vehicle to a warm place and allow
the ice to melt.
FUEL FILLER DOOR
OQL048027L
OQL048046L
WARNING
Before refueling, be sure to
check what type of fuel is used
for your vehicle.
If you put diesel fuel into a
gasoline-powered vehicle or
gasoline into a diesel-powered
vehicle, it may affect the fuel
system and cause serious dam-
age to the vehicle.