2021 KIA SPORTAGE tires
[x] Cancel search: tiresPage 443 of 631
5 157
Driving your vehicle
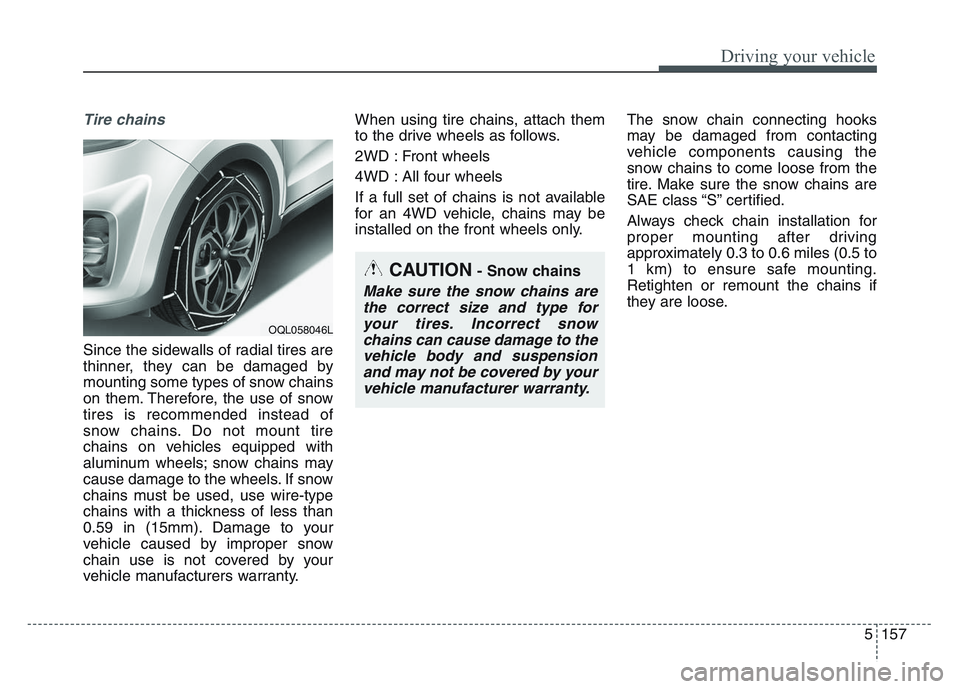
Tire chains
Since the sidewalls of radial tires are
thinner, they can be damaged by
mounting some types of snow chains
on them. Therefore, the use of snow
tires is recommended instead of
snow chains. Do not mount tire
chains on vehicles equipped with
aluminum wheels; snow chains may
cause damage to the wheels. If snow
chains must be used, use wire-type
chains with a thickness of less than
0.59 in (15mm). Damage to your
vehicle caused by improper snow
chain use is not covered by your
vehicle manufacturers warranty.When using tire chains, attach them
to the drive wheels as follows.
2WD : Front wheels
4WD : All four wheels
If a full set of chains is not available
for an 4WD vehicle, chains may be
installed on the front wheels only.
The snow chain connecting hooks
may be damaged from contacting
vehicle components causing the
snow chains to come loose from the
tire. Make sure the snow chains are
SAE class “S” certified.
Always check chain installation for
proper mounting after driving
approximately 0.3 to 0.6 miles (0.5 to
1 km) to ensure safe mounting.
Retighten or remount the chains if
they are loose.
CAUTION- Snow chains
Make sure the snow chains are
the correct size and type foryour tires. Incorrect snowchains can cause damage to thevehicle body and suspensionand may not be covered by yourvehicle manufacturer warranty.
OQL058046L
Page 447 of 631
5 161
Driving your vehicle
If you are considering towing with
your vehicle, you should first check
with your state's Department of
Motor Vehicles to determine the legal
requirements.
Since laws vary the requirements for
towing trailers, cars, or other types of
vehicles or apparatus may differ. Ask
an authorized Kia dealer for further
details before towing.
You may require an additional wiring
harness connector to install a trailer
hitch. Please contact an authorized
Kia dealer for more details.Your vehicle can tow a trailer. To
identify what the vehicle trailering
capacity is for your vehicle, you
should read the information in
“Weight of the trailer” that appears
later in this section.Remember that trailering is different
than just driving your vehicle by itself.
Trailering means changes in han-
dling, durability, and fuel economy.
Successful, safe trailering requires
correct equipment, and it has to be
used properly.
This section contains many time-
tested, important trailering tips and
safety rules. Many of these are
important for your safety and that of
your passengers. Please read this
section carefully before you pull a
trailer.
Load-pulling components such as
the engine, transmission, wheel
assemblies, and tires are forced to
work harder against the load of the
added weight. The engine is required
to operate at relatively higher speeds
and under greater loads. This addi-
tional burden generates extra heat.
The trailer also adds considerably to
wind resistance, increasing the
pulling requirements.
TRAILER TOWING
CAUTION - Trailer
installation
Follow instructions in this sec-tion when pulling a trailer.Pulling a trailer improperly candamage your vehicle and resultin costly repairs not covered byyour warranty.
WARNING- Towing a
trailer
Always check your towing
equipment to confirm correct
equipment size and installation
before use. Using incompatible
or incorrectly installed trailer
equipment can affect the vehi-
cle operation and endanger you
and your passengers.
WARNING- Weight
limits
Before towing, make sure the
total trailer weight, GCW (gross
combination weight), GVW
(gross vehicle weight), GAW
(gross axle weight) and trailer
tongue load are all within the
limits.
Page 449 of 631
5 163
Driving your vehicle
Driving with a trailer
Towing a trailer requires a certain
amount of experience. Before setting
out for the open road, you must get
to know your trailer. Acquaint your-
self with the feel of handling and
braking with the added weight of the
trailer. And always keep in mind that
the vehicle you are driving is now a
good deal longer and not nearly so
responsive as your vehicle is by
itself.
Before you start, check the trailer
hitch and platform, safety chains,
electrical connector(s), lights, tires
and mirror adjustment. If the trailer
has electric brakes, start your vehicle
and trailer moving and then apply the
trailer brake controller by hand to be
sure the brakes are working. This lets
you check your electrical connection
at the same time.
During your trip, check occasionally
to be sure that the load is secure,
and that the lights and any trailer
brakes are still working.
Following distance
Stay at least twice as far behind the
vehicle ahead as you would when
driving your vehicle without a trailer.
This can help you avoid situations
that require heavy braking and sud-
den turns.
Passing
You’ll need more passing distance
up ahead when you’re towing a trail-
er. And, because of the increased
vehicle length, you’ll need to go
much farther beyond the passed
vehicle before you can return to your
lane. Due to the added load to the
engine when going uphill the vehicle
may also take longer to pass than it
would on flat ground.
Backing up
Hold the bottom of the steering
wheel with one hand. Then, to move
the trailer to the left, just move your
hand to the left. To move the trailer to
the right, move your hand to the
right. Always back up slowly and, if
possible, have someone guide you.
Making turns
When you’re turning with a trailer,
make wider turns than normal. Do
this so your trailer won’t strike soft
shoulders, curbs, road signs, trees,
or other objects near the edge of the
road. Avoid jerky or sudden maneu-
vers. Signal well in advance before
turning or lane changes.
Page 459 of 631
5 173
Driving your vehicle
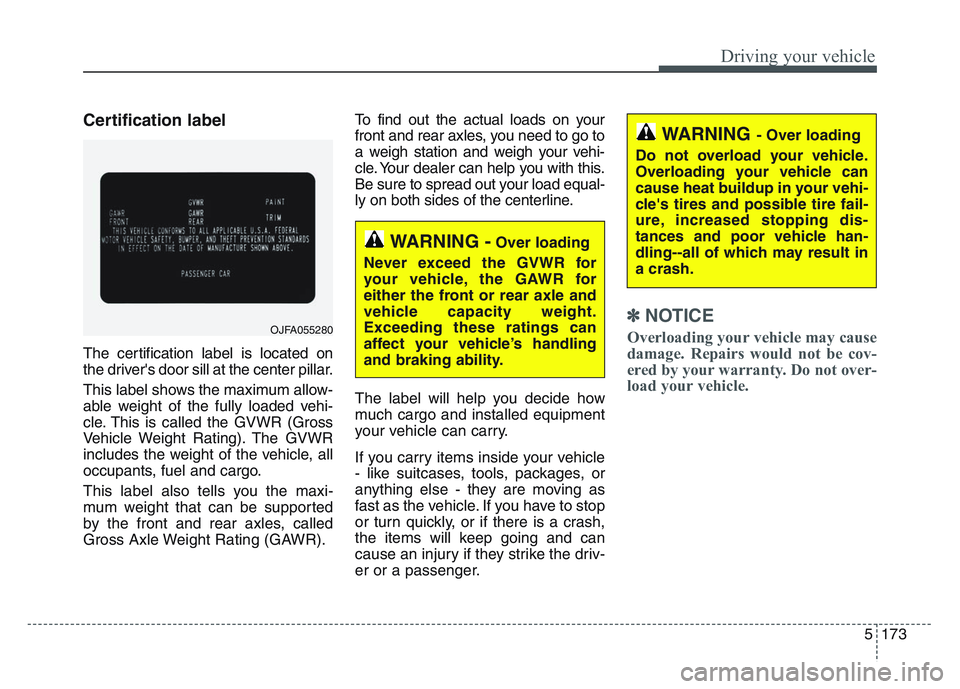
Certification label
The certification label is located on
the driver's door sill at the center pillar.
This label shows the maximum allow-
able weight of the fully loaded vehi-
cle. This is called the GVWR (Gross
Vehicle Weight Rating). The GVWR
includes the weight of the vehicle, all
occupants, fuel and cargo.
This label also tells you the maxi-
mum weight that can be supported
by the front and rear axles, called
Gross Axle Weight Rating (GAWR).To find out the actual loads on your
front and rear axles, you need to go to
a weigh station and weigh your vehi-
cle. Your dealer can help you with this.
Be sure to spread out your load equal-
ly on both sides of the centerline.
The label will help you decide how
much cargo and installed equipment
your vehicle can carry.
If you carry items inside your vehicle
- like suitcases, tools, packages, or
anything else - they are moving as
fast as the vehicle. If you have to stop
or turn quickly, or if there is a crash,
the items will keep going and can
cause an injury if they strike the driv-
er or a passenger.
✽NOTICE
Overloading your vehicle may cause
damage. Repairs would not be cov-
ered by your warranty. Do not over-
load your vehicle.OJFA055280
WARNING -Over loading
Never exceed the GVWR for
your vehicle, the GAWR for
either the front or rear axle and
vehicle capacity weight.
Exceeding these ratings can
affect your vehicle’s handling
and braking ability.
WARNING - Over loading
Do not overload your vehicle.
Overloading your vehicle can
cause heat buildup in your vehi-
cle's tires and possible tire fail-
ure, increased stopping dis-
tances and poor vehicle han-
dling--all of which may result in
a crash.
Page 461 of 631
What to do in an emergency
Road warning . . . . . . . . . . . . . . . . . . . . . . . . . . . . . . 6-2
• Hazard warning flasher . . . . . . . . . . . . . . . . . . . . . . . . 6-2
In case of an emergency while driving . . . . . . . . . . 6-3
• If the engine stalls at a crossroad or crossing. . . . . . . 6-3
• If you have a flat tire while driving . . . . . . . . . . . . . . . 6-3
• If the engine stalls while driving . . . . . . . . . . . . . . . . . 6-3
If the engine will not start . . . . . . . . . . . . . . . . . . . . 6-4
• If engine doesn't turn over or turns over slowly . . . . 6-4
• If engine turns over normally but does not start . . . . 6-4
Emergency starting . . . . . . . . . . . . . . . . . . . . . . . . . 6-5
• Jump starting . . . . . . . . . . . . . . . . . . . . . . . . . . . . . . . . . 6-5
• Push-starting . . . . . . . . . . . . . . . . . . . . . . . . . . . . . . . . . 6-6
If the engine overheats . . . . . . . . . . . . . . . . . . . . . . . 6-7
Tire Pressure Monitoring System (TPMS) . . . . . . 6-8
• Check tire pressure . . . . . . . . . . . . . . . . . . . . . . . . . . . . 6-8
• Low tire pressure telltale . . . . . . . . . . . . . . . . . . . . . . 6-10
• Low tire pressure position telltale . . . . . . . . . . . . . . . 6-10
• Changing a tire with TPMS . . . . . . . . . . . . . . . . . . . . 6-12
If you have a flat tire (with spare tire) . . . . . . . . . 6-15
• Jack and tools . . . . . . . . . . . . . . . . . . . . . . . . . . . . . . . 6-15
• Removing and storing the spare tire . . . . . . . . . . . . . 6-16
• Changing tires . . . . . . . . . . . . . . . . . . . . . . . . . . . . . . . 6-17
If you have a flat tire (with Tire Mobility Kit) . . 6-24
• Introduction . . . . . . . . . . . . . . . . . . . . . . . . . . . . . . . . . 6-25
• Notes on the safe use of the Tire Mobility Kit . . . . . 6-25
• Components of the Tire Mobility Kit (TMK). . . . . . 6-27
• Using the Tire Mobility Kit . . . . . . . . . . . . . . . . . . . . 6-28
• Distributing the sealant. . . . . . . . . . . . . . . . . . . . . . . . 6-31
• Checking the tire inflation pressure . . . . . . . . . . . . . 6-31
• Technical data . . . . . . . . . . . . . . . . . . . . . . . . . . . . . . . 6-32
Towing . . . . . . . . . . . . . . . . . . . . . . . . . . . . . . . . . . . 6-\
33
• Towing service . . . . . . . . . . . . . . . . . . . . . . . . . . . . . . . 6-33
• Removable towing hook . . . . . . . . . . . . . . . . . . . . . . . 6-34
• Emergency towing . . . . . . . . . . . . . . . . . . . . . . . . . . . . 6-35
6
Page 468 of 631
What to do in an emergency
86
TIRE PRESSURE MONITORING SYSTEM (TPMS)
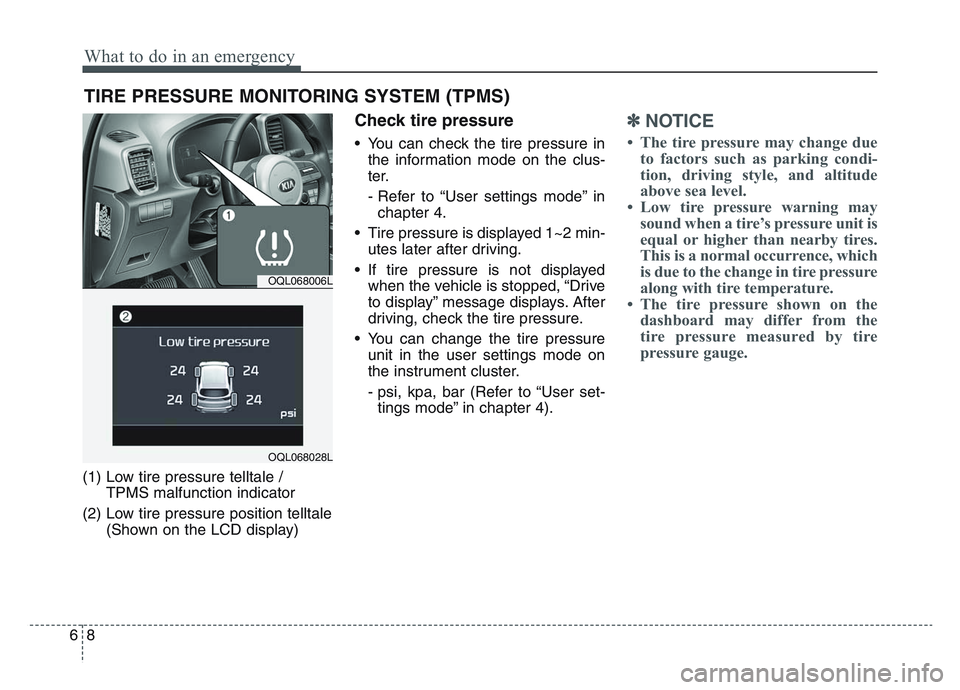
(1) Low tire pressure telltale / TPMS malfunction indicator
(2) Low tire pressure position telltale (Shown on the LCD display)
Check tire pressure
• You can check the tire pressure inthe information mode on the clus-
ter.
- Refer to “User settings mode” inchapter 4.
• Tire pressure is displayed 1~2 min- utes later after driving.
• If tire pressure is not displayed when the vehicle is stopped, “Drive
to display” message displays. After
driving, check the tire pressure.
• You can change the tire pressure unit in the user settings mode on
the instrument cluster.
- psi, kpa, bar (Refer to “User set-tings mode” in chapter 4).
✽NOTICE
• The tire pressure may change due to factors such as parking condi-
tion, driving style, and altitude
above sea level.
• Low tire pressure warning may sound when a tire’s pressure unit is
equal or higher than nearby tires.
This is a normal occurrence, which
is due to the change in tire pressure
along with tire temperature.
• The tire pressure shown on the dashboard may differ from the
tire pressure measured by tire
pressure gauge.
OQL068006L
OQL068028L
Page 469 of 631
69
What to do in an emergency
Each tire, including the spare (if pro-
vided), should be checked monthly
when cold and inflated to the inflation
pressure recommended by the vehi-
cle manufacturer on the vehicle plac-
ard or tire inflation pressure label. (If
your vehicle has tires of a different
size than the size indicated on the
vehicle placard or tire inflation pres-
sure label, you should determine the
proper tire inflation pressure for
those tires.)
As an added safety feature, your
vehicle has been equipped with a tire
pressure monitoring system (TPMS)
that illuminates a low tire pressure
telltale when one or more of your
tires is significantly under-inflated.
Accordingly, when the low tire pres-
sure telltale illuminates, you should
stop and check your tires as soon as
possible, and inflate them to the
proper pressure. Driving on a signifi-
cantly under-inflated tire causes the
tire to overheat and can lead to tire
failure. Under inflation also reduces
fuel efficiency and tire tread life, and
may affect the vehicle’s handling and
stopping ability.Please note that the TPMS is not a
substitute for proper tire maintenance,
and it is the driver’s responsibility to
maintain correct tire pressure, even if
under-inflation has not reached the
level to trigger illumination of the
TPMS low tire pressure telltale.
Your vehicle has also been equipped
with a TPMS malfunction indicator to
indicate when the system is not
operating properly. The TPMS mal-
function indicator is combined with
the low tire pressure telltale. When
the system detects a malfunction,
the telltale will flash for approximate-
ly one minute and then remain con-
tinuously illuminated. This sequence
will continue upon subsequent vehi-
cle start-ups as long as the malfunc-
tion exists. When the malfunction
indicator is illuminated, the system
may not be able to detect or signal
low tire pressure as intended. TPMS
malfunctions may occur for a variety
of reasons, including the installation
of replacement or alternate tires or
wheels on the vehicle that prevent
the TPMS from functioning properly.
Always check the TPMS malfunction
telltale after replacing one or more
tires or wheels on your vehicle to
ensure that the replacement or alter-
nate tires and wheels allow the
TPMS to continue to function proper-
l y.
Page 470 of 631
What to do in an emergency
106
✽NOTICE
If the TPMS, Low Tire Pressure
indicator does not illuminate for 3
seconds when the ignition switch or
the Engine start/stop button is
turned to the ON position, or if they
remain illuminated after coming on
for approximately 3 seconds, take
your vehicle to your nearest author-
ized Kia dealer and have the system
checked.
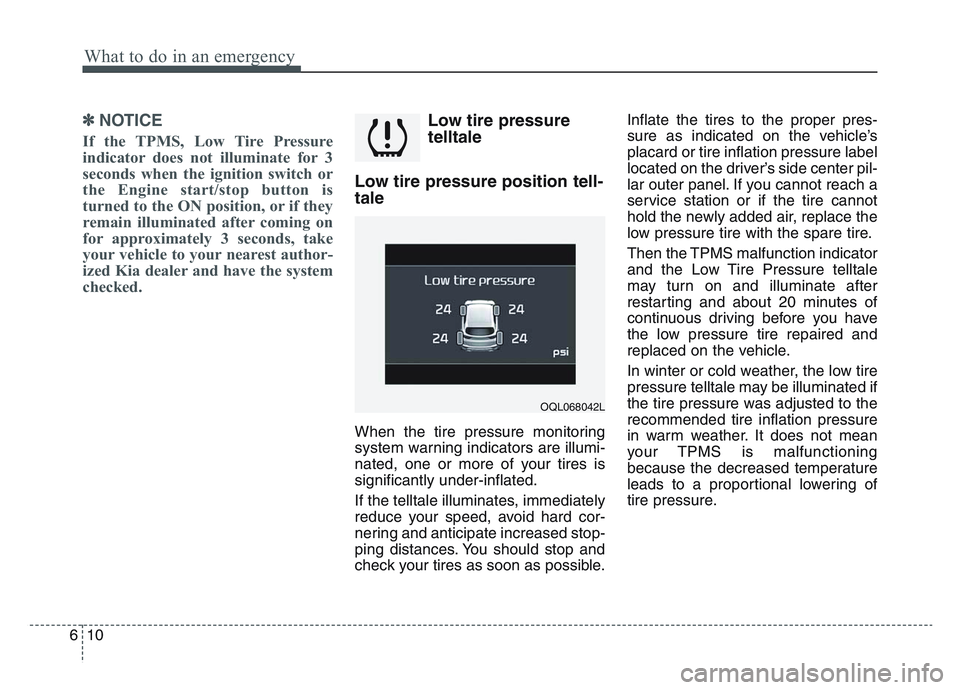
Low tire pressure
telltale
Low tire pressure position tell-
tale
When the tire pressure monitoring
system warning indicators are illumi-
nated, one or more of your tires is
significantly under-inflated.
If the telltale illuminates, immediately
reduce your speed, avoid hard cor-
nering and anticipate increased stop-
ping distances. You should stop and
check your tires as soon as possible. Inflate the tires to the proper pres-
sure as indicated on the vehicle’s
placard or tire inflation pressure label
located on the driver’s side center pil-
lar outer panel. If you cannot reach a
service station or if the tire cannot
hold the newly added air, replace the
low pressure tire with the spare tire.
Then the TPMS malfunction indicator
and the Low Tire Pressure telltale
may turn on and illuminate after
restarting and about 20 minutes of
continuous driving before you have
the low pressure tire repaired and
replaced on the vehicle.
In winter or cold weather, the low tire
pressure telltale may be illuminated if
the tire pressure was adjusted to the
recommended tire inflation pressure
in warm weather. It does not mean
your TPMS is malfunctioning
because the decreased temperature
leads to a proportional lowering of
tire pressure.
OQL068042L