2021 KIA SPORTAGE light
[x] Cancel search: lightPage 473 of 631
6 13
What to do in an emergency
You may not be able to identify a low
tire by simply looking at it. Always
use a good quality tire pressure
gauge to measure the tire's inflation
pressure. Please note that a tire that
is hot (from being driven) will have a
higher pressure measurement than a
tire that is cold (from sitting station-
ary for at least 3 hours and driven
less than 1 mile (1.6 km) during that
3 hour period).
Allow the tire to cool before measur-
ing the inflation pressure. Always be
sure the tire is cold before inflating to
the recommended pressure.
A cold tire means the vehicle has
been sitting for 3 hours and driven for
less than 1 mile (1.6 km) in that 3
hour period.
Never use tire sealant if your vehicle
is equipped with a Tire Pressure
Monitoring System. The liquid
sealant can damage the tire pres-
sure sensors.• The TPMS cannot alert you to
severe and sudden tire damage
caused by external factors such as
nails or road debris.
• If you feel any vehicle instability, immediately take your foot off the
accelerator, apply the brakes grad-
ually and with light force, and slow-
ly move to a safe position off the
road.✽NOTICE - Protecting TPMS
Tampering with, modifying, or dis-
abling the Tire Pressure Monitoring
System (TPMS) components may
interfere with the system's ability to
warn the driver of low tire pressure
conditions and/or TPMS malfunc-
tions. Tampering with, modifying,
or disabling the Tire Pressure
Monitoring System (TPMS) compo-
nents may void the warranty for
that portion of the vehicle.
Page 479 of 631
6 19
What to do in an emergency
9. Loosen the wheel nuts andremove them with your fingers.
Slide the wheel off the studs and
lay it flat so it cannot roll away. To
put the wheel on the hub, pick up
the spare tire, line up the holes
with the studs and slide the wheel
onto them. If this is difficult, tip the
wheel slightly and get the top hole
in the wheel lined up with the top
stud. Jiggle the wheel back and
forth until the wheel can slide over
the other studs. Wheels may have sharp edges.
Handle them carefully to avoid possi-
ble severe injury. Before putting the
wheel into place, be sure that there
is nothing on the hub or wheel (such
as mud, tar, gravel, etc.) that pre-
vents the wheel from fitting solidly
against the hub.
10. To install the wheel, hold it on the
studs, put the wheel nuts on the
studs and tighten them finger
tight. Jiggle the tire to be sure it is
completely seated, then tighten
the nuts as much as possible
with your fingers again.
11. Insert the wrench into the jack and lower the vehicle to the
ground by turning the wheel nut
wrench counterclockwise.
WARNING- Installing a
wheel
Make sure the wheel makes
good contact with the hub when
installed. If the contact of the
mounting surface between the
wheel and hub is not good, the
wheel nuts could come loose
and cause the loss of a wheel.
Loss of a wheel may result in
loss of control of the vehicle.
Page 485 of 631
6 25
What to do in an emergency
Introduction
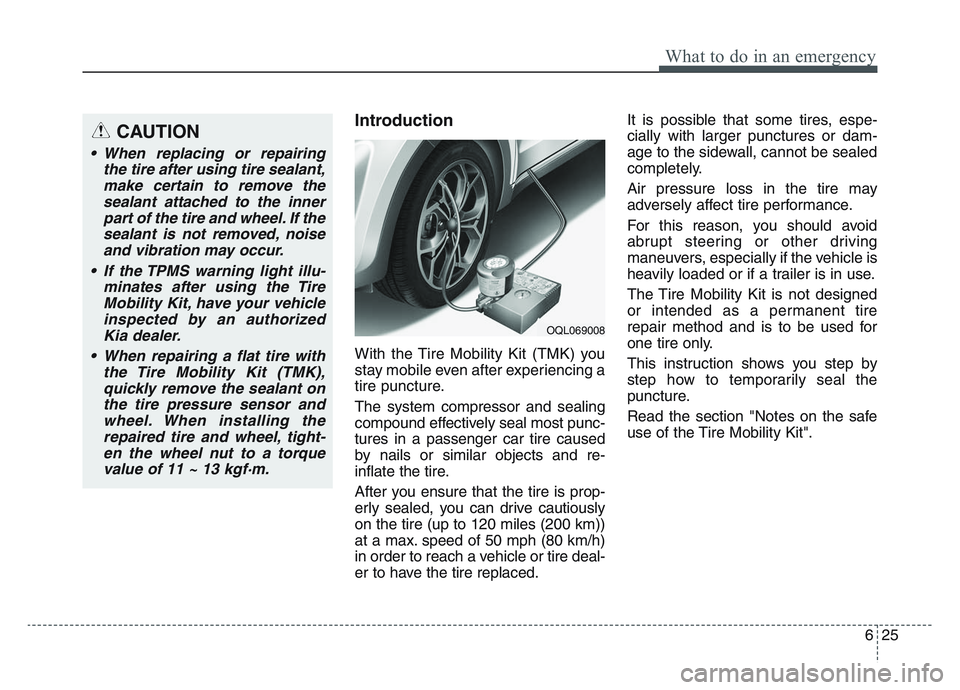
With the Tire Mobility Kit (TMK) you
stay mobile even after experiencing a
tire puncture.
The system compressor and sealing
compound effectively seal most punc-
tures in a passenger car tire caused
by nails or similar objects and re-
inflate the tire.
After you ensure that the tire is prop-
erly sealed, you can drive cautiously
on the tire (up to 120 miles (200 km))
at a max. speed of 50 mph (80 km/h)
in order to reach a vehicle or tire deal-
er to have the tire replaced.It is possible that some tires, espe-
cially with larger punctures or dam-
age to the sidewall, cannot be sealed
completely.
Air pressure loss in the tire may
adversely affect tire performance.
For this reason, you should avoid
abrupt steering or other driving
maneuvers, especially if the vehicle is
heavily loaded or if a trailer is in use.
The Tire Mobility Kit is not designed
or intended as a permanent tire
repair method and is to be used for
one tire only.
This instruction shows you step by
step how to temporarily seal the
puncture.
Read the section "Notes on the safe
use of the Tire Mobility Kit".
OQL069008
CAUTION
• When replacing or repairing
the tire after using tire sealant,make certain to remove thesealant attached to the innerpart of the tire and wheel. If thesealant is not removed, noiseand vibration may occur.
• If the TPMS warning light illu- minates after using the TireMobility Kit, have your vehicleinspected by an authorizedKia dealer.
• When repairing a flat tire with the Tire Mobility Kit (TMK),quickly remove the sealant onthe tire pressure sensor andwheel. When installing therepaired tire and wheel, tight-en the wheel nut to a torquevalue of 11 ~ 13 kgf·m.
Page 499 of 631
• Radial-ply tires . . . . . . . . . . . . . . . . . . . . . . . . . . . . . . 7-59
• Low aspect ratio tire . . . . . . . . . . . . . . . . . . . . . . . . . . 7-59
Fuses . . . . . . . . . . . . . . . . . . . . . . . . . . . . . . . . . . . . \
7-61
• Inner panel fuse replacement . . . . . . . . . . . . . . . . . . . 7-63
• Engine compartment fuse replacement. . . . . . . . . . . 7-65
• Fuse/relay panel description. . . . . . . . . . . . . . . . . . . . 7-67
Light bulbs . . . . . . . . . . . . . . . . . . . . . . . . . . . . . . . 7-79
• Bulb replacement precaution . . . . . . . . . . . . . . . . . . . 7-79
• Light bulb position (Front) . . . . . . . . . . . . . . . . . . . . 7-81
• Light bulb position (Rear) . . . . . . . . . . . . . . . . . . . . . 7-82
• Light bulb position (Side) . . . . . . . . . . . . . . . . . . . . . . 7-83
• Headlamp (High/Low beam) bulb replacement . . . . 7-83
• Front turn signal lamp bulb replacement . . . . . . . . . 7-84
• Position lamp + DRL bulb replacement . . . . . . . . . . 7-85
• Front fog lamp (Bulb and LED type) bulbreplacement . . . . . . . . . . . . . . . . . . . . . . . . . . . . . . . . 7-86
• Stop and tail lamp bulb replacement . . . . . . . . . . . . 7-86
• Tail lamp (inside) bulb replacement . . . . . . . . . . . . . 7-87
• Stop and tail lamp (LED type) bulb replacement . . 7-88
• Back-up lamp and Rear turn signal lamp (Bulb type) bulb replacement . . . . . . . . . . . . . . . . . 7-89
• High mounted stop lamp (LED type) bulb replacement . . . . . . . . . . . . . . . . . . . . . . . . . . . . . . . . 7-89
• License plate lamp (Bulb type) bulb replacement . . 7-89
• Side repeater lamp (LED type) bulb replacement . . 7-90 • Map lamp (Bulb and LED type)
bulb replacement. . 7-90
• Vanity mirror lamp (Bulb type) bulb replacement . . 7-91
• Room lamp (Bulb type) bulb replacement . . . . . . . 7-91
• Personal lamp (LED type) bulb replacement . . . . . . 7-92
• Glove box lamp (Bulb type) bulb replacement . . . . 7-92
• Liftgate room lamp (Bulb type) bulb replacement . . 7-93
Appearance care . . . . . . . . . . . . . . . . . . . . . . . . . . . 7-94
• Exterior care . . . . . . . . . . . . . . . . . . . . . . . . . . . . . . . . 7-94
• Interior care . . . . . . . . . . . . . . . . . . . . . . . . . . . . . . . . . 7-99
Emission control system . . . . . . . . . . . . . . . . . . . 7-102
• Crankcase emission control system . . . . . . . . . . . . . 7-102
• Evaporative emission control (including ORVR: Onboard Refueling Vapor Recovery) system . . . . . 7-102
• Exhaust emission control system . . . . . . . . . . . . . . . 7-103
7
Page 504 of 631
77
Maintenance
OWNER MAINTENANCE
The following lists are vehicle checks
and inspections that should be per-
formed by the owner or an author-
ized Kia dealer at the frequencies
indicated to help ensure safe,
dependable operation of your vehi-
cle.
Any adverse conditions should be
brought to the attention of your deal-
er as soon as possible.
These Owner Maintenance Checks
are generally not covered by war-
ranties and you may be charged for
labor, parts and lubricants used.Owner maintenance schedule
When you stop for fuel:
• Check the engine oil level.
• Check the coolant level in thecoolant reservoir.
• Check the windshield washer fluid level.
• Look for low or under-inflated tires.
While operating your vehicle:
• Note any changes in the sound of the exhaust or any smell of
exhaust fumes in the vehicle.
• Check for vibrations in the steering wheel. Notice any increased steer-
ing effort or looseness in the steer-
ing wheel, or change in its straight-
ahead position.
• Notice if your vehicle constantly turns slightly or “pulls” to one side
when traveling on smooth, level
roads.
• When stopping, listen and check for unusual sounds, pulling to one
side, increased brake pedal travel
or “hard-to-push” brake pedal.
• If any slipping or changes in the operation of your transmission
occurs, check the transmission
fluid level.
• Check the automatic transmission P (Park) function.
• Check the parking brake.
• Check for fluid leaks under your vehicle (water dripping from the air
conditioning system during or after
use is normal).
WARNING- Hot coolant
Be careful when checking your
engine coolant level when the
engine is hot. Scalding hot
coolant and steam may blow
out under pressure.
Page 505 of 631
Maintenance
87
At least monthly:
• Check the coolant level in theengine coolant reservoir.
• Check the operation of all exterior lights, including the stoplights, turn
signals and hazard warning flash-
ers.
• Check the inflation pressures of all tires including the spare for tires
that are worn, show uneven wear,
or are damaged.
• Check for loose wheel lug nuts.
At least twice a year (i.e., every Spring and Fall) :
• Check the radiator, heater and air conditioning hoses for leaks or
damage.
• Check the windshield washer spray and wiper operation. Clean
the wiper blades with clean cloth
dampened with washer fluid.
• Check the headlight alignment.
• Check the muffler, exhaust pipes, shields and clamps.
• Check the lap/shoulder belts for wear and function.
At least once a year :
• Clean the body and door drainholes.
• Lubricate the door hinges and check the hood hinges.
• Lubricate the door and hood locks and latches.
• Lubricate the door rubber weather- strips.
• Check the air conditioning system.
• Inspect and lubricate automatic transmission linkage and controls.
• Clean the battery and terminals.
• Check the brake fluid level.
Page 539 of 631
Maintenance
427
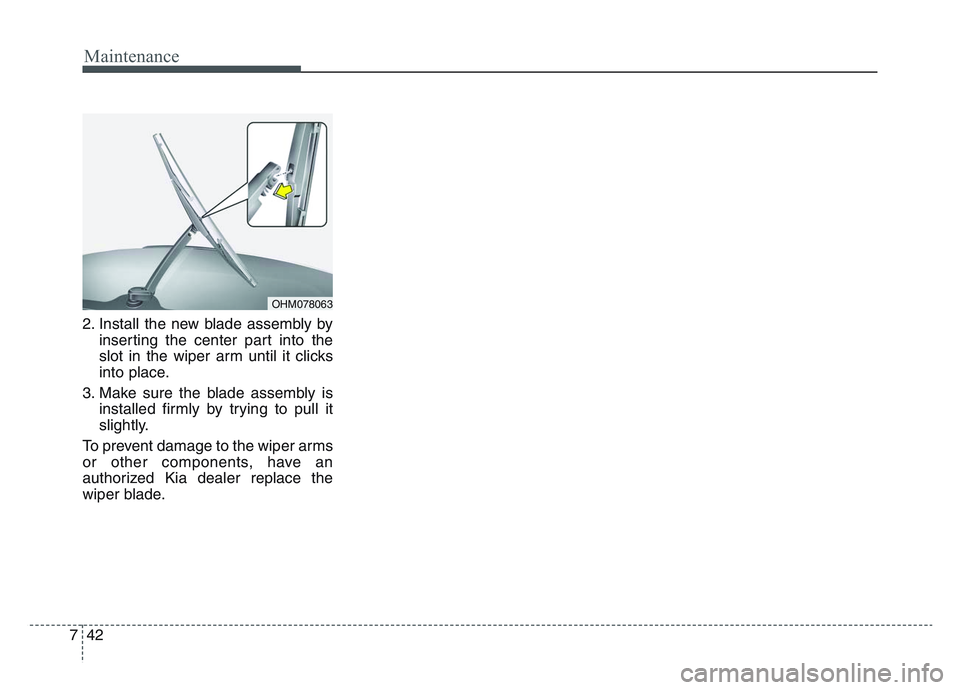
2. Install the new blade assembly byinserting the center part into the
slot in the wiper arm until it clicks
into place.
3. Make sure the blade assembly is installed firmly by trying to pull it
slightly.
To prevent damage to the wiper arms
or other components, have an
authorized Kia dealer replace the
wiper blade.
OHM078063
Page 548 of 631
7 51
Maintenance
Wheel replacement
When replacing the metal wheels for
any reason, make sure the new
wheels are equivalent to the original
factory units in diameter, rim width
and offset.
A wheel that is not the correct size
may adversely affect wheel and
bearing life, braking and stopping
abilities, handling characteristics,
ground clearance, body-to-tire clear-
ance, snow chain clearance,
speedometer and odometer calibra-
tion, headlight aim and bumper
height.
Tire traction
Tire traction can be reduced if you
drive on worn tires, tires that are
improperly inflated or on slippery
road surfaces. Tires should be
replaced when tread wear indicators
appear. Slow down whenever there
is rain, snow or ice on the road, to
reduce the possibility of losing con-
trol of the vehicle.
Tire maintenance
In addition to proper inflation, correct
wheel alignment helps to decrease
tire wear. If you find a tire is worn
unevenly, have your dealer check the
wheel alignment.
When you have new tires installed,
make sure they are balanced. This
will increase vehicle ride comfort and
tire life. Additionally, a tire should
always be rebalanced if it is removed
from the wheel.
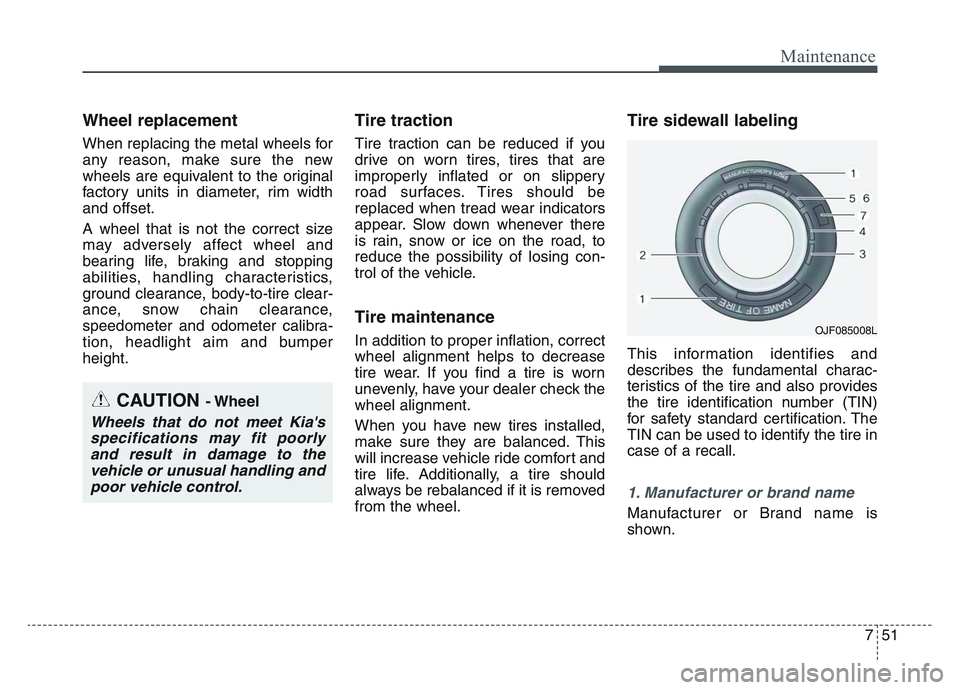
Tire sidewall labeling
This information identifies and
describes the fundamental charac-
teristics of the tire and also provides
the tire identification number (TIN)
for safety standard certification. The
TIN can be used to identify the tire in
case of a recall.
1. Manufacturer or brand name
Manufacturer or Brand name is
shown.
CAUTION - Wheel
Wheels that do not meet Kia'sspecifications may fit poorlyand result in damage to thevehicle or unusual handling andpoor vehicle control.
OJF085008L