2021 HYUNDAI TUCSON HYBRID buttons
[x] Cancel search: buttonsPage 208 of 630
05
5-51
ODN8H050341N
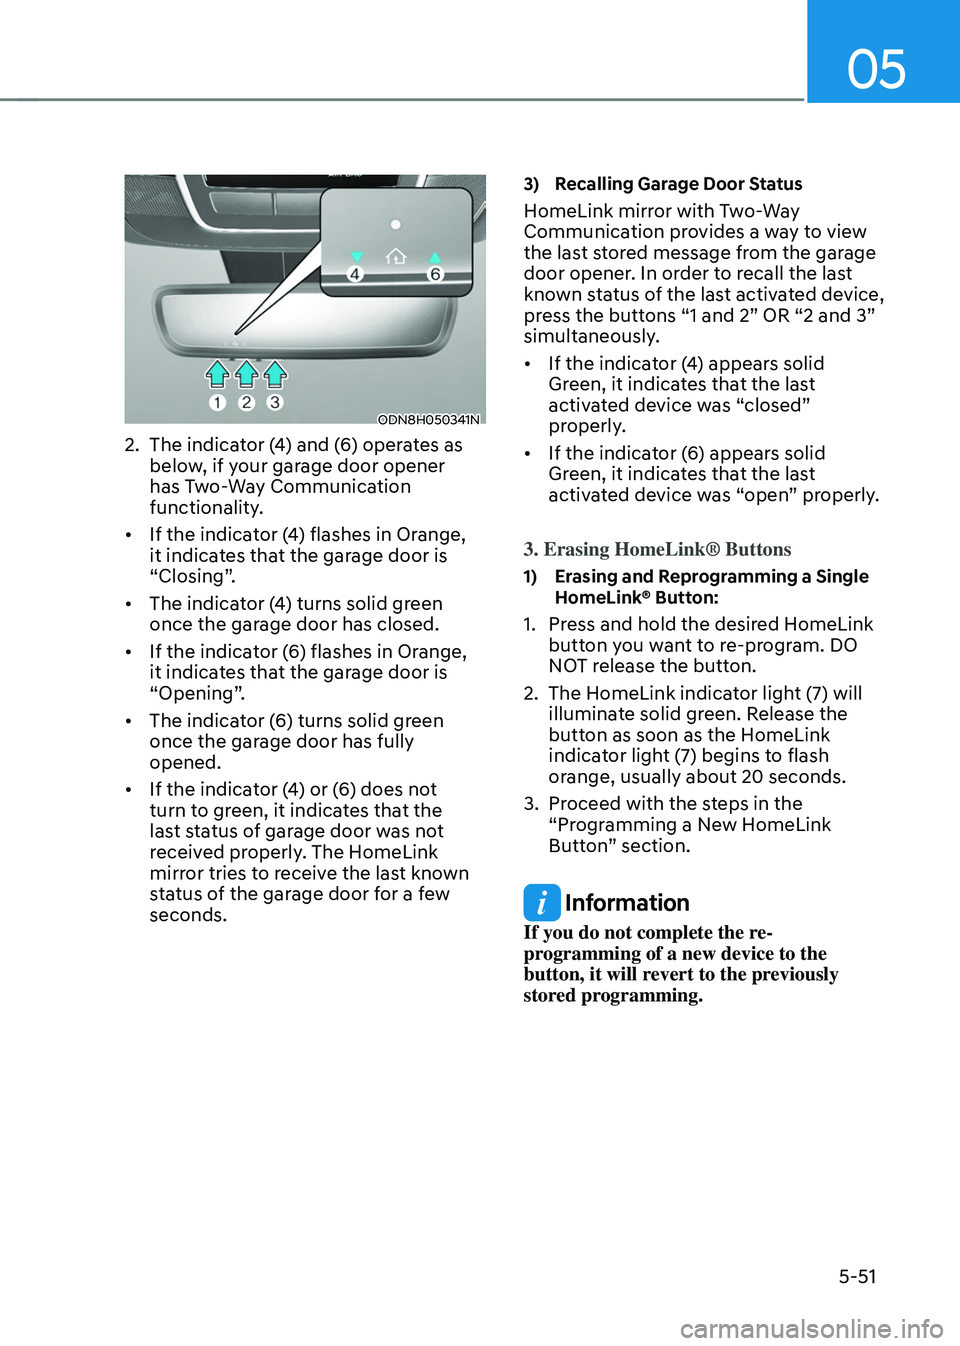
2. The indicator (4) and (6) operates as
below, if your garage door opener
has Two-Way Communication
functionality.
• If the indicator (4) flashes in Orange,
it indicates that the garage door is
“Closing”.
• The indicator (4) turns solid green
once the garage door has closed.
• If the indicator (6) flashes in Orange,
it indicates that the garage door is
“Opening”.
• The indicator (6) turns solid green
once the garage door has fully
opened.
• If the indicator (4) or (6) does not
turn to green, it indicates that the
last status of garage door was not
received properly. The HomeLink
mirror tries to receive the last known
status of the garage door for a few
seconds.
3) Recalling Garage Door Status
HomeLink mirror with Two-Way
Communication provides a way to view
the last stored message from the garage
door opener. In order to recall the last
known status of the last activated device,
press the buttons “1 and 2” OR “2 and 3”
simultaneously.
• If the indicator (4) appears solid
Green, it indicates that the last
activated device was “closed”
properly.
• If the indicator (6) appears solid
Green, it indicates that the last
activated device was “open” properly.
3. Erasing HomeLink® Buttons
1) Erasing and Reprogramming a Single
H omeLink® Button:
1. Press and hold the desired HomeLink
butt on you want to re-program. DO
NOT release the button.
2.
The HomeLink indica
tor light (7) will
illuminate solid green. Release the
button as soon as the HomeLink
indicator light (7) begins to flash
orange, usually about 20 seconds.
3.
Proceed with the s
teps in the
“Programming a New HomeLink
Button” section.
Information
If you do not complete the re-
programming of a new device to the
button, it will revert to the previously
stored programming.
Page 209 of 630
Convenient features
5-52
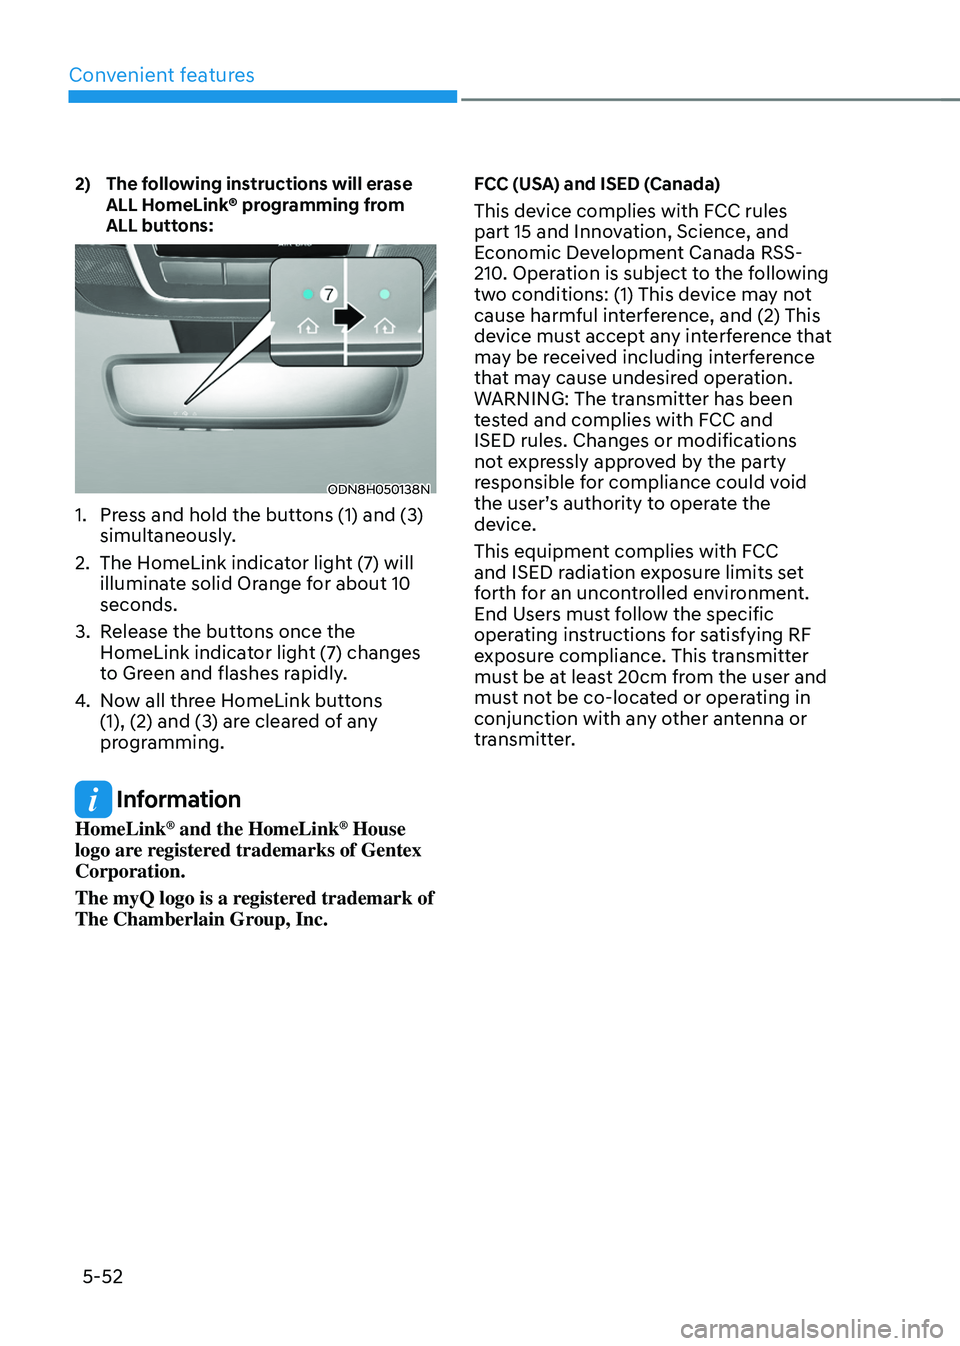
2) The following instructions will erase
ALL HomeLink® programming from
ALL buttons:
ODN8H050138N
1. Press and hold the buttons (1) and (3)
simultaneously .
2.
The HomeLink indica
tor light (7) will
illuminate solid Orange for about 10
seconds.
3.
Release the butt
ons once the
HomeLink indicator light (7) changes
to Green and flashes rapidly.
4.
No
w all three HomeLink buttons
(1), (2) and (3) are cleared of any
programming.
Information
HomeLink® and the HomeLink® House
logo are registered trademarks of Gentex
Corporation.
The myQ logo is a registered trademark of
The Chamberlain Group, Inc.
FCC (USA) and ISED (Canada)
This device complies with FCC rules
part 15 and Innovation, Science, and
Economic Development Canada RSS-
210. Operation is subject to the following
two conditions: (1) This device may not
cause harmful interference, and (2) This
device must accept any interference that
may be received including interference
that may cause undesired operation.
WARNING: The transmitter has been
tested and complies with FCC and
ISED rules. Changes or modifications
not expressly approved by the party
responsible for compliance could void
the user’s authority to operate the
device.
This equipment complies with FCC
and ISED radiation exposure limits set
forth for an uncontrolled environment.
End Users must follow the specific
operating instructions for satisfying RF
exposure compliance. This transmitter
must be at least 20cm from the user and
must not be co-located or operating in
conjunction with any other antenna or
transmitter.
Page 230 of 630
05
5-73
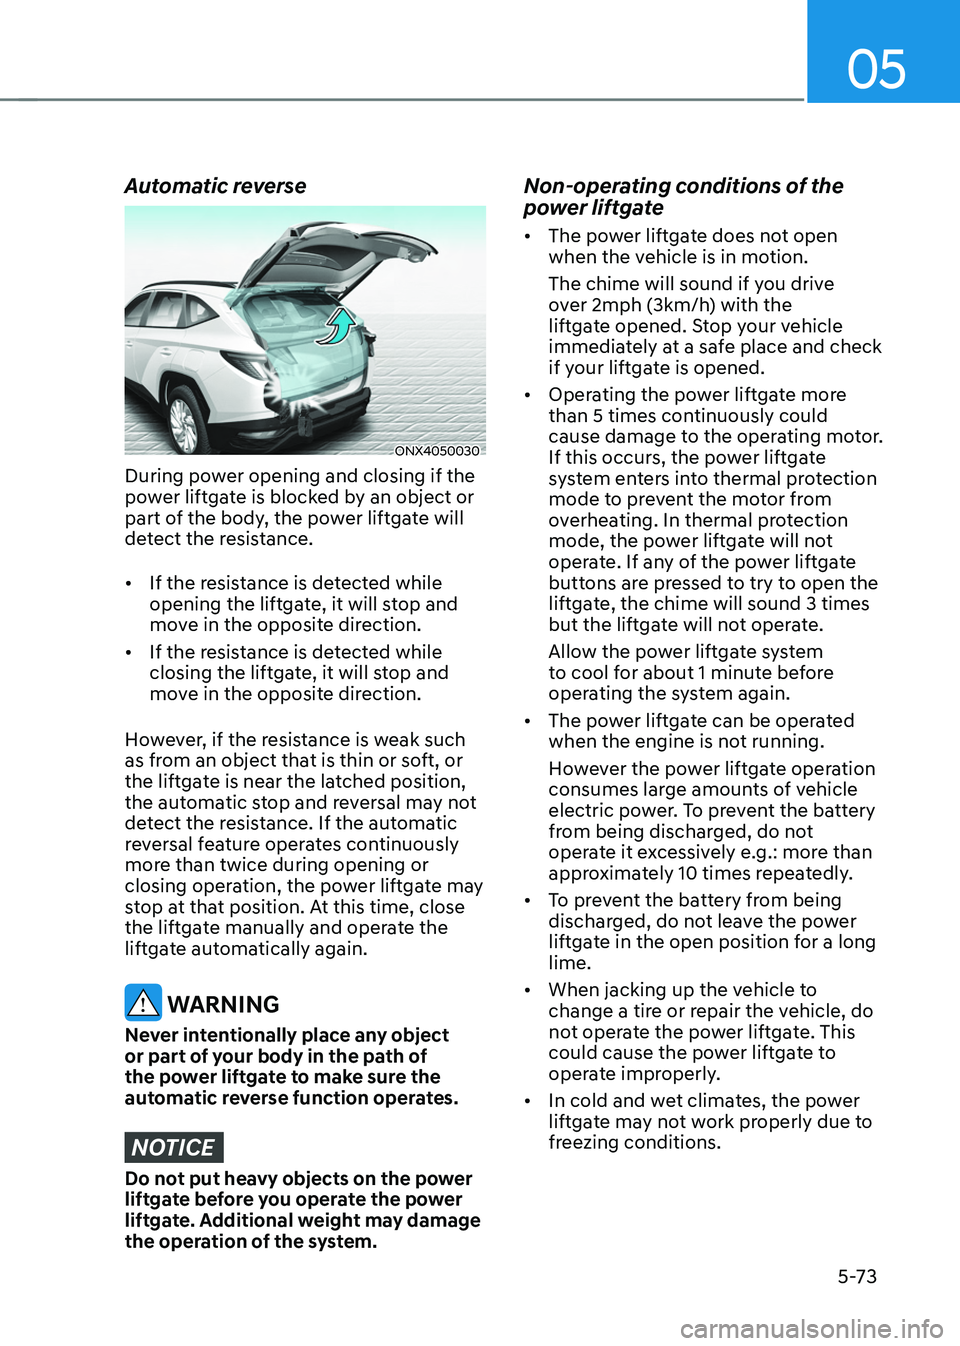
Automatic reverse
ONX4050030
During power opening and closing if the
power liftgate is blocked by an object or
part of the body, the power liftgate will
detect the resistance.
• If the resistance is detected while
opening the liftgate, it will stop and
move in the opposite direction.
• If the resistance is detected while
closing the liftgate, it will stop and
move in the opposite direction.
However, if the resistance is weak such
as from an object that is thin or soft, or
the liftgate is near the latched position,
the automatic stop and reversal may not
detect the resistance. If the automatic
reversal feature operates continuously
more than twice during opening or
closing operation, the power liftgate may
stop at that position. At this time, close
the liftgate manually and operate the
liftgate automatically again.
WARNING
Never intentionally place any object
or part of your body in the path of
the power liftgate to make sure the
automatic reverse function operates.
NOTICE
Do not put heavy objects on the power
liftgate before you operate the power
liftgate. Additional weight may damage
the operation of the system.
Non-operating conditions of the
power liftgate
• The power liftgate does not open
when the vehicle is in motion.
The chime will sound if you drive
over 2mph (3km/h) with the
liftgate opened. Stop your vehicle
immediately at a safe place and check
if your liftgate is opened.
• Operating the power liftgate more
than 5 times continuously could
cause damage to the operating motor.
If this occurs, the power liftgate
system enters into thermal protection
mode to prevent the motor from
overheating. In thermal protection
mode, the power liftgate will not
operate. If any of the power liftgate
buttons are pressed to try to open the
liftgate, the chime will sound 3 times
but the liftgate will not operate.
Allow the power liftgate system
to cool for about 1 minute before
operating the system again.
• The power liftgate can be operated
when the engine is not running.
However the power liftgate operation
consumes large amounts of vehicle
electric power. To prevent the battery
from being discharged, do not
operate it excessively e.g.: more than
approximately 10 times repeatedly.
• To prevent the battery from being
discharged, do not leave the power
liftgate in the open position for a long
lime.
• When jacking up the vehicle to
change a tire or repair the vehicle, do
not operate the power liftgate. This
could cause the power liftgate to
operate improperly.
• In cold and wet climates, the power
liftgate may not work properly due to
freezing conditions.
Page 255 of 630
Convenient features
5-98
ONX4050072
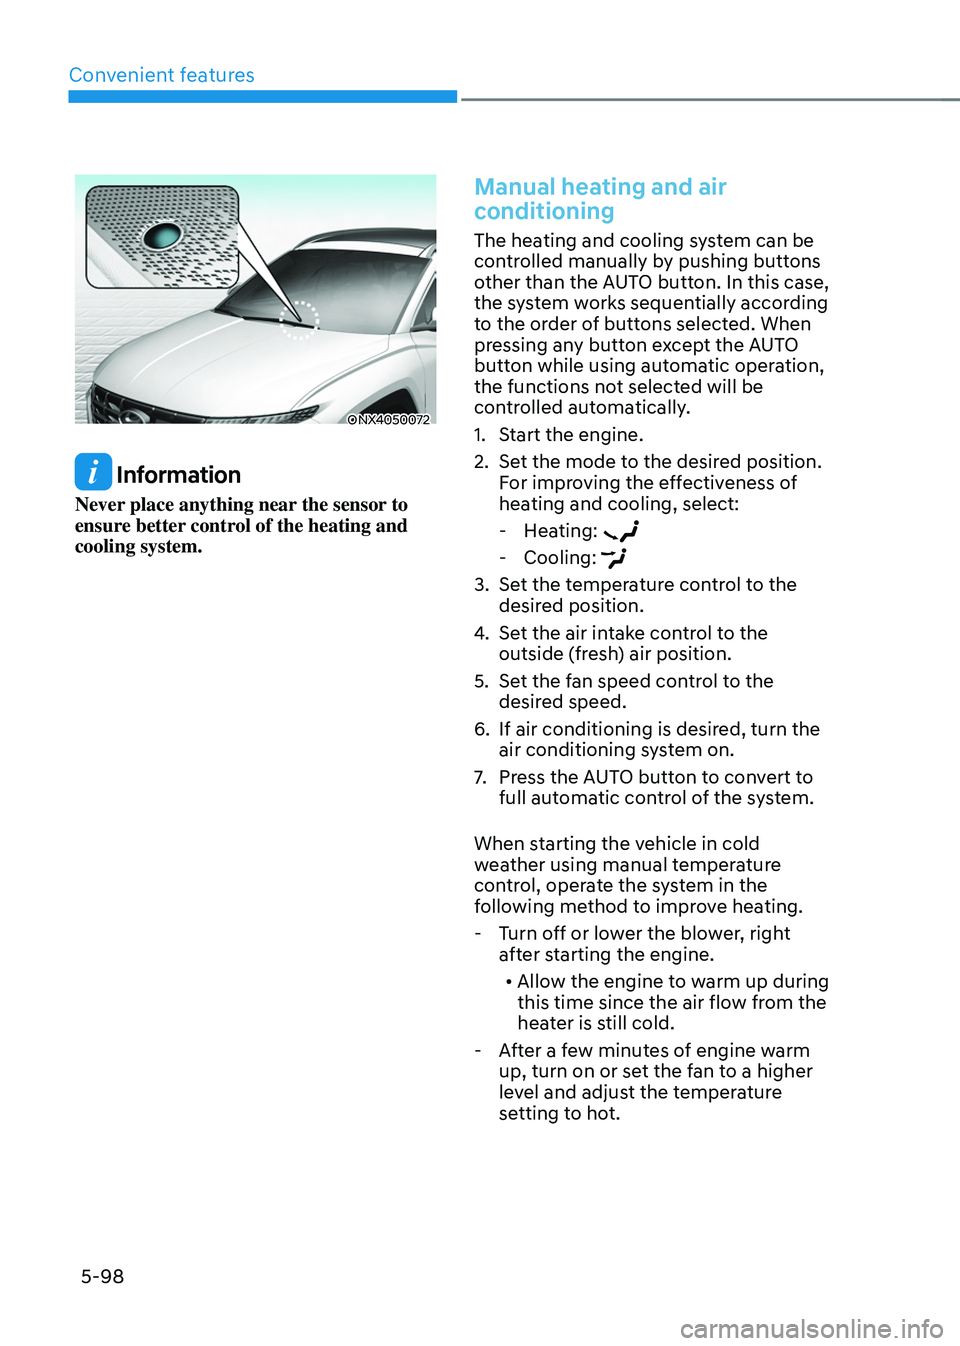
Information
Never place anything near the sensor to
ensure better control of the heating and
cooling system.
Manual heating and air
conditioning
The heating and cooling system can be
controlled manually by pushing buttons
other than the AUTO button. In this case,
the system works sequentially according
to the order of buttons selected. When
pressing any button except the AUTO
button while using automatic operation,
the functions not selected will be
controlled automatically.
1.
Start the engine.
2.
Set the mode t
o the desired position.
For improving the effectiveness of
heating and cooling, select:
- Hea
ting:
- Cooling:
3. Set the temperature control to the
desired position.
4.
Set the air in
take control to the
outside (fresh) air position.
5.
Set the f
an speed control to the
desired speed.
6.
If air conditioning is desired, turn the
air conditioning s
ystem on.
7.
Press the A
UTO button to convert to
full automatic control of the system.
When starting the vehicle in cold
weather using manual temperature
control, operate the system in the
following method to improve heating.
- Turn o
ff or lower the blower, right
after starting the engine.
• Allow the engine to warm up during
this time since the air flow from the
heater is still cold.
- Aft
er a few minutes of engine warm
up, turn on or set the fan to a higher
level and adjust the temperature
setting to hot.
Page 261 of 630
Convenient features
5-104
Air conditioning
Push the A/C button to turn the air
conditioning system on (indicator light
will illuminate).
Push the button again to turn the air
conditioning system off.
OFF mode
Push the OFF button to turn the climate
control system off. However, you can still
operate the mode and air intake buttons
as long as the ignition switch is in the ON
position.
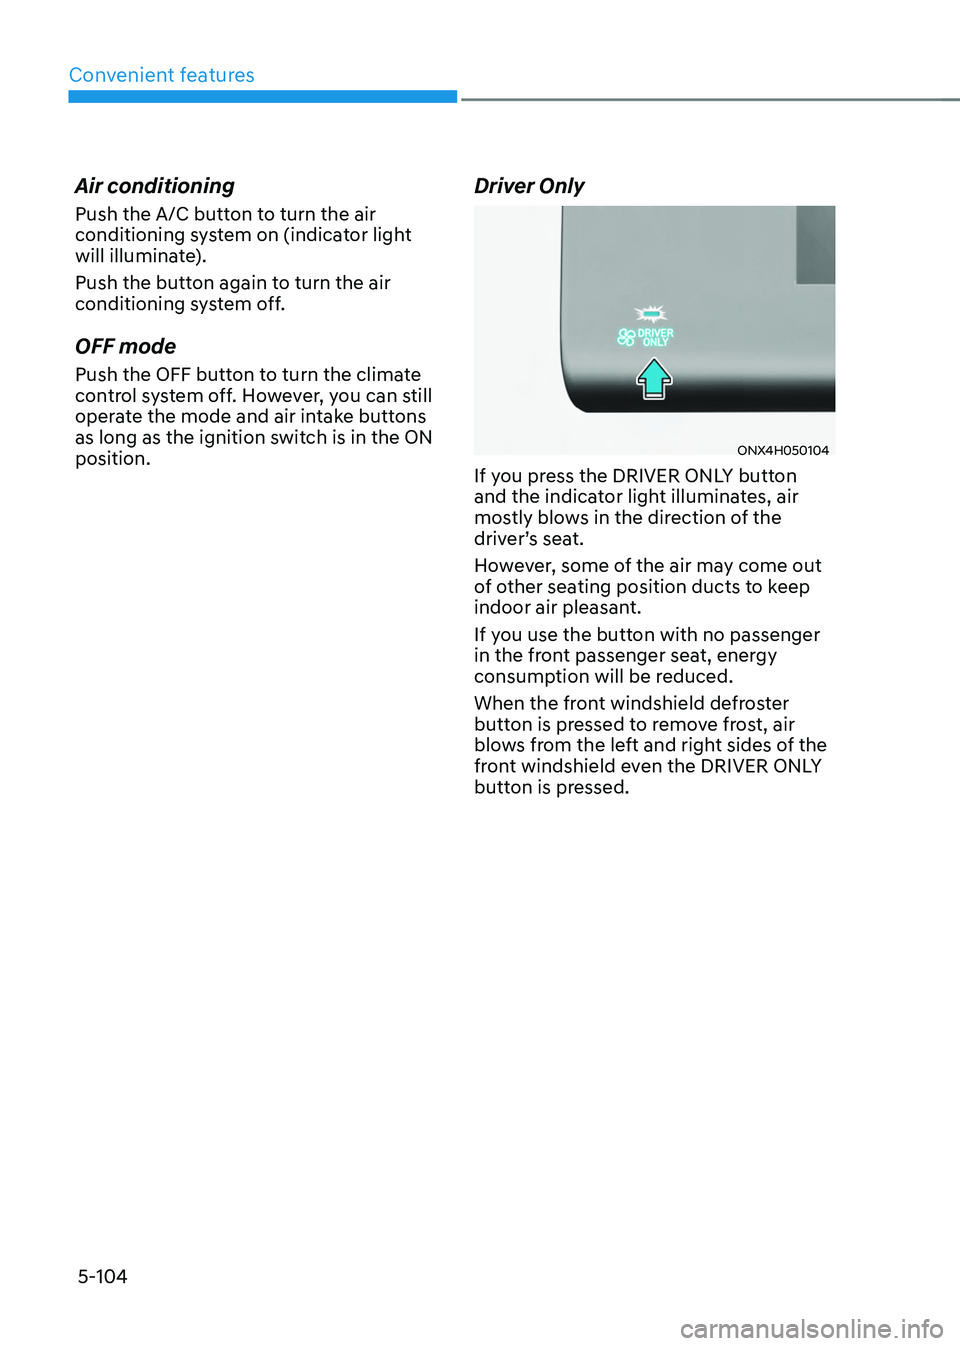
Driver Only
ONX4H050104
If you press the DRIVER ONLY button
and the indicator light illuminates, air
mostly blows in the direction of the
driver’s seat.
However, some of the air may come out
of other seating position ducts to keep
indoor air pleasant.
If you use the button with no passenger
in the front passenger seat, energy
consumption will be reduced.
When the front windshield defroster
button is pressed to remove frost, air
blows from the left and right sides of the
front windshield even the DRIVER ONLY
button is pressed.
Page 285 of 630
Convenient features5-128
InfoTaInmenT s ysTem
NOTICE
• If you install an aftermarket HID
head lamp, your vehicle’s audio and
electronic devices may not function
properly.
• Prevent chemicals such as perfume,
cosmetic oil, sun cream, hand
cleaner, and air freshener from
contacting the interior parts
because they may cause damage or
discoloration.
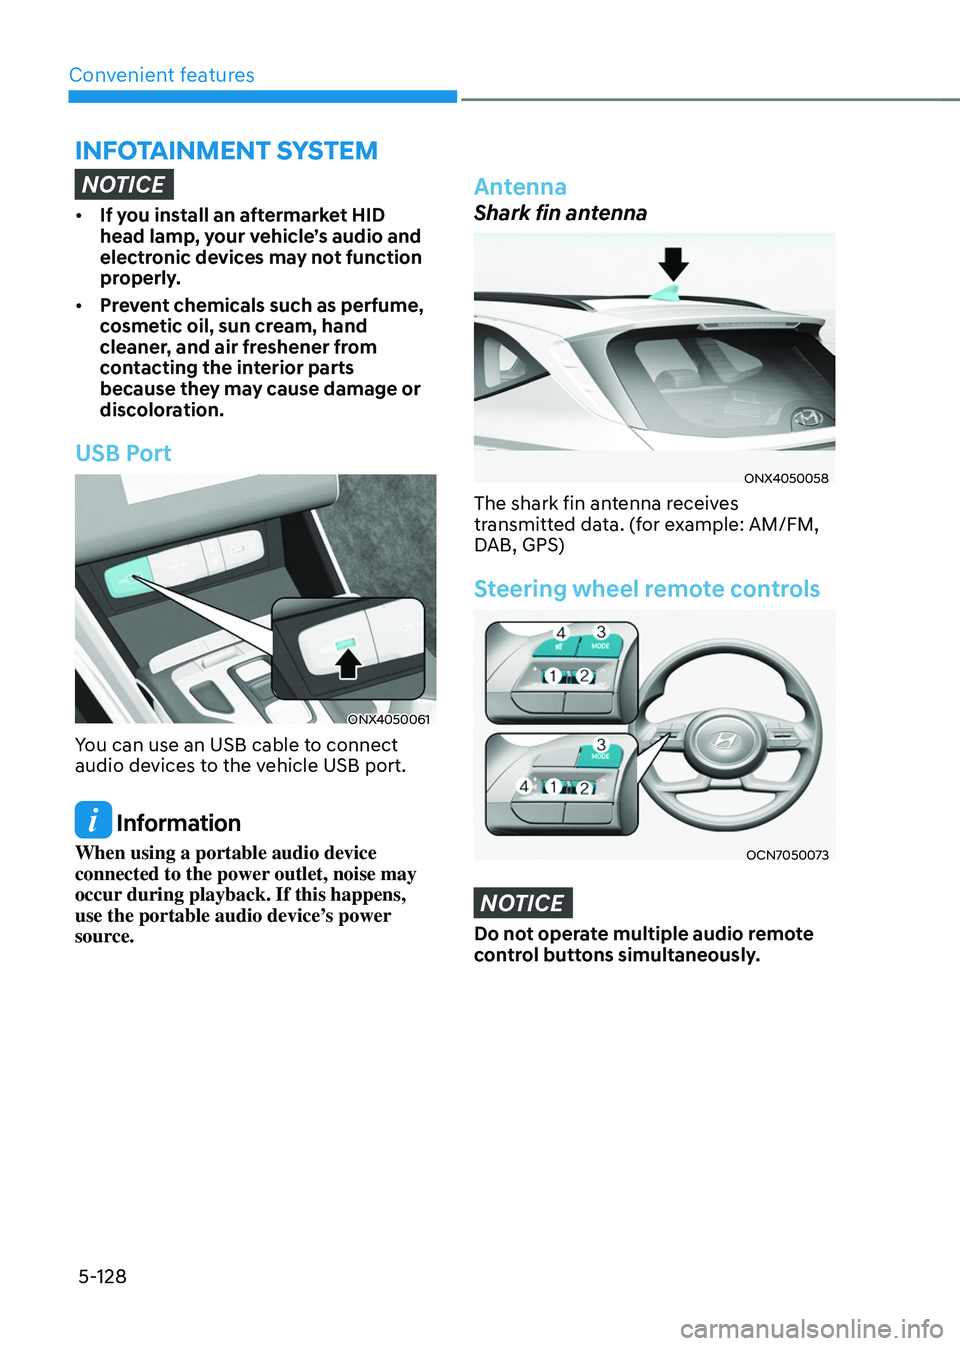
USB Port
ONX4050061
You can use an USB cable to connect
audio devices to the vehicle USB port.
Information
When using a portable audio device
connected to the power outlet, noise may
occur during playback. If this happens,
use the portable audio device’s power
source.
Antenna
Shark fin antenna
ONX4050058
The shark fin antenna receives
transmitted data. (for example: AM/FM,
DAB, GPS)
Steering wheel remote controls
OCN7050073
NOTICE
Do not operate multiple audio remote
control buttons simultaneously.
Page 509 of 630
Driver assistance system
7-150
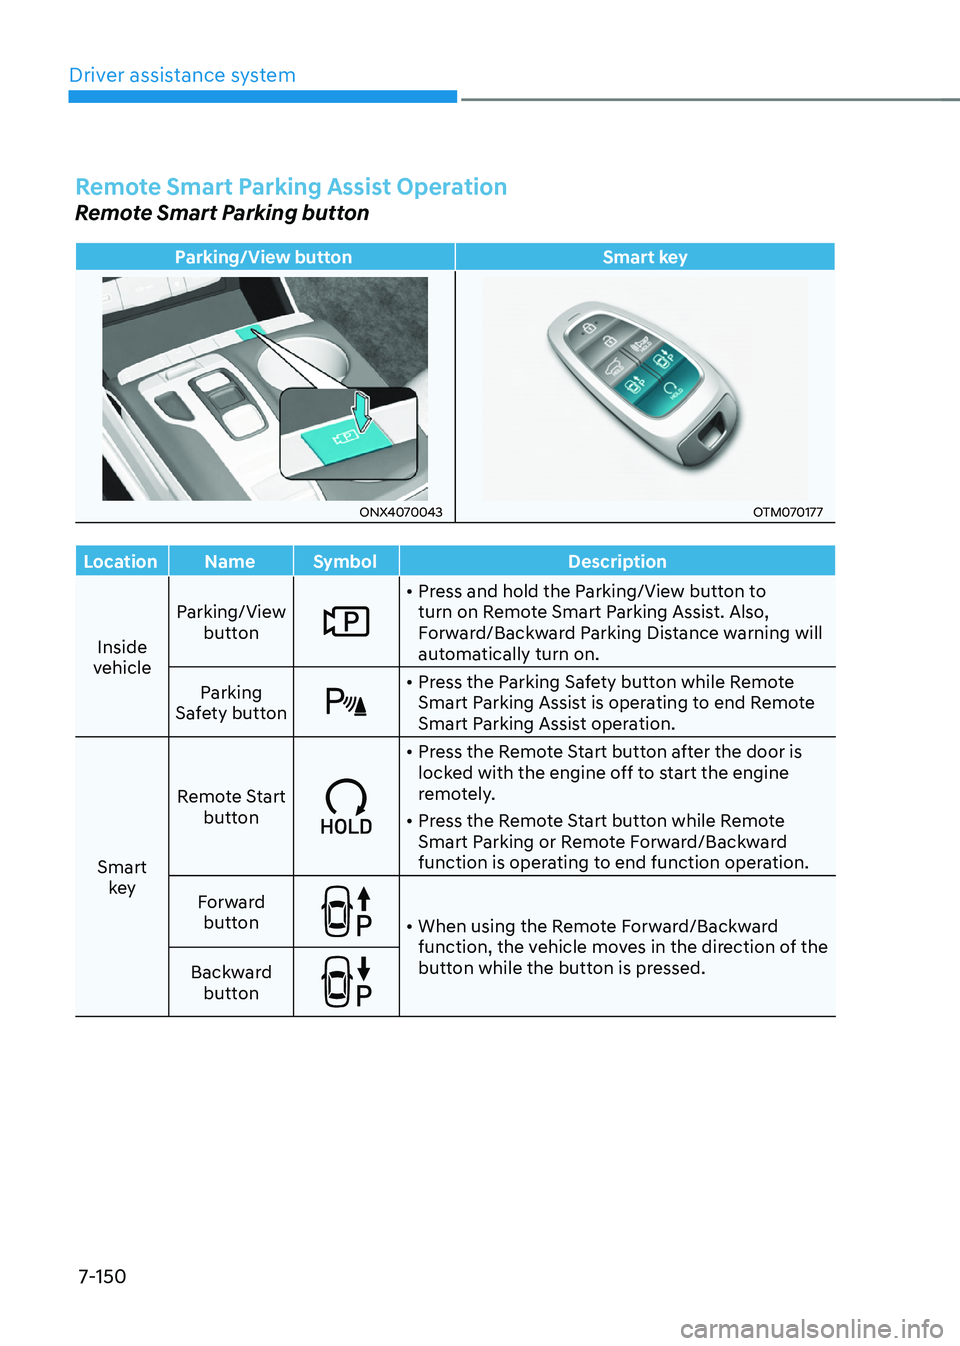
Remote Smart Parking Assist Operation
Remote Smart Parking button
Parking/View buttonSmart key
ONX4070043OTM070177
Location Name Symbol Description
Inside
vehicle Parking/View
button
• Press and hold the Parking/View button to
turn on Remote Smart Parking Assist. Also,
Forward/Backward Parking Distance warning will
automatically turn on.
Parking
Safety button
• Press the Parking Safety button while Remote
Smart Parking Assist is operating to end Remote
Smart Parking Assist operation.
Smart key Remote Start
button
• Press the Remote Start button after the door is
locked with the engine off to start the engine
remotely.
• Press the Remote Start button while Remote
Smart Parking or Remote Forward/Backward
function is operating to end function operation.
Forward button
• When using the Remote Forward/Backward
function, the vehicle moves in the direction of the
button while the button is pressed.
Backward
button
Page 513 of 630

Driver assistance system
7-154
Remote Forward/Backward function
operation status
Operation status Smart key LED Hazard
warning light
Under
control Green LED
continuously
blinks
-
Pause Red LED
continuously
blinks Blinks
Off Red LED
illuminates for
4 seconds and
then turns off Blinks 3
times and
turns off
Complete Green LED
illuminates for
4 seconds and
then turns off Blinks 1
time and
turns off
Ã
Operation status by the hazard
w
arning light may not be applicable
based on the regulation of your
country.
à If the smart ke
y is not within the
operating range from the vehicle
(approximately 13 ft. (4 m)), the
smart key LED will not illuminate or
blink. Use the smart key within the
operating range.
How to turn off Remote Forward/
Backward function while operating
• Press the Parking/View () button
while the infotainment system screen
guides the driver using method 2.
• Shift the gear except to P (Park)
while the infotainment system screen
guides the driver using method 2.
• Press the Parking Safety (
) button
or select ‘Cancel’ on the in
fotainment sy
stem screen.
• Press the Remote Start (
) button
on the smart key while the vehicle is
being controlled by Remote Forward/
Backward function. Remote Forward/
Backward function will turn off. At this
time, the engine will turn off.
• Get on the vehicle with the smart key.
Remote Forward/Backward function
will turn off. At this time, the engine
will remain on.
The function will pause in the
following conditions when:
• There is a pedestrian, animal or object
in the direction the vehicle is moving
• The door or liftgate is open
• The Forward (
) or Backward ()
button is not continuously pressed
• Simultaneously pressing multiple
buttons on a smart key
• The smart key is not operated within
13 ft. (4 m) from the vehicle
• Button of another smart key is pressed
in addition to the operating smart key
• Blind-Spot Collision-Avoidance
Assist or Rear Cross-Traffic Collision-
Avoidance Assist operates while the
vehicle is being controlled in the
reverse direction.