2021 HYUNDAI SANTA FE display
[x] Cancel search: displayPage 224 of 636
Convenient features
5-80
OTMA050019
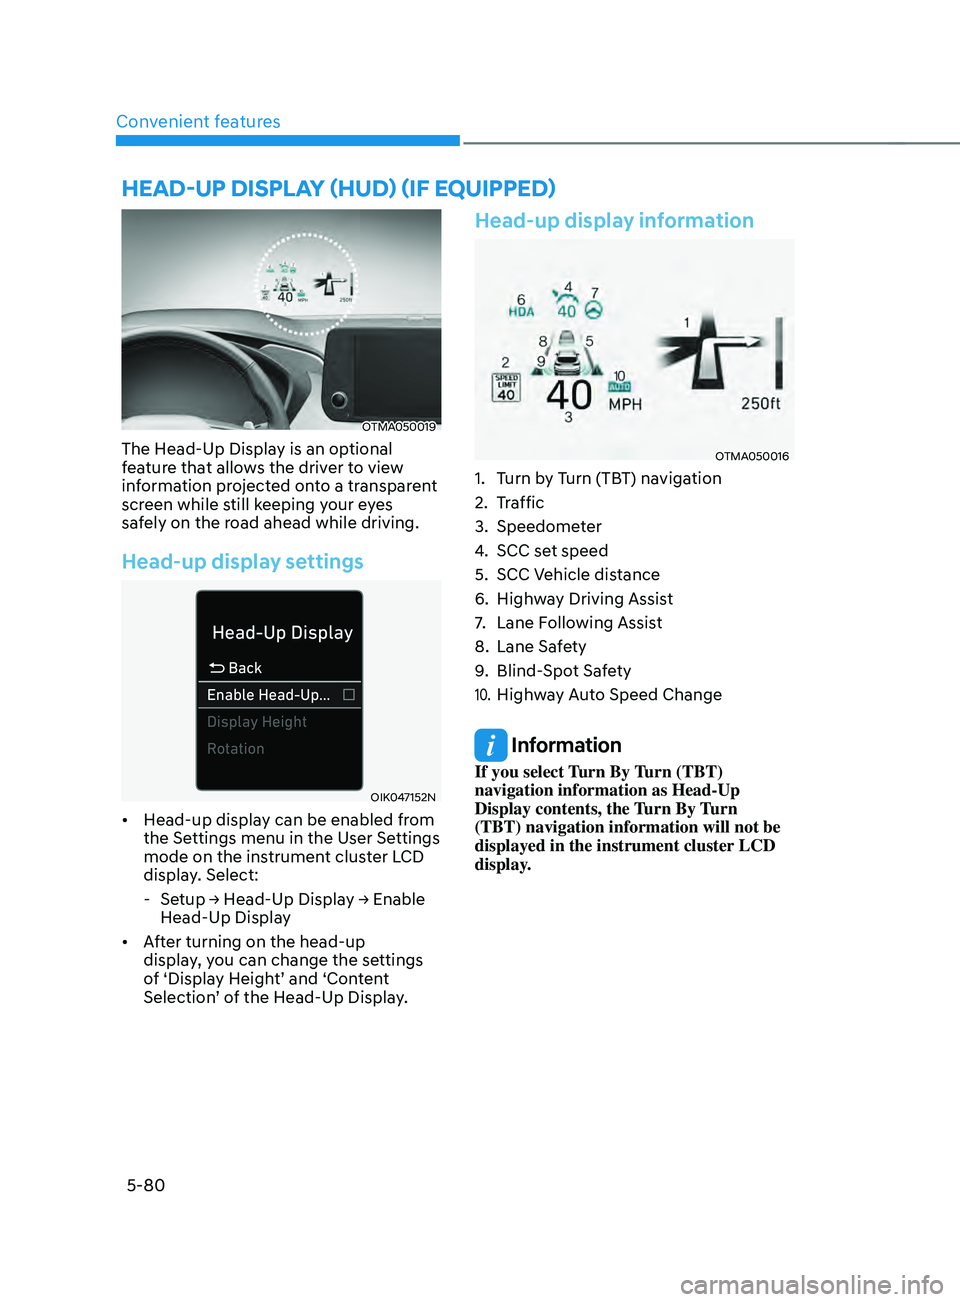
The Head-Up Display is an optional
feature that allows the driver to view
information projected onto a transparent
screen while still keeping your eyes
safely on the road ahead while driving.
Head-up display settings
OIK047152N
• Head-up display can be enabled from
the Settings menu in the User Settings
mode on the instrument cluster LCD
display. Select:
-Setup → H
ead-Up
Displa
y
→ E
nable
Head-Up Displa
y
• After turning on the head-up
display, you can change the settings
of ‘Display Height’ and ‘Content
Selection’ of the Head-Up Display.
Head-up display information
OTMA050016
1. Turn by Turn (TBT) navigation
2.
Tr
affic
3.
Speedomet
er
4.
SCC set speed
5.
SCC Vehicle dis
tance
6.
Highw
ay Driving Assist
7.
Lane Follo
wing Assist
8.
Lane Saf
ety
9.
Blind-Spo
t Safety
10. Highway Auto Speed Change
Information
If you select Turn By Turn (TBT)
navigation information as Head-Up
Display contents, the Turn By Turn
(TBT) navigation information will not be
displayed in the instrument cluster LCD
display.
hEAD-Up DIspLAY (hUD) (IF EQUIppED)
Page 225 of 636
05
5-81
Precautions while using the
head-up display
• It may sometimes be difficult to read
information on the Head-Up Display in
the following situations.
- The driver is impr
operly positioned
in the driver’s seat
- The driver w
ears polarizing-filter
sunglasses
- An object is locat
ed above the
head-up display cover
- The vehicle is driv
en on a wet road
- Any impr
oper lighting accessory is
installed inside the vehicle, or there
is incoming light from outside of the
vehicle
- The driver w
ears glasses
- The driver w
ears contact lenses
When it is difficult to read the Head-
Up Display information, adjust the
image height or brightness level from
the Settings menu in the infotainment
system screen. •
For your safety, make sure to stop the
vehicle before adjusting the settings.
• Do not tint the front windshield glass
or add other types of metallic coating.
Otherwise, the Head-Up Display
image may be invisible.
• Do not place any accessories on the
crash pad or attach any objects on the
windshield glass.
• When replacing the front windshield
glass, replace it with a windshield
glass designed for Head-Up Display
operation. Otherwise, duplicated
images may be displayed on the
windshield glass.
WARNING
Blind-Spot Collision Warning
warnings on the Head-Up Display are
supplemental. Do not solely depend on
them to change lanes. Always take a
look around before changing lanes.
Page 229 of 636
05
5-85
Headlamp delay function
(if equipped)
If you place the ignition switch to the
ACC position or the OFF position with
the headlamps ON, the headlamps (and/
or position lamps) remain on for about
5 minutes. However, if the driver’s door
is opened and closed, the headlamps
are turned off after 15 seconds. Also,
with the vehicle off if the driver’s door is
opened and closed, the headlamps (and/
or position lamps) are turned off after 15
seconds.
The headlamps (and/or position lamps)
can be turned off by pressing the lock
button on the remote key or smart key
twice or turning the headlamp switch to
the OFF or AUTO position.
You can enable the headlamp delay
function
b
y
selecting ‘Se
tup
→ U
ser
Settings → Ligh
ts
→ H
eadlight
Dela
y.
NOTICE
If the driver exits the vehicle through
another door besides the driver
door, the battery saver function
does not operate and the headlamp
delay function does not turn OFF
automatically.
This may cause the battery to
discharge. To avoid battery discharge,
turn OFF the headlamps manually from
the headlamp switch before exiting the
vehicle.
Traffic change (if equipped)
The low beam light distribution is
asymmetric. If you go abroad to a
country with opposite traffic direction,
this asymmetric part will dazzle
oncoming car driver.
To prevent dazzle, ECE regulation
demand several technical solutions (ex.
automatic change system, adhesive
sheet, down aiming). These headlamps
are designed not to dazzle opposite
drivers.
You can activate or deactivate the Traffic
Change feature from the User Settings
mode
on the L
CD
displa
y.
Go t
o
‘Ligh
ts
→ Tr
avel Mode’.
For more details, refer to “LCD Display”
In chapter 4.
Page 231 of 636
05
5-87
System operation
Display and control
• After selecting ‘High Beam Assist’
in the Settings menu, High Beam
Assist will operate by following the
procedure below.
- Place the headlamp switch in the AUTO position and push
the headlamp lever towards the
instrument cluster. The High Beam
Assist (
) indicator light will
illuminate on the cluster and the
system will be enabled.
- When the system is enabled, high beam will turn on when vehicle
speed is above 25mph (40km/h).
When vehicle speed is below 15mph
(25km/h), high beam will not turn
on.
- The High Beam (
) indicator light
will illuminate on the cluster when
high beam is on.
• When High Beam Assist is operating, if
the headlamp lever or switch is used,
the system operates as follow:
- If the headlamp lever is pulled towards you when the high beam
is off, the high beam will turn on
without High Beam Assist canceled.
When you let go of the headlamp
lever, the lever will move to the
middle and the high beam will turn
off.
- If the headlamp lever is pulled towards you when the high beam is
on by High Beam Assist, low beam
will be on and the system will turn
off.
- If the headlamp switch is placed from AUTO to another position
(headlamp/position/off), High
Beam Assist will turn off and the
corresponding lamp will turn on. •
When High Beam Assist is operating,
high beam switches to low beam if
any of the following conditions occur:
- When the headlamp of an oncoming vehicle is detected.
- When the tail lamp of a vehicle in front is detected.
- When the headlamp or tail lamp of a motorcycle or a bicycle is detected.
- When the surrounding ambient light is bright enough that high beams
are not required.
- When streetlights or other lights are detected.
System malfunction and
limitations
System malfunction
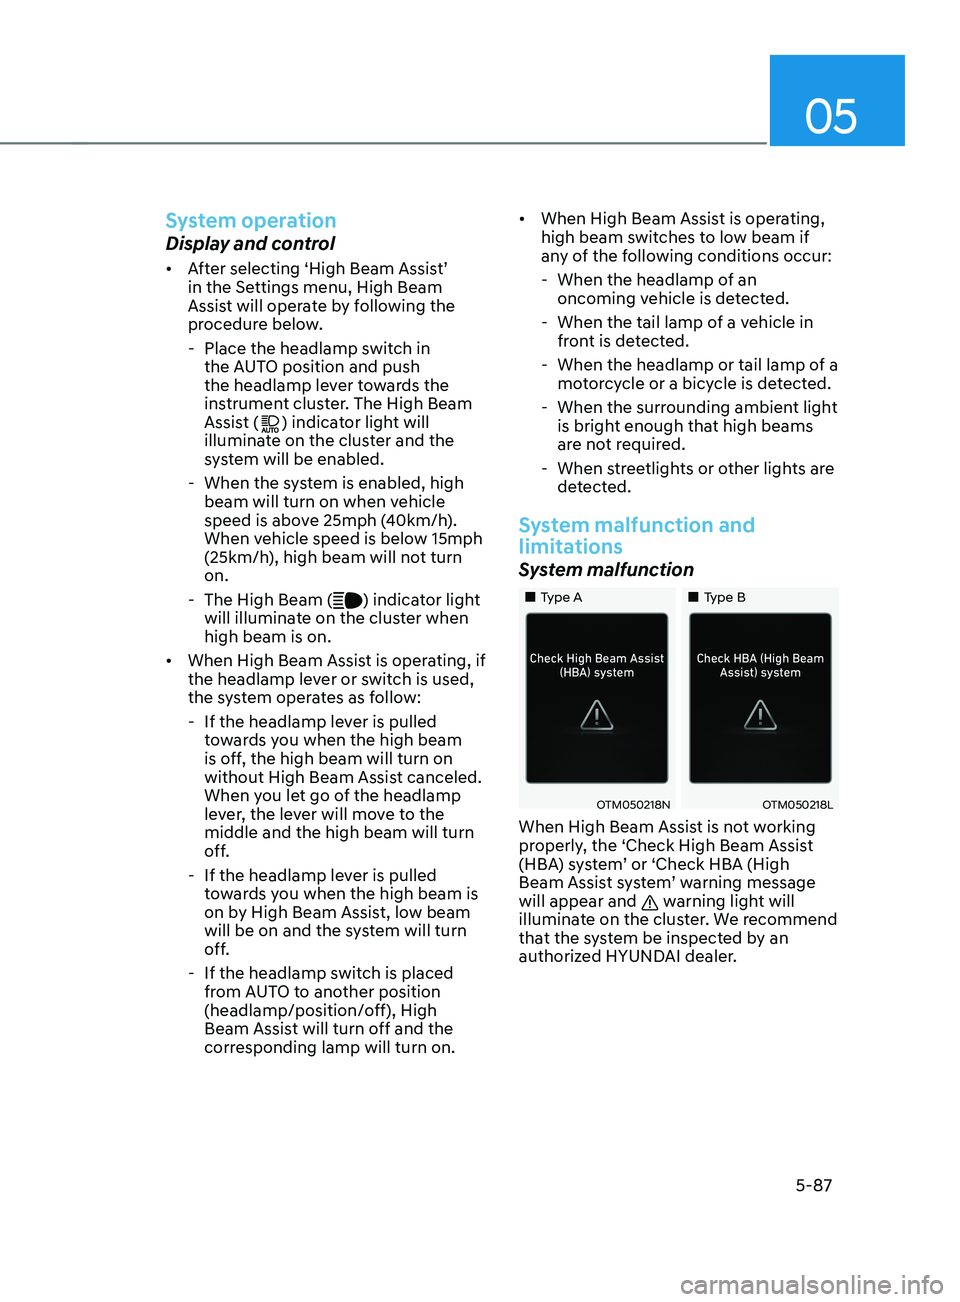
„„Type A „„Type B
OTM050218NOTM050218L
When High Beam Assist is not working
properly, the ‘Check High Beam Assist
(HBA) system’ or ‘Check HBA (High
Beam Assist system’ warning message
will appear and
warning light will
illuminate on the cluster. We recommend
that the system be inspected by an
authorized HYUNDAI dealer.
Page 236 of 636
Convenient features
5-92
Welcome system
OTM050075
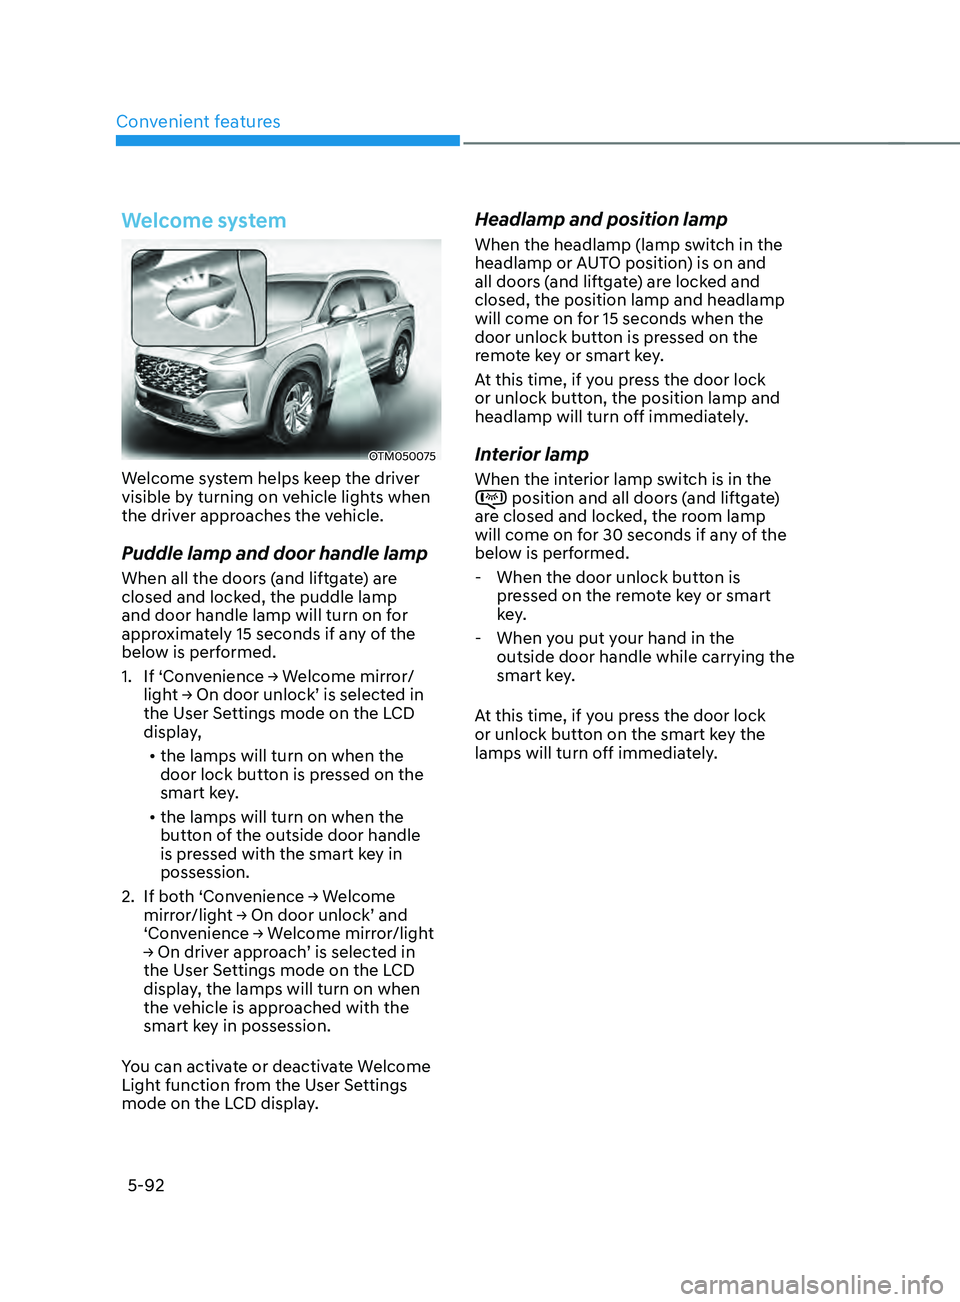
Welcome system helps keep the driver
visible by turning on vehicle lights when
the driver approaches the vehicle.
Puddle lamp and door handle lamp
When all the doors (and liftgate) are
closed and locked, the puddle lamp
and door handle lamp will turn on for
approximately 15 seconds if any of the
below is performed.
1.
If ‘Con
venience
→ W
elcome
mirr
or/
light
→ On door unlock’ is select
ed
in the User Se
ttings mode on the LCD
display,
• the lamps will turn on when the
door lock button is pressed on the
smart key.
• the lamps will turn on when the
button of the outside door handle
is pressed with the smart key in
possession.
2.
If bo
th
‘Con
venience
→ W
elcome
mirror/ligh
t
→ On door unlock’ and ‘Conv
enience
→ W
elcome
mirr
or/light
→ On driv
er
appr
oach’
is select
ed
in the User Se
ttings mode on the LCD
display, the lamps will turn on when
the vehicle is approached with the
smart key in possession.
You can activate or deactivate Welcome
Light function from the User Settings
mode on the LCD display.
Headlamp and position lamp
When the headlamp (lamp switch in the
headlamp or AUTO position) is on and
all doors (and liftgate) are locked and
closed, the position lamp and headlamp
will come on for 15 seconds when the
door unlock button is pressed on the
remote key or smart key.
At this time, if you press the door lock
or unlock button, the position lamp and
headlamp will turn off immediately.
Interior lamp
When the interior lamp switch is in the position and all doors (and liftgate)
are closed and locked, the room lamp
will come on for 30 seconds if any of the
below is performed.
- When the door unlock button is pr
essed on the remote key or smart
key.
- When you put y
our hand in the
outside door handle while carrying the
smart key.
At this time, if you press the door lock
or unlock button on the smart key the
lamps will turn off immediately.
Page 240 of 636
Convenient features
5-96
Rear window wiper and washer
OTLE045165
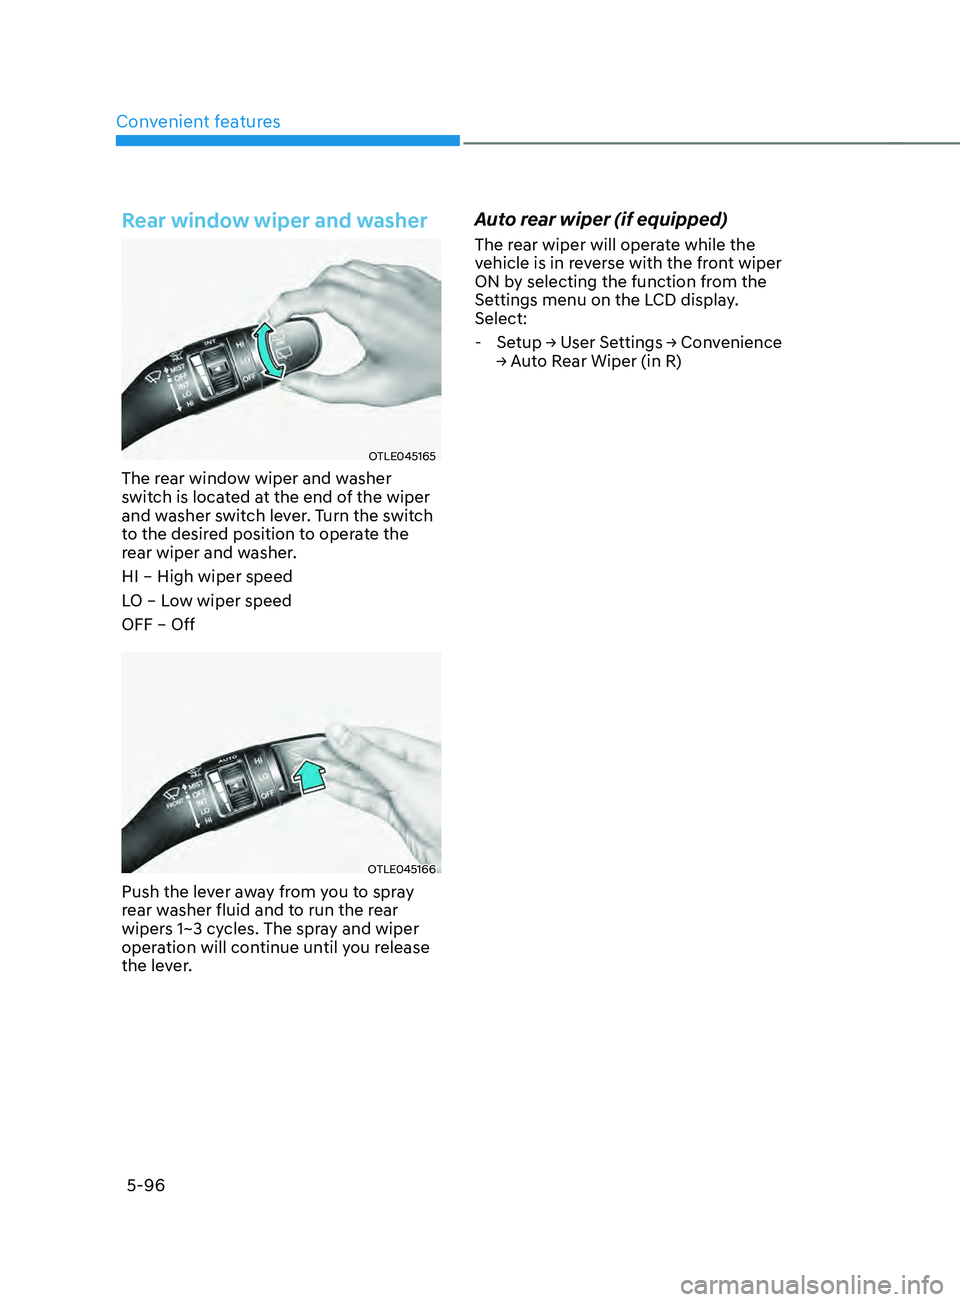
The rear window wiper and washer
switch is located at the end of the wiper
and washer switch lever. Turn the switch
to the desired position to operate the
rear wiper and washer.
HI – High wiper speed
LO – Low wiper speed
OFF – Off
OTLE045166
Push the lever away from you to spray
rear washer fluid and to run the rear
wipers 1~3 cycles. The spray and wiper
operation will continue until you release
the lever.
Auto rear wiper (if equipped)
The rear wiper will operate while the
vehicle is in reverse with the front wiper
ON by selecting the function from the
Settings menu on the LCD display.
Select:
-Setup → U
ser
Se
ttings
→ Con
venience
→ A
uto
R
ear
Wiper (in R)
Page 250 of 636
Convenient features
5-106
Automatic heating and air
conditioning
The Automatic Climate Control System
is controlled by setting the desired
temperature.
1.
Press the A
UTO button. (3)
The modes, fan speeds, air intake and
air-conditioning will be controlled
automatically by the temperature
setting you select.
2.
Turn the t
emperature control knob
(1, 2) to the desired temperature. If
the temperature is set to the lowest
setting (Lo), the air conditioning
system will operate continuously.
After the interior has cooled
sufficiently, adjust the knob to
a higher temperature set point
whenever possible.
To turn the automatic operation off,
select any button of the following:
- Mode selection butt
on
- Fr
ont windshield defroster button
(Press the button one more time
to deselect the front windshield
defroster function. The ‘AUTO’ sign
will illuminate on the information
display once again.)
- Fan speed con
trol button
The selected function will be
controlled manually while other
functions operate automatically.
For your convenience and to improve
the effectiveness of the climate control,
use the AUTO button and set the
temperature to 73°F (23°C).
OTM050052
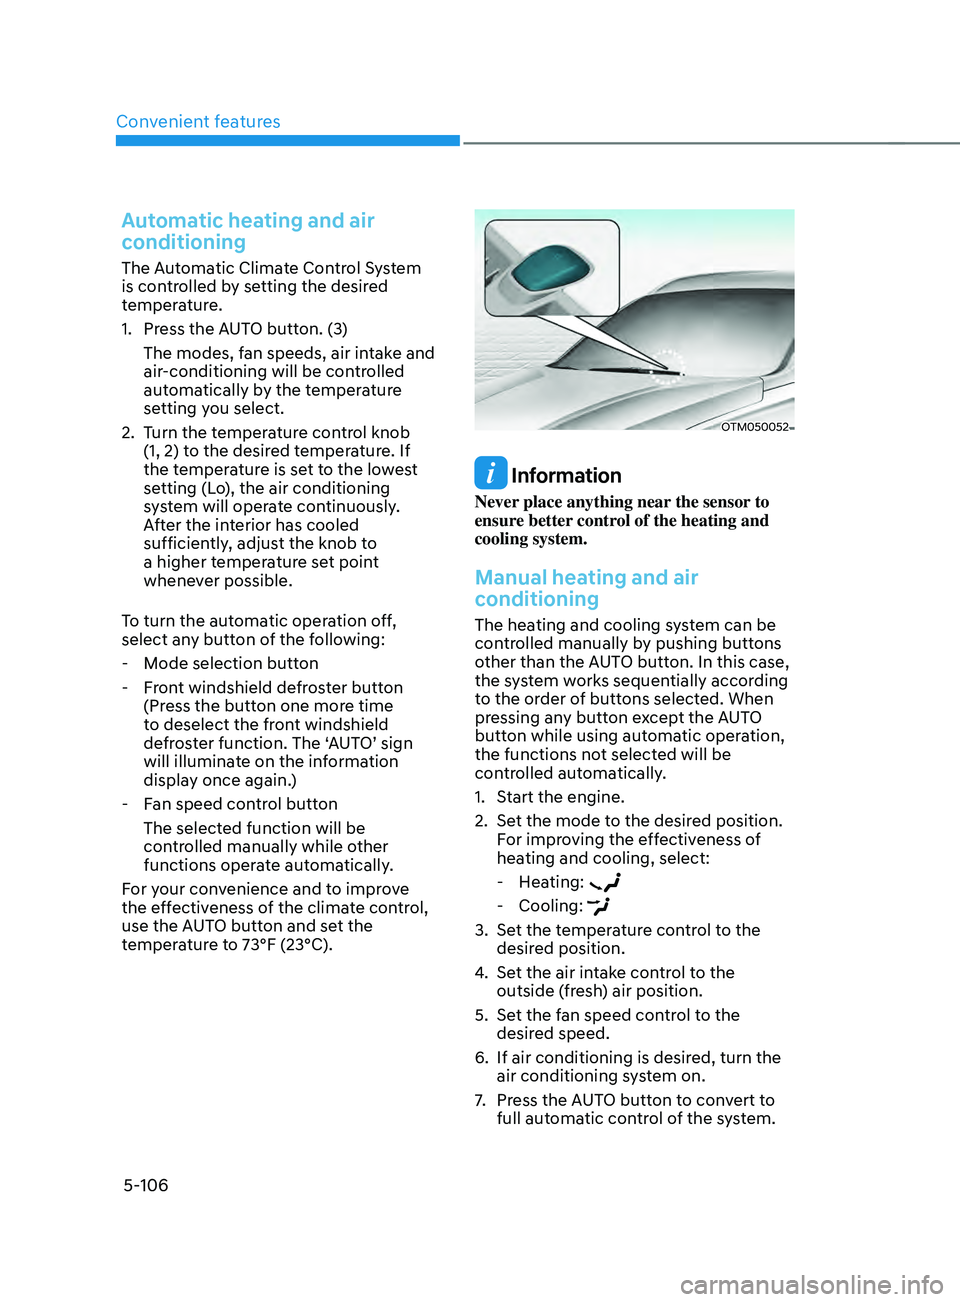
Information
Never place anything near the sensor to
ensure better control of the heating and
cooling system.
Manual heating and air
conditioning
The heating and cooling system can be
controlled manually by pushing buttons
other than the AUTO button. In this case,
the system works sequentially according
to the order of buttons selected. When
pressing any button except the AUTO
button while using automatic operation,
the functions not selected will be
controlled automatically.
1.
Start the engine.
2.
Set the mode t
o the desired position.
For improving the effectiveness of
heating and cooling, select:
- Hea
ting:
- Cooling:
3. Set the temperature control to the
desired position.
4.
Set the air in
take control to the
outside (fresh) air position.
5.
Set the f
an speed control to the
desired speed.
6.
If air conditioning is desired, turn the
air conditioning s
ystem on.
7.
Press the A
UTO button to convert to
full automatic control of the system.
Page 253 of 636
05
5-109
Temperature control
OTM050103
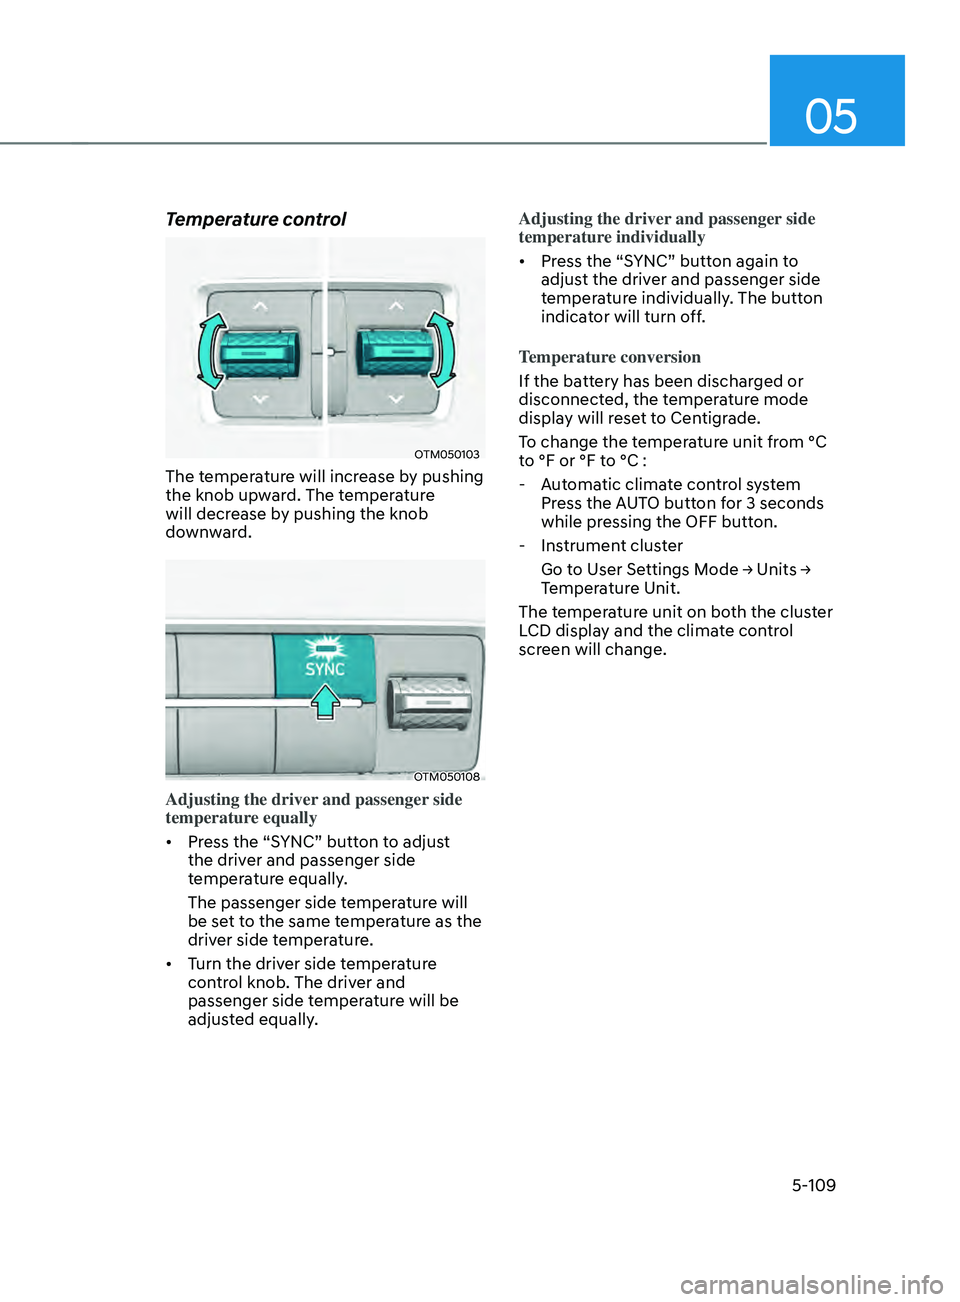
The temperature will increase by pushing
the knob upward. The temperature
will decrease by pushing the knob
downward.
OTM050108
Adjusting the driver and passenger side
temperature equally
• Press the “SYNC” button to adjust
the driver and passenger side
temperature equally.
The passenger side temperature will
be set to the same temperature as the
driver side temperature.
• Turn the driver side temperature
control knob. The driver and
passenger side temperature will be
adjusted equally. Adjusting the driver and passenger side
temperature individually
•
Press the “SYNC” button again to
adjust the driver and passenger side
temperature individually. The button
indicator will turn off.
Temperature conversion
If the battery has been discharged or
disconnected, the temperature mode
display will reset to Centigrade.
To change the temperature unit from °C
to °F or °F to °C :
- Aut
omatic climate control system
Press the AUTO button for 3 seconds
while pressing the OFF button.
- Instrumen
t cluster
Go
t
o
U
ser
Se
ttings
M
ode
→ Units → Temper
ature Unit.
The temperature unit on both the cluster
LCD display and the climate control
screen will change.