2021 HYUNDAI SANTA FE CALLIGRAPHY length
[x] Cancel search: lengthPage 22 of 636

Vehicle Information, Consumer Information and Reporting Safety Defects
2-8
Itemsin (mm)
Overall length 188.4 (4,785)
Overall width 74.8 (1,900)
Overall height 2WD
4WD
66.3 (1,685) / 67.3 (1,710)* 67.1 (1,705) / 68.1 (1,730)*
Tread Front
Rear
18’’ / 19’’ : 64.80 (1,646) 18’’ / 19’’ : 65.19 (1,656) 20’’ : 64.44 (1,637) 20’’ : 64.84 (1,647)
Wheelbase 108.9 (2,765)
* : if equipped with roof rack
ENGINE
Engine Displacement
cu. in (cc) Bore x Stroke
in. (mm) Firing order No. of cylinders
Smartstream G 2.5 GDI 152.4
(2,497) 3.5 x 4
(88.5 x 101.5) 1-3-4-2 4, in-line
Smartstream G 2.5 T-GDI
DIMENSIONS
Page 35 of 636
3-3
03
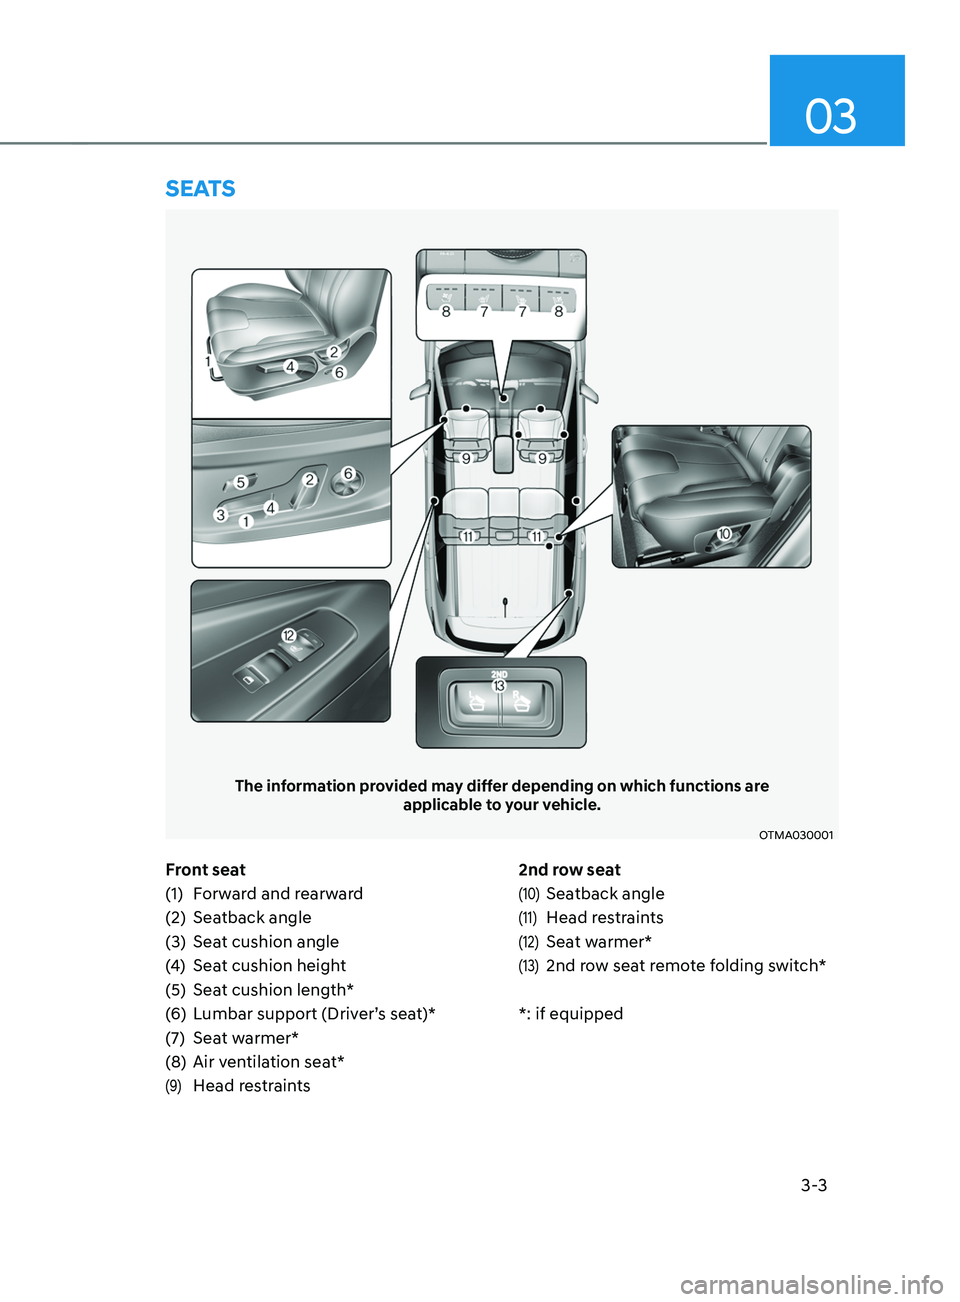
Front seat
(1)
Forw
ard and rearward
(2)
Seatback angle
(3
)
Seat cushion angle
(4
)
Seat cushion heigh
t
(5)
Seat cushion length*
(
6)
Lumbar support (Driv
er’s seat)*
(7)
Seat w
armer*
(8)
Air ven
tilation seat*
(9) Head restraints 2nd row seat
(10) Seatback angle
(11) Head restraints
(12) Seat warmer*
(13) 2nd row seat remote folding switch*
*: if equipped
SEATS
The information provided may differ depending on which functions are applicable to your vehicle.
OTMA030001
Page 41 of 636
03
3-9
Seat belts must be snug against your
hips and chest to work properly. When
the seatback is reclined, the shoulder
belt cannot do its job because it will not
be snug against your chest. Instead,
it will be in front of you. During an
accident, you could be thrown into the
seat belt, causing neck or other injuries.
The more the seatback is reclined,
the greater chance the passenger’s
hips will slide under the lap belt or the
passenger’s neck will strike the shoulder
belt.
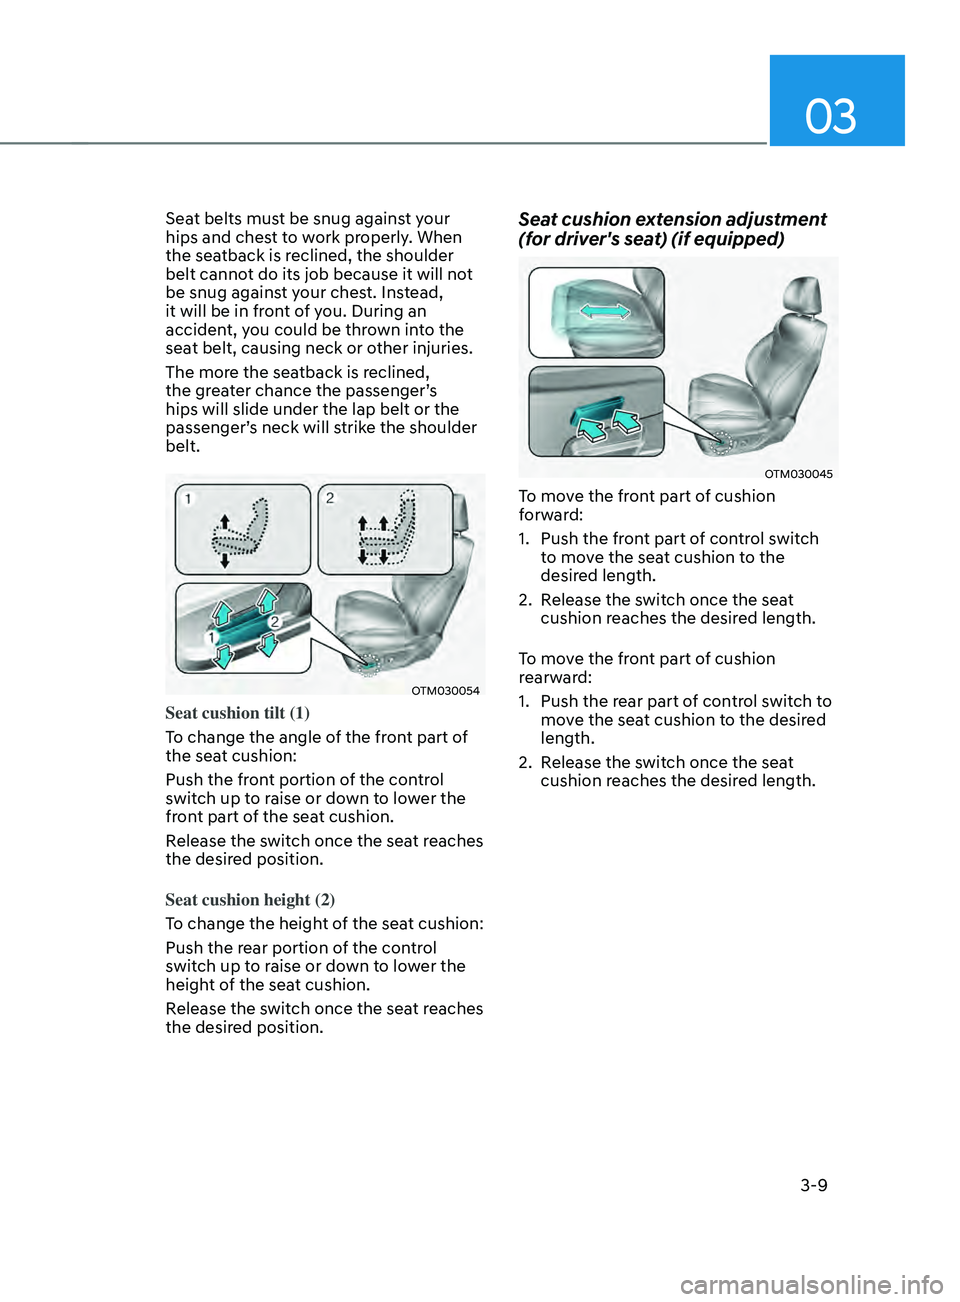
OTM030054
Seat cushion tilt (1)
To change the angle of the front part of
the seat cushion:
Push the front portion of the control
switch up to raise or down to lower the
front part of the seat cushion.
Release the switch once the seat reaches
the desired position.
Seat cushion height (2)
To change the height of the seat cushion:
Push the rear portion of the control
switch up to raise or down to lower the
height of the seat cushion.
Release the switch once the seat reaches
the desired position.
Seat cushion extension adjustment
(for driver's seat) (if equipped)
OTM030045
To move the front part of cushion
forward:
1.
Push the fron
t part of control switch
to move the seat cushion to the
desired length.
2.
Release the s
witch once the seat
cushion reaches the desired length.
To move the front part of cushion
rearward:
1.
Push the rear part o
f control switch to
move the seat cushion to the desired
length.
2.
Release the s
witch once the seat
cushion reaches the desired length.
Page 57 of 636
03
3-25
Seat belt restraint system
WARNING
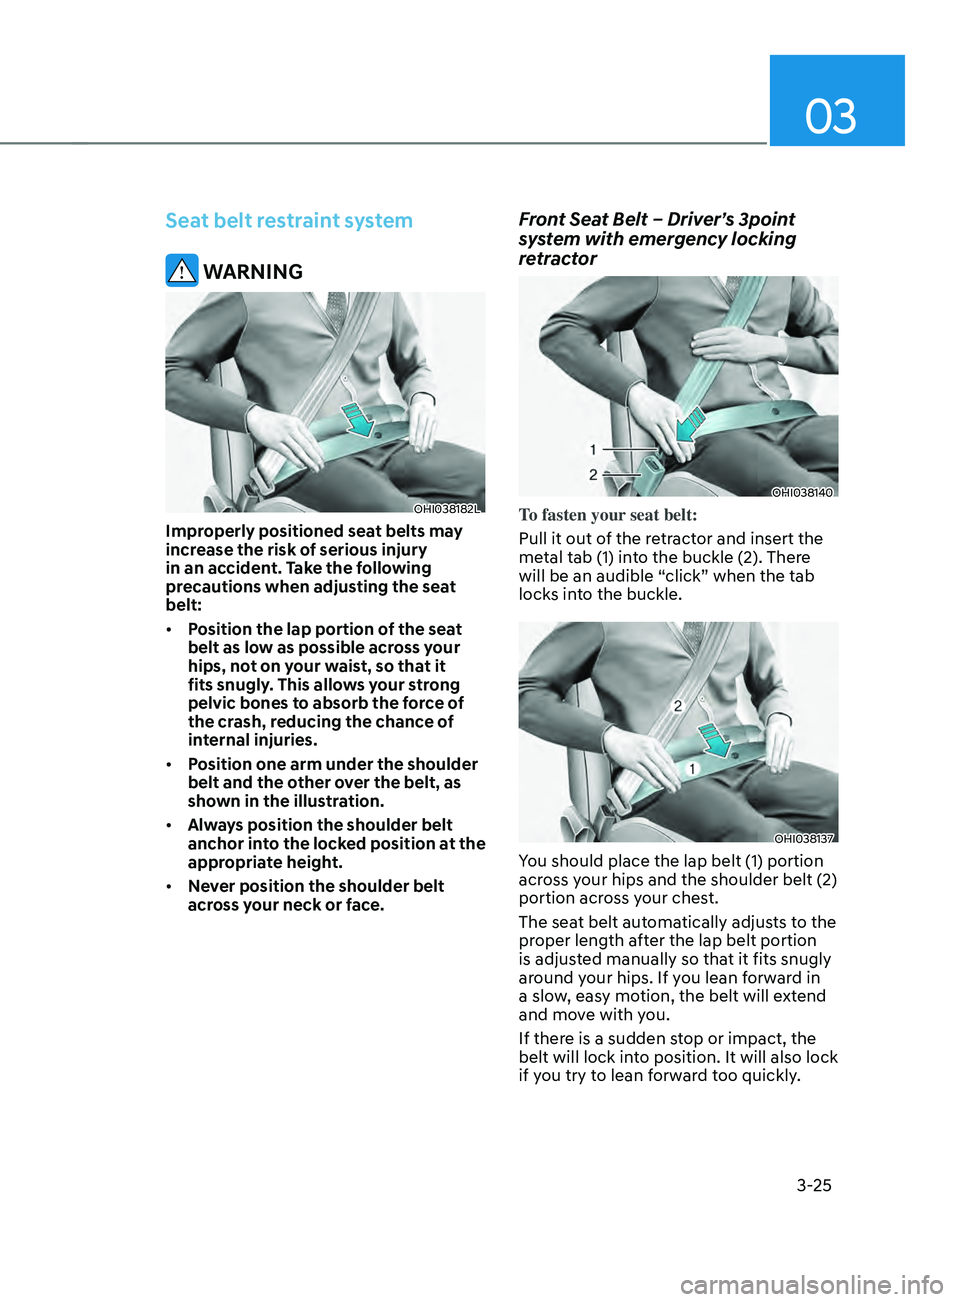
OHI038182L
Improperly positioned seat belts may
increase the risk of serious injury
in an accident. Take the following
precautions when adjusting the seat
belt:
• Position the lap portion of the seat
belt as low as possible across your
hips, not on your waist, so that it
fits snugly. This allows your strong
pelvic bones to absorb the force of
the crash, reducing the chance of
internal injuries.
• Position one arm under the shoulder
belt and the other over the belt, as
shown in the illustration.
• Always position the shoulder belt
anchor into the locked position at the
appropriate height.
• Never position the shoulder belt
across your neck or face.
Front Seat Belt – Driver’s 3point
system with emergency locking
retractor
OHI038140
To fasten your seat belt:
Pull it out of the retractor and insert the
metal tab (1) into the buckle (2). There
will be an audible “click” when the tab
locks into the buckle.
OHI038137
You should place the lap belt (1) portion
across your hips and the shoulder belt (2)
portion across your chest.
The seat belt automatically adjusts to the
proper length after the lap belt portion
is adjusted manually so that it fits snugly
around your hips. If you lean forward in
a slow, easy motion, the belt will extend
and move with you.
If there is a sudden stop or impact, the
belt will lock into position. It will also lock
if you try to lean forward too quickly.
Page 59 of 636
03
3-27
Rear Seat Belt – Passenger’s 3point
system with convertible locking
retractor
This type of seat belt combines the
features of both an emergency locking
retractor seat belt and an automatic
locking retractor seat belt. Convertible
retractor type seat belts are installed
in the rear seat positions to help
accommodate the installation of child
restraint systems. Although a convertible
retractor is also installed in the front
passenger seat position, NEVER place
any infant/child restraint system in the
front seat of the vehicle.
To fasten your seat belt:
Pull the seat belt out of the retractor
and insert the metal tab into the buckle.
There will be an audible “click” when
the tab locks into the buckle. When
not securing a child restraint, the seat
belt operates in the same way as the
driver’s seat belt (Emergency Locking
Retractor Type). It automatically adjusts
to the proper length only after the lap
belt portion of the seat belt is adjusted
manually so that it fits snugly across your
hips.
When the seat belt is fully extended from
the retractor to allow the installation of
a child restraint system, the seat belt
operation changes to allow the belt to
retract, but not to extend (Automatic
Locking Retractor Type). Refer to the
“Using a Child Restraint System” section
in this chapter.
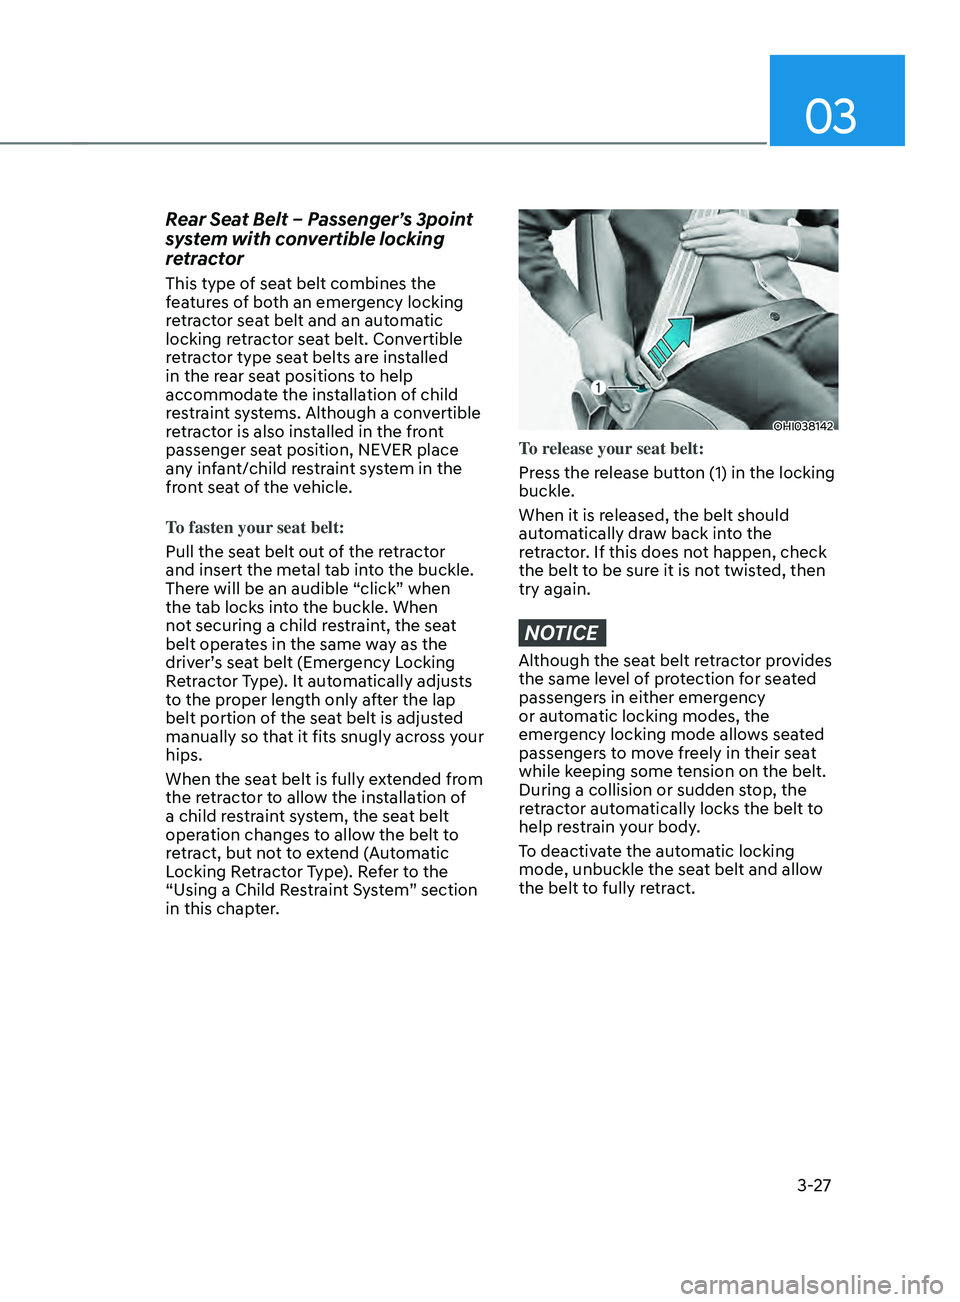
OHI038142
To release your seat belt:
Press the release button (1) in the locking
buckle.
When it is released, the belt should
automatically draw back into the
retractor. If this does not happen, check
the belt to be sure it is not twisted, then
try again.
NOTICE
Although the seat belt retractor provides
the same level of protection for seated
passengers in either emergency
or automatic locking modes, the
emergency locking mode allows seated
passengers to move freely in their seat
while keeping some tension on the belt.
During a collision or sudden stop, the
retractor automatically locks the belt to
help restrain your body.
To deactivate the automatic locking
mode, unbuckle the seat belt and allow
the belt to fully retract.
Page 280 of 636
Convenient features
5-136
ExTERIOR FEATURES
Roof side rails
OTM050017
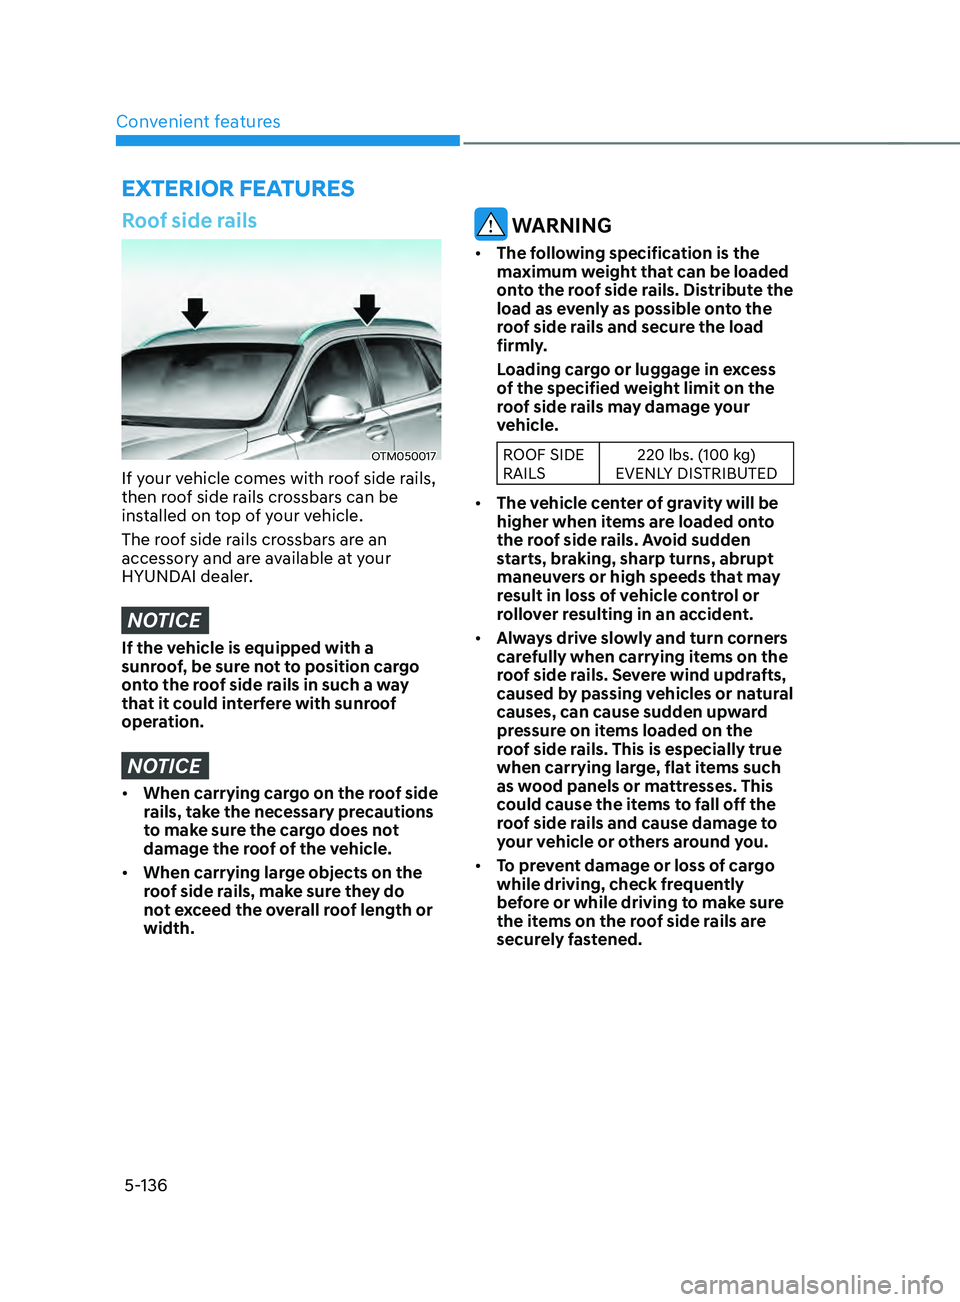
If your vehicle comes with roof side rails,
then roof side rails crossbars can be
installed on top of your vehicle.
The roof side rails crossbars are an
accessory and are available at your
HYUNDAI dealer.
NOTICE
If the vehicle is equipped with a
sunroof, be sure not to position cargo
onto the roof side rails in such a way
that it could interfere with sunroof
operation.
NOTICE
• When carrying cargo on the roof side
rails, take the necessary precautions
to make sure the cargo does not
damage the roof of the vehicle.
• When carrying large objects on the
roof side rails, make sure they do
not exceed the overall roof length or
width.
WARNING
• The following specification is the
maximum weight that can be loaded
onto the roof side rails. Distribute the
load as evenly as possible onto the
roof side rails and secure the load
firmly.
Loading cargo or luggage in excess
of the specified weight limit on the
roof side rails may damage your
vehicle.
ROOF SIDE
RAILS 220 lbs. (100 kg)
EVENLY DISTRIBUTED
• The vehicle center of gravity will be
higher when items are loaded onto
the roof side rails. Avoid sudden
starts, braking, sharp turns, abrupt
maneuvers or high speeds that may
result in loss of vehicle control or
rollover resulting in an accident.
• Always drive slowly and turn corners
carefully when carrying items on the
roof side rails. Severe wind updrafts,
caused by passing vehicles or natural
causes, can cause sudden upward
pressure on items loaded on the
roof side rails. This is especially true
when carrying large, flat items such
as wood panels or mattresses. This
could cause the items to fall off the
roof side rails and cause damage to
your vehicle or others around you.
• To prevent damage or loss of cargo
while driving, check frequently
before or while driving to make sure
the items on the roof side rails are
securely fastened.
Page 287 of 636
05
5-143
USB
Supported audio formats
• Audio file specification
- WA
Veform audio format
- MPEG1/2/2.5 A
udio Layer3
- Window
s Media Audio Ver 7.X/8.X
• Bit rates
- MPEG1 (La
yer3):
32/40/48/56/64/80/96/112/128/160
/192/224/256/320 kbps
- MPEG2 (La
yer3):
8/16/24/32/40/48/56/64/80/96/112
/128/144/160 kbps
- MPEG2.5 (La
yer3):
8/16/24/32/40/48/56/64/80/96/112
/128/144/160 kbps
- WMA (High Range): 48/64/80/96/128/160/192 kbps
• Bits P
er Sample
- WA
V (PCM(Stereo)): 24 bit
- WA
V (IMA ADPCM): 4 bit
- WA
V (MS ADPCM): 4 bit
• Sampling frequency
- MPEG1: 44
100/48000/32000 Hz
- MPEG2: 22050/2
4000/16000 Hz
- MPEG2.5: 11025/12000/8000 Hz
- WMA: 32000/44100/48000 Hz
- WA
V: 44100/48000 Hz
• Maximum length of folder/file names
(Based on Unicode): 40 English or
Korean characters
• Supported characters for folder/
file names (Unicode support): 2,604
Korean characters, 94 alphanumeric
characters, 4,888 Chinese characters
in common use, 986 special
characters
• Maximum number of folders: 1,000
• Maximum number of files: 5,000
NOTICE
• Files that are not in a supported
format may not be recognised or
played, or information about them,
such as the file name, may not be
displayed properly.
• Only files with .mp3/.wma/.wav
extensions can be recognised by the
system. If the file is not in supported
format, change the file format by
using the latest encoding software.
• The device will not support files
locked by DRM (Digital Rights
Management).
• For MP3/WMA compression files and
WAV file, differences in sound quality
will occur depending on the bitrate.
(Music files with a higher bitrate
have a better sound quality.)
• Japanese or Simplified Chinese
characters in folder or file names
may not be displayed properly.
INFOTAINMENT SYS TEM SPE CIFICATIONS
Page 354 of 636
Driving your vehicle
6-66
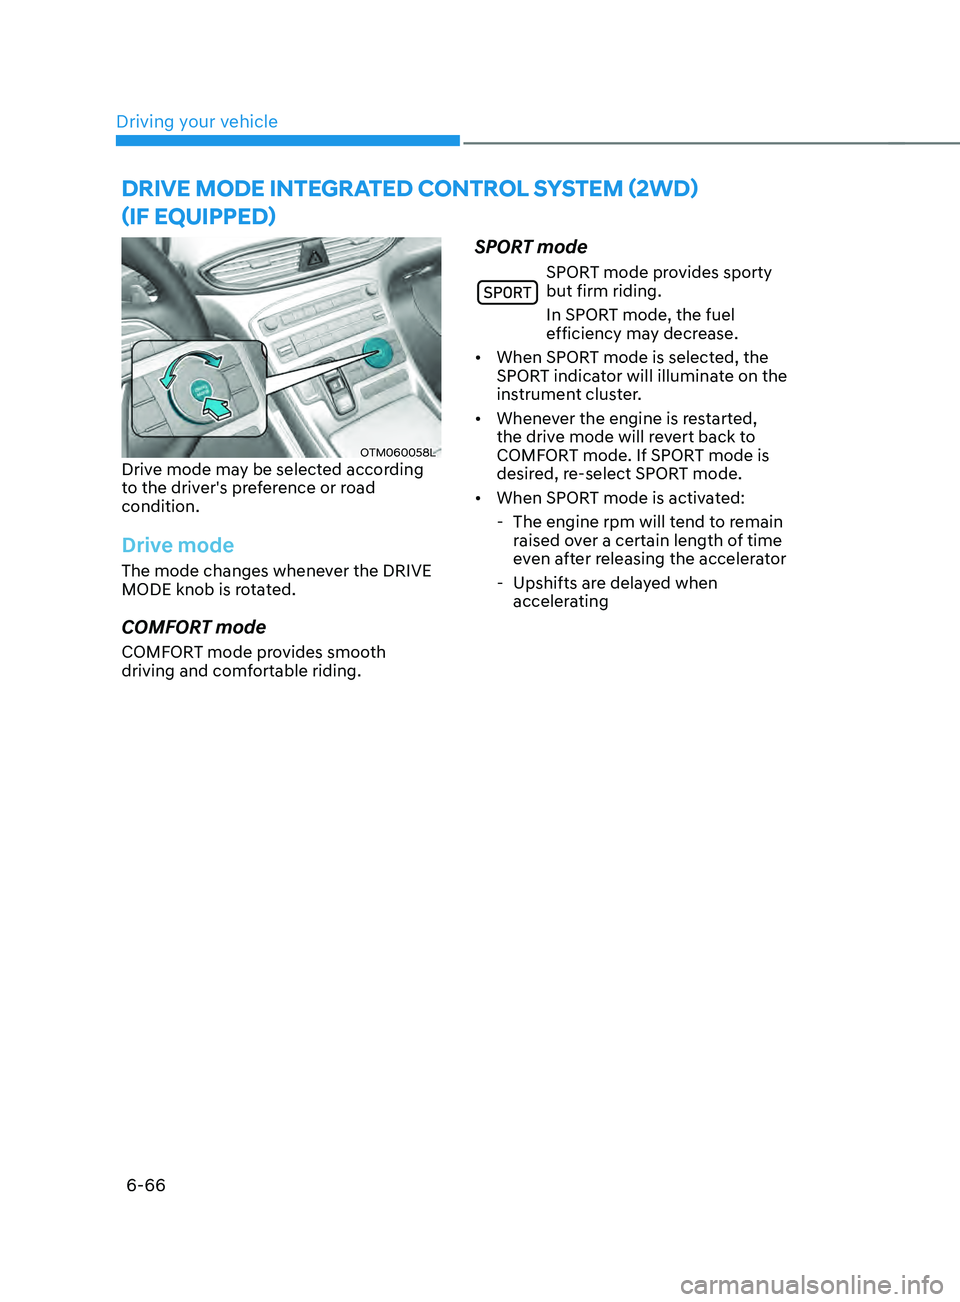
OTM060058LDrive mode may be selected according
to the driver's preference or road
condition.
Drive mode
The mode changes whenever the DRIVE
MODE knob is rotated.
COMFORT mode
COMFORT mode provides smooth
driving and comfortable riding.
SPORT mode
SPORT mode provides sporty
but firm riding.
In SPORT mode, the fuel
efficiency may decrease.
• When SPORT mode is selected, the
SPORT indicator will illuminate on the
instrument cluster.
• Whenever the engine is restarted,
the drive mode will revert back to
COMFORT mode. If SPORT mode is
desired, re-select SPORT mode.
• When SPORT mode is activated:
- The engine rpm will tend t
o remain
raised over a certain length of time
even after releasing the accelerator
- Upshifts are dela
yed when
accelerating
DRIVE mODE InTEgRA TED C OnTR OL sYsTEm (2WD)
(
IF E
QUI
ppED)