2021 HYUNDAI SANTA FE CALLIGRAPHY infotainment
[x] Cancel search: infotainmentPage 52 of 636
Seats & Safety System
3-20
• When pressing the switch for more
than 1.5 seconds with the seat warmer
operating, the seat warmer will turn
OFF.
• The seat warmer defaults to the OFF
position whenever the ignition switch
is ON.
• Auto Comfort Control (for driver’s
seat) (if equipped)
- The seat w
armer automatically
controls the seat temperature
depending on the ambient
temperature and the set climate
control temperature when the
engine is running. If the seat
warmer switch is pushed, the seat
warmer will have to be controlled
manually.
To use this function, it must be
activated from the Settings menu in
the AV/AVN system screen.
- The seat w
armer defaults to the
OFF position whenever the ignition
switch is ON. However, if the Auto
Comfort Control function is ON, the
driver’s seat warmer will turn on
and off depending on the ambient
temperature and the set climate
control temperature.
For more details, refer to the separately
supplied Infotainment manual with
your vehicle.
Information
With the seat warmer switch in the ON
position, the heating system in the seat
turns off or on automatically depending on
the seat temperature.
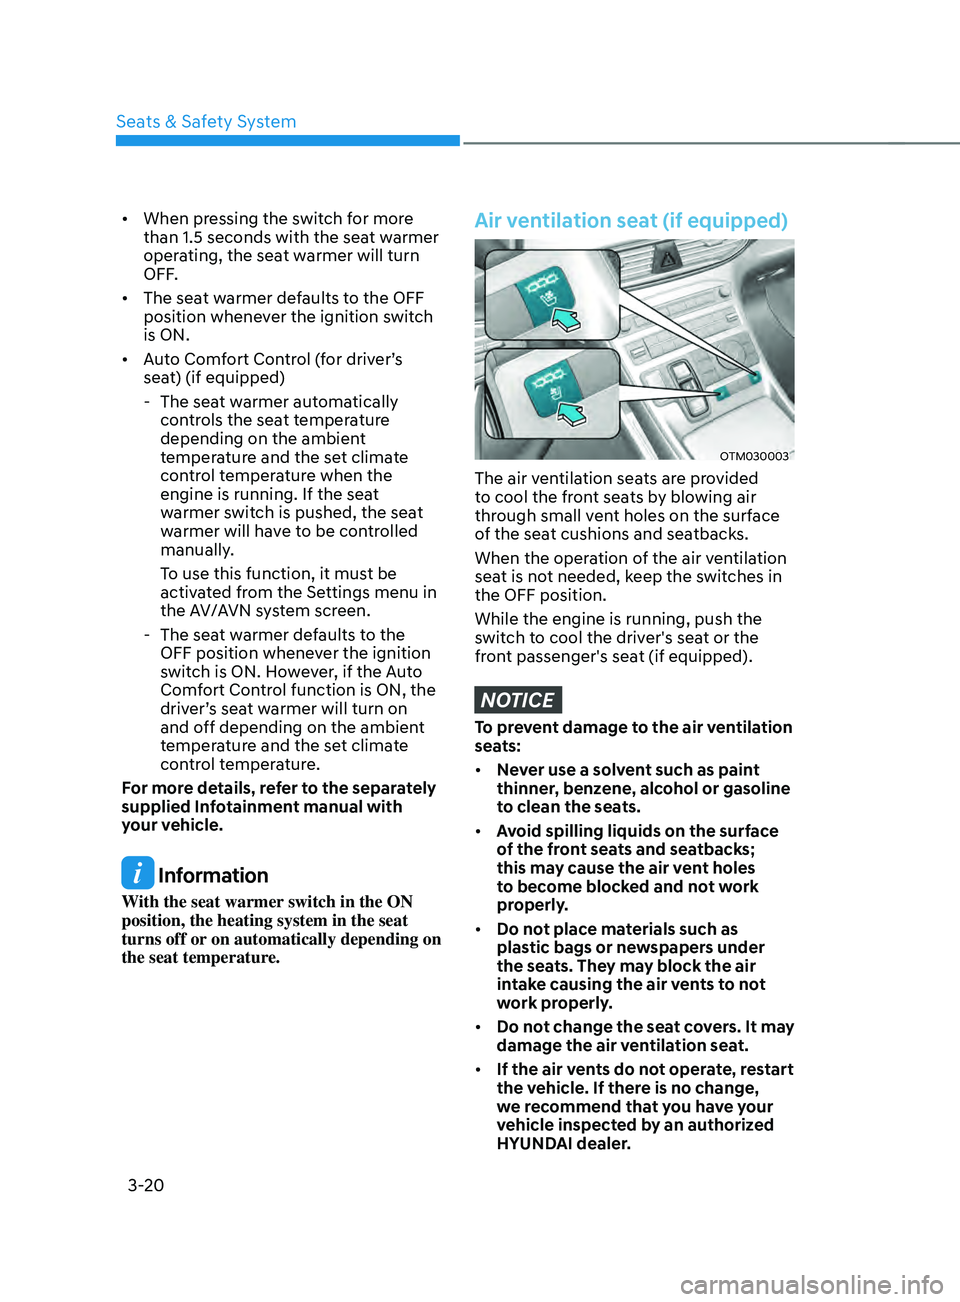
Air ventilation seat (if equipped)
OTM030003
The air ventilation seats are provided
to cool the front seats by blowing air
through small vent holes on the surface
of the seat cushions and seatbacks.
When the operation of the air ventilation
seat is not needed, keep the switches in
the OFF position.
While the engine is running, push the
switch to cool the driver's seat or the
front passenger's seat (if equipped).
NOTICE
To prevent damage to the air ventilation
seats:
• Never use a solvent such as paint
thinner, benzene, alcohol or gasoline
to clean the seats.
• Avoid spilling liquids on the surface
of the front seats and seatbacks;
this may cause the air vent holes
to become blocked and not work
properly.
• Do not place materials such as
plastic bags or newspapers under
the seats. They may block the air
intake causing the air vents to not
work properly.
• Do not change the seat covers. It may
damage the air ventilation seat.
• If the air vents do not operate, restart
the vehicle. If there is no change,
we recommend that you have your
vehicle inspected by an authorized
HYUNDAI dealer.
Page 53 of 636
03
3-21
• Each time you push the switch, the
airflow changes as follows:
OFF
LOW ( )HIGH ( )
MIDDLE ( )
• When pressing the switch for
more than 1.5 seconds with the
air ventilation seat operating, the
operation will turn OFF.
• The air ventilation seats defaults
to the OFF position whenever the
ignition switch is placed to the ON
position.
• Auto Comfort Control (for driver’s
seat) (if equipped)
- The air ven
tilation seats
automatically controls the seat
temperature depending on the
ambient temperature and the set
climate control temperature when
the engine is running. If the air
ventilation seats switch is pushed,
the air ventilation seats will have to
be controlled manually.
To use this function, it must be
activated from the Settings menu in
the AV/AVN system screen.
- The air ven
tilation seats defaults
to the OFF position whenever the
ignition switch is ON. However, if
the Auto Comfort Control function
is ON, the air ventilation seats will
turn on and off depending on the
ambient temperature and the set
climate control temperature.
For more details, refer to the separately
supplied Infotainment manual with
your vehicle.
Rear Occupant Alert (ROA) (if
equipped)
Rear Occupant Alert is provided to help
prevent the driver from leaving the
vehicle with the rear passenger left in the
vehicle.
System setting
To use Rear Occupant Alert, it must be
enabled from the Settings menu in the
infotainment system screen. Select:
- Setup → V
ehicle
Se
ttings
→ Conv
enience
→ R
ear
Occupan
t
Alert
F
or detailed information, scan the QR
code in the separately supplied simple
manual.
System operation
• First alert
When you open the front door after
opening and closing the rear door and
turning off the engine, the ‘Check rear
seats’ warning message appears on
the cluster.
• Second alert
After the first alert, the second alert
operates when any movement is
detected in the vehicle after the
driver’s door is closed and all the
doors are locked. The horn will sound
for approximately 25 seconds. If
the system continues to detect a
movement, the alert operates up to 8
times.
Unlock the doors with the smart key
to stop the alert.
• The system detects movement in the
vehicle for 8 hours after the door is
locked.
• The second alert is activated only after
the prior activation of the first alert.
Page 103 of 636

04
4-5
Instrument cluster control
Instrument panel illumination
When the vehicle’s parking lights or
headlamps are on, press the illumination
control switch to adjust the brightness of
the instrument panel illumination.
When pressing the illumination control
switch, the interior switch illumination
intensity also adjusted.
You can adjust the brightness of the
instrument panel illumination form the
User Settings Mode on the LCD display
when
the ignition s
witch
is on (‘Ligh
ts
→ Illumination
’). When the vehicle’s parking
lights or headlamps are on, interior
switch illumination intensity and mood
lamps are also adjusted.
If your vehicle is equipped with
additional navigation, please refer
to the infotainment system manual
separately supplied.
WARNING
Never adjust the instrument cluster
while driving. This could result in loss
of control and lead to an accident that
may cause death, serious injury, or
vehicle damage.
• The brightness of the instrument
panel illumination is displayed.
• If the brightness reaches to the
maximum or minimum level, a chime
will sound.
Gauges and meters
Speedometer
„„4.2-inch „„12.3-inch
OTM040059LOTM040006L
The speedometer indicates the speed of
the vehicle and is calibrated in miles per
hour (MPH) and/or kilometers per hour
(km/h).
Tachometer
„„4.2-inch„„12.3-inch
OTM040007LOTM040008LThe tachometer indicates the
approximate number of engine
revolutions per minute (rpm).
Use the tachometer to select the correct
shift points and to prevent lugging and/
or over-revving the engine.
NOTICE
Do not operate the engine within the
tachometer's RED ZONE. This may
cause severe engine damage.
Page 107 of 636

04
4-9
Fuel economy (for 12.3-inch cluster)
OTMA040002
The average fuel economy (1) and instant
fuel economy (2) is displayed at the
bottom of the cluster.
Automatic reset
To automatically reset the average fuel
economy, select between "After Ignition"
or "After Refueling" from the Settings
menu in the infotainment system screen.
Transmission shift indicator
Automatic transmission / Dual
clutch transmission shift indicator
„„4.2-inch„„12.3-inch
OTM040016OCN7040013N
This indicator informs the current gear
engaged.
Page 127 of 636

04
4-29
LCD display control
OTM040050
The LCD display modes can be changed by using the control buttons.
SwitchFunction
MODE button for changing modes
, MOVE switch for changing items
OK SELECT/RESET button for setting or resetting the selected item
Information
When the infotainment system is applied, only the User’s Setting mode on the
infotainment system is supported but the User’s Setting mode on the instrument cluster is
not supported.
LCD DISPLAY
Page 131 of 636
04
4-33
OTM080005L
Tire Pressure
This mode displays information related to
Tire Pressure.
For more details, refer to "Tire Pressure
Monitoring System (TPMS)" in chapter
8.
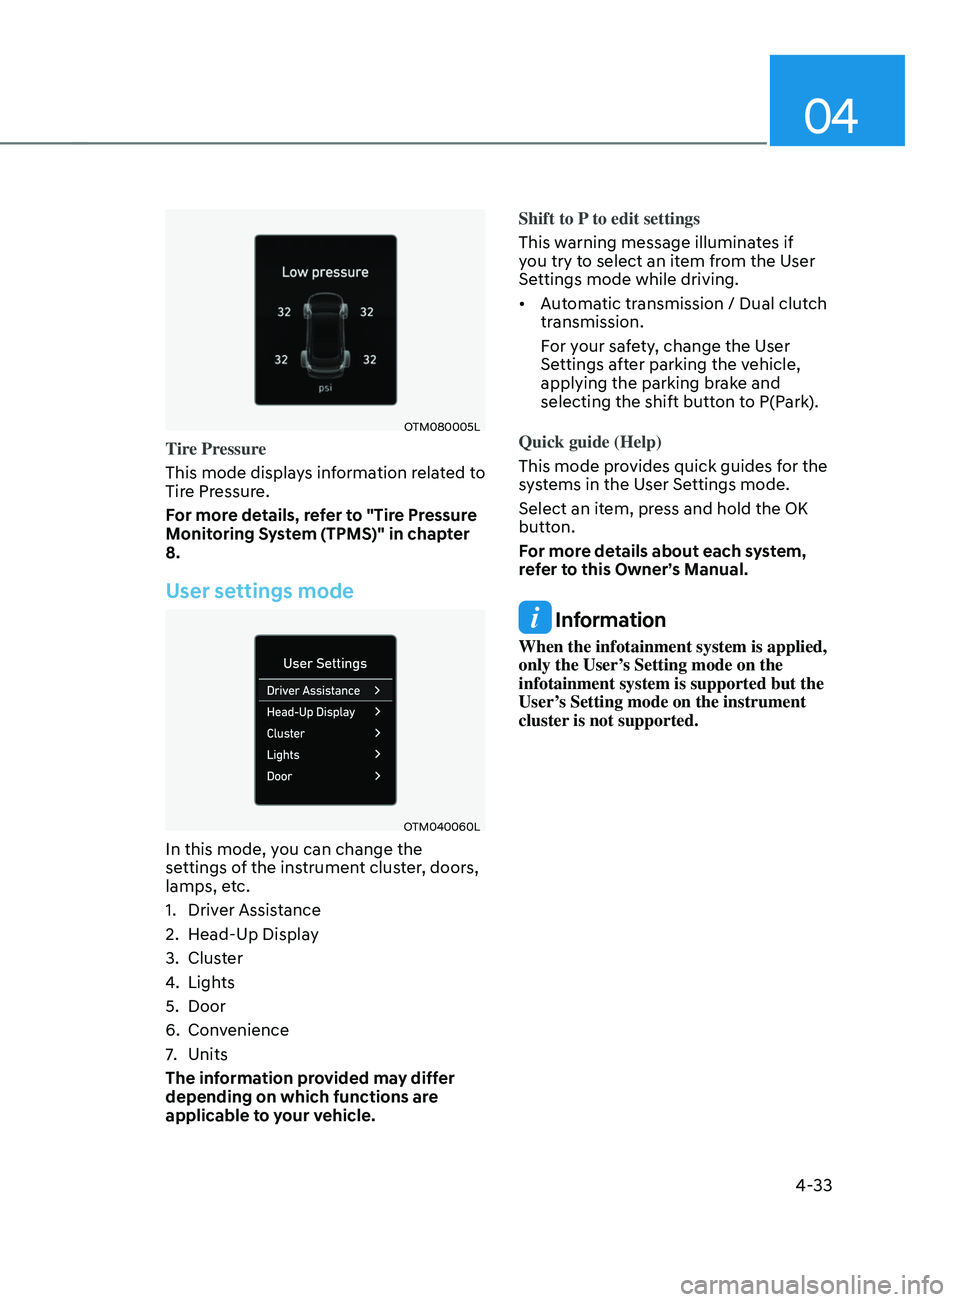
User settings mode
OTM040060L
In this mode, you can change the
settings of the instrument cluster, doors,
lamps, etc.
1.
Driver Assis
tance
2.
Head-Up Displa
y
3.
Clust
er
4.
Lights
5.
Door
6.
Conv
enience
7.
Units
The inf
ormation provided may differ
depending on which functions are
applicable to your vehicle. Shift to P to edit settings
This warning message illuminates if
you try to select an item from the User
Settings mode while driving.
•
Automatic transmission / Dual clutch
transmission.
For your safety, change the User
Settings after parking the vehicle,
applying the parking brake and
selecting the shift button to P(Park).
Quick guide (Help)
This mode provides quick guides for the
systems in the User Settings mode.
Select an item, press and hold the OK
button.
For more details about each system,
refer to this Owner’s Manual.
Information
When the infotainment system is applied,
only the User’s Setting mode on the
infotainment system is supported but the
User’s Setting mode on the instrument
cluster is not supported.
Page 148 of 636
Infotainment system ........................................................................\
..............5-137USB Port ........................................................................\
............................................. 5-137
An tenna ........................................................................\
..................................... .........5-137
Steering wheel remote controls
........................................................................\
....... 5-137
In
fotainment system
........................................................................\
........................ 5-
138
Voice recognition
........................................................................\
............................. 5-
138
Bluetooth® Wireless Technology
........................................................................\
..... 5-139
H
ow vehicle radio works
........................................................................\
.................. 5-
139
Infotainment System specifications ............................................................5-143USB ........................................................................\
.................................................... 5-143
Blue tooth ........................................................................\
.......................................... 5-
144
Trademarks ........................................................................\
.............................5-144
5
Page 160 of 636
Convenient features
5-16
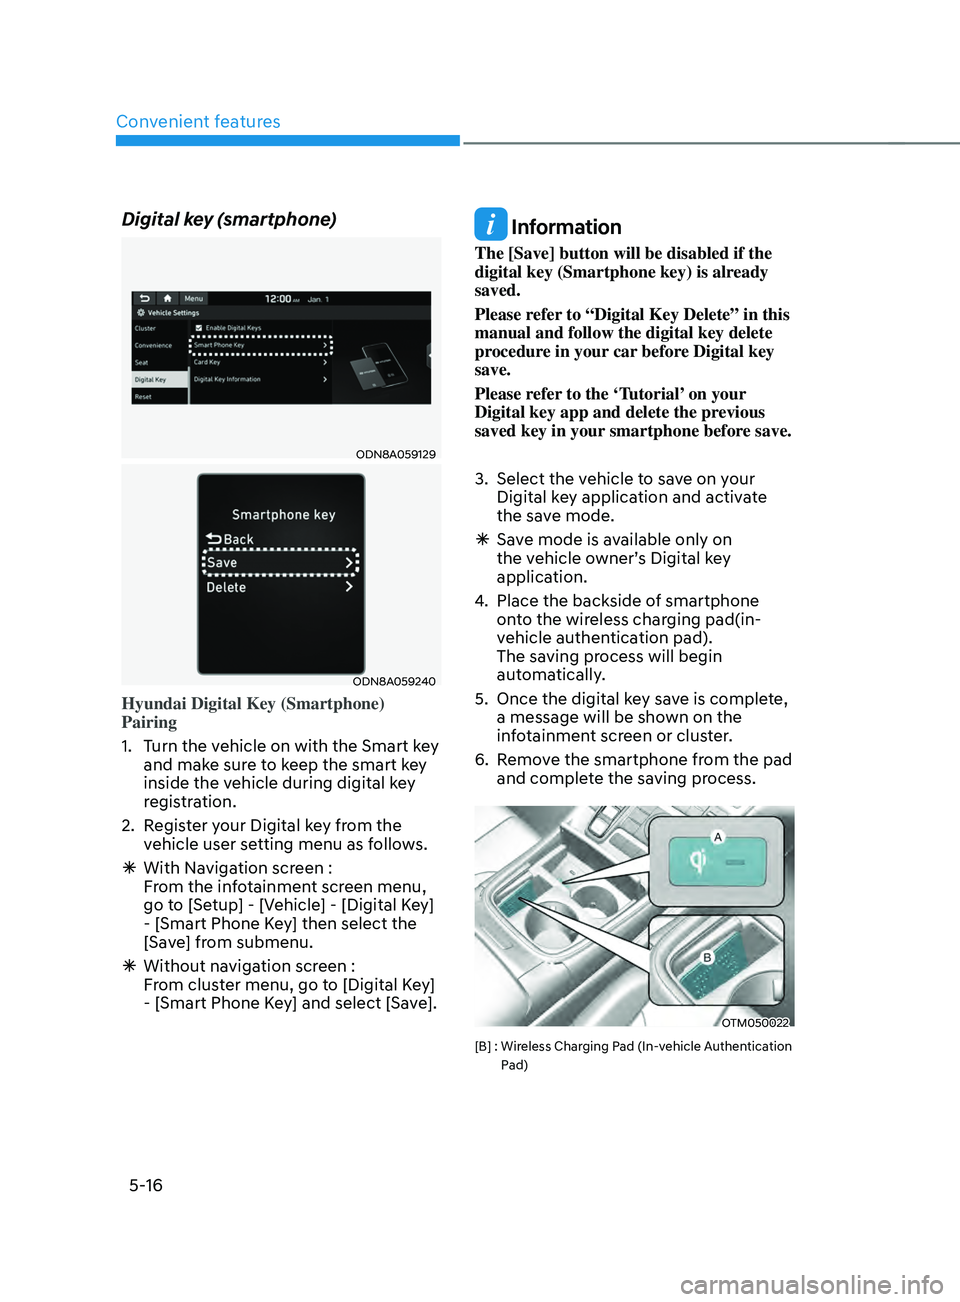
Digital key (smartphone)
ODN8A059129
ODN8A059240
Hyundai Digital Key (Smartphone)
Pairing
1.
Turn the v
ehicle on with the Smart key
and make sure to keep the smart key
inside the vehicle during digital key
registration.
2.
Regis
ter your Digital key from the
vehicle user setting menu as follows.
à With Naviga
tion screen :
From the infotainment screen menu,
go to [Setup] - [Vehicle] - [Digital Key]
- [Smart Phone Key] then select the
[Save] from submenu.
à Without naviga
tion screen :
From cluster menu, go to [Digital Key]
- [Smart Phone Key] and select [Save].
Information
The [Save] button will be disabled if the
digital key (Smartphone key) is already
saved.
Please refer to “Digital Key Delete” in this
manual and follow the digital key delete
procedure in your car before Digital key
save.
Please refer to the ‘Tutorial’ on your
Digital key app and delete the previous
saved key in your smartphone before save.
3.
Select the vehicle t
o save on your
Digital key application and activate
the save mode.
à Sav
e mode is available only on
the vehicle owner’s Digital key
application.
4.
Place the backside o
f smartphone
onto the wireless charging pad(in-
vehicle authentication pad).
The saving process will begin
automatically.
5.
Once the digital ke
y save is complete,
a message will be shown on the
infotainment screen or cluster.
6.
Remo
ve the smartphone from the pad
and complete the saving process.
OTM050022
[B] : Wireless Charging Pad (In-vehicle Authentication
P
ad)