2021 HYUNDAI SANTA FE CALLIGRAPHY gas type
[x] Cancel search: gas typePage 12 of 636
Introduction
1-6
Using Fuel Additives (except Detergent Fuel Additives)
Using fuel additives such as:
- Silicone fuel additive
- Ferr
ocene (iron-based) fuel additive
- Other metallic
-based fuel additives
May result in cylinder misfire, poor acceleration, engine stalling, damage to the
catalyst, or abnormal corrosion, and may cause damage to the engine resulting in a
reduction in the overall life of the powertrain.
- The Malfunction Indicat
or Lamp (MIL) may illuminate.
NOTICE
Damage to the fuel system or performance problem caused by the use of these fuels
may not be covered by your New Vehicle Limited Warranty.
Gasoline containing MMT
Some gasoline contains harmful manganese-based fuel additives such as MMT
(Methylcyclopentadienyl Manganese Tricarbonyl).
HYUNDAI does not recommend the use of gasoline containing MMT.
This type of fuel can reduce vehicle performance and affect your emission control
system.
The malfunction indicator lamp on the cluster may come on.
Detergent Fuel Additives
HYUNDAI recommends that you use good quality gasolines treated with detergent
additives such as TOP TIER Detergent Gasoline, which help prevent deposit formation
in the engine. These gasolines will help the engine run cleaner and enhance
performance of the Emission Control System. For more information on TOP TIER
Detergent Gasoline, please go to the website (www. toptiergas.com).
For customers who do not use TOP Tier Detergent Gasoline regularly, and have
problems starting or the engine does not run smoothly, detergent-based fuel additives
that you can purchase separately may be added to the gasoline. If TOP TIER Detergent
Gasoline is not available, one bottle of additive added to the fuel tank according to the
maintenance schedule is recommended (refer to the Maintenance Schedule in chapter
9).
Additives are available from your authorized HYUNDAI dealer along with information
on how to use them. Do not mix other additives.
Operation in foreign countries
If you are going to drive your vehicle in another country, be sure to:
• Observe all regulations regarding registration and insurance.
• Determine that acceptable fuel is available.
Page 223 of 636
05
5-79
• Do not get back into a vehicle
once you have begun refueling.
You can generate a buildup of
static electricity by touching,
rubbing or sliding against any item
or fabric capable of producing
static electricity. Static electricity
discharge can ignite fuel vapors
causing a fire. If you must re-enter
the vehicle, you should once again
eliminate potentially dangerous
static electricity discharge by
touching a metal part of the vehicle,
away from the fuel filler neck, nozzle
or other fuel source, with your bare
hand.
• When using an approved portable
fuel container, be sure to place the
container on the ground prior to
refueling. Static electricity discharge
from the container can ignite fuel
vapors causing a fire.
Once refueling has begun, contact
between your bare hand and the
vehicle should be maintained until
the filling is complete.
• Use only approved portable plastic
fuel containers designed to carry and
store fuel.
• When refueling, always shift the
gear to the P (Park) position, set
the parking brake, and press the
Engine Start/Stop button to the
OFF position. Sparks produced by
electrical components related to the
engine can ignite fuel vapors causing
a fire.
• Do not use matches or a lighter and
do not smoke or leave a lit cigarette
in your vehicle while at a gas station,
especially during refueling.• Do not over-fill or top-off your
vehicle tank, which can cause fuel
spillage.
• If a fire breaks out during refueling,
leave the vicinity of the vehicle, and
immediately contact the manager
of the gas station and then contact
the local fire department. Follow any
safety instructions they provide.
• If pressurized fuel sprays out, it can
cover your clothes or skin and thus
subject you to the risk of fire and
burns. Always remove the fuel cap
carefully and slowly. If the cap is
venting fuel or if you hear a hissing
sound, wait until the condition stops
before completely removing the cap.
• Always check that the fuel cap is
installed securely to prevent fuel
spillage in the event of an accident.
Information
Make sure to refuel your vehicle according
to the “Fuel Requirements” section in
suggested in chapter 1.
NOTICE
• Do not spill fuel on the exterior
surfaces of the vehicle. Any type of
fuel spilled on painted surfaces may
damage the paint.
• If the fuel filler cap requires
replacement, we recommend that
you use only a genuine HYUNDAI cap
or the equivalent specified for your
vehicle. An incorrect fuel filler cap
can result in a serious malfunction of
the fuel system or emission control
system.
Page 306 of 636

Driving your vehicle
6-18
Shift-lock system
For your safety, the automatic
transmission has a shift-lock system
which prevents shifting the transmission
from P (Park) into R (Reverse) unless the
brake pedal is depressed.
To shift the transmission from P (Park)
into R (Reverse):
1.
Depress and hold the br
ake pedal.
2.
Start the engine or place the ignition
s
witch in the ON position.
3.
Depress the br
ake pedal and push the
R (Reverse) button. (button type)
Ignition key interlock system
(if equipped)
The ignition key cannot be removed
unless the shift lever is in the P (Park)
position.
When the battery is discharged:
The shift buttons will not function when
the battery is discharged.
In emergencies, do the following to
move the shift button to N (Neutral) on a
level ground.
1.
Connect the batt
ery cables from
another vehicle or from a another
battery to the jump-starting terminals
inside the engine compartment.
For more details, refer to “Jump
Starting” in chapter 7.
2.
Release the parking br
ake with the
ignition switch in the ON position.
3.
Shift the gear to the N(N
eutral)
position refer to the “Stay in Neutral
when vehicle is Off” in this chapter.
Parking
Always come to a complete stop and
continue to depress the brake pedal.
Move the shift lever/button into the P
(Park) position, apply the parking brake,
and place the ignition switch in the
LOCK/OFF position. Take the Key with
you when exiting the vehicle.
WARNING
When you stay in the vehicle with
the engine running, be careful not to
depress the accelerator pedal for a long
period of time. The engine or exhaust
system may overheat and start a fire.
The exhaust gas and the exhaust system
are very hot. Keep away from the
exhaust system components.
Do not stop or park over flammable
materials, such as dry grass, paper or
leaves. They may ignite and cause a fire.
Page 318 of 636
Driving your vehicle
6-30
Parking
Always come to a complete stop and
continue to depress the brake pedal.
Press the P (Park) button, apply the
parking brake, and place the ignition
switch in the LOCK/OFF position. Take
the Key with you when exiting the
vehicle.
WARNING
When you stay in the vehicle with
the engine running, be careful not to
depress the accelerator pedal for a long
period of time. The engine or exhaust
system may overheat and start a fire.
The exhaust gas and the exhaust system
are very hot. Keep away from the
exhaust system components.
Do not stop or park over flammable
materials, such as dry grass, paper or
leaves. They may ignite and cause a fire.
LCD display message (button
type)
Shifting conditions not met. Reduce
speed, then shift
The warning message appears on the
LCD display, when engine RPM is too
high, or when driving speed is too fast to
shift the gear.
We recommend you decrease the engine
speed or slow down before shifting the
gear.
Press brake pedal to change gear
The warning message appears on the
LCD display, when the brake pedal is not
depressed while shifting the gear.
We recommend you to depress the brake
pedal and then shift the gear.
Shift to P after stopping
The warning message appears on the
LCD display, when the gear is shifted to P
(Park) while the vehicle is moving.
Stop the vehicle before shifting to P
(Park).
PARK engaged
The warning message appears on the
LCD display, when the gear is shifted to P
(Park) while the vehicle is moving.
Stop the vehicle before shifting to P
(Park).
Page 603 of 636
09
9-53
OTM090035
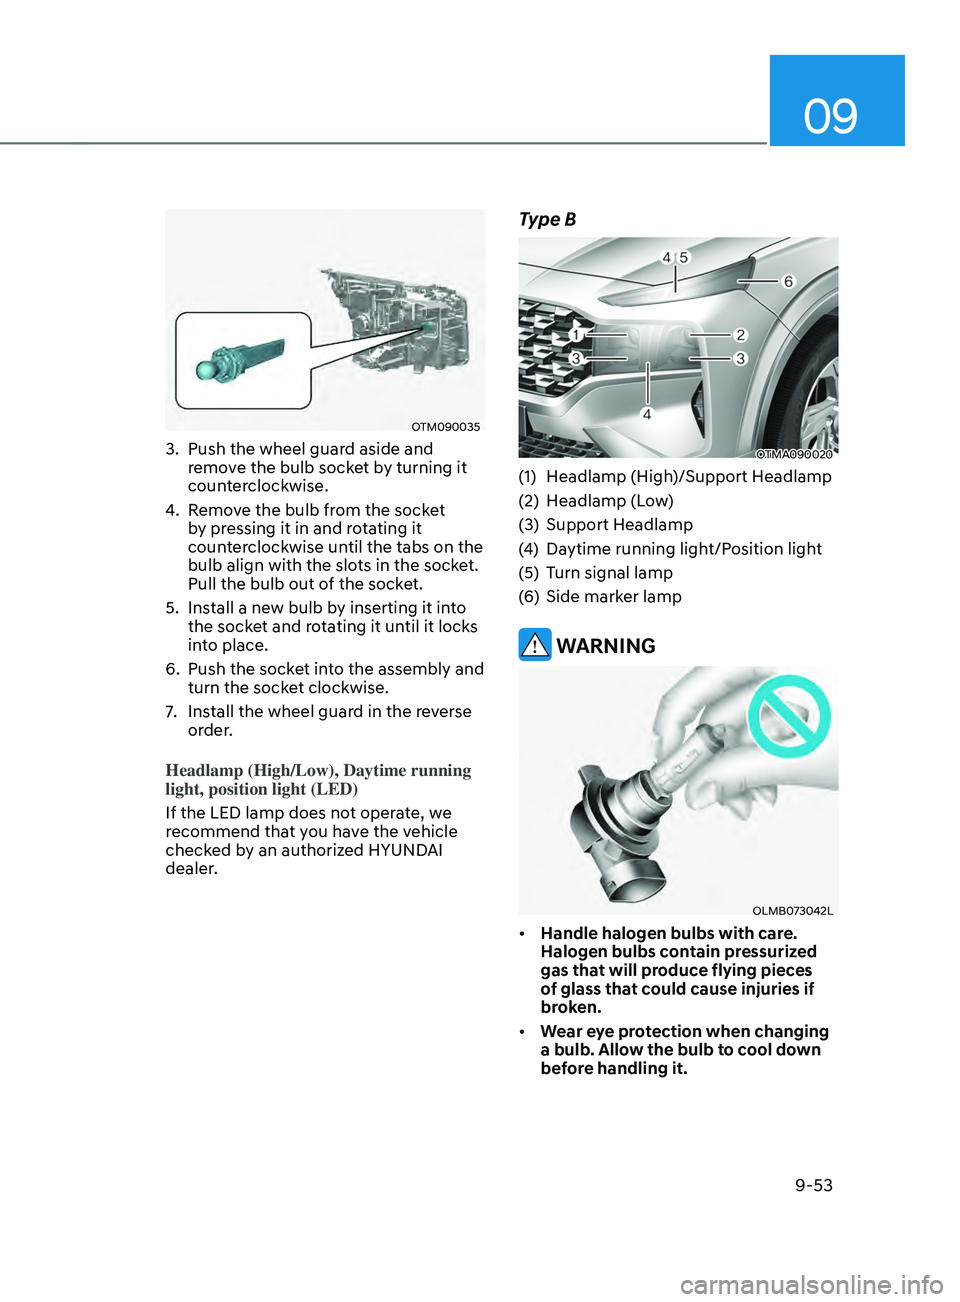
3. Push the wheel guard aside and
remove the bulb socket by turning it
counterclockwise.
4.
Remo
ve the bulb from the socket
by pressing it in and rotating it
counterclockwise until the tabs on the
bulb align with the slots in the socket.
Pull the bulb out of the socket.
5.
Install a ne
w bulb by inserting it into
the socket and rotating it until it locks
into place.
6.
Push the socke
t into the assembly and
turn the socket clockwise.
7.
Install the wheel guar
d in the reverse
order.
Headlamp (High/Low), Daytime running
light, position light (LED)
If the LED lamp does not operate, we
recommend that you have the vehicle
checked by an authorized HYUNDAI
dealer.
Type B
OTMA090020
(1) Headlamp (High)/Support Headlamp
(2)
Headlamp (L
ow)
(3)
Support Headlamp
(4
)
Daytime running ligh
t/Position light
(5)
Turn signal lamp
(
6)
Side marker lamp
WARNING
OLMB073042L
• Handle halogen bulbs with care.
Halogen bulbs contain pressurized
gas that will produce flying pieces
of glass that could cause injuries if
broken.
• Wear eye protection when changing
a bulb. Allow the bulb to cool down
before handling it.
Page 627 of 636
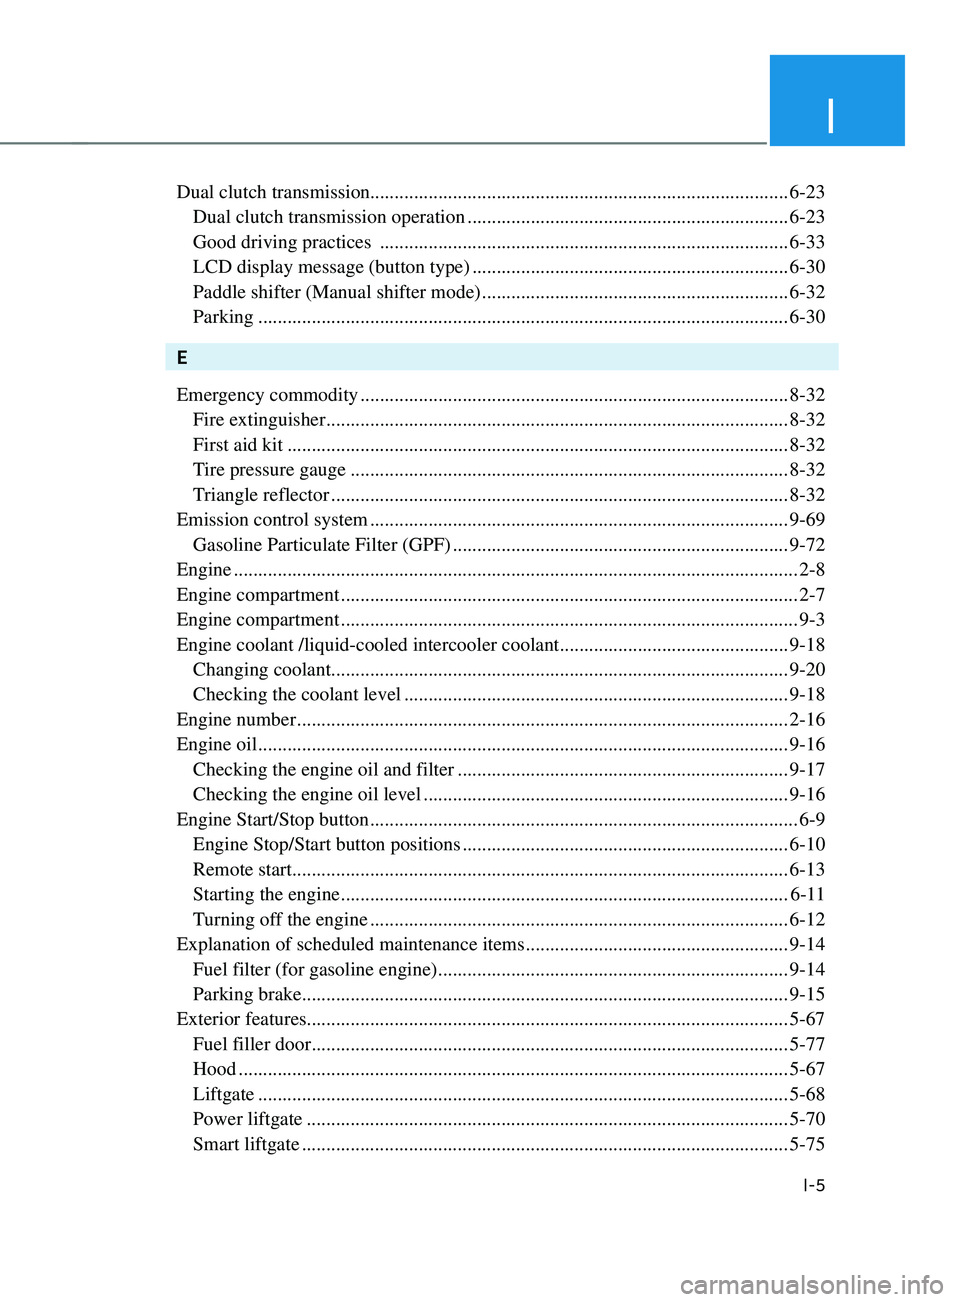
I
I-5
Dual clutch transmission........................................................................\
.............. 6-23
Dual clutch transmission operation ..................................................................6-23
Good driving practices ........................................................................\
............ 6-33
LCD display message (button type) .................................................................6-30
Paddle shifter (Manual shifter mode) ...............................................................6-32
Parking ........................................................................\
..................................... 6-30
E
Emer
gency commodity
........................................................................\
................ 8-32
Fire extinguisher ........................................................................\
....................... 8-32
First aid kit ........................................................................\
............................... 8-32
Tire pressure gauge ........................................................................\
..................8-32
Triangle reflector ........................................................................\
...................... 8-32
Emission control system
........................................................................\
.............. 9-69
Gasoline Particulate Filter (GPF) .....................................................................9-72
Engine
........................................................................\
............................................ 2-8
Engine compartment
........................................................................\
...................... 2-7
Engine compartment
........................................................................\
...................... 9-3
Engine coolant /liquid-cooled intercooler coolant
............................................... 9-18
Changing coolant ........................................................................\
...................... 9-20
Checking the coolant level ........................................................................\
.......9-18
Engine number
........................................................................\
............................. 2-16
Engine oil
........................................................................\
..................................... 9-16
Checking the engine oil and filter ....................................................................9-17
Checking the engine oil level ........................................................................\
... 9-16
Engine Start/Stop button
........................................................................\
................ 6-9
Engine Stop/Start button positions ...................................................................6-10
Remote start ........................................................................\
.............................. 6-13
Starting the engine ........................................................................\
....................6-1
1
Turning of
f the engine
........................................................................\
.............. 6-12
Explanation of scheduled maintenance items
...................................................... 9-14
Fuel filter (for gasoline engine) ........................................................................\
9-14
Parking brake ........................................................................\
............................ 9-15
Exterior features
........................................................................\
........................... 5-67
Fuel filler door ........................................................................\
.......................... 5-77
Hood ........................................................................\
......................................... 5-67
Liftgate ........................................................................\
.....................................5-68
Power liftgate ........................................................................\
...........................5-70
Smart liftgate ........................................................................\
............................ 5-75