2021 HYUNDAI SANTA FE CALLIGRAPHY default
[x] Cancel search: defaultPage 52 of 636

Seats & Safety System
3-20
• When pressing the switch for more
than 1.5 seconds with the seat warmer
operating, the seat warmer will turn
OFF.
• The seat warmer defaults to the OFF
position whenever the ignition switch
is ON.
• Auto Comfort Control (for driver’s
seat) (if equipped)
- The seat w
armer automatically
controls the seat temperature
depending on the ambient
temperature and the set climate
control temperature when the
engine is running. If the seat
warmer switch is pushed, the seat
warmer will have to be controlled
manually.
To use this function, it must be
activated from the Settings menu in
the AV/AVN system screen.
- The seat w
armer defaults to the
OFF position whenever the ignition
switch is ON. However, if the Auto
Comfort Control function is ON, the
driver’s seat warmer will turn on
and off depending on the ambient
temperature and the set climate
control temperature.
For more details, refer to the separately
supplied Infotainment manual with
your vehicle.
Information
With the seat warmer switch in the ON
position, the heating system in the seat
turns off or on automatically depending on
the seat temperature.
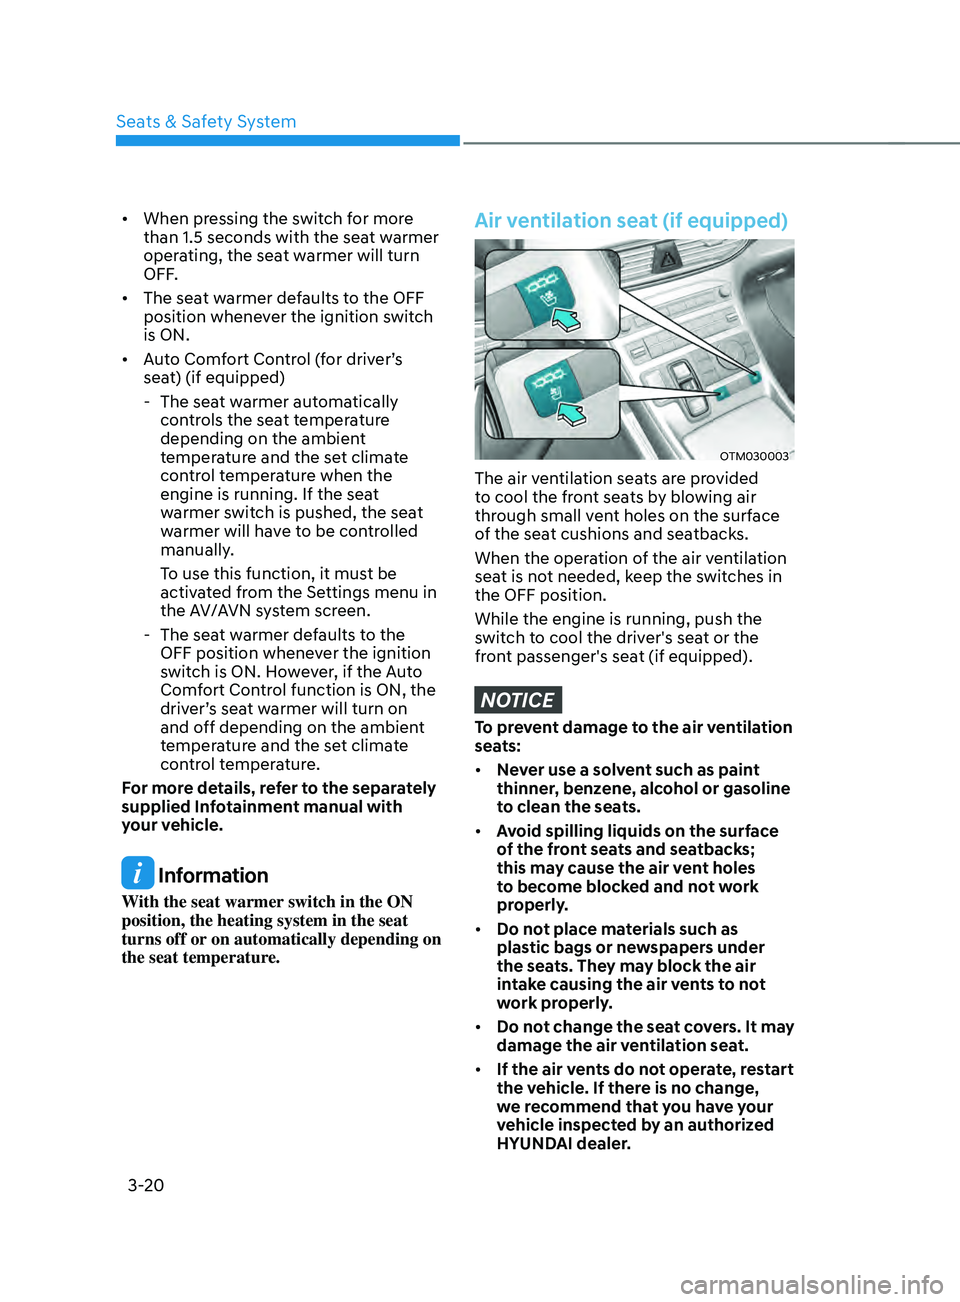
Air ventilation seat (if equipped)
OTM030003
The air ventilation seats are provided
to cool the front seats by blowing air
through small vent holes on the surface
of the seat cushions and seatbacks.
When the operation of the air ventilation
seat is not needed, keep the switches in
the OFF position.
While the engine is running, push the
switch to cool the driver's seat or the
front passenger's seat (if equipped).
NOTICE
To prevent damage to the air ventilation
seats:
• Never use a solvent such as paint
thinner, benzene, alcohol or gasoline
to clean the seats.
• Avoid spilling liquids on the surface
of the front seats and seatbacks;
this may cause the air vent holes
to become blocked and not work
properly.
• Do not place materials such as
plastic bags or newspapers under
the seats. They may block the air
intake causing the air vents to not
work properly.
• Do not change the seat covers. It may
damage the air ventilation seat.
• If the air vents do not operate, restart
the vehicle. If there is no change,
we recommend that you have your
vehicle inspected by an authorized
HYUNDAI dealer.
Page 53 of 636

03
3-21
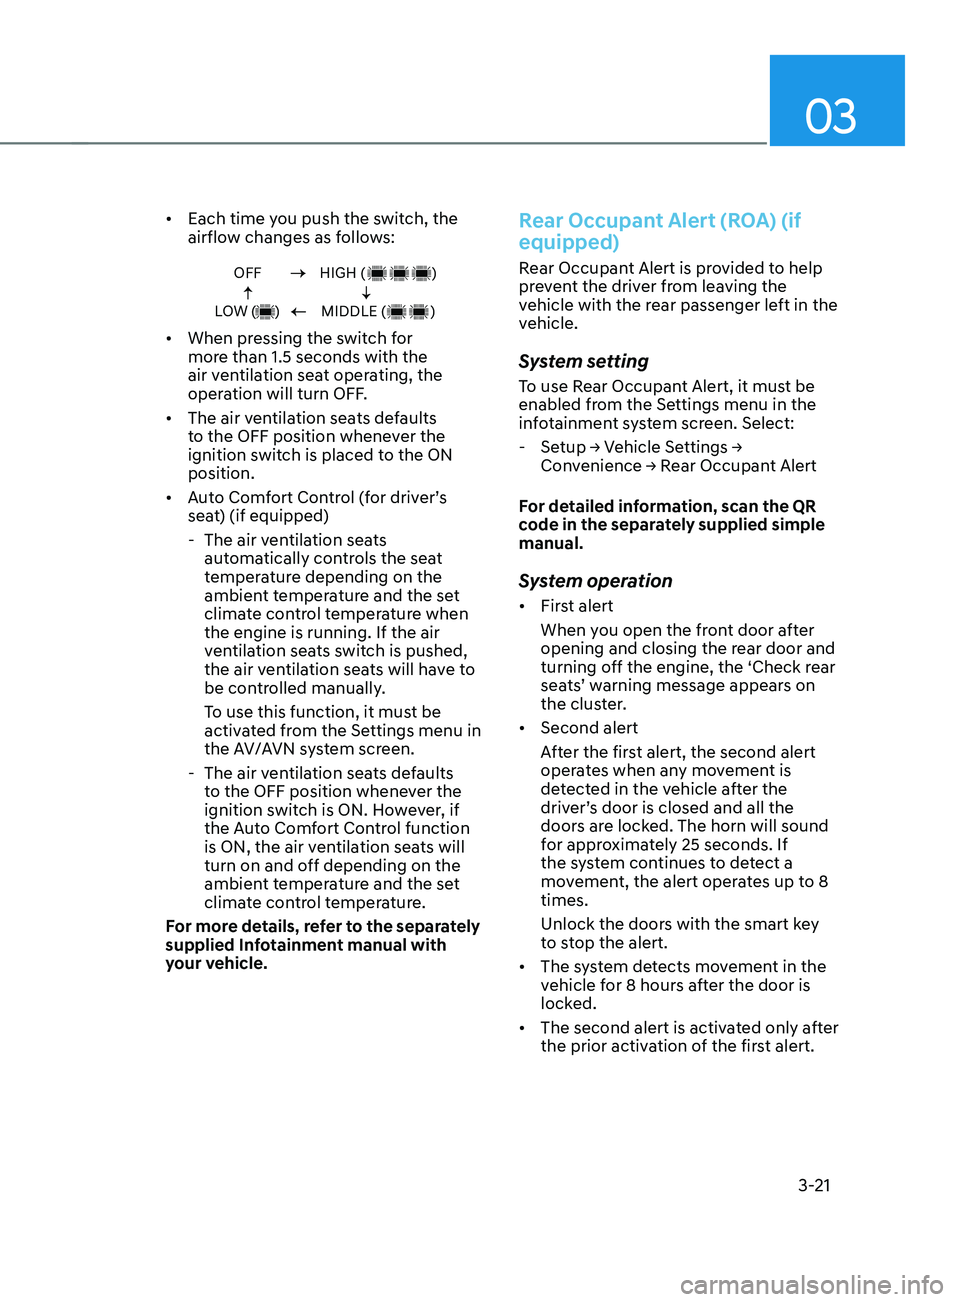
• Each time you push the switch, the
airflow changes as follows:
OFF
LOW ( )HIGH ( )
MIDDLE ( )
• When pressing the switch for
more than 1.5 seconds with the
air ventilation seat operating, the
operation will turn OFF.
• The air ventilation seats defaults
to the OFF position whenever the
ignition switch is placed to the ON
position.
• Auto Comfort Control (for driver’s
seat) (if equipped)
- The air ven
tilation seats
automatically controls the seat
temperature depending on the
ambient temperature and the set
climate control temperature when
the engine is running. If the air
ventilation seats switch is pushed,
the air ventilation seats will have to
be controlled manually.
To use this function, it must be
activated from the Settings menu in
the AV/AVN system screen.
- The air ven
tilation seats defaults
to the OFF position whenever the
ignition switch is ON. However, if
the Auto Comfort Control function
is ON, the air ventilation seats will
turn on and off depending on the
ambient temperature and the set
climate control temperature.
For more details, refer to the separately
supplied Infotainment manual with
your vehicle.
Rear Occupant Alert (ROA) (if
equipped)
Rear Occupant Alert is provided to help
prevent the driver from leaving the
vehicle with the rear passenger left in the
vehicle.
System setting
To use Rear Occupant Alert, it must be
enabled from the Settings menu in the
infotainment system screen. Select:
- Setup → V
ehicle
Se
ttings
→ Conv
enience
→ R
ear
Occupan
t
Alert
F
or detailed information, scan the QR
code in the separately supplied simple
manual.
System operation
• First alert
When you open the front door after
opening and closing the rear door and
turning off the engine, the ‘Check rear
seats’ warning message appears on
the cluster.
• Second alert
After the first alert, the second alert
operates when any movement is
detected in the vehicle after the
driver’s door is closed and all the
doors are locked. The horn will sound
for approximately 25 seconds. If
the system continues to detect a
movement, the alert operates up to 8
times.
Unlock the doors with the smart key
to stop the alert.
• The system detects movement in the
vehicle for 8 hours after the door is
locked.
• The second alert is activated only after
the prior activation of the first alert.
Page 184 of 636

Convenient features
5-40
Recalling memory positions
1. Shift to P (Park) while the Engine
Start/Stop button is in the ON
position.
2.
Press the desir
ed memory button (1
or 2). The system will beep once, and
then the driver’s seat position, side
view mirror position, steering wheel
position, instrument panel illumination
intensity and head-up display height/
brightness will automatically adjust to
the stored positions.
3.
‘Driver 1 (
or 2) settings applied’ will
appear on the cluster LCD display.
Information
• If you press the SET button or the
corresponding button which the
setting is being recalled, the setting will
temporarily deactivate. If you press the
other buttons, the setting of the pressed
button will activate.
For example, if you press the SET
button or number 1 button with the
number 1 setting in operation, the
setting will temporarily deactivate. If
you press the number 2 button, the
number 2 setting will activate.
• If you adjust the seat, rearview mirror,
steering wheel, instrument panel
illumination or head-up display while
recalling the stored positions, the pre-
set settings will become ineffective.
Resetting the system
Take the following procedures to reset
integrated memory system, when it does
not operate properly.
Resetting integrated memory
system
1. Stop the vehicle and open the driver’s
door with the E
ngine Start/Stop
button in the ON position and the
vehicle shifted to P (Park).
2.
Adjus
t the driver’s seat and seatback
to the foremost position.
3.
Press the SET butt
on and push
forward the driver’s seat movement
switch over 2 seconds simultaneously.
While resetting integrated memory
system
1. Resetting starts with a notification
sound.
2.
The driver’
s seat and seatback is
adjusted to the rearward position with
the notification sound.
3.
The driver’
s seat and seatback is
re-adjusted to the default position
(central position) with the notification
sound.
However, in the following cases, the
resetting procedure and the notification
sound may stop.
• The memory button is pressed.
• The seat control switch is operated.
• The gear is shifted out of P (Park).
• The driving speed exceeds
2 mph (3km/h).
• The driver’s door is closed.
Page 188 of 636

Convenient features
5-44
• Auto Comfort Control (for driver’s
seat) (if equipped)
- The heat
ed steering wheel
automatically controls the steering
wheel temperature depending on
the ambient temperature and the
set climate control temperature
when the engine is running. If the
heated steering wheel switch is
pushed, the heated steering wheel
will have to be controlled manually.
To use this function, it must be
activated from the Settings menu in
the AVN system screen.
- The heat
ed steering wheel defaults
to the OFF position whenever the
ignition switch is ON. However, if
the Auto Comfort Control function
is ON, the heated steering wheel
will turn on and off depending on
the ambient temperature and the
set climate control temperature.
For more details, we recommend that
you contact an authorized HYUNDAI
dealer.
Information
The heated steering wheel will turn off
automatically approximately 30 minutes
after the heated steering wheel is turned
on.
NOTICE
Do not install any cover or accessory
on the steering wheel. This cover or
accessory could cause damage to the
heated steering wheel system.
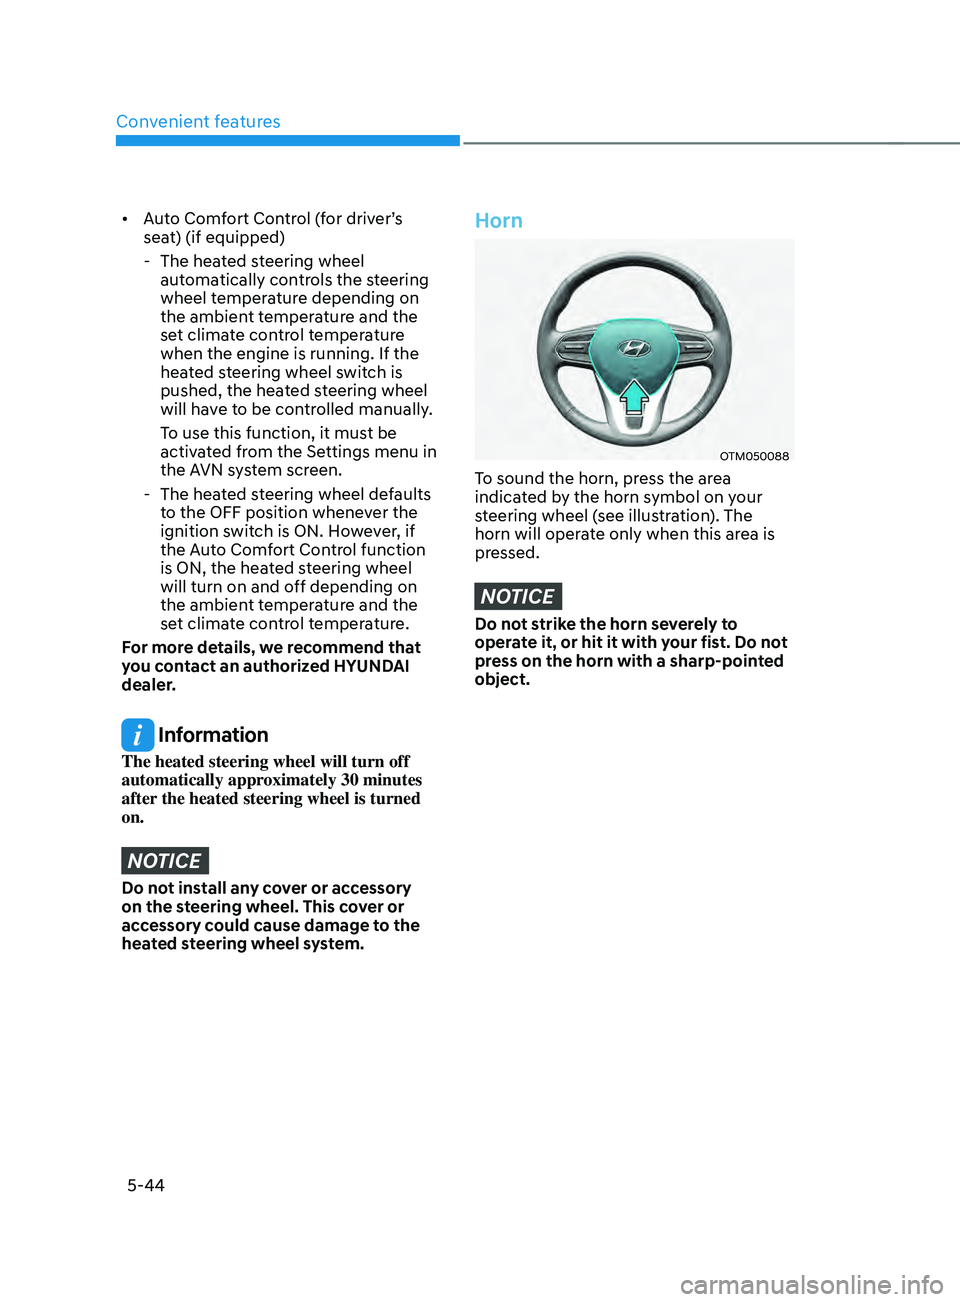
Horn
OTM050088
To sound the horn, press the area
indicated by the horn symbol on your
steering wheel (see illustration). The
horn will operate only when this area is
pressed.
NOTICE
Do not strike the horn severely to
operate it, or hit it with your fist. Do not
press on the horn with a sharp-pointed
object.
Page 190 of 636
![HYUNDAI SANTA FE CALLIGRAPHY 2021 Owners Manual Convenient features
5-46
Day/night rearview mirror
(if equipped)
OTM050018[A]: Day, [B]: Night
Make this adjustment before you start
driving and while the day/night lever is in
the day position.
P HYUNDAI SANTA FE CALLIGRAPHY 2021 Owners Manual Convenient features
5-46
Day/night rearview mirror
(if equipped)
OTM050018[A]: Day, [B]: Night
Make this adjustment before you start
driving and while the day/night lever is in
the day position.
P](/manual-img/35/56181/w960_56181-189.png)
Convenient features
5-46
Day/night rearview mirror
(if equipped)
OTM050018[A]: Day, [B]: Night
Make this adjustment before you start
driving and while the day/night lever is in
the day position.
Pull the day/night lever towards you to
reduce glare from the headlamps of the
vehicles behind you during night driving.
Remember that you lose some rearview
clarity in the night position.
Electrochromic mirror (ECM) with
HomeLink® system (if equipped)
Your vehicle may be equipped with
a Gentex Automatic-Dimming Mirror
with an Integrated HomeLink® Wireless
Control System.
During nighttime driving, this feature
will automatically detect and reduce
rearview mirror glare. The HomeLink®
Universal Transceiver allows you to
activate your garage door(s), electric
gate, home lighting, etc.
OTMA050002
(1) HomeLink Channel 1
(2)
HomeLink Channel 2
(3
)
HomeLink Channel 3
(4
)
Garage Door Opener S
tatus Indicator:
Closing or Closed
(5)
HomeLink Oper
ation Indicator
(6)
Garage Door Opener S
tatus Indicator:
Opening or Opened
(7)
HomeLink U
ser Interface Indicator
Automatic-Dimming Night Vision Safety™
(NVS
®) Mirror (if equipped)
The NVS® Mirror automatically reduces
glare by monitoring light levels in the
front and the rear of the vehicle. Any
object that obstructs either light sensor
will degrade the automatic dimming
control feature.
For more information regarding NVS®
mirrors and other applications, please
refer to the Gentex website:
www.gentex.com
Your mirror will automatically dim
upon detecting glare from the vehicles
traveling behind you.
The mirror defaults to the ON position
each time the vehicle is started.