2021 HYUNDAI SANTA FE CALLIGRAPHY reset
[x] Cancel search: resetPage 203 of 636
05
5-59
Power windows
The ignition switch must be in the
ON position to be able to raise or
lower the windows. Each door has a
Power Window switch to control that
door’s window. The driver has a Power
Window Lock switch which can block
the operation of passenger windows.
The power windows will operate for
approximately 3 minutes after the
ignition switch is placed in the ACC or
OFF position. However, if the front doors
are opened, the Power Windows cannot
be operated even within the 3 minutes
period.
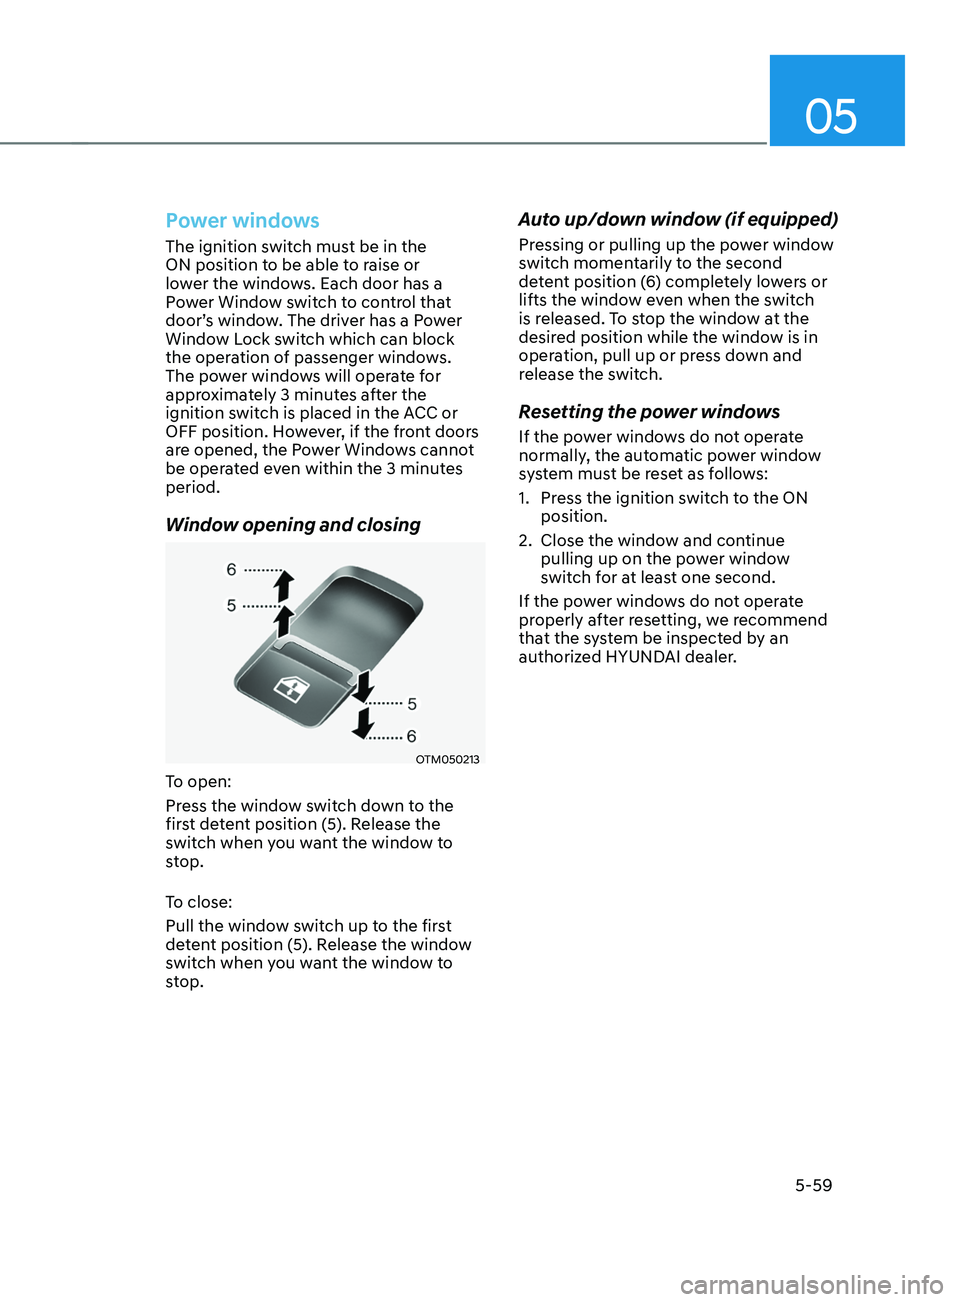
Window opening and closing
OTM050213
To open:
Press the window switch down to the
first detent position (5). Release the
switch when you want the window to
stop.
To close:
Pull the window switch up to the first
detent position (5). Release the window
switch when you want the window to
stop.
Auto up/down window (if equipped)
Pressing or pulling up the power window
switch momentarily to the second
detent position (6) completely lowers or
lifts the window even when the switch
is released. To stop the window at the
desired position while the window is in
operation, pull up or press down and
release the switch.
Resetting the power windows
If the power windows do not operate
normally, the automatic power window
system must be reset as follows:
1.
Press the ignition s
witch to the ON
position.
2.
Close the window and con
tinue
pulling up on the power window
switch for at least one second.
If the power windows do not operate
properly after resetting, we recommend
that the system be inspected by an
authorized HYUNDAI dealer.
Page 209 of 636
05
5-65
Automatic reverse
ODH043039
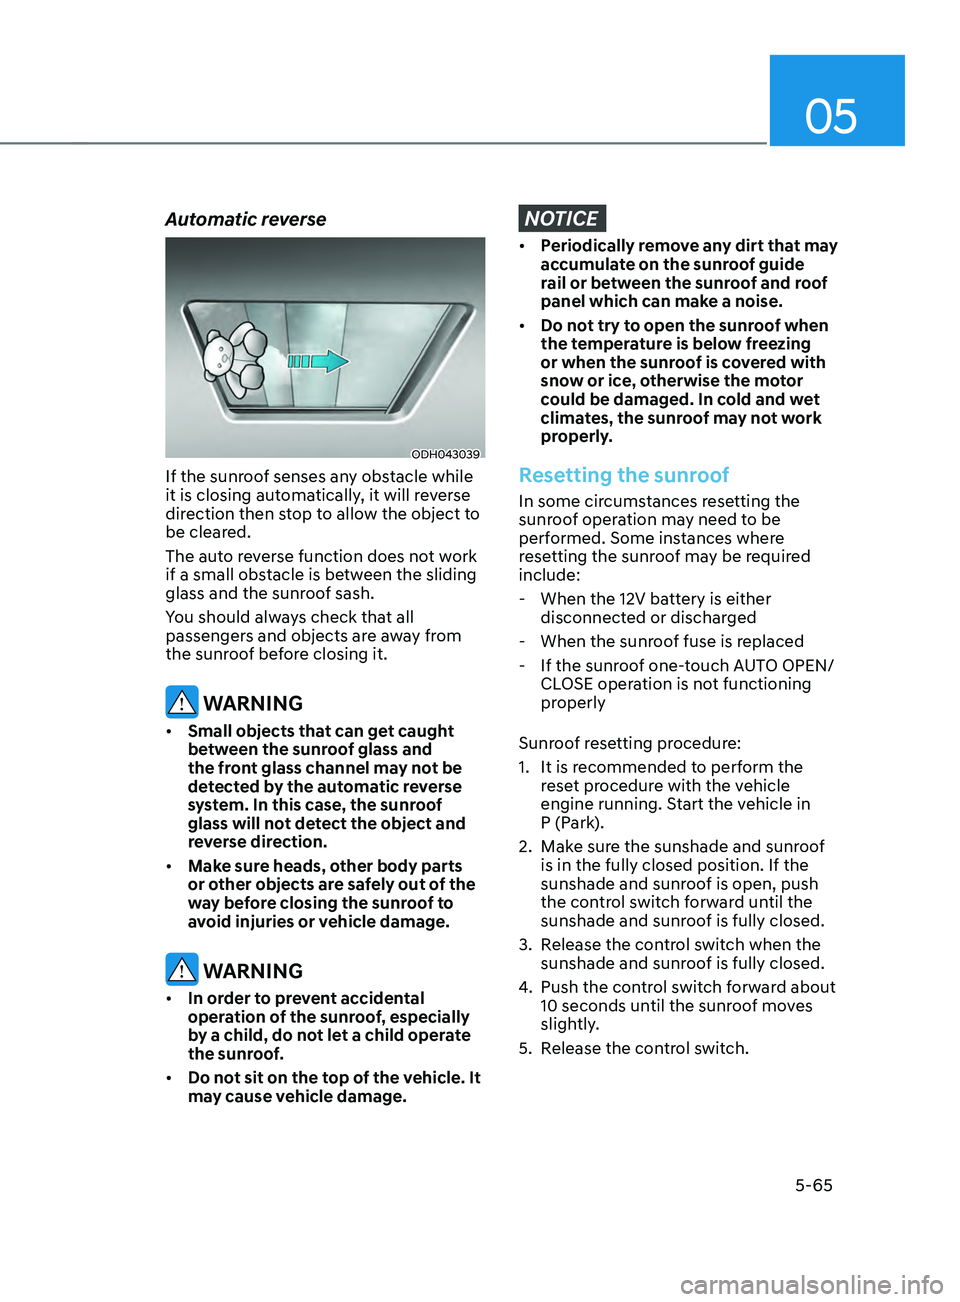
If the sunroof senses any obstacle while
it is closing automatically, it will reverse
direction then stop to allow the object to
be cleared.
The auto reverse function does not work
if a small obstacle is between the sliding
glass and the sunroof sash.
You should always check that all
passengers and objects are away from
the sunroof before closing it.
WARNING
• Small objects that can get caught
between the sunroof glass and
the front glass channel may not be
detected by the automatic reverse
system. In this case, the sunroof
glass will not detect the object and
reverse direction.
• Make sure heads, other body parts
or other objects are safely out of the
way before closing the sunroof to
avoid injuries or vehicle damage.
WARNING
• In order to prevent accidental
operation of the sunroof, especially
by a child, do not let a child operate
the sunroof.
• Do not sit on the top of the vehicle. It
may cause vehicle damage.
NOTICE
• Periodically remove any dirt that may
accumulate on the sunroof guide
rail or between the sunroof and roof
panel which can make a noise.
• Do not try to open the sunroof when
the temperature is below freezing
or when the sunroof is covered with
snow or ice, otherwise the motor
could be damaged. In cold and wet
climates, the sunroof may not work
properly.
Resetting the sunroof
In some circumstances resetting the
sunroof operation may need to be
performed. Some instances where
resetting the sunroof may be required
include:
- When the 12V batt
ery is either
disconnected or discharged
- When the sunroo
f fuse is replaced
- If the sunroo
f one-touch AUTO OPEN/
CLOSE operation is not functioning
properly
Sunroof resetting procedure:
1.
It is recommended t
o perform the
reset procedure with the vehicle
engine running. Start the vehicle in
P (Park).
2.
Make sur
e the sunshade and sunroof
is in the fully closed position. If the
sunshade and sunroof is open, push
the control switch forward until the
sunshade and sunroof is fully closed.
3.
Release the con
trol switch when the
sunshade and sunroof is fully closed.
4.
Push the contr
ol switch forward about
10 seconds until the sunroof moves
slightly.
5.
Release the con
trol switch.
Page 210 of 636
Convenient features
5-66
6. Within 3 seconds, push and hold
the control switch forward until the
sunshade and sunroof operates as
follows:
Sunshade
Open → Glass Open → Glass Close → Sunshade Close
Do no
t release the switch until the
operation is completed.
If you release the control switch during
operation, start the procedure again from
step 2.
7.
Release the sunr
oof control switch
after all steps have completed. The
sunroof system has been reset.
Information
If the sunroof is not reset when the vehicle
battery is disconnected or discharged, or
the sunroof fuse is blown, the sunroof may
not operate normally.
For more detailed information, we
recommend that you contact an
authorized HYUNDAI dealer.
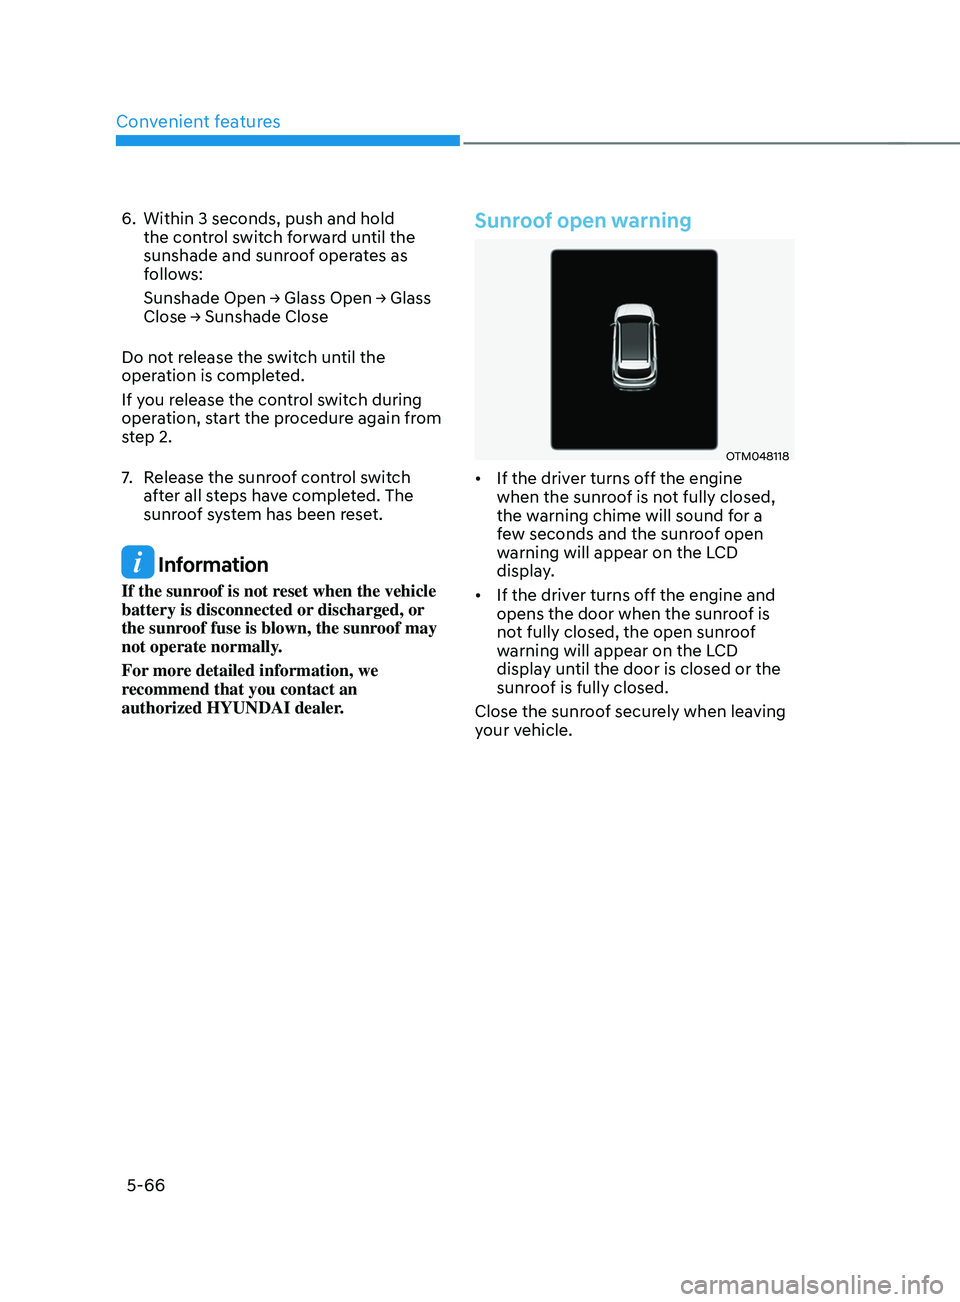
Sunroof open warning
OTM048118
• If the driver turns off the engine
when the sunroof is not fully closed,
the warning chime will sound for a
few seconds and the sunroof open
warning will appear on the LCD
display.
• If the driver turns off the engine and
opens the door when the sunroof is
not fully closed, the open sunroof
warning will appear on the LCD
display until the door is closed or the
sunroof is fully closed.
Close the sunroof securely when leaving
your vehicle.
Page 217 of 636
05
5-73
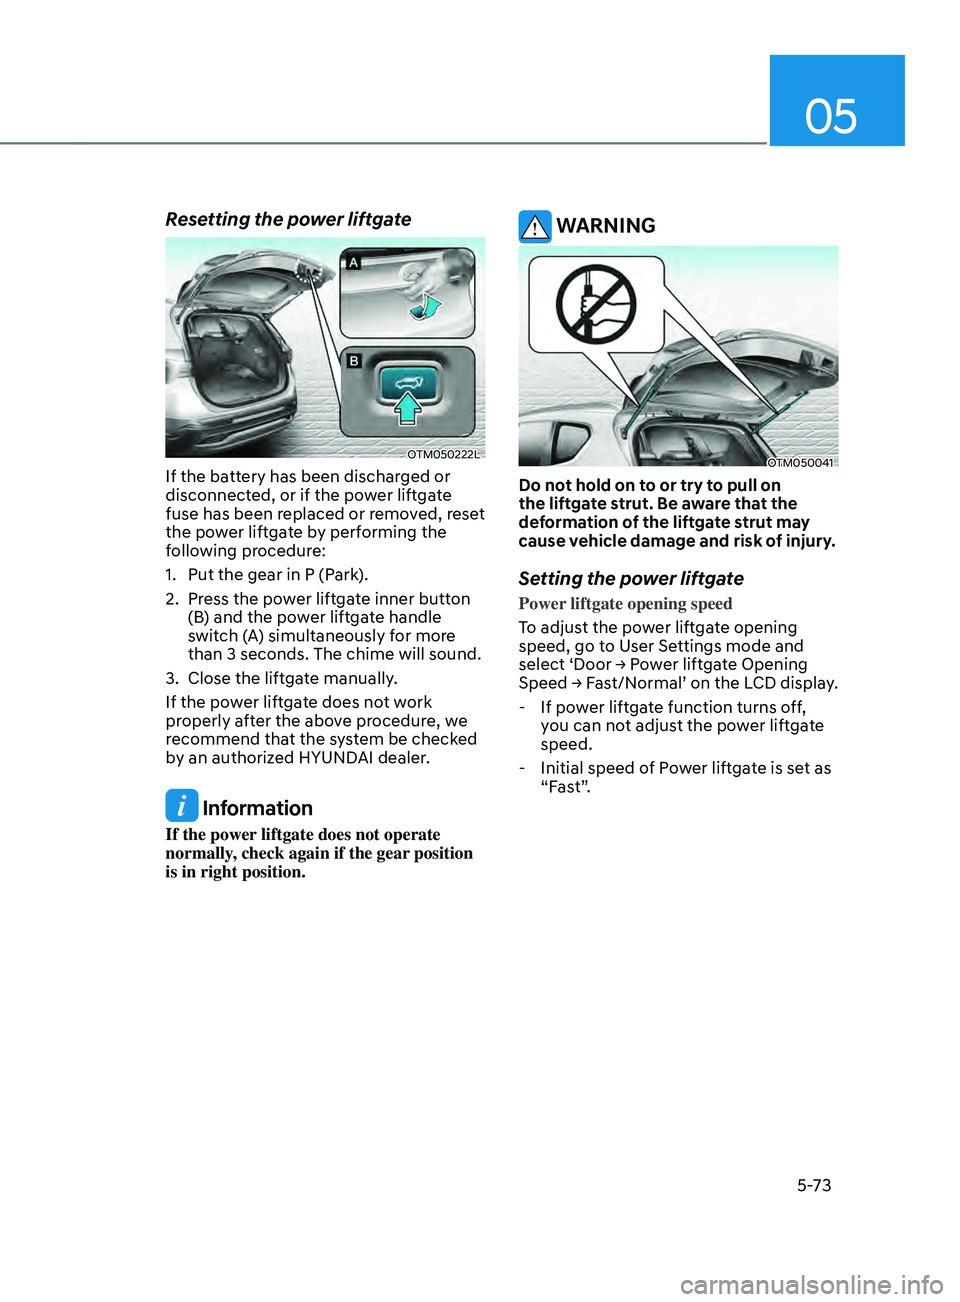
Resetting the power liftgate
OTM050222L
If the battery has been discharged or
disconnected, or if the power liftgate
fuse has been replaced or removed, reset
the power liftgate by performing the
following procedure:
1.
Put the gear in P (Park
).
2.
Press the po
wer liftgate inner button
(B) and the power liftgate handle
switch (A) simultaneously for more
than 3 seconds. The chime will sound.
3.
Close the liftga
te manually.
If the power liftgate does not work
properly after the above procedure, we
recommend that the system be checked
by an authorized HYUNDAI dealer.
Information
If the power liftgate does not operate
normally, check again if the gear position
is in right position.
WARNING
OTM050041
Do not hold on to or try to pull on
the liftgate strut. Be aware that the
deformation of the liftgate strut may
cause vehicle damage and risk of injury.
Setting the power liftgate
Power liftgate opening speed
To adjust the power liftgate opening
speed, go to User Settings mode and
select
‘Door → P
ower
lift
gate
Opening Speed → Fas
t/Normal’
on the LCD display
.
- If pow
er liftgate function turns off,
you can not adjust the power liftgate
speed.
- Initial speed of P
ower liftgate is set as
“Fast”.
Page 253 of 636
05
5-109
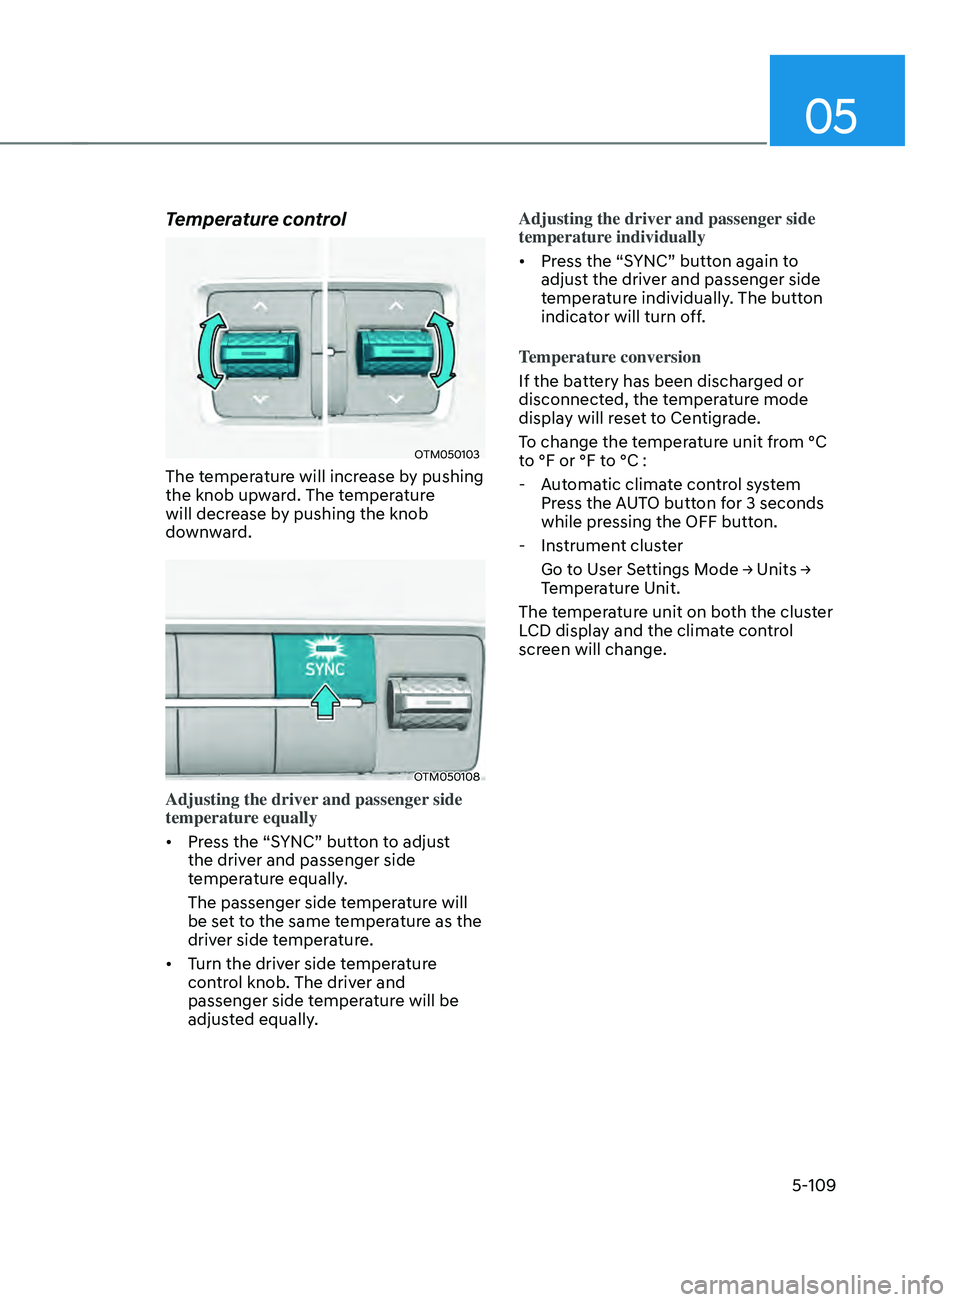
Temperature control
OTM050103
The temperature will increase by pushing
the knob upward. The temperature
will decrease by pushing the knob
downward.
OTM050108
Adjusting the driver and passenger side
temperature equally
• Press the “SYNC” button to adjust
the driver and passenger side
temperature equally.
The passenger side temperature will
be set to the same temperature as the
driver side temperature.
• Turn the driver side temperature
control knob. The driver and
passenger side temperature will be
adjusted equally. Adjusting the driver and passenger side
temperature individually
•
Press the “SYNC” button again to
adjust the driver and passenger side
temperature individually. The button
indicator will turn off.
Temperature conversion
If the battery has been discharged or
disconnected, the temperature mode
display will reset to Centigrade.
To change the temperature unit from °C
to °F or °F to °C :
- Aut
omatic climate control system
Press the AUTO button for 3 seconds
while pressing the OFF button.
- Instrumen
t cluster
Go
t
o
U
ser
Se
ttings
M
ode
→ Units → Temper
ature Unit.
The temperature unit on both the cluster
LCD display and the climate control
screen will change.
Page 261 of 636
05
5-117
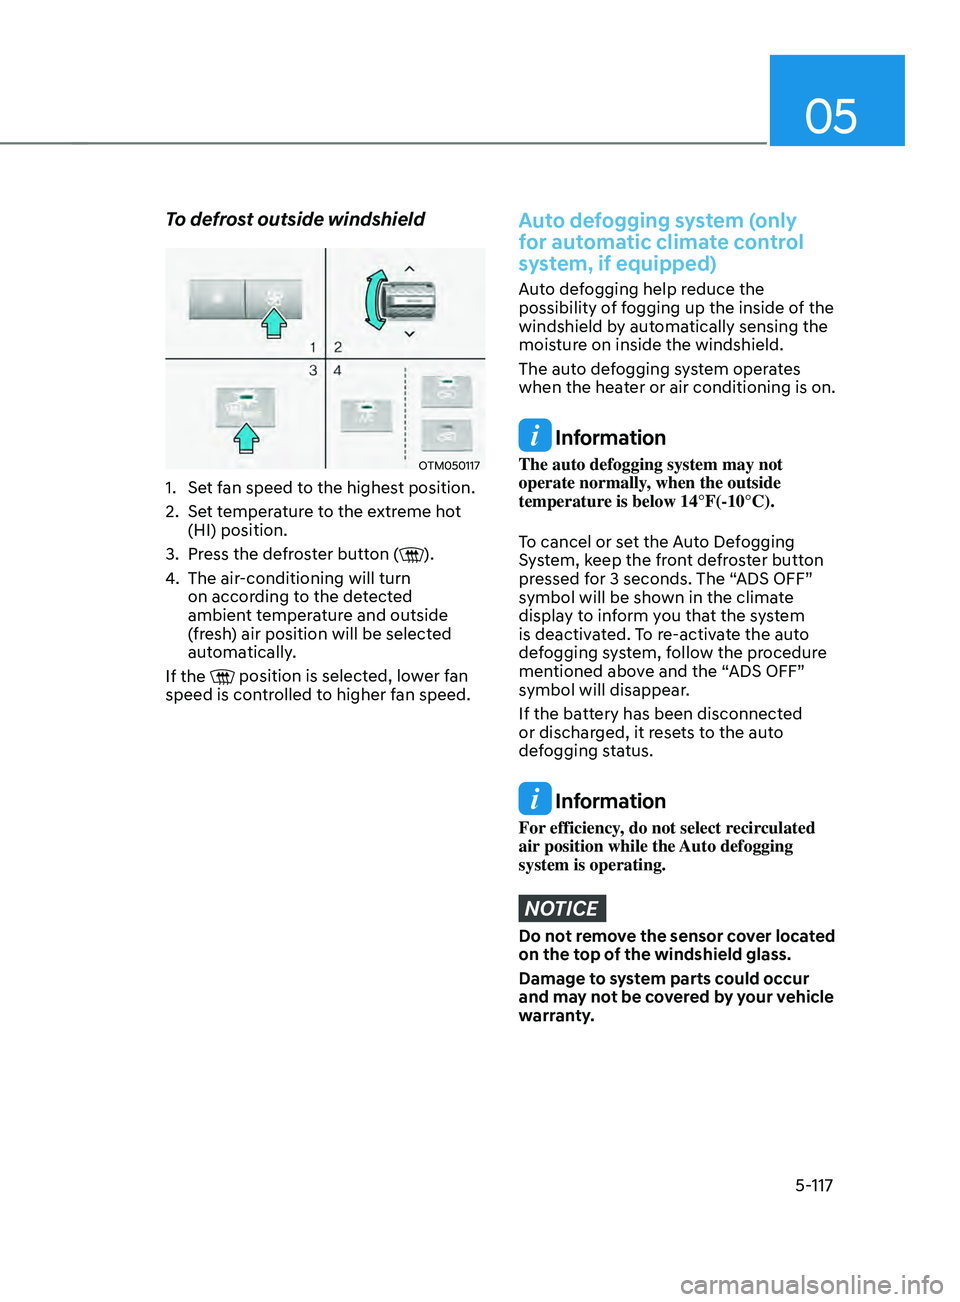
To defrost outside windshield
OTM050117
1. Set fan speed to the highest position.
2.
Set t
emperature to the extreme hot
(HI) position.
3.
Press the de
froster button (
).
4.
The air-conditioning will turn
on accor
ding to the detected
ambient temperature and outside
(fresh) air position will be selected
automatically.
If the
position is selected, lower fan
speed is controlled to higher fan speed.
Auto defogging system (only
for automatic climate control
system, if equipped)
Auto defogging help reduce the
possibility of fogging up the inside of the
windshield by automatically sensing the
moisture on inside the windshield.
The auto defogging system operates
when the heater or air conditioning is on.
Information
The auto defogging system may not
operate normally, when the outside
temperature is below 14°F(-10°C).
To cancel or set the Auto Defogging
System, keep the front defroster button
pressed for 3 seconds. The “ADS OFF”
symbol will be shown in the climate
display to inform you that the system
is deactivated. To re-activate the auto
defogging system, follow the procedure
mentioned above and the “ADS OFF”
symbol will disappear.
If the battery has been disconnected
or discharged, it resets to the auto
defogging status.
Information
For efficiency, do not select recirculated
air position while the Auto defogging
system is operating.
NOTICE
Do not remove the sensor cover located
on the top of the windshield glass.
Damage to system parts could occur
and may not be covered by your vehicle
warranty.
Page 282 of 636
Convenient features
5-138
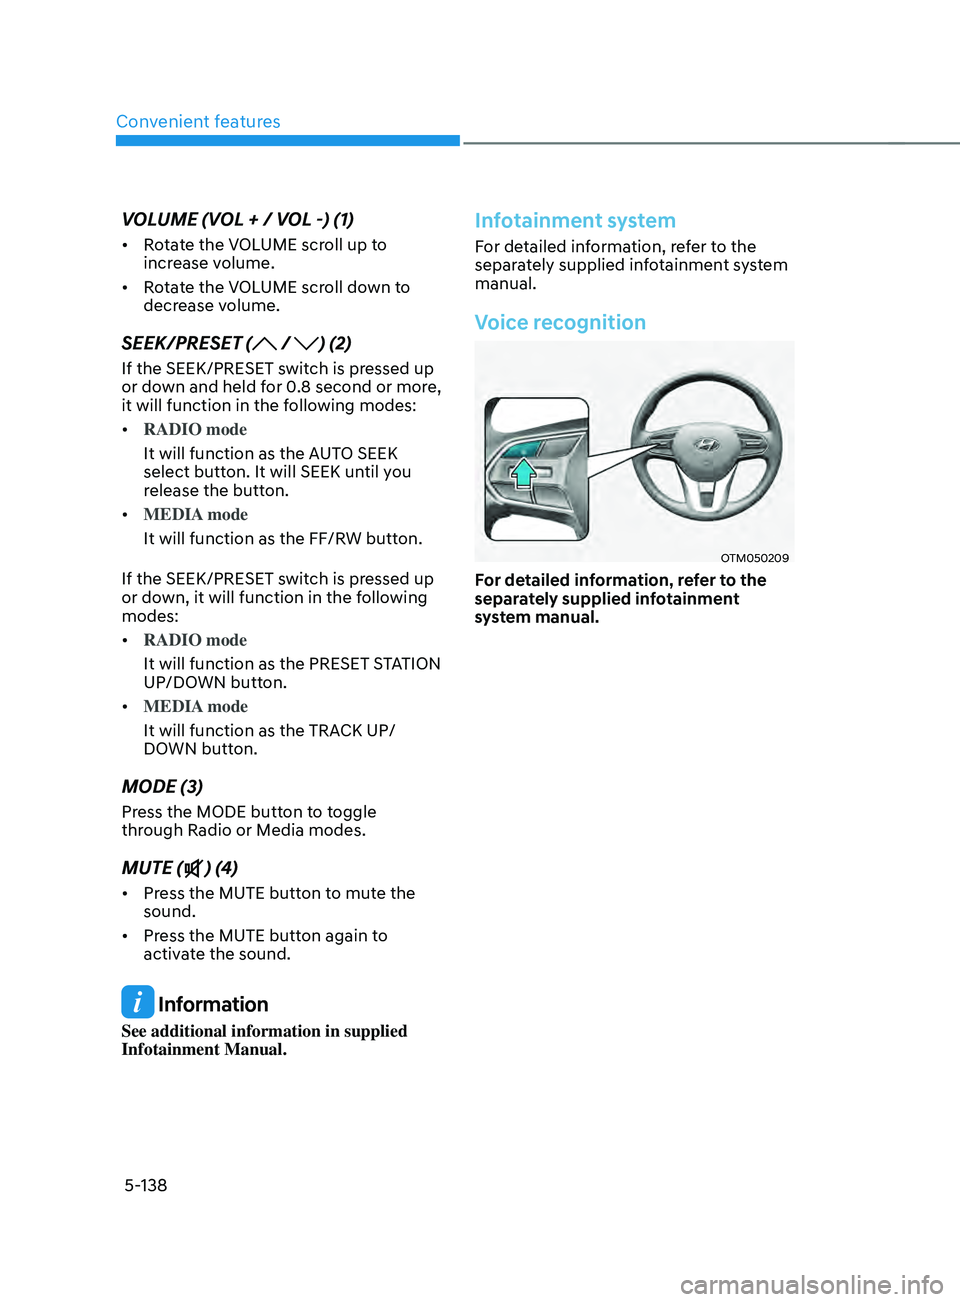
VOLUME (VOL + / VOL -) (1)
• Rotate the VOLUME scroll up to
increase volume.
• Rotate the VOLUME scroll down to
decrease volume.
SEEK/PRESET ( / ) (2)
If the SEEK/PRESET switch is pressed up
or down and held for 0.8 second or more,
it will function in the following modes:
• RADIO mode
It will function as the AUTO SEEK
select button. It will SEEK until you
release the button.
• MEDIA mode
It will function as the FF/RW button.
If the SEEK/PRESET switch is pressed up
or down, it will function in the following
modes:
• RADIO mode
It will function as the PRESET STATION
UP/DOWN button.
• MEDIA mode
It will function as the TRACK UP/
DOWN button.
MODE (3)
Press the MODE button to toggle
through Radio or Media modes.
MUTE () (4)
• Press the MUTE button to mute the
sound.
• Press the MUTE button again to
activate the sound.
Information
See additional information in supplied
Infotainment Manual.
Infotainment system
For detailed information, refer to the
separately supplied infotainment system
manual.
Voice recognition
OTM050209
For detailed information, refer to the
separately supplied infotainment
system manual.
Page 429 of 636
07
7-47
• The driver’s attention level is displayed
on the scale of 1 to 5. The lower the
level is, the more inattentive the driver
is.
• The level decreases when the driver
does not take a break for a certain
period of time.
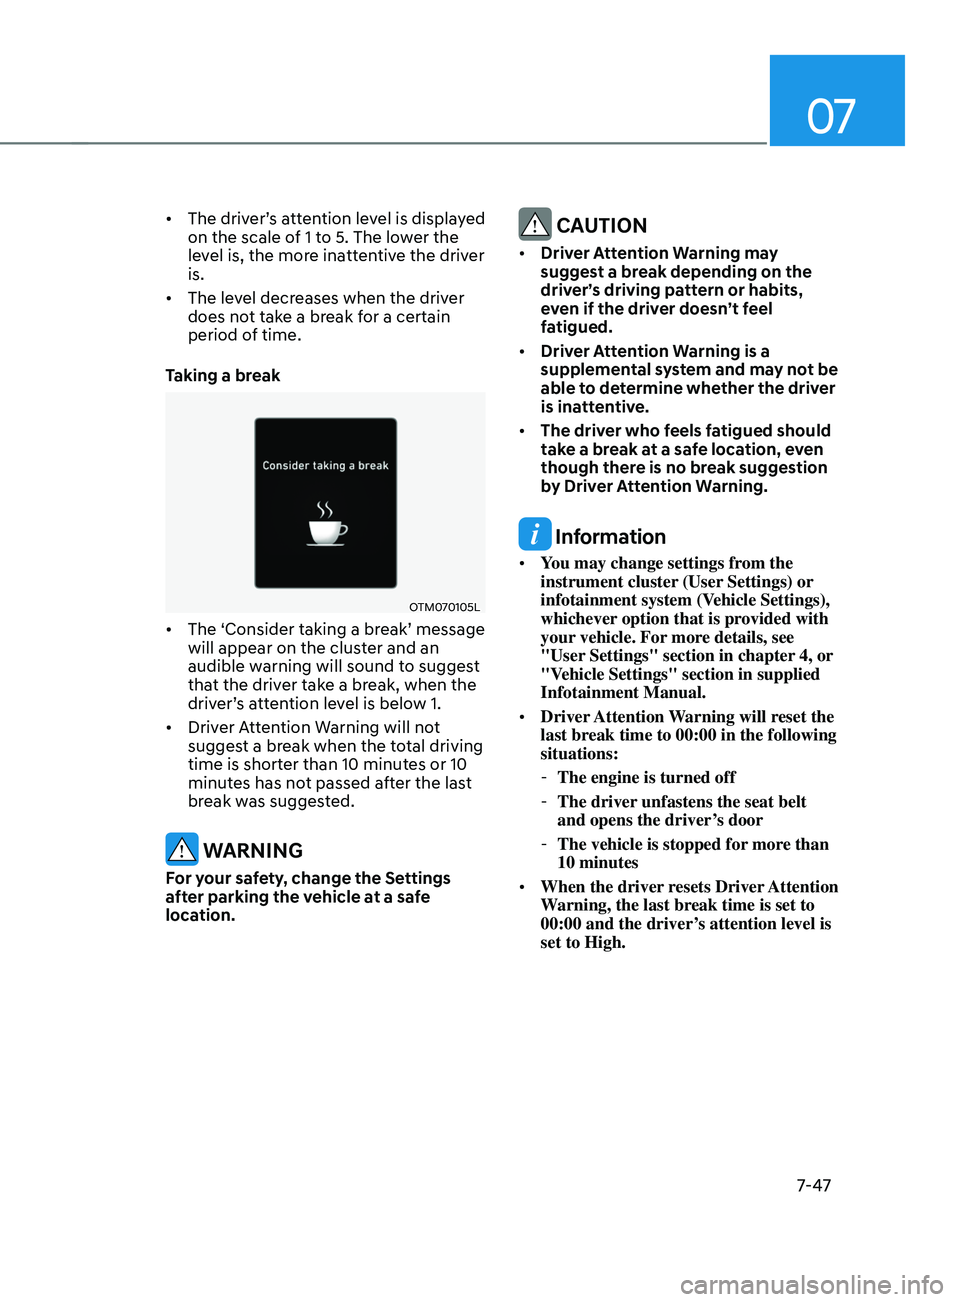
Taking a break
OTM070105L
• The ‘Consider taking a break’ message
will appear on the cluster and an
audible warning will sound to suggest
that the driver take a break, when the
driver’s attention level is below 1.
• Driver Attention Warning will not
suggest a break when the total driving
time is shorter than 10 minutes or 10
minutes has not passed after the last
break was suggested.
WARNING
For your safety, change the Settings
after parking the vehicle at a safe
location.
CAUTION
• Driver Attention Warning may
suggest a break depending on the
driver’s driving pattern or habits,
even if the driver doesn’t feel
fatigued.
• Driver Attention Warning is a
supplemental system and may not be
able to determine whether the driver
is inattentive.
• The driver who feels fatigued should
take a break at a safe location, even
though there is no break suggestion
by Driver Attention Warning.
Information
• You may change settings from the
instrument cluster (User Settings) or
infotainment system (Vehicle Settings),
whichever option that is provided with
your vehicle. For more details, see
"User Settings" section in chapter 4, or
"Vehicle Settings" section in supplied
Infotainment Manual.
• Driver Attention Warning will reset the
last break time to 00:00 in the following
situations:
-The engine is turned off
-The driver unfastens the seat belt
and opens the driver
’s door
-The vehicle is stopped for mor
e than
10 minutes
• When the driver resets Driver Attention
Warning, the last break time is set to
00:00 and the driver’s attention level is
set to High.