2021 HYUNDAI PALISADE warning lights
[x] Cancel search: warning lightsPage 470 of 612
5-161
Driving your vehicle
5
Distance
Stay at least twice as far behind the
vehicle ahead as you would when
driving your vehicle without a trailer.
This can help you avoid situations
that require heavy braking and sud-
den turns.
Passing
You will need more passing distance
up ahead when you’re towing a trail-
er. And, because of the increased
vehicle length, you’ll need to go
much farther beyond the passed
vehicle before you can return to your
lane.
Backing up
Hold the bottom of the steering
wheel with one hand. Then, to move
the trailer to the left, move your hand
to the left. To move the trailer to the
right, move your hand to the right.
Always back up slowly and, if possi-
ble, have someone guide you.
Making turns
When you're turning with a trailer,
make wider turns than normal. Do
this so your trailer won't strike soft
shoulders, curbs, road signs, trees, or
other objects. Avoid jerky or sudden
maneuvers. Signal well in advance.
Turn signals
When you tow a trailer, your vehicle
has to have a different turn signal
flasher and extra wiring. The green
arrows on your instrument panel will
flash whenever you signal a turn or
lane change. Properly connected,
the trailer lights will also flash to alert
other drivers you're about to turn,
change lanes, or stop.
When towing a trailer, the green
arrows on your instrument panel will
flash for turns even if the bulbs on the
trailer are burned out. Thus, you may
think drivers behind you are seeing
your signals when, in fact, they are
not. It's important to check periodical-
ly to be sure the trailer bulbs are still
working. You must also check the
lights every time you disconnect and
then reconnect the wires.Do not connect a trailer lighting
system directly to your vehi-
cle's lighting system. Use an
approved trailer wiring harness.
Failure to do so could result in
damage to the vehicle electrical
system and/or personal injury.
Consult an authorized HYUNDAI
dealer for assistance.
WARNING
Page 472 of 612
5-163
Driving your vehicle
5
5. Start the vehicle, apply the brakes,
shift to neutral, release the park-
ing brake and slowly release the
brakes until the trailer chocks
absorb the load.
6. Reapply the brakes and parking
brakes.
7. Move the shift lever to P (Park).
8. Shut off the vehicle and release
the vehicle brakes but leave the
parking brake set.Driving the vehicle after it has
been parked on a hill
1. With the gear shift lever in P
(Park), apply the brakes and hold
the brake pedal down while per-
forming the following:
and
2. Slowly remove your foot from the
brake pedal.
3. Drive slowly until the trailer is clear
of the chocks.
4. Stop and have someone pick up
and store the chocks.
Maintenance when trailer tow-
ing
Your vehicle will need service more
often when you regularly pull a trail-
er. Important items to pay particular
attention to include engine oil, auto-
matic transmission fluid, axle lubri-
cant and cooling system fluid. Brake
condition is another important item to
frequently check. If you're trailering,
it’s a good idea to review these items
before you start your trip. Don't forget
to also maintain your trailer and
hitch. Follow the maintenance sched-
ule that accompanied your trailer and
check it periodically. Preferably,
inspect the vehicle and trailer at the
start of each day's driving. Inspect
the hitch mounting to make sure the
hitch is properly secured to the vehi-
cle. Inspect the trailer electrical
wiring to make sure brake lights, turn
signal lights, running lights, and haz-
ard lights are working properly.
Do not get out of the vehicle
without the parking brake
firmly set. If you have left the
engine running, the vehicle
can move suddenly. You and
others could be seriously or
fatally injured.
Do not apply the accelerator
pedal to hold the vehicle on
an uphill.
WARNING
Page 481 of 612

6-2
The hazard warning flasher serves
as a warning to other drivers to exer-
cise extreme caution when approach-
ing, overtaking, or passing your vehi-
cle.
It should be used whenever emer-
gency repairs are being made or
when the vehicle is stopped near the
edge of a roadway.To turn the hazard warning flasher
on or off, press the hazard warning
flasher button. The button is located
in the center fascia panel. Both the
left and right turn signal lights will
flash simultaneously.
• The hazard warning flasher oper-
ates whether your vehicle is run-
ning or not.
The turn signals do not work when
the hazard flasher is on.
If the Engine Stalls While
Driving
Reduce your speed gradually,
keeping a straight line. Move cau-
tiously off the road to a safe place.
Turn on your hazard warning flash-
er.
Try to start the engine again. If
your vehicle will not start, contact
an authorized HYUNDAI dealer or
seek other qualified assistance.
If the Engine Stalls at a
Crossroad or Crossing
If the engine stalls at a crossroads or
crossing, if safe to do so, move the
shift button to the N (Neutral) posi-
tion and then push the vehicle to a
safe location.
H HA
AZ
ZA
AR
RD
D
W
WA
AR
RN
NI
IN
NG
G
F
FL
LA
AS
SH
HE
ER
R
What to do in an emergency
I
IN
N
C
CA
AS
SE
E
O
OF
F
A
AN
N
E
EM
ME
ER
RG
GE
EN
NC
CY
Y
W WH
HI
IL
LE
E
D
DR
RI
IV
VI
IN
NG
G
OLX2068001
Page 510 of 612
Owner Maintenance Schedule
When you stop for fuel:
• Check the engine oil level.
Check the coolant level in the
engine coolant reservoir.
Check the windshield washer fluid
level.
Check the tire for low or under-
inflated tires.
While operating your vehicle:
Note any changes in the sound of
the exhaust or any smell of
exhaust fumes in the vehicle.
Check for vibrations in the steering
wheel. Notice if there is any
increased steering effort or loose-
ness in the steering wheel, or
change in its straight-ahead posi-
tion.
Notice if your vehicle constantly
turns slightly or "pulls" to one side
when traveling on smooth, level
road.
When stopping, listen and check
for unusual sounds, pulling to one
side, increased brake pedal travel
or "hard-to-push" brake pedal.
If any slipping or changes in the
operation of your transmission
occurs, check the transmission
fluid level.
Check the automatic transmission
P (Park) function. Check the parking brake.
Check for fluid leaks under your
vehicle (water dripping from the air
conditioning system during or after
use is normal).
At least monthly:
Check coolant level in the engine
coolant reservoir.
Check the operation of all exterior
lights, including the brake lights,
turn signals and hazard warning
flashers.
Check the inflation pressures of all
tires including the spare for tires
that are worn, show uneven wear,
or are damaged.
Check for loose wheel lug nuts.
At least twice a year:
(i.e., every Spring and Autumn)
Check radiator, heater and air con-
ditioning hoses for leaks or dam-
age.
Check windshield washer spray
and wiper operation. Clean wiper
blades with a clean cloth damp-
ened with washer a fluid. Be careful when checking your
engine coolant level when the
engine is hot. This may result in
coolant being blown out of the
opening and cause serious
burns and other injuries.
WARNING
Maintenance
7-6
Page 552 of 612
7-48
Maintenance
F FU
US
SE
ES
S
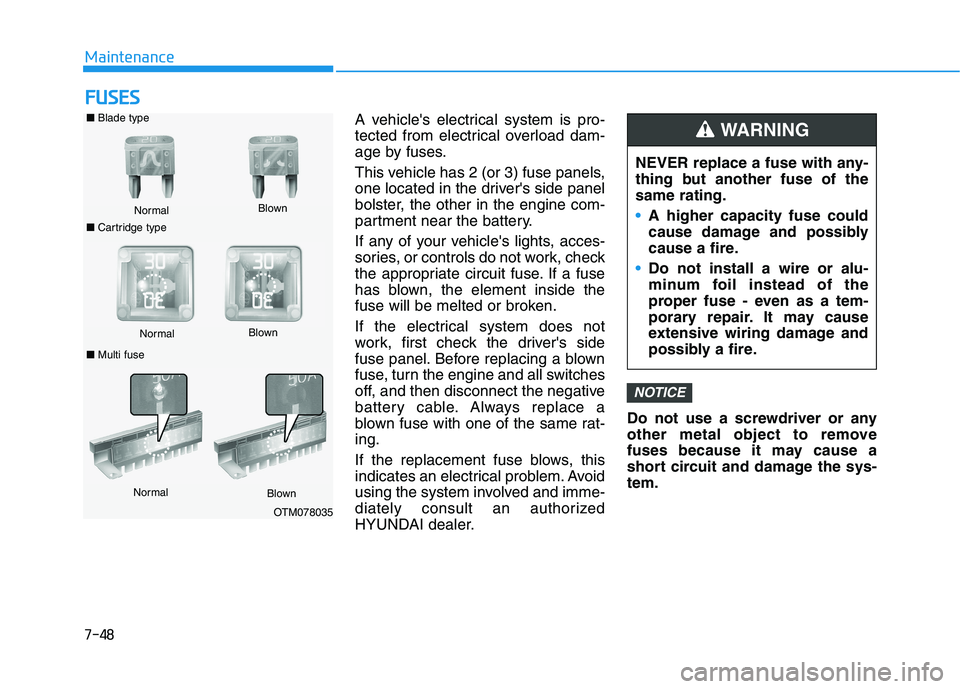
A vehicle's electrical system is pro-
tected from electrical overload dam-
age by fuses.
This vehicle has 2 (or 3) fuse panels,
one located in the driver's side panel
bolster, the other in the engine com-
partment near the battery.
If any of your vehicle's lights, acces-
sories, or controls do not work, check
the appropriate circuit fuse. If a fuse
has blown, the element inside the
fuse will be melted or broken.
If the electrical system does not
work, first check the driver's side
fuse panel. Before replacing a blown
fuse, turn the engine and all switches
off, and then disconnect the negative
battery cable. Always replace a
blown fuse with one of the same rat-
ing.
If the replacement fuse blows, this
indicates an electrical problem. Avoid
using the system involved and imme-
diately consult an authorized
HYUNDAI dealer.Do not use a screwdriver or any
other metal object to remove
fuses because it may cause a
short circuit and damage the sys-
tem.
NOTICE
NEVER replace a fuse with any-
thing but another fuse of the
same rating.
A higher capacity fuse could
cause damage and possibly
cause a fire.
Do not install a wire or alu-
minum foil instead of the
proper fuse - even as a tem-
porary repair. It may cause
extensive wiring damage and
possibly a fire.
WARNING ■Blade type
Normal
■Cartridge typeBlown
NormalBlown
■Multi fuse
Normal
Blown
OTM078035
Page 571 of 612

7-67
7
Maintenance1. Using a flat-blade screwdriver,
gently pry the lens from the interi-
or lamp housing.
Map lamp, room lamp, vanity mirror lamp and luggage compartment lamp (Bulb type)
Interior Light Bulb Replacement
Prior to working on the Interior
Lights, ensure that the "OFF"
button is depressed to avoid
burning your fingers or receiv-
ing an electric shock.
WARNING
OLX2078050L
■Map lamp
OLX2078051L
■Room lamp
OLX2078052L
■Luggage compartment lamp
OLX2078043
■Glove box lamp
OLF074069
■Vanity mirror lamp
Page 605 of 612
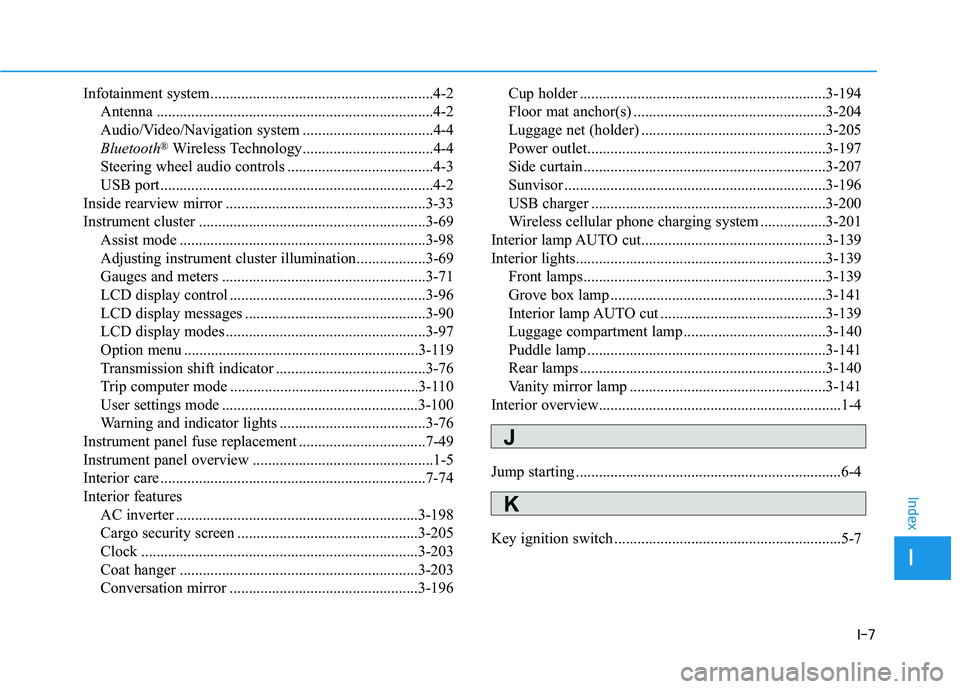
I-7
Infotainment system..........................................................4-2
Antenna ........................................................................4-2
Audio/Video/Navigation system ..................................4-4
Bluetooth
®Wireless Technology..................................4-4
Steering wheel audio controls ......................................4-3
USB port.......................................................................4-2
Inside rearview mirror ....................................................3-33
Instrument cluster ...........................................................3-69
Assist mode ................................................................3-98
Adjusting instrument cluster illumination..................3-69
Gauges and meters .....................................................3-71
LCD display control ...................................................3-96
LCD display messages ...............................................3-90
LCD display modes ....................................................3-97
Option menu .............................................................3-119
Transmission shift indicator .......................................3-76
Trip computer mode .................................................3-110
User settings mode ...................................................3-100
Warning and indicator lights ......................................3-76
Instrument panel fuse replacement .................................7-49
Instrument panel overview ...............................................1-5
Interior care .....................................................................7-74
Interior features
AC inverter ...............................................................3-198
Cargo security screen ...............................................3-205
Clock ........................................................................3-203
Coat hanger ..............................................................3-203
Conversation mirror .................................................3-196Cup holder ................................................................3-194
Floor mat anchor(s) ..................................................3-204
Luggage net (holder) ................................................3-205
Power outlet..............................................................3-197
Side curtain...............................................................3-207
Sunvisor ....................................................................3-196
USB charger .............................................................3-200
Wireless cellular phone charging system .................3-201
Interior lamp AUTO cut................................................3-139
Interior lights.................................................................3-139
Front lamps...............................................................3-139
Grove box lamp ........................................................3-141
Interior lamp AUTO cut ...........................................3-139
Luggage compartment lamp .....................................3-140
Puddle lamp ..............................................................3-141
Rear lamps ................................................................3-140
Vanity mirror lamp ...................................................3-141
Interior overview...............................................................1-4
Jump starting .....................................................................6-4
Key ignition switch ...........................................................5-7
I
Index
J
K
Page 606 of 612

I-8
Label
Tire sidewall labeling .................................................7-39
Tire specification and pressure label ..........................8-11
Vehicle certification label ...........................................8-10
Lane change signals ......................................................3-137
Lane Following Assist (LFA) system ...........................5-104
Lane Keeping Assist (LKA) system .............................5-110
LCD display
Assist mode ................................................................3-98
Driving assist view mode .........................................3-117
LCD display modes ....................................................3-97
Master warning mode .................................................3-99
Other information display ........................................3-118
Parking assist view mode .........................................3-117
Trip computer mode ...................................................3-98
Turn By Turn (TBT) mode .......................................3-117
User settings mode ...................................................3-100
Utility view mode .....................................................3-116
View modes ..............................................................3-115LCD display messages
Battery discharging due to external electrical
devices .....................................................................3-91
Check Blind-Spot Collision Warning system ............3-94
Check BRAKE SWITCH fuse ...................................3-91
Check Driver Attention Warning (DAW) system ......3-95
Check Forward Collision-Avoidance Assist system ..3-94
Check headlight ..........................................................3-94
Check headlight LED .................................................3-94
Check High Beam Assist (HBA) system ...................3-94
Check Lane Keeping Assist (LKA) system ...............3-95
Check Smart Cruise Control system ..........................3-95
Door, Hood, Trunk open indicator .............................3-91
Engine has overheated................................................3-93
Heated steering wheel turned off ...............................3-93
Key not detected .........................................................3-90
Key not in vehicle ......................................................3-90
Lights mode ................................................................3-93
Low fuel .....................................................................3-93
Low key battery..........................................................3-90
Low pressure ..............................................................3-92
Low washer fluid........................................................3-93
Press brake pedal to start engine ................................3-90
Press START button again .........................................3-90
Press START button with key ....................................3-91
Shift to P or N to start engine ....................................3-90
Sunroof open indicator ...............................................3-92
Window open indicator ..............................................3-92
Wiper mode ................................................................3-93
Index
L