2021 HYUNDAI KONA EV stop start
[x] Cancel search: stop startPage 123 of 478
3-39
Convenient features of your vehicle
Sunshade
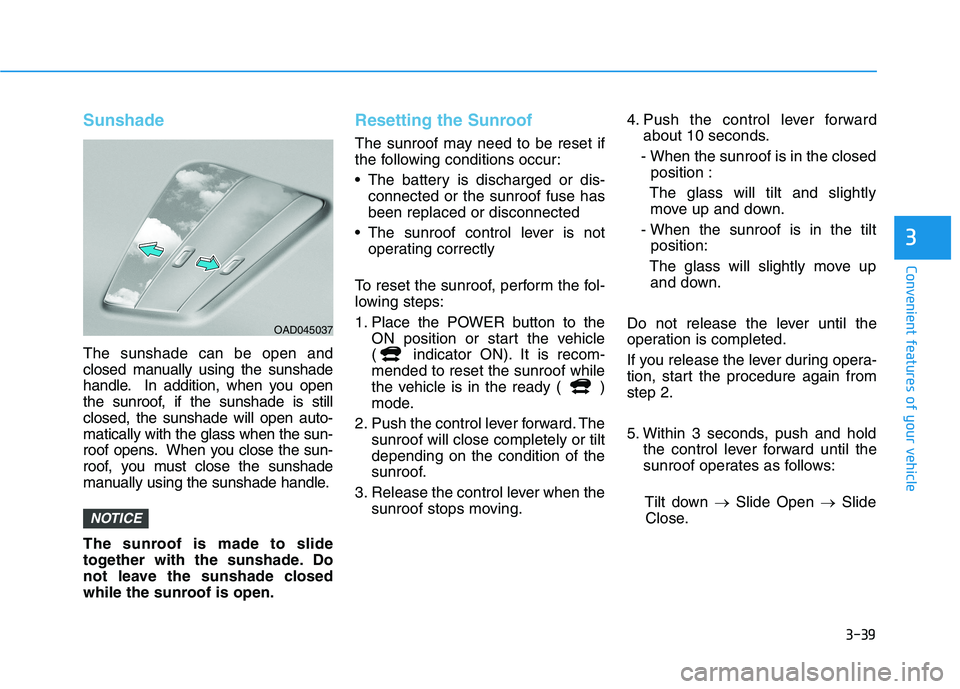
The sunshade can be open and
closed manually using the sunshade
handle. In addition, when you open
the sunroof, if the sunshade is still
closed, the sunshade will open auto-
matically with the glass when the sun-
roof opens. When you close the sun-
roof, you must close the sunshade
manually using the sunshade handle.
The sunroof is made to slide
together with the sunshade. Do
not leave the sunshade closed
while the sunroof is open.
Resetting the Sunroof
The sunroof may need to be reset if
the following conditions occur:
The battery is discharged or dis-
connected or the sunroof fuse has
been replaced or disconnected
The sunroof control lever is not
operating correctly
To reset the sunroof, perform the fol-
lowing steps:
1. Place the POWER button to the
ON position or start the vehicle
( indicator ON). It is recom-
mended to reset the sunroof while
the vehicle is in the ready ( )
mode.
2. Push the control lever forward. The
sunroof will close completely or tilt
depending on the condition of the
sunroof.
3. Release the control lever when the
sunroof stops moving.4. Push the control lever forward
about 10 seconds.
- When the sunroof is in the closed
position :
The glass will tilt and slightly
move up and down.
- When the sunroof is in the tilt
position:
The glass will slightly move up
and down.
Do not release the lever until the
operation is completed.
If you release the lever during opera-
tion, start the procedure again from
step 2.
5. Within 3 seconds, push and hold
the control lever forward until the
sunroof operates as follows:
Tilt down →Slide Open →Slide
Close.
NOTICE
3
OAD045037
Page 160 of 478
3-76
When this warning message is
displayed, do not accelerate or
start the vehicle suddenly.
When the high voltage battery
level is low, the power down
warning illuminates and the
power output from the vehicle is
limited. Charge the battery
immediately since your vehicle
may not drive uphill or skid on a
slope with the warning light ON.
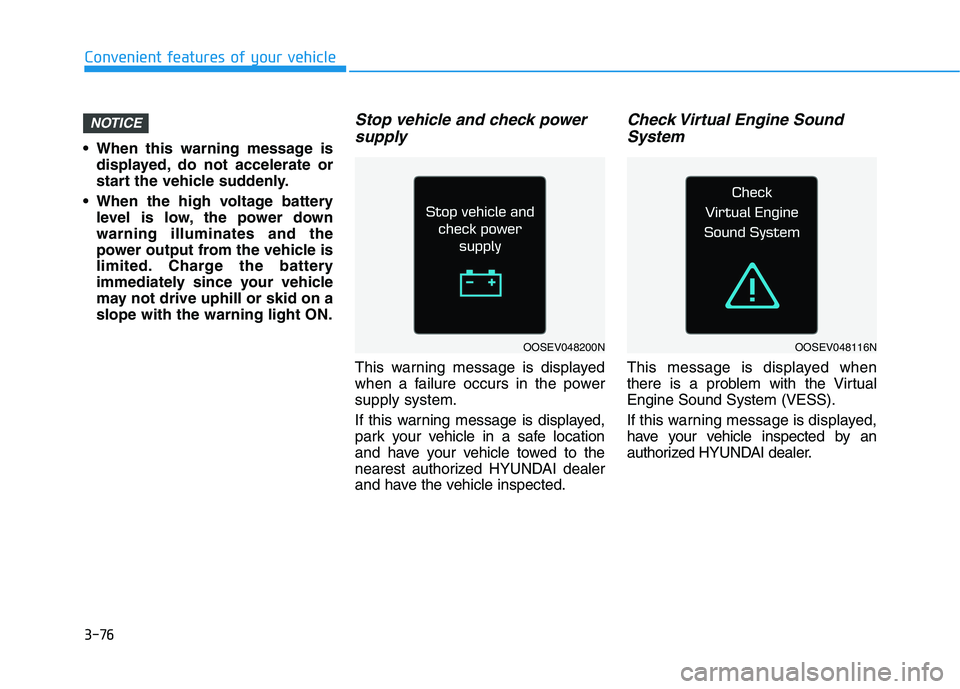
Stop vehicle and check power
supply
This warning message is displayed
when a failure occurs in the power
supply system.
If this warning message is displayed,
park your vehicle in a safe location
and have your vehicle towed to the
nearest authorized HYUNDAI dealer
and have the vehicle inspected.
Check Virtual Engine Sound
System
This message is displayed when
there is a problem with the Virtual
Engine Sound System (VESS).
If this warning message is displayed,
have your vehicle inspected by an
authorized HYUNDAI dealer.
NOTICE
Convenient features of your vehicle
OOSEV048200NOOSEV048116N
Page 178 of 478
3-94
Convenient features of your vehicle
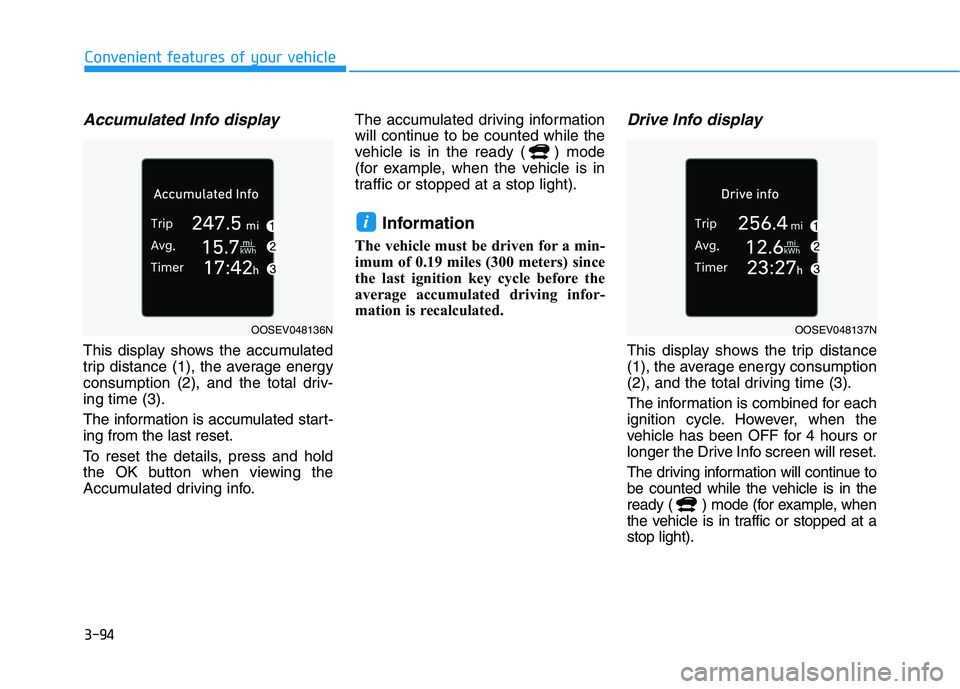
Accumulated Info display
This display shows the accumulated
trip distance (1), the average energy
consumption (2), and the total driv-
ing time (3).
The information is accumulated start-
ing from the last reset.
To reset the details, press and hold
the OK button when viewing the
Accumulated driving info.The accumulated driving information
will continue to be counted while the
vehicle is in the ready ( ) mode
(for example, when the vehicle is in
traffic or stopped at a stop light).
Information
The vehicle must be driven for a min-
imum of 0.19 miles (300 meters) since
the last ignition key cycle before the
average accumulated driving infor-
mation is recalculated.
Drive Info display
This display shows the trip distance
(1), the average energy consumption
(2), and the total driving time (3).
The information is combined for each
ignition cycle. However, when the
vehicle has been OFF for 4 hours or
longer the Drive Info screen will reset.
The driving information will continue to
be counted while the vehicle is in the
ready ( ) mode (for example, when
the vehicle is in traffic or stopped at a
stop light).
i
OOSEV048136NOOSEV048137N
Page 223 of 478
3-139
Convenient features of your vehicle
3
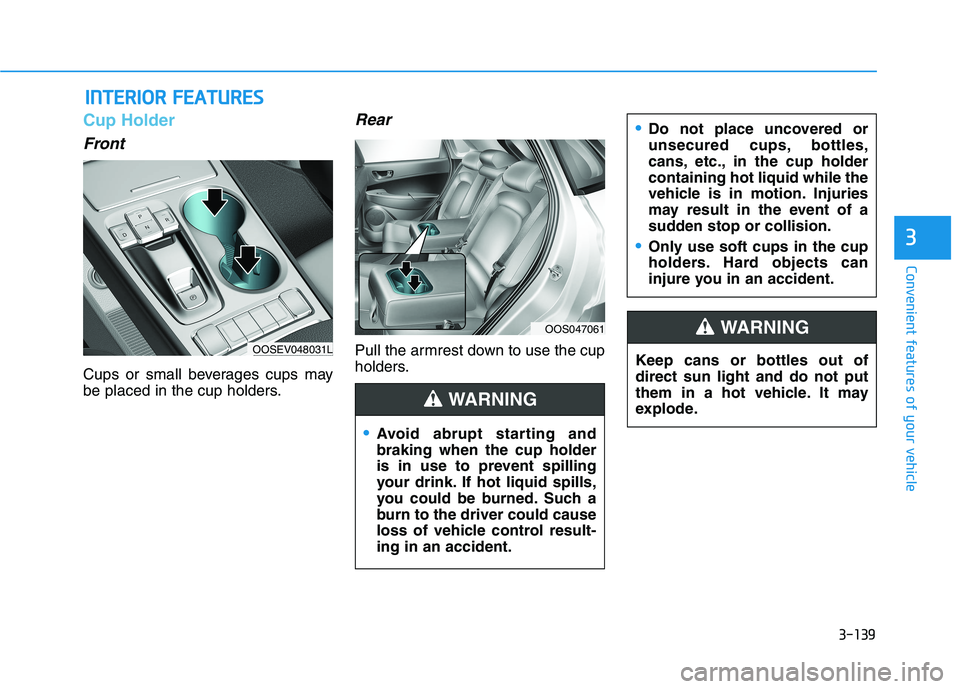
Cup Holder
Front
Cups or small beverages cups may
be placed in the cup holders.
Rear
Pull the armrest down to use the cup
holders.
I IN
NT
TE
ER
RI
IO
OR
R
F
FE
EA
AT
TU
UR
RE
ES
S
Avoid abrupt starting and
braking when the cup holder
is in use to prevent spilling
your drink. If hot liquid spills,
you could be burned. Such a
burn to the driver could cause
loss of vehicle control result-
ing in an accident.
WARNING
OOSEV048031L
OOS047061
Keep cans or bottles out of
direct sun light and do not put
them in a hot vehicle. It may
explode.
WARNING
Do not place uncovered or
unsecured cups, bottles,
cans, etc., in the cup holder
containing hot liquid while the
vehicle is in motion. Injuries
may result in the event of a
sudden stop or collision.
Only use soft cups in the cup
holders. Hard objects can
injure you in an accident.
Page 227 of 478
3-143
Convenient features of your vehicle
3
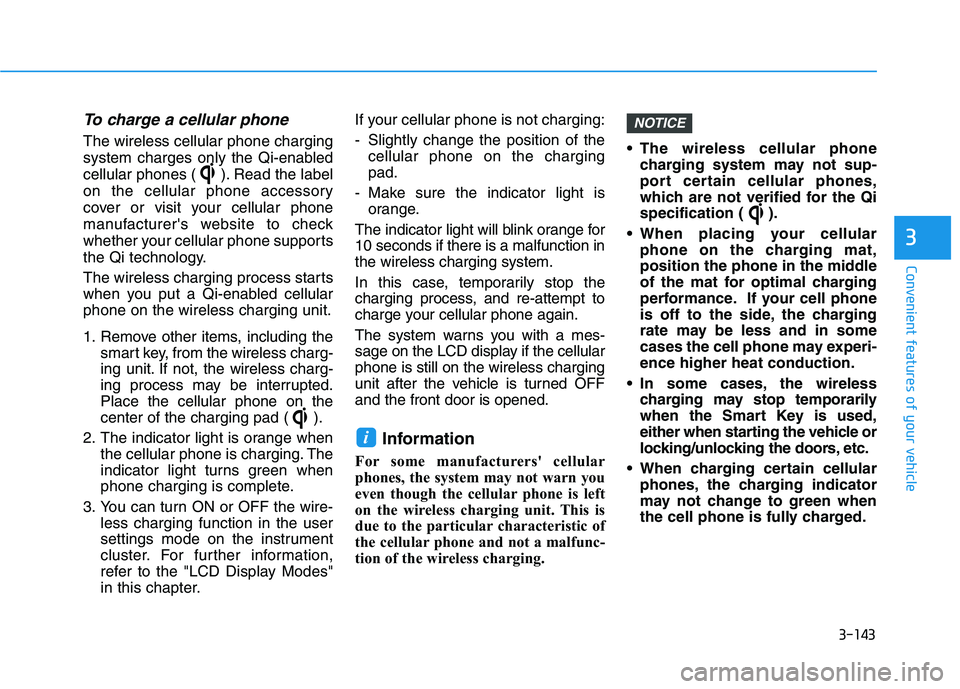
To charge a cellular phone
The wireless cellular phone charging
system charges only the Qi-enabled
cellular phones ( ). Read the label
on the cellular phone accessory
cover or visit your cellular phone
manufacturer's website to check
whether your cellular phone supports
the Qi technology.
The wireless charging process starts
when you put a Qi-enabled cellular
phone on the wireless charging unit.
1. Remove other items, including the
smart key, from the wireless charg-
ing unit. If not, the wireless charg-
ing process may be interrupted.
Place the cellular phone on the
center of the charging pad ( ).
2. The indicator light is orange when
the cellular phone is charging. The
indicator light turns green when
phone charging is complete.
3. You can turn ON or OFF the wire-
less charging function in the user
settings mode on the instrument
cluster. For further information,
refer to the "LCD Display Modes"
in this chapter.If your cellular phone is not charging:
- Slightly change the position of the
cellular phone on the charging
pad.
- Make sure the indicator light is
orange.
The indicator light will blink orange for
10 seconds if there is a malfunction in
the wireless charging system.
In this case, temporarily stop the
charging process, and re-attempt to
charge your cellular phone again.
The system warns you with a mes-
sage on the LCD display if the cellular
phone is still on the wireless charging
unit after the vehicle is turned OFF
and the front door is opened.
Information
For some manufacturers' cellular
phones, the system may not warn you
even though the cellular phone is left
on the wireless charging unit. This is
due to the particular characteristic of
the cellular phone and not a malfunc-
tion of the wireless charging. The wireless cellular phone
charging system may not sup-
port certain cellular phones,
which are not verified for the Qi
specification ( ).
When placing your cellular
phone on the charging mat,
position the phone in the middle
of the mat for optimal charging
performance. If your cell phone
is off to the side, the charging
rate may be less and in some
cases the cell phone may experi-
ence higher heat conduction.
In some cases, the wireless
charging may stop temporarily
when the Smart Key is used,
either when starting the vehicle or
locking/unlocking the doors, etc.
When charging certain cellular
phones, the charging indicator
may not change to green when
the cell phone is fully charged.
NOTICE
i
Page 245 of 478
5-10
Driving your vehicle
To prevent damage to the vehicle:
If the " " indicator turns off
while you are in motion, do not
attempt to shift to the P (Park)
position.
To prevent damage to the vehicle:
When the stop lamp fuse is blown,
you cannot normally start the
vehicle. Replace the fuse with a
new one. If you are not able to
replace the fuse, you can start the
vehicle by pressing and holding
the POWER button for 10 seconds
with the POWER button in the ACC
position.
Do not press the POWER button
for more than 10 seconds except
when the stop lamp fuse is blown.
For your safety always depress
the brake pedal before starting the
vehicle.
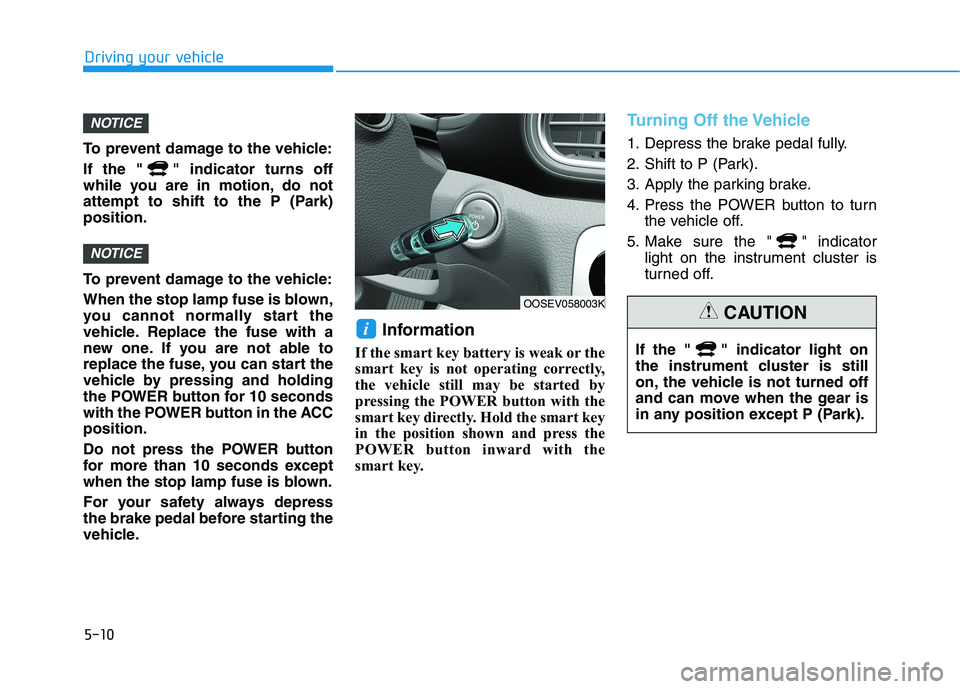
Information
If the smart key battery is weak or the
smart key is not operating correctly,
the vehicle still may be started by
pressing the POWER button with the
smart key directly. Hold the smart key
in the position shown and press the
POWER button inward with the
smart key.
Turning Off the Vehicle
1. Depress the brake pedal fully.
2. Shift to P (Park).
3. Apply the parking brake.
4. Press the POWER button to turn
the vehicle off.
5. Make sure the " " indicator
light on the instrument cluster is
turned off.
i
NOTICE
NOTICE
OOSEV058003K
If the " " indicator light on
the instrument cluster is still
on, the vehicle is not turned off
and can move when the gear is
in any position except P (Park).
CAUTION
Page 248 of 478
5-13
Driving your vehicle
5
When the driver's door is opened
within 3 minutes with the POWER
button in the ACC position and the
gear in N (Neutral), the vehicle is
automatically turned OFF and shifted
to the P (Park) position.
D (Drive)
This is the normal driving position.
To shift to D (Drive), press the [D]
button while depressing the brake
pedal.
Shift-lock system
For your safety, your vehicle has a
shift-lock system which prevents
shifting the gear from P (Park) or N
(Neutral) into R (Reverse) or D
(Drive) unless the brake pedal is
depressed.
To shift from P (Park) or N (Neutral)
into R (Reverse) or D (Drive), from R
(Reverse) into D (Drive) or from D
(Drive) into R (Reverse):
1. Depress and hold the brake pedal.
2. Start the vehicle or place the
POWER button in the ON position.
3. Press the R (Reverse) or D (Drive)
button.
Information
For your safety, you cannot shift the
gear while the charging cable is con-
nected.
When the battery (12 V) is dis-
charged
You cannot shift the gear when the
battery is discharged.
Jump start your vehicle (refer to
"Jump Starting" in chapter 6) or con-
tact an authorized HYUNDAI dealer.
Parking
Always come to a complete stop and
continue to depress the brake pedal.
Shift to the P (Park) position, apply
the parking brake, and place the
POWER button in the OFF position.
Take the Key with you when exiting
the vehicle.
i
Page 272 of 478
5-37
Driving your vehicle
5
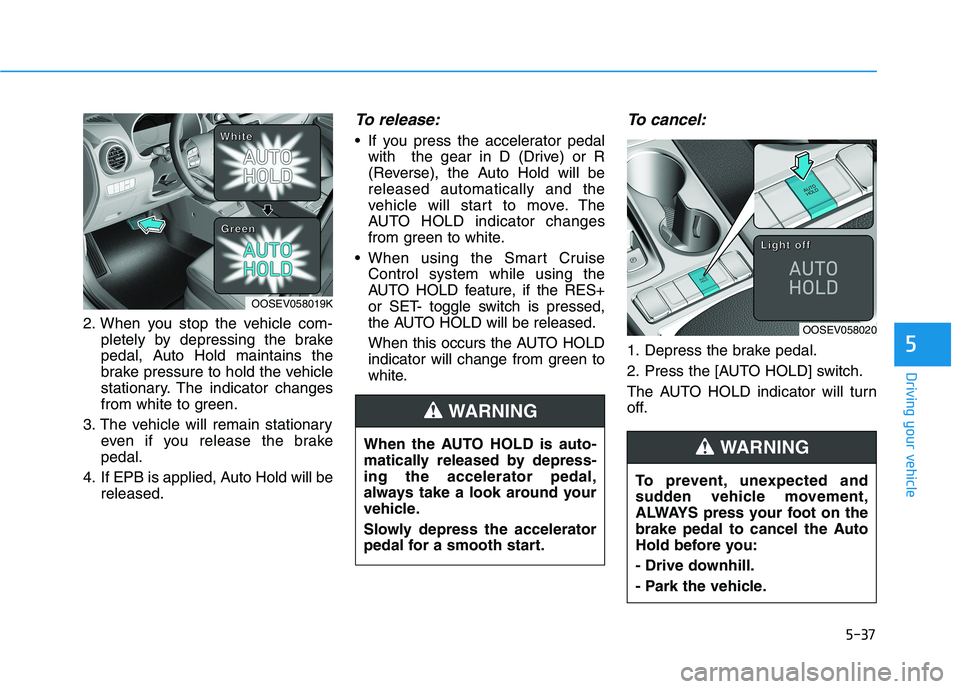
2. When you stop the vehicle com-
pletely by depressing the brake
pedal, Auto Hold maintains the
brake pressure to hold the vehicle
stationary. The indicator changes
from white to green.
3. The vehicle will remain stationary
even if you release the brake
pedal.
4. If EPB is applied, Auto Hold will be
released.
To release:
If you press the accelerator pedal
with the gear in D (Drive) or R
(Reverse), the Auto Hold will be
released automatically and the
vehicle will start to move. The
AUTO HOLD indicator changes
from green to white.
When using the Smart Cruise
Control system while using the
AUTO HOLD feature, if the RES+
or SET- toggle switch is pressed,
the AUTO HOLD will be released.
When this occurs the AUTO HOLD
indicator will change from green to
white.
To cancel:
1. Depress the brake pedal.
2. Press the [AUTO HOLD] switch.
The AUTO HOLD indicator will turn
off.
OOSEV058020
L L L L
i i i i
g g g g
h h h h
t t t t
o o o o
f f f f
f f f f
When the AUTO HOLD is auto-
matically released by depress-
ing the accelerator pedal,
always take a look around your
vehicle.
Slowly depress the accelerator
pedal for a smooth start.
WARNING
OOSEV058019K
W W W W
h h h h
i i i i
t t t t
e e e e
G G G G
r r r r
e e e e
e e e e
n n n n
To prevent, unexpected and
sudden vehicle movement,
ALWAYS press your foot on the
brake pedal to cancel the Auto
Hold before you:
- Drive downhill.
- Park the vehicle.
WARNING