Page 166 of 478
3-82
Convenient features of your vehicle
User settings mode
In this mode, you can change the
settings of the instrument cluster,
doors, lamps, etc.
1. Head-up display
2. Driver Assistance
3. Door
4. Lights
5. Sound
6. Convenience
7. Service interval
8. Other
9. Utility Mode
10. Language
11. ResetThe information provided may differ
depending on which functions are
applicable to your vehicle.
Shift to P to edit settings
This warning message appears if
you try to adjust the User Settings
while driving.
For your safety, change the User
Settings after parking the vehicle,
applying the parking brake and shift-
ing to P (Park).
Quick guide help
This mode provides quick guides for
the systems in the User Settings
mode.
Select an item, press and hold the
OK button.
For more details, about each sys-
tem, refer to this Owner’s Manual.
OOSEV048216N
OOSEV048172L
Page 183 of 478
3-99
Convenient features of your vehicle
3
L LI
IG
GH
HT
TI
IN
NG
G
Exterior Lights
Lighting control
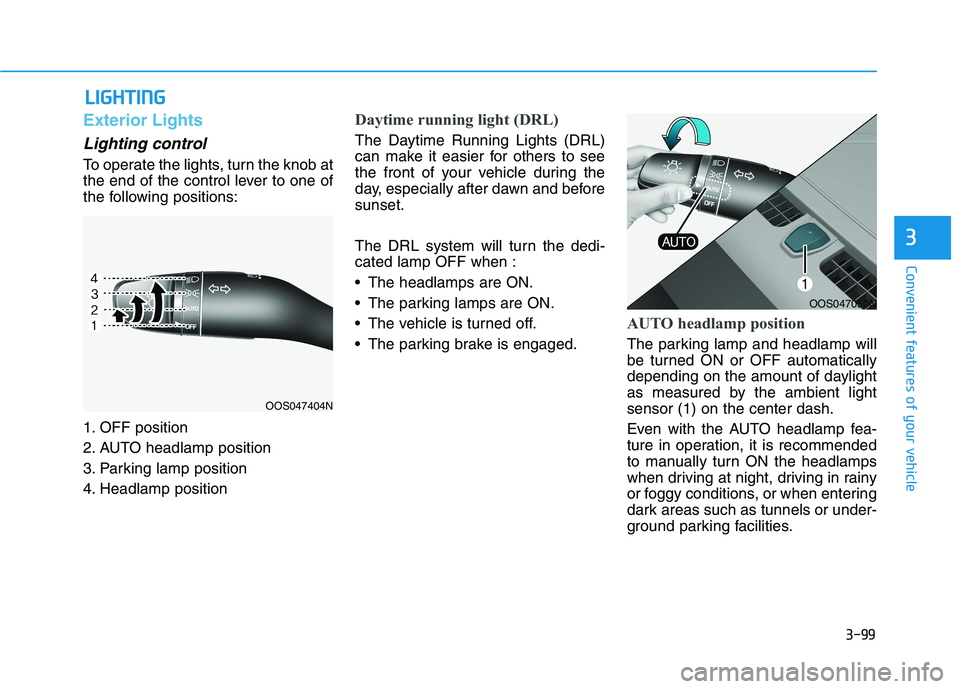
To operate the lights, turn the knob at
the end of the control lever to one of
the following positions:
1. OFF position
2. AUTO headlamp position
3. Parking lamp position
4. Headlamp position
Daytime running light (DRL)
The Daytime Running Lights (DRL)
can make it easier for others to see
the front of your vehicle during the
day, especially after dawn and before
sunset.
The DRL system will turn the dedi-
cated lamp OFF when :
The headlamps are ON.
The parking lamps are ON.
The vehicle is turned off.
The parking brake is engaged.
AUTO headlamp position
The parking lamp and headlamp will
be turned ON or OFF automatically
depending on the amount of daylight
as measured by the ambient light
sensor (1) on the center dash.
Even with the AUTO headlamp fea-
ture in operation, it is recommended
to manually turn ON the headlamps
when driving at night, driving in rainy
or foggy conditions, or when entering
dark areas such as tunnels or under-
ground parking facilities.
OOS047404N
OOS047050N
Page 243 of 478
5-8
Driving your vehicle
Button Position Action Notice
ON
Press the POWER button while it is in the
ACC position without depressing the brake
pedal.
The warning lights can be checked before
the vehicle is started.Do not leave the POWER button in the ON
position when the vehicle is not in the ready
( ) mode to prevent the battery from dis-
charging.
START
To start the vehicle, depress the brake pedal
and press the POWER button with the gear
in the P (Park) position.If you press the POWER button without
depressing the brake pedal, the vehicle does
not start and the POWER button changes as
follows:
OFF → →
ACC → →
ON → →
OFF or ACC
Page 245 of 478
5-10
Driving your vehicle
To prevent damage to the vehicle:
If the " " indicator turns off
while you are in motion, do not
attempt to shift to the P (Park)
position.
To prevent damage to the vehicle:
When the stop lamp fuse is blown,
you cannot normally start the
vehicle. Replace the fuse with a
new one. If you are not able to
replace the fuse, you can start the
vehicle by pressing and holding
the POWER button for 10 seconds
with the POWER button in the ACC
position.
Do not press the POWER button
for more than 10 seconds except
when the stop lamp fuse is blown.
For your safety always depress
the brake pedal before starting the
vehicle.
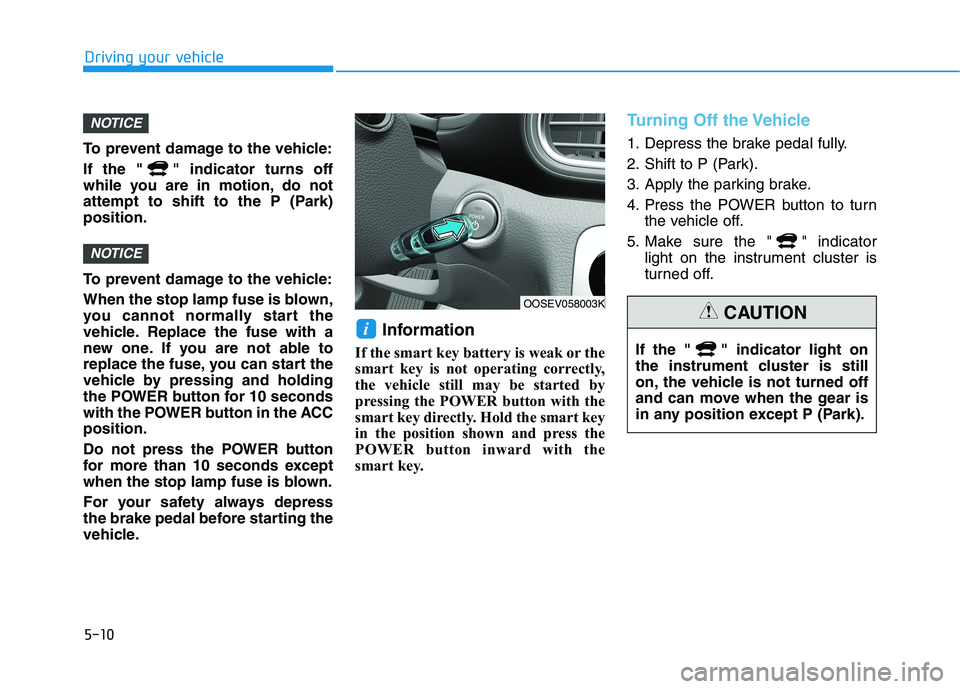
Information
If the smart key battery is weak or the
smart key is not operating correctly,
the vehicle still may be started by
pressing the POWER button with the
smart key directly. Hold the smart key
in the position shown and press the
POWER button inward with the
smart key.
Turning Off the Vehicle
1. Depress the brake pedal fully.
2. Shift to P (Park).
3. Apply the parking brake.
4. Press the POWER button to turn
the vehicle off.
5. Make sure the " " indicator
light on the instrument cluster is
turned off.
i
NOTICE
NOTICE
OOSEV058003K
If the " " indicator light on
the instrument cluster is still
on, the vehicle is not turned off
and can move when the gear is
in any position except P (Park).
CAUTION
Page 252 of 478
5-17
Driving your vehicle
5
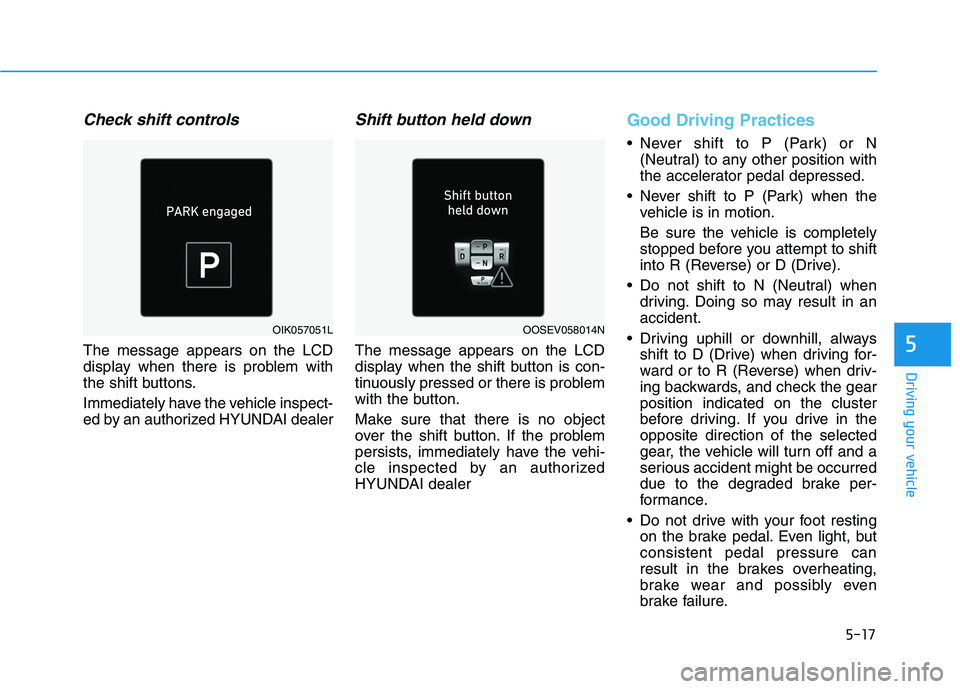
Check shift controls
The message appears on the LCD
display when there is problem with
the shift buttons.
Immediately have the vehicle inspect-
ed by an authorized HYUNDAI dealer
Shift button held down
The message appears on the LCD
display when the shift button is con-
tinuously pressed or there is problem
with the button.
Make sure that there is no object
over the shift button. If the problem
persists, immediately have the vehi-
cle inspected by an authorized
HYUNDAI dealer
Good Driving Practices
Never shift to P (Park) or N
(Neutral) to any other position with
the accelerator pedal depressed.
Never shift to P (Park) when the
vehicle is in motion.
Be sure the vehicle is completely
stopped before you attempt to shift
into R (Reverse) or D (Drive).
Do not shift to N (Neutral) when
driving. Doing so may result in an
accident.
Driving uphill or downhill, always
shift to D (Drive) when driving for-
ward or to R (Reverse) when driv-
ing backwards, and check the gear
position indicated on the cluster
before driving. If you drive in the
opposite direction of the selected
gear, the vehicle will turn off and a
serious accident might be occurred
due to the degraded brake per-
formance.
Do not drive with your foot resting
on the brake pedal. Even light, but
consistent pedal pressure can
result in the brakes overheating,
brake wear and possibly even
brake failure.
OIK057051LOOSEV058014N
Page 264 of 478
5-29
Driving your vehicle
5
Power Brakes
Your vehicle has power-assisted
brakes that adjust automatically
through normal usage.
If power is not supplied to your vehi-
cle such as when the battery is dis-
charged or the vehicle is turned off
while driving, the power assist for the
brakes will not work. You can still stop
your vehicle by applying greater
force to the brake pedal than typical.
The stopping distance, however, will
be longer than with power brakes.
Do not pump the brake pedal when
the power assist has been interrupt-
ed.
B BR
RA
AK
KI
IN
NG
G
S
SY
YS
ST
TE
EM
M
Take the following precautions:
Do not drive with your foot
resting on the brake pedal.
This will create abnormal high
brake temperatures, exces-
sive brake lining and pad
wear, and increased stopping
distances.
When descending down a
long or steep hill, use the pad-
dle shifter (left side lever) to
increase regenerative braking
in order to control your speed
without using the brake pedal
excessively. Applying the
brakes continuously will
cause the brakes to overheat
and could result in a tempo-
rary loss of braking perform-
ance.
Wet brakes may impair the
vehicle's ability to safely slow
down; the vehicle may also
pull to one side when the
brakes are applied. Applying
the brakes lightly will indicate
whether they have been
affected in this way. Always
test your brakes in this fash-
ion after driving through deep
water. To dry the brakes, light-
ly tap the brake pedal to heat
up the brakes while maintain-
ing a safe forward speed until
brake performance returns to
normal. Avoid driving at high
speeds until the brakes func-
tion correctly.WARNING
Page 265 of 478
5-30
Driving your vehicle
Do not continue depressing the
brake pedal if the "
"indica-
tor is OFF. The battery may be
discharged.
Noise and vibration generated
during braking is normal.
Under normal operation, electric
brake pump noise and motor
vibration may occur temporarily
in below cases.
- When the pedal is depressed
suddenly.
- When the pedal is repeatedly
depressed in short intervals.
- When the ABS function is acti-
vated while braking.
Disc Brake Wear Indicator
When your brake pads are worn and
new pads are required, you will hear
a high pitched warning sound from
your front or rear brakes. You may
hear this sound come and go or it
may occur whenever you depress
the brake pedal.
Note that some driving conditions or
climates may cause a brake squeal
when you first apply (or lightly apply)
the brakes. This is normal and does
not indicate a problem with your
brakes.
To avoid costly brake repairs, do
not continue to drive with worn
brake pads.
Information
Always replace brake pads as com-
plete front or rear axle sets.
Electronic Parking Brake
(EPB)
Applying the parking brake
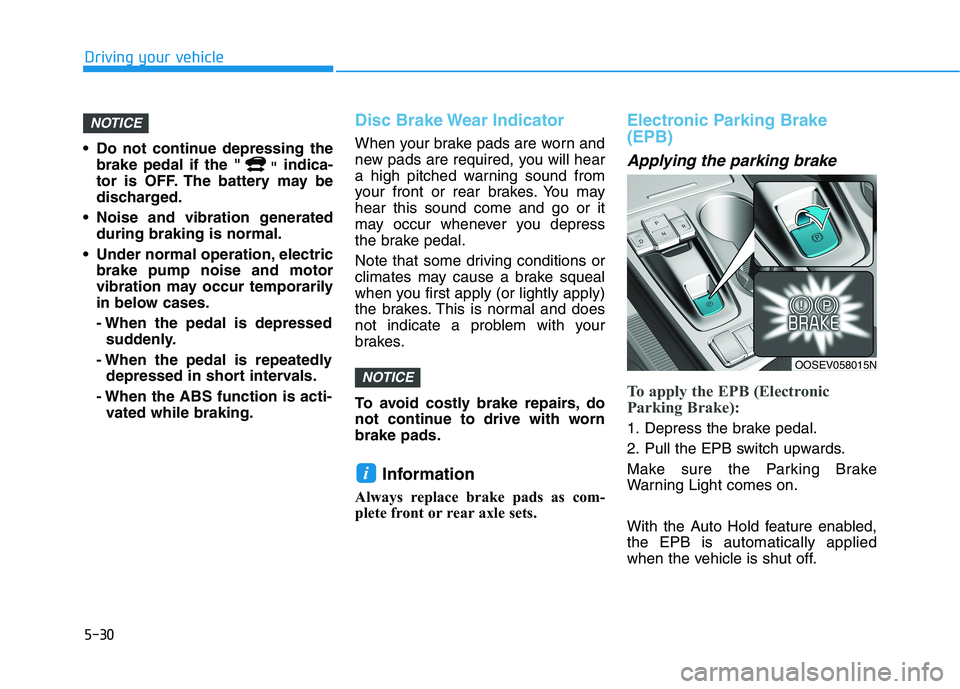
To apply the EPB (Electronic
Parking Brake):
1. Depress the brake pedal.
2. Pull the EPB switch upwards.
Make sure the Parking Brake
Warning Light comes on.
With the Auto Hold feature enabled,
the EPB is automatically applied
when the vehicle is shut off.
i
NOTICE
NOTICE
OOSEV058015N
Page 266 of 478
5-31
Driving your vehicle
5
However, if Auto Hold is OFF when
the the vehicle is turned off, the EPB
will not be applied.Releasing the parking brake
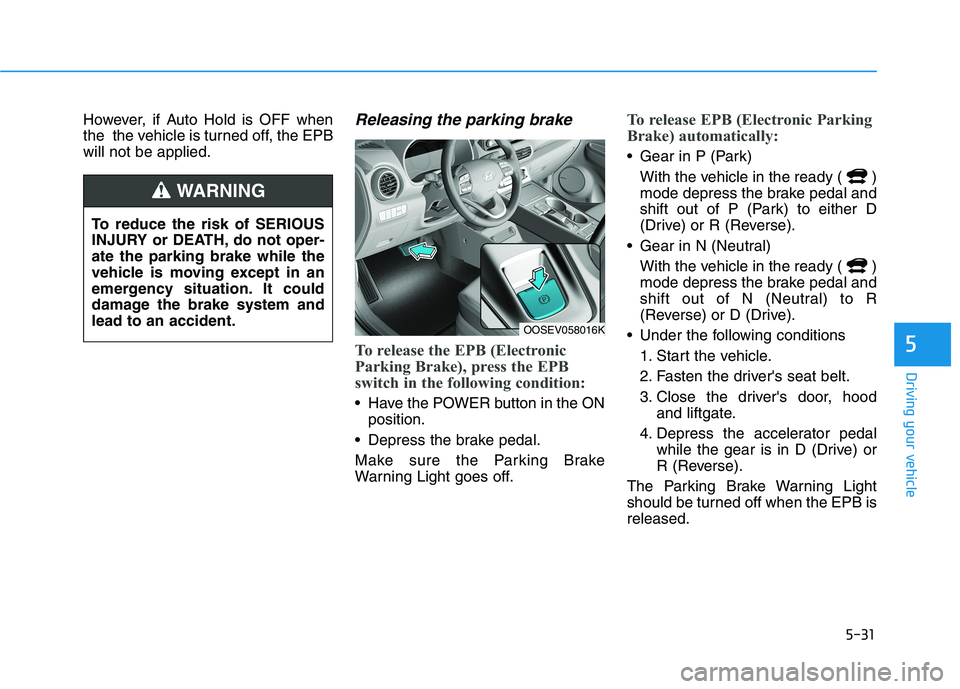
To release the EPB (Electronic
Parking Brake), press the EPB
switch in the following condition:
Have the POWER button in the ON
position.
Depress the brake pedal.
Make sure the Parking Brake
Warning Light goes off.
To release EPB (Electronic Parking
Brake) automatically:
Gear in P (Park)
With the vehicle in the ready ( )
mode depress the brake pedal and
shift out of P (Park) to either D
(Drive) or R (Reverse).
Gear in N (Neutral)
With the vehicle in the ready ( )
mode depress the brake pedal and
shift out of N (Neutral) to R
(Reverse) or D (Drive).
Under the following conditions
1. Start the vehicle.
2. Fasten the driver's seat belt.
3. Close the driver's door, hood
and liftgate.
4. Depress the accelerator pedal
while the gear is in D (Drive) or
R (Reverse).
The Parking Brake Warning Light
should be turned off when the EPB is
released.
To reduce the risk of SERIOUS
INJURY or DEATH, do not oper-
ate the parking brake while the
vehicle is moving except in an
emergency situation. It could
damage the brake system and
lead to an accident.
WARNING
OOSEV058016K