Page 30 of 546
H21
AC Charge
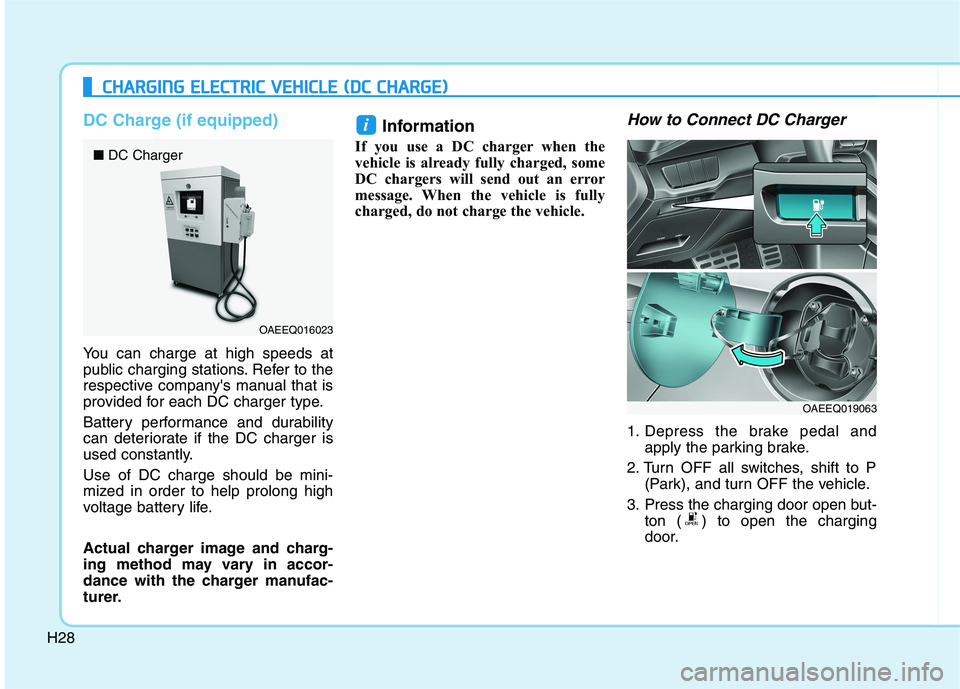
Actual charger image and charg-
ing method may vary in accor-
dance with the charger manufac-
turer.
How to Connect AC Charger
1. Depress the brake pedal andapply the parking brake.
2. Turn OFF all switches, shift to P (Park), and turn OFF the vehicle. If charging is initiated without the
gear in P (Park), the charging will
start after the gear is automatical-
ly shifted to P (Park).
3. Press the charging door open but-ton ( ) to open the charging
door.
CCHH AARRGG IINN GG EE LLEE CCTT RR IICC VV EEHH IICC LLEE (( AA CC CC HH AARRGG EE))
OLFP0Q4057N
■
AC Charger
OAEEQ019063
Page 37 of 546

H28
DC Charge (if equipped)
You can charge at high speeds at
public charging stations. Refer to the
respective company's manual that is
provided for each DC charger type.
Battery performance and durability
can deteriorate if the DC charger is
used constantly. Use of DC charge should be mini-
mized in order to help prolong high
voltage battery life.
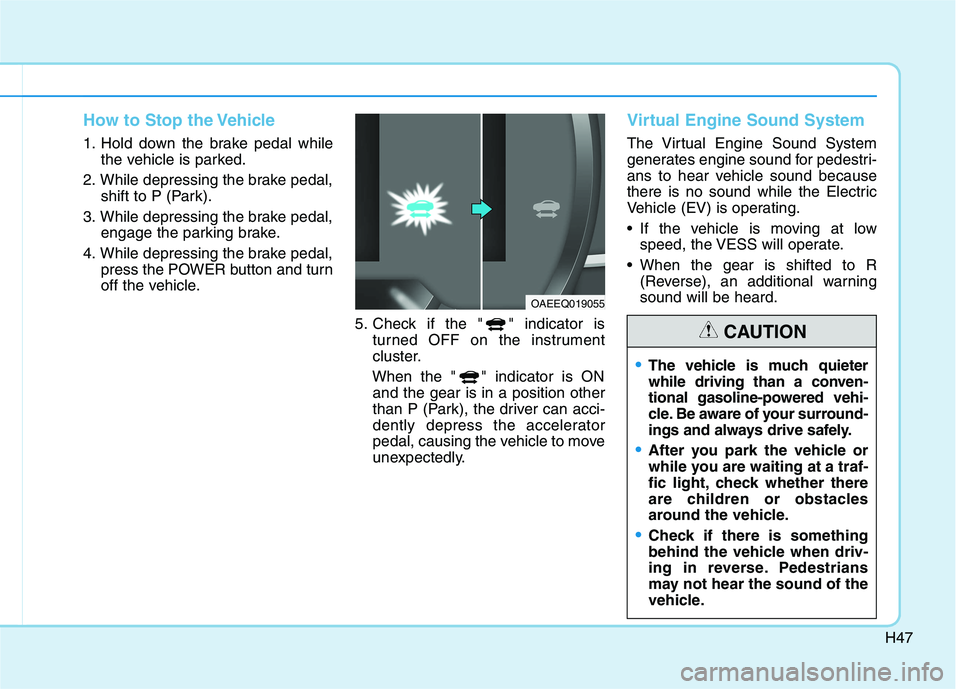
Actual charger image and charg-
ing method may vary in accor-
dance with the charger manufac-
turer.Information
If you use a DC charger when the
vehicle is already fully charged, some
DC chargers will send out an error
message. When the vehicle is fully
charged, do not charge the vehicle.
How to Connect DC Charger
1. Depress the brake pedal and apply the parking brake.
2. Turn OFF all switches, shift to P (Park), and turn OFF the vehicle.
3. Press the charging door open but- ton ( ) to open the charging
door.
i
CCHH AARRGG IINN GG EE LLEE CCTT RR IICC VV EEHH IICC LLEE (( DD CC CC HH AARRGG EE))
OAEEQ016023
■
DC Charger
OAEEQ019063
Page 44 of 546
H35
2. Check if the power lamp (green)illuminates on the control box. 3. Depress the brake pedal and
apply the parking brake.
4. Turn OFF all switches, shift to P (Park), and turn OFF the vehicle. If charging is initiated without the
gear in P (Park), the charging will
start after the gear is automatical-
ly shifted to P (Park).
5. Press the charging door open but-ton ( ) to open the charging
door.
OOSEVQ018056
OAEEQ019063
Page 55 of 546
H46
How to Start the Vehicle
1. Holding the smart key, sit in thedriver's seat.
2. Fasten the seat belt before start- ing the vehicle.
3. Make sure to engage the parking brake.
4. Turn OFF all electrical devices.
5. Make sure to depress and hold the brake pedal.
6. While depressing the brake pedal, shift to P (Park).
7. Depress and hold the brake while pressing the POWER button. 8. When the " " indicator is ON,
you can drive the vehicle.
When the " " indicator is OFF, you cannot drive the vehicle. Start
the vehicle again.
9. Depress and hold the brake pedal and shift to the desired position. Information
While the charging cable is connected,
the gear cannot be shift from P (Park)
to any other gear for safety reasons.
10.Release the parking brake and slowly release the brake pedal.
Check if the vehicle slowly moves
forward, then depress the accel-
erator pedal.
i
DDRRIIVV IINN GG EE LLEE CCTT RR IICC VV EEHH IICC LLEE
OAEEQ019054
Page 56 of 546

H47
How to Stop the Vehicle
1. Hold down the brake pedal whilethe vehicle is parked.
2. While depressing the brake pedal, shift to P (Park).
3. While depressing the brake pedal, engage the parking brake.
4. While depressing the brake pedal, press the POWER button and turn
off the vehicle.
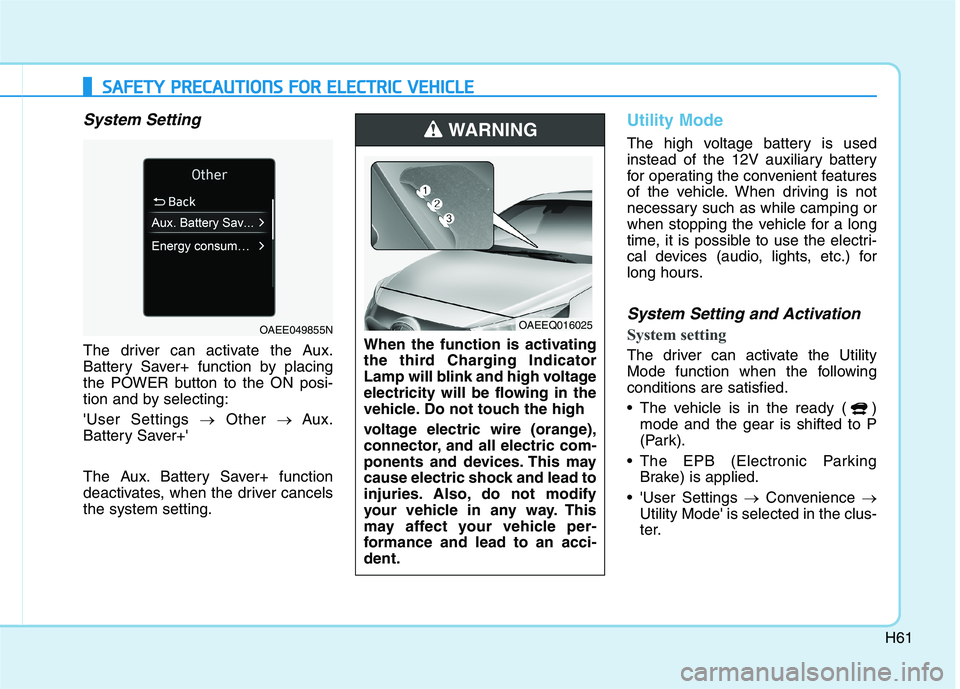
5. Check if the " " indicator isturned OFF on the instrument
cluster.
When the " " indicator is ON and the gear is in a position other
than P (Park), the driver can acci-
dently depress the accelerator
pedal, causing the vehicle to move
unexpectedly.
Virtual Engine Sound System
The Virtual Engine Sound System
generates engine sound for pedestri-
ans to hear vehicle sound because
there is no sound while the Electric
Vehicle (EV) is operating.
If the vehicle is moving at low speed, the VESS will operate.
When the gear is shifted to R (Reverse), an additional warning sound will be heard.
OAEEQ019055
The vehicle is much quieter
while driving than a conven-
tional gasoline-powered vehi-
cle. Be aware of your surround-
ings and always drive safely.
After you park the vehicle or
while you are waiting at a traf-
fic light, check whether there
are children or obstacles
around the vehicle.
Check if there is something
behind the vehicle when driv-
ing in reverse. Pedestrians
may not hear the sound of the
vehicle.
CAUTION
Page 70 of 546

H61
SSAA FFEE TT YY PP RR EECCAA UU TTIIOO NNSS FF OO RR EE LLEE CCTT RR IICC VV EEHH IICC LLEE
System Setting
The driver can activate the Aux.
Battery Saver+ function by placing
the POWER button to the ON posi-
tion and by selecting: 'User Settings �Other � Aux.
Battery Saver+'
The Aux. Battery Saver+ function
deactivates, when the driver cancelsthe system setting.
Utility Mode
The high voltage battery is used
instead of the 12V auxiliary battery
for operating the convenient features
of the vehicle. When driving is not
necessary such as while camping or
when stopping the vehicle for a long
time, it is possible to use the electri-
cal devices (audio, lights, etc.) for
long hours.
System Setting and Activation
System setting
The driver can activate the Utility
Mode function when the followingconditions are satisfied.
The vehicle is in the ready ( ) mode and the gear is shifted to P
(Park).
The EPB (Electronic Parking Brake) is applied.
'User Settings �Convenience �
Utility Mode' is selected in the clus-
ter.When the function is activating
the third Charging Indicator
Lamp will blink and high voltage
electricity will be flowing in the
vehicle. Do not touch the high
voltage electric wire (orange),
connector, and all electric com-
ponents and devices. This may
cause electric shock and lead to
injuries. Also, do not modify
your vehicle in any way. This
may affect your vehicle per-
formance and lead to an acci-dent.
WARNING
OAEEQ016025OAEE049855N
Page 79 of 546

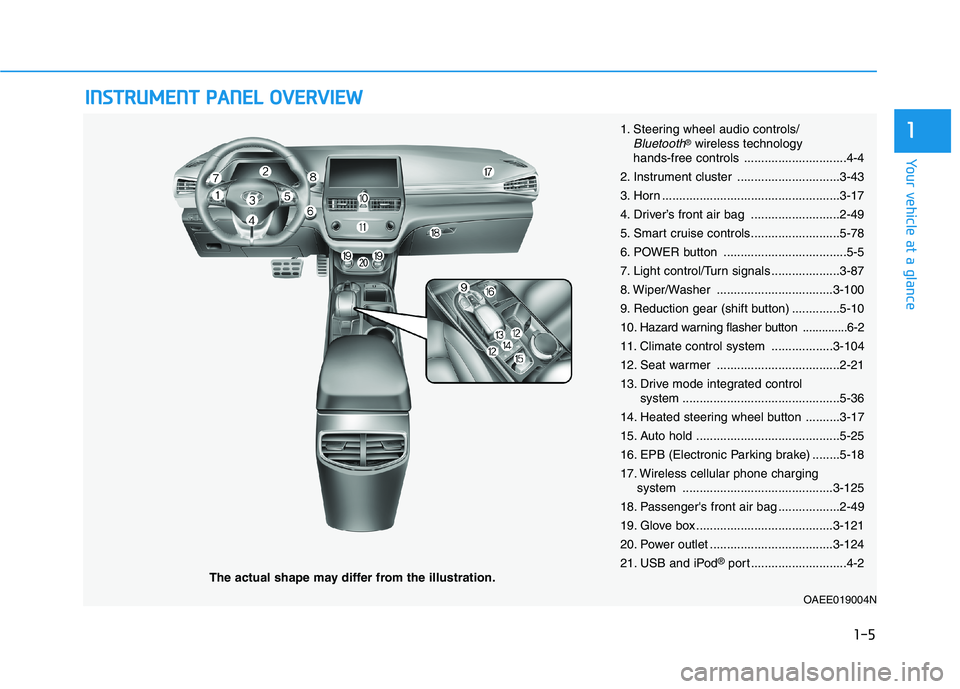
IINN SSTT RR UU MM EENN TT PP AA NN EELL OO VVEERR VV IIEE WW
The actual shape may differ from the illustration.
1-5
Your vehicle at a glance
11. Steering wheel audio controls/Bluetooth®wireless technology
hands-free controls ..............................4-4
2. Instrument cluster ..............................3-43
3. Horn ....................................................3-17
4. Driver’s front air bag ..........................2-49
5. Smart cruise controls..........................5-78
6. POWER button ....................................5-5
7. Light control/Turn signals ....................3-87
8. Wiper/Washer ..................................3-100
9. Reduction gear (shift button) ..............5-1010
. Hazard warning flasher button ..............6-2
11. Climate control system ..................3-104
12. Seat warmer ....................................2-21
13. Drive mode integrated control system ..............................................5-36
14. Heated steering wheel button ..........3-17
15. Auto hold ..........................................5-25
16. EPB (Electronic Parking brake) ........5-18
17. Wireless cellular phone charging system ............................................3-125
18. Passenger's front air bag ..................2-49
19. Glove box ........................................3-121
20. Power outlet ....................................3-124
21. USB and iPod ®
port ............................4-2
OAEE019004N
Page 95 of 546
2-15
Safety system of your vehicle
2
Armrest (if equipped)
The armrest is located in the center
of the rear seat. Pull the armrest
down by using the strap from the
seatback to use it.
Make sure the vehicle is off,
shifted to (Park), and the parking
brake is securely applied when-
ever loading or unloading cargo.
Failure to take these steps may
allow the vehicle to move if the
shift button is inadvertentlypressed to another position.
WARNING
OAE036022
Be careful when loading
cargo through the rear pas-
senger seats to prevent dam-
age to the vehicle interior.
When cargo is loaded through
the rear passenger seats,
ensure the cargo is properly
secured to prevent it from
moving while driving.
Unsecured cargo in the pas-
senger compartment can
cause damage to the vehicle
or injury to it's occupants.
CAUTION