2021 HYUNDAI IONIQ ELECTRIC buttons
[x] Cancel search: buttonsPage 164 of 546
3-14
Convenient features of your vehicle
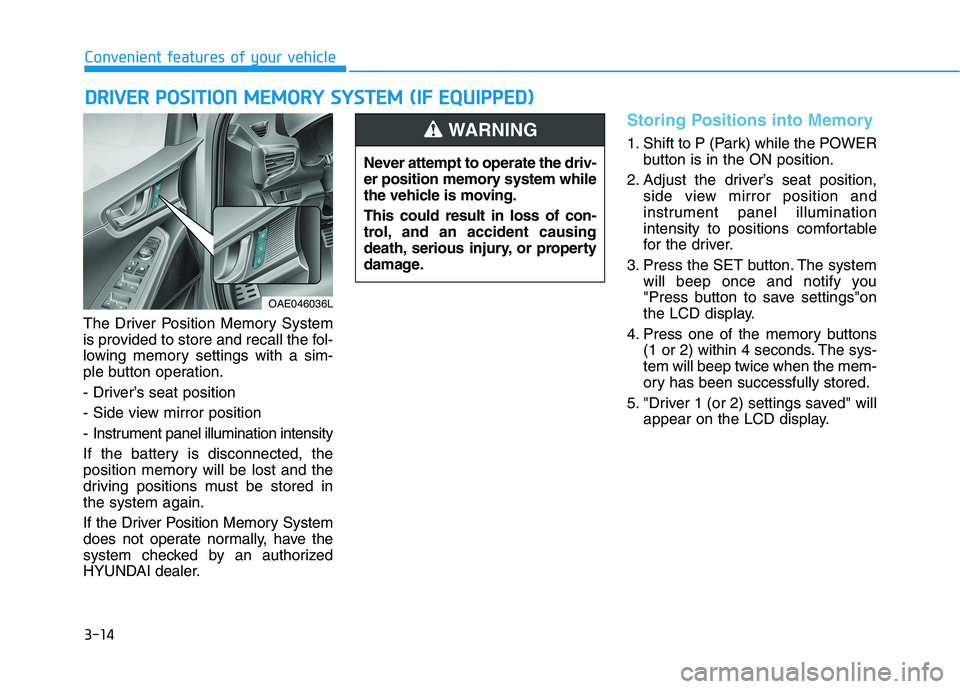
The Driver Position Memory System
is provided to store and recall the fol-
lowing memory settings with a sim-
ple button operation.
- Driver’s seat position
- Side view mirror position
- Instrument panel illumination intensity
If the battery is disconnected, the
position memory will be lost and the
driving positions must be stored inthe system again.
If the Driver Position Memory System
does not operate normally, have the
system checked by an authorized
HYUNDAI dealer.
Storing Positions into Memory
1. Shift to P (Park) while the POWERbutton is in the ON position.
2. Adjust the driver’s seat position, side view mirror position and
instrument panel illumination
intensity to positions comfortable
for the driver.
3. Press the SET button. The system will beep once and notify you
"Press button to save settings"on
the LCD display.
4. Press one of the memory buttons (1 or 2) within 4 seconds. The sys-tem will beep twice when the mem-
ory has been successfully stored.
5. "Driver 1 (or 2) settings saved" will appear on the LCD display.
DDRRIIVV EERR PP OO SSIITT IIOO NN MM EEMM OORRYY SS YY SSTT EEMM (( IIFF EE QQ UUIIPP PPEEDD ))
OAE046036L Never attempt to operate the driv-
er position memory system while
the vehicle is moving. This could result in loss of con-
trol, and an accident causing
death, serious injury, or property
damage.
WARNING
Page 165 of 546
3-15
Convenient features of your vehicle
3
Recalling positions from mem-
ory
1. Shift to P (Park) while the POWERbutton is in the ON position.
2. Press the desired memory button (1 or 2). The system will beep once,
and then the driver’s seat position,
side view mirror position and instru-ment panel illumination intensitywill automatically adjust to the
stored positions.
3. "Driver 1(or 2) settings is applied" will appear on the LCD display. While recalling the "1" memory
position, pressing the SET or 1
button temporarily stops theadjustment of the recalled memo-
ry position. Pressing the 2 button
recalls the "2" memory position.
While recalling the "2" memory position, pressing the SET or 2
button temporarily stops theadjustment of the recalled memo-
ry position. Pressing the 1 button
recalls the "1" memory position.
While recalling the stored posi- tions, pressing one of the con-
trol buttons for the driver’s seat,
side view mirror or instrumentpanel illumination will cause the
movement of that component to
stop and move in the direction
that the control button ispressed.
Easy Access Function
When exiting the vehicle the driver’s
seat will move rearward when the
vehicle is turned off, and the gear in
P (Park).
When entering the vehicle the dri-
ver’s seat will move forward when the
smart key is detected with the
POWER button in the ACC/ON/
START position.
You can activate or deactivate the Easy Access Function from the User
Settings mode on the LCD display.
For more information, refer to the
"LCD Display" section in this
chapter.
NOTICE
Page 173 of 546
3-23
Convenient features of your vehicle
3
There are some conditions that can
cause changes to the vehicle mag-
nets, such as installing a ski rack or
a CB antenna. Body repair work on
the vehicle can also cause changes
to the vehicle’s magnetic field. In
these situations, the compass will
need to be re-calibrated to quickly
correct these changes.
If you need to recalibrate the com- pass:
1. Press and hold the button formore than 6 seconds. When the
compass memory is cleared a "C"
will appear in the display.
2. Drive the vehicle in 2 complete cir- cles at less than 8 km/h (5 mph).Integrated HomeLink ®
Wireless
Control System
The HomeLink ®
Wireless Control
System can replace up to three hand-
held radio-frequency (RF) transmit-
ters with a single built-in device. This
innovative feature will learn the radiofrequency codes of most current
transmitters to operate devices such
as gate operators, garage door open-
ers, entry door locks, security sys-
tems, even home lighting. Both stan-
dard and rolling code-equipped trans-
mitters can be programmed by fol-
lowing the outlined procedures. Additional HomeLink ®
information
can be found at: www.homelink.com
or by calling 1-800-355-3515.
Retain the original transmitter of the
RF device you are programming for
use in other vehicles as well as forfuture HomeLink ®
programming. It is
also suggested that upon the sale of
the vehicle, the programmedHomeLink ®
buttons be erased for
security purposes.Before programming HomeLink ®
to a garage door
opener or gate operator, makesure people and objects are out
of the way of the device to pre-
vent potential harm or damage.Do not use the HomeLink ®
with
any garage door opener that
lacks the safety stop and
reverse features required by
federal safety standards (this
includes any garage door open-
er model manufactured before
April 1, 1982). A garage doorthat cannot detect an object -signaling the door to stop and
reverse - does not meet current
federal safety standards. Using
a garage door opener without
these features increases the
risk of serious injury or death.
WARNING
Page 175 of 546
3-25
Convenient features of your vehicle
3
4. Press and hold the just-trainedHomeLink ®
button and observe
the red Status Indicator LED. If the
indicator light stays on constantly,
programming is complete and
your device should activate.
5. To program the remaining two HomeLink ®
buttons, follow either
steps 1 through 4 above for other
Rolling Code devices or steps 2
through 5 in Standard Programming
for standard devices.Standard programming
To train most devices, follow these
instructions:
1. For first-time programming, press and hold the two outside buttons, HomeLink ®
Channel 1 and
Channel 3 Buttons, until the indi-cator light begins to flash (after 20
seconds). Release both buttons.
Do not hold the buttons for longer
than 30 seconds.
2. Position the end of your hand-held transmitter 2-8 cm (1-3 inches)
away from the HomeLink ®
buttons
while keeping the indicator light in
view.
3. Simultaneously press and hold both the HomeLink ®
and hand-
held transmitter button. DO NOT
release the buttons until step 4has been completed. 4. While continuing to hold the but-
tons the red Indicator Status LED
will flash slowly and then rapidlyafter HomeLink ®
successfully
trains to the frequency signal from
the hand-held transmitter. Release
both buttons.
5. Press and hold the just-trained HomeLink ®
button and observe
the red Status Indicator LED. If the
indicator light stays on constantly,
programming is complete and
your device should activate whenthe HomeLink ®
button is pressed
and released.
6. To program the remaining two HomeLink ®
buttons, follow steps 2
through 5.
Page 176 of 546
3-26
Convenient features of your vehicle
Gate operator & Canadian program-ming
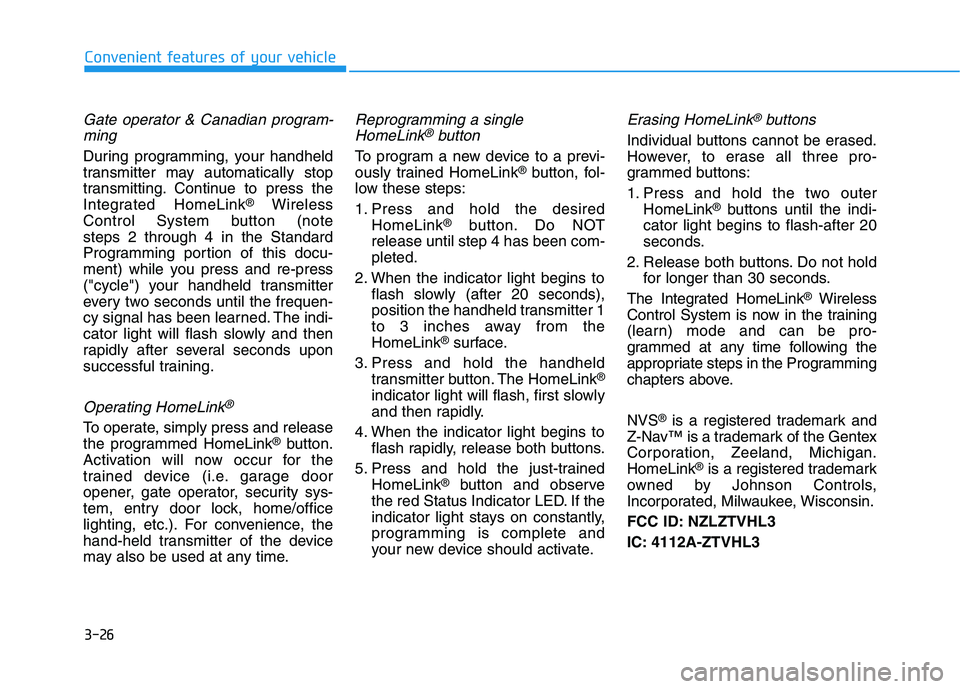
During programming, your handheld
transmitter may automatically stop
transmitting. Continue to press the
Integrated HomeLink ®
Wireless
Control System button (note steps 2 through 4 in the Standard
Programming portion of this docu-
ment) while you press and re-press
("cycle") your handheld transmitter
every two seconds until the frequen-
cy signal has been learned. The indi-
cator light will flash slowly and then
rapidly after several seconds upon
successful training.
Operating HomeLink®
To operate, simply press and release
the programmed HomeLink ®
button.
Activation will now occur for the
trained device (i.e. garage door
opener, gate operator, security sys-
tem, entry door lock, home/office
lighting, etc.). For convenience, the
hand-held transmitter of the device
may also be used at any time.
Reprogramming a single
HomeLink®button
To program a new device to a previ-
ously trained HomeLink ®
button, fol-
low these steps:
1. Press and hold the desired HomeLink ®
button. Do NOT
release until step 4 has been com- pleted.
2. When the indicator light begins to flash slowly (after 20 seconds),
position the handheld transmitter 1
to 3 inches away from theHomeLink ®
surface.
3. Press and hold the handheld transmitter button. The HomeLink ®
indicator light will flash, first slowly
and then rapidly.
4. When the indicator light begins to flash rapidly, release both buttons.
5. Press and hold the just-trained HomeLink ®
button and observe
the red Status Indicator LED. If the
indicator light stays on constantly,
programming is complete and
your new device should activate.
Erasing HomeLink®buttons
Individual buttons cannot be erased.
However, to erase all three pro-
grammed buttons:
1. Press and hold the two outer HomeLink ®
buttons until the indi-
cator light begins to flash-after 20
seconds.
2. Release both buttons. Do not hold for longer than 30 seconds.
The Integrated HomeLink ®
Wireless
Control System is now in the training
(learn) mode and can be pro-
grammed at any time following the
appropriate steps in the Programming
chapters above. NVS ®
is a registered trademark and
Z-Nav™ is a trademark of the Gentex
Corporation, Zeeland, Michigan.HomeLink ®
is a registered trademark
owned by Johnson Controls,
Incorporated, Milwaukee, Wisconsin.
FCC ID: NZLZTVHL3
IC: 4112A-ZTVHL3
Page 223 of 546
3-73
Convenient features of your vehicle
3
LCD Display Control
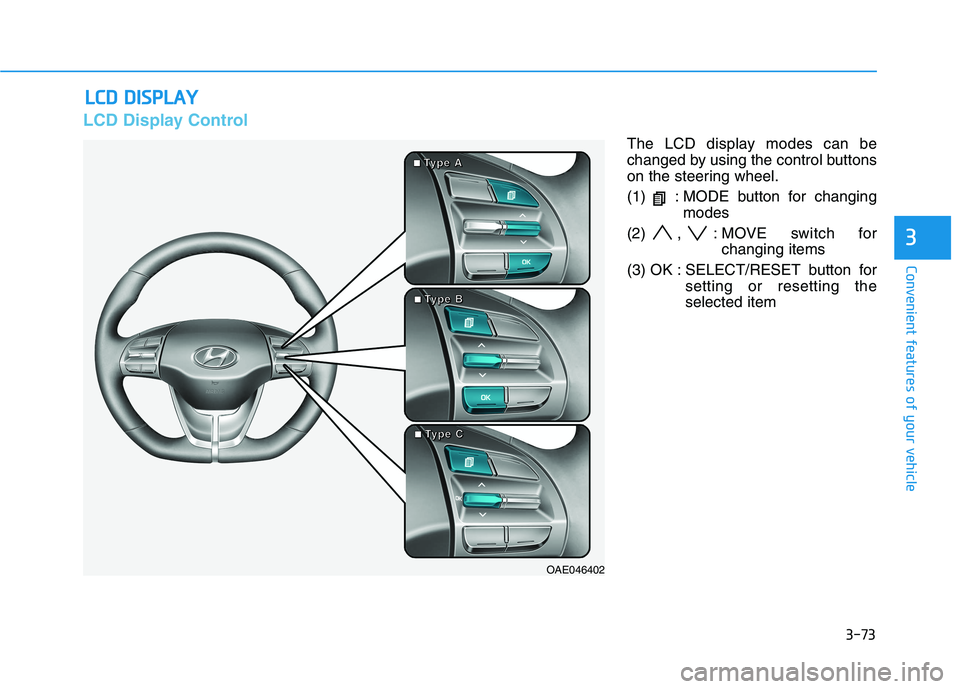
The LCD display modes can be
changed by using the control buttons
on the steering wheel.
(1) : MODE button for changingmodes
(2) , : MOVE switch for changing items
(3) OK : SELECT/RESET button for setting or resetting the selected item
LLCC DD DD IISS PP LLAA YY
OAE046402
■
■■■TTTTyyyyppppeeee AAAA
■■■■TTTTyyyyppppeeee BBBB
■■■■TTTTyyyyppppeeee CCCC
Page 260 of 546
3-110
Convenient features of your vehicle
Automatic Heating and Air Conditioning
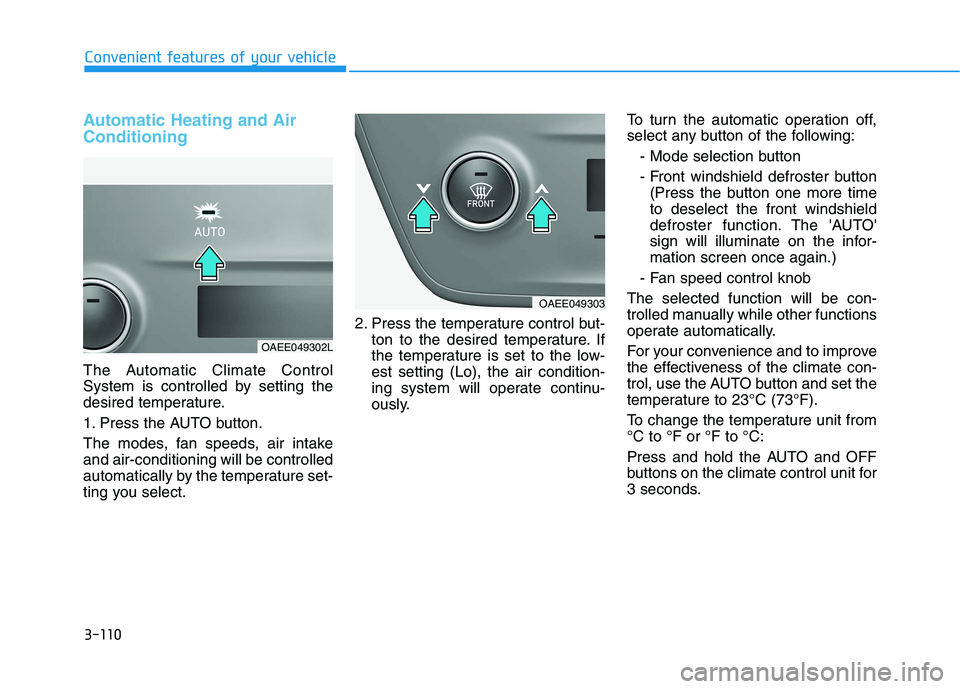
The Automatic Climate Control
System is controlled by setting the
desired temperature.
1. Press the AUTO button.
The modes, fan speeds, air intake and air-conditioning will be controlled
automatically by the temperature set-
ting you select.2. Press the temperature control but-
ton to the desired temperature. If
the temperature is set to the low-est setting (Lo), the air condition-
ing system will operate continu-
ously. To turn the automatic operation off,
select any button of the following:
- Mode selection button
- Front windshield defroster button(Press the button one more time to deselect the front windshield
defroster function. The 'AUTO'
sign will illuminate on the infor-mation screen once again.)
- Fan speed control knob
The selected function will be con-
trolled manually while other functions
operate automatically.
For your convenience and to improve
the effectiveness of the climate con-
trol, use the AUTO button and set the
temperature to 23°C (73°F).
To change the temperature unit from °C to °F or °F to °C:
Press and hold the AUTO and OFF
buttons on the climate control unit for
3 seconds.
OAEE049303
OAEE049302L
Page 261 of 546
3-111
Convenient features of your vehicle
3
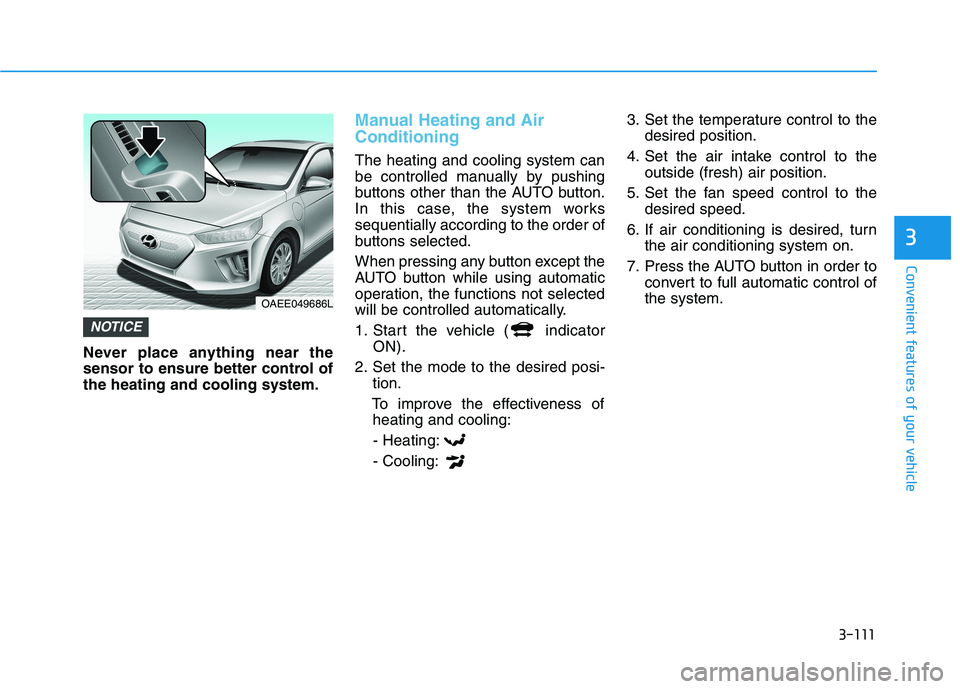
Never place anything near the
sensor to ensure better control ofthe heating and cooling system.
Manual Heating and Air Conditioning
The heating and cooling system can
be controlled manually by pushing
buttons other than the AUTO button.
In this case, the system workssequentially according to the order of
buttons selected.
When pressing any button except the
AUTO button while using automatic
operation, the functions not selected
will be controlled automatically.
1. Start the vehicle ( indicatorON).
2. Set the mode to the desired posi- tion.
To improve the effectiveness of heating and cooling:
- Heating:- Cooling: 3. Set the temperature control to the
desired position.
4. Set the air intake control to the outside (fresh) air position.
5. Set the fan speed control to the desired speed.
6. If air conditioning is desired, turn the air conditioning system on.
7. Press the AUTO button in order to convert to full automatic control of the system.
NOTICE
OAEE049686L