Page 186 of 546

3-36
Convenient features of your vehicle
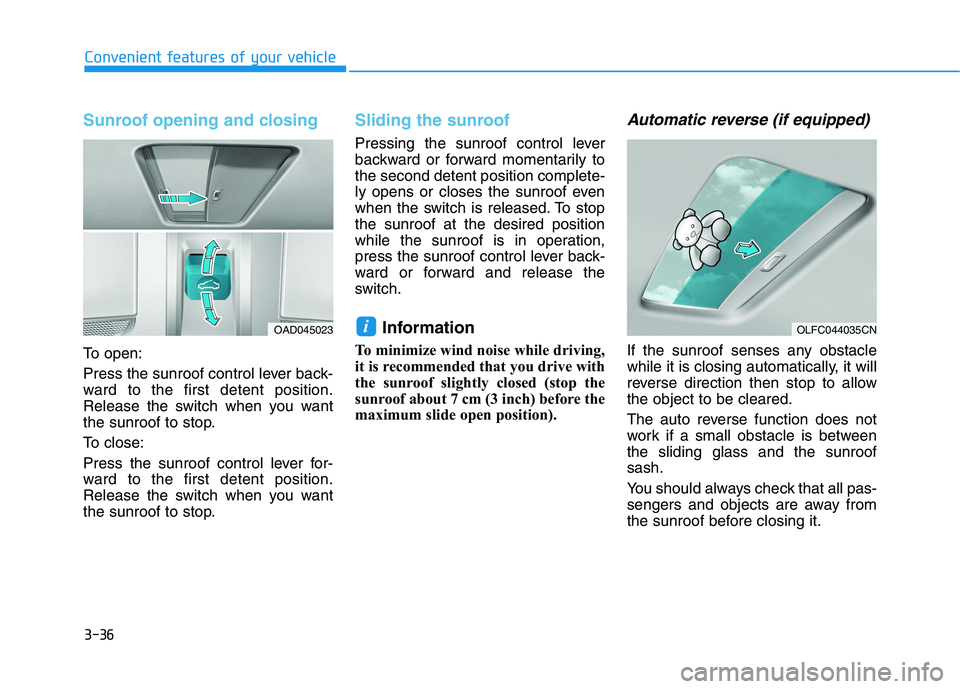
Sunroof opening and closing
To open:
Press the sunroof control lever back-
ward to the first detent position.
Release the switch when you want
the sunroof to stop.
To close:
Press the sunroof control lever for-
ward to the first detent position.
Release the switch when you want
the sunroof to stop.
Sliding the sunroof
Pressing the sunroof control lever
backward or forward momentarily tothe second detent position complete-
ly opens or closes the sunroof even
when the switch is released. To stopthe sunroof at the desired position
while the sunroof is in operation,
press the sunroof control lever back-
ward or forward and release the
switch.Information
To minimize wind noise while driving,
it is recommended that you drive with
the sunroof slightly closed (stop the
sunroof about 7 cm (3 inch) before the
maximum slide open position).
Automatic reverse (if equipped)
If the sunroof senses any obstacle
while it is closing automatically, it will
reverse direction then stop to allowthe object to be cleared.
The auto reverse function does not
work if a small obstacle is betweenthe sliding glass and the sunroofsash.
You should always check that all pas-
sengers and objects are away from
the sunroof before closing it.
iOLFC044035CNOAD045023
Page 188 of 546

3-38
Convenient features of your vehicle
Resetting the sunroof
Sunroof needs to be reset if the fol-
lowing occurs :
- Battery is discharged or discon-nected or the related fuse has been replaced or disconnected
- The one-touch sliding function of the sunroof does not normally oper-ate
Reset procedure :
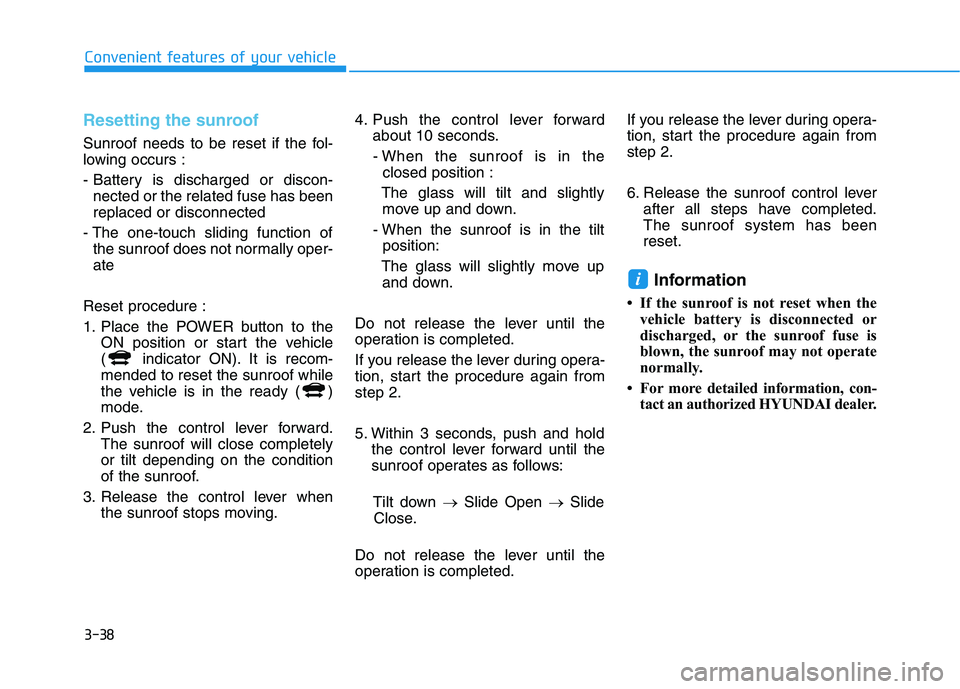
1. Place the POWER button to the ON position or start the vehicle
( indicator ON). It is recom-mended to reset the sunroof while
the vehicle is in the ready ( )
mode.
2. Push the control lever forward. The sunroof will close completelyor tilt depending on the condition
of the sunroof.
3. Release the control lever when the sunroof stops moving. 4. Push the control lever forward
about 10 seconds.
- When the sunroof is in the closed position :
The glass will tilt and slightly move up and down.
- When the sunroof is in the tilt position:
The glass will slightly move up and down.
Do not release the lever until the
operation is completed.
If you release the lever during opera-
tion, start the procedure again fromstep 2.
5. Within 3 seconds, push and hold the control lever forward until the
sunroof operates as follows:
Tilt down �Slide Open �Slide
Close.
Do not release the lever until the
operation is completed. If you release the lever during opera-
tion, start the procedure again fromstep 2.
6. Release the sunroof control lever
after all steps have completed. The sunroof system has beenreset.
Information
If the sunroof is not reset when the vehicle battery is disconnected or
discharged, or the sunroof fuse is
blown, the sunroof may not operate
normally.
For more detailed information, con- tact an authorized HYUNDAI dealer.
i
Page 189 of 546
3-39
Convenient features of your vehicle
3
Hood
Opening the hood
1. Park the vehicle and set the park-ing brake.
2. Pull the release lever to unlatch the hood. The hood should pop
open slightly. 3. Go to the front of the vehicle, raise
the hood slightly, push up the sec-
ondary latch (1) inside of the hoodcenter and lift the hood (2). 4. Pull out the support rod and hold
the hood open with the supportrod (1).
EEXX TTEERR IIOO RR FF EE AA TTUU RREESS
OAEE049011L
OAEE049005LOAD045039
Page 190 of 546

3-40
Convenient features of your vehicle
Closing the hood
1. Before closing the hood, check thefollowing:
ment must be correctly installed.
bustible material must be
removed from the motor com-
partment.
2. Lower the hood halfway (lifted approximately 30 cm (12 inches)from the closed position) and push
down to securely lock in place.
Then double check to be sure the
hood is secure. If the hood can
slightly be raised, it is not secure-
ly locked. Open it again and close
it with more force.
Before closing the hood, ensure all obstructions are
removed from around thehood opening.
Always double check to be
sure that the hood is firmly
latched before driving away.
Check there is no hood open
warning light or message dis-
played on the instrument clus-
ter. Driving with the hood
opened may cause a total loss
of visibility, which mightresult in an accident.
Do not move the vehicle with the hood in the raised posi-
tion, as vision is obstructed,
which might result in an acci-
dent, and the hood could fall
or be damaged.
WARNING
Grasp the support rod in the
area wrapped in rubber. The
rubber will help prevent you
from being burned by hot
metal when the parts in the
motor compartment are hot.
The support rod must be
inserted completely into the
hole provided whenever you
inspect the motor compart-
ment. This will prevent the
hood from falling and possi-
bly injuring you.
WARNING
Page 193 of 546
3-43
Convenient features of your vehicle
3
Charging Door
Opening the charging door
The charging door must be opened
from inside the vehicle by pushing
the charging door open button.
1. Depress the brake pedal andapply the parking brake.
2. Turn OFF all switches, shift to P (Park), and turn OFF the vehicle.
3. Press the charging door open but- ton ( ) to open the charging
door.
Closing the charging door
1. After recharging, install the charg-ing inlet cover.
2. Close the charging door until it is latched securely.
For more details, refer to the
Electric Vehicle Guide provided in
the front of the owner’s manual.
Unlock Charging Door in Emergency
If the charging door does not open
due to battery discharge and failure
of the electric wires, open the tail-gate and slightly pull the emergency
cable as shown above. The chargingdoor will then open.
OAEE046010
OAEEQ019063
Page 194 of 546
3-44
Convenient features of your vehicleI
I NN SSTT RR UU MM EENN TT CC LLUU SSTT EERR
1. Power/Charge gauge
2. Speedometer/Eco guide
3. Warning and indicator lights
4. LCD display (including Trip computer)
5. Battery SOC (State of Charge) gauge
OAEE049100
The actual cluster in the vehicle may
differ from the illustration.
Page 195 of 546
3-45
Convenient features of your vehicle
3
Instrument Cluster Control
Adjusting instrument clusterillumination
When the vehicle’s parking lights or headlights are on, press the illumina-
tion control button to adjust the
brightness of the instrument panelillumination. When pressing the illumination con-
trol button, the interior switch illumi-nation intensity is also adjusted. The brightness of the instrument
panel illumination is displayed.
If the brightness reaches the maxi- mum or minimum level, a chimewill sound.
OIK047144L
OAEPH049401N Never adjust the instrument
cluster while driving. Doing socould lead to driver distraction
which may cause an accident
and lead to vehicle damage,
serious injury, or death.
WARNING
Page 197 of 546

3-47
Convenient features of your vehicle
3
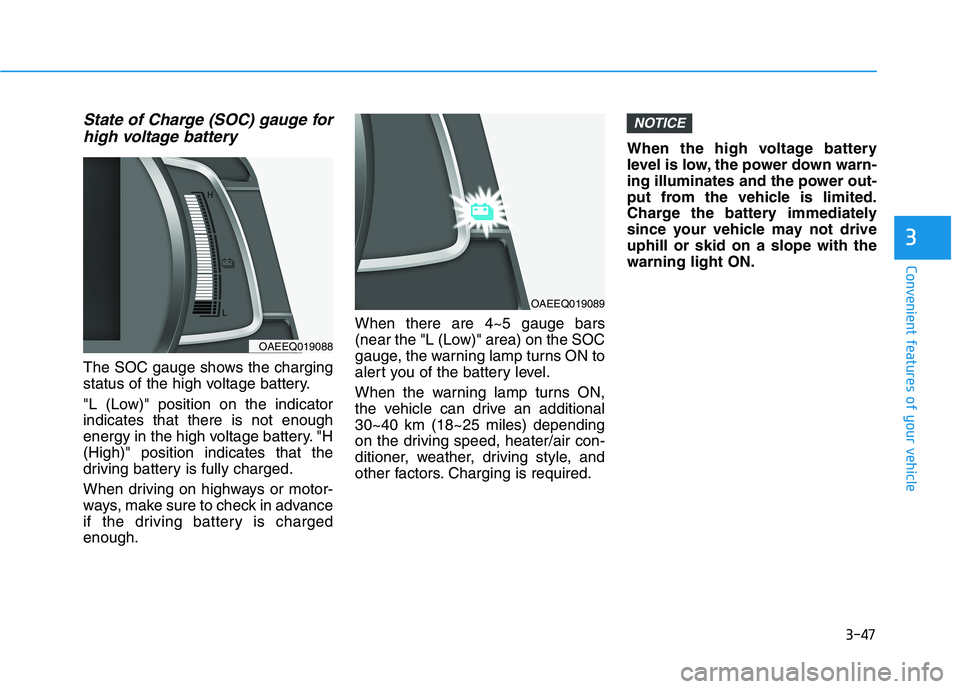
State of Charge (SOC) gauge forhigh voltage battery
The SOC gauge shows the charging
status of the high voltage battery.
"L (Low)" position on the indicator indicates that there is not enough
energy in the high voltage battery. "H(High)" position indicates that the
driving battery is fully charged.
When driving on highways or motor-
ways, make sure to check in advance
if the driving battery is chargedenough. When there are 4~5 gauge bars
(near the "L (Low)" area) on the SOC
gauge, the warning lamp turns ON to
alert you of the battery level.
When the warning lamp turns ON,
the vehicle can drive an additional30~40 km (18~25 miles) depending
on the driving speed, heater/air con-
ditioner, weather, driving style, and
other factors. Charging is required.When the high voltage battery
level is low, the power down warn-
ing illuminates and the power out-
put from the vehicle is limited.
Charge the battery immediately
since your vehicle may not driveuphill or skid on a slope with thewarning light ON.
NOTICE
OAEEQ019088
OAEEQ019089