Page 214 of 787

212
uuOperating the Switches Around the Steering Wheel uWipers and Washers
Controls
The rear wiper and washer can be used when
the power mode is in ON.
■Wiper switch (OFF, INT, ON)
Change the wiper switch setting according to
the amount of rain.
■Washer ( )
Sprays while you rotate the switch to this
position.
Hold it to activate the wiper and to spray the
washer. Once released, the washer spray will
stop and the rear wiper will return to its
selected switch setting after a few sweeps.
■Operating in reverse
When you put the transmission into
(R with the windshield wiper activated, the rear
wiper operates automatically as fo llows even if its switch is off.
*1: Models with manual intermittent operation
*2: Models with automati c intermittent operation
■Rear Wiper/Washer
ON: Continuous wipe
Washer OFF
INT : Intermittent
Front Wiper PositionRear Wiper Operation
INT*1 (Intermittent)
AUTO*2 (Intermittent) Intermittent
LO
(Low speed wipe)
HI (High speed wipe)Continuous
21 US ODYSSEY-31THR6310.book 212 ページ 2020年6月17日 水曜日 午後2時46分
Page 215 of 787

213
uuOperating the Switches Around the Steering Wheel uRear Defogger/Heated Door Mirror* Button
Controls
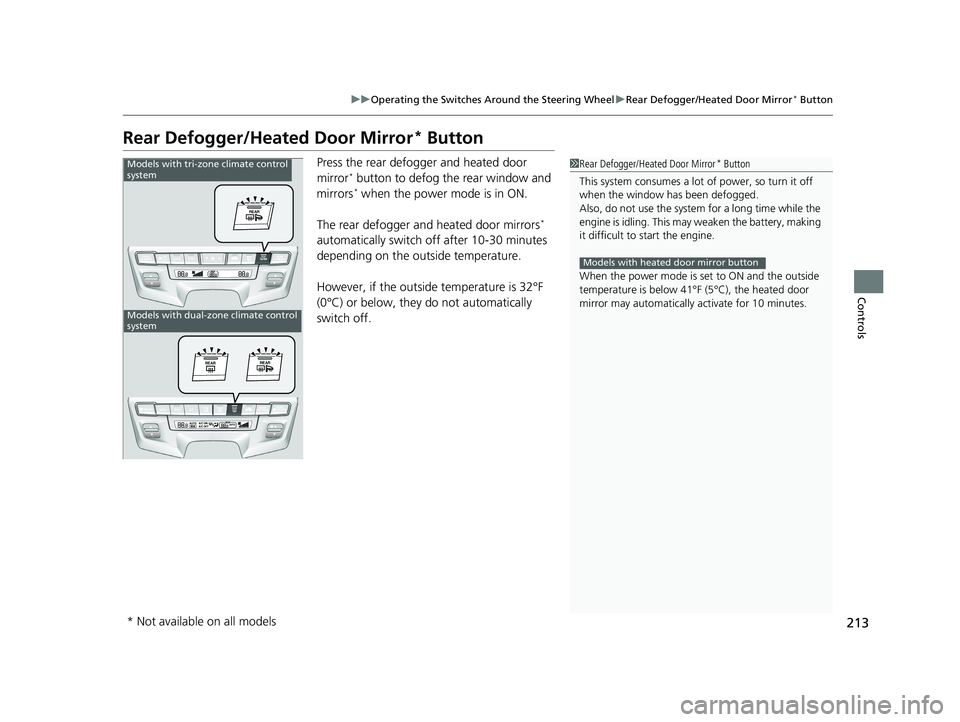
Rear Defogger/Heated Door Mirror* Button
Press the rear defogger and heated door
mirror* button to defog the rear window and
mirrors* when the power mode is in ON.
The rear defogger and heated door mirrors
*
automatically switch of f after 10-30 minutes
depending on the outside temperature.
However, if the outsid e temperature is 32°F
(0°C) or below, they do not automatically
switch off.
1 Rear Defogger/Heated Door Mirror* Button
This system consumes a lot of power, so turn it off
when the window has been defogged.
Also, do not use the system for a long time while the
engine is idling. This may weaken the battery, making
it difficult to start the engine.
When the power mode is se t to ON and the outside
temperature is below 41°F (5°C), the heated door
mirror may automatically activate for 10 minutes.
Models with heated door mirror button
Models with tri-zone climate control
system
Models with dual-zone climate control
system
* Not available on all models
21 US ODYSSEY-31THR6310.book 213 ページ 2020年6月17日 水曜日 午後2時46分
Page 216 of 787
214
uuOperating the Switches Around the Steering Wheel uHeated Windshield Button
Controls
Heated Windshield Button
Press the heated windshield button to deice
the windshield when the power mode is in
ON.
Canadian models
1Heated Windshield Button
This system consumes a lot of power, so turn it off
when the window has been deiced. Also, do not use
the system for a long period when the engine is
idling. This may weaken the battery, making it
difficult to start the engine.
When the outside temperature is below 39°F (4°C),
the heated windshield may automatically activate.
The system deactivates itself once the outside
temperature reaches 43°F (6°C).
21 US ODYSSEY-31THR6310.book 214 ページ 2020年6月17日 水曜日 午後2時46分
Page 217 of 787
215
uuOperating the Switches Around the Steering Wheel uBrightness Control
Controls
Brightness Control
When the power mode is in ON, you can use
the brightness control knob to adjust
instrument panel brightness.
Brighten: Turn the knob to the right.
Dim: Turn the knob to the left.
You will hear a beeper when the brightness
reaches minimum or maximum. Several
seconds after you have adjusted the
brightness, you will be returned to the
previous screen.
■Brightness level indicator
The brightness level is shown on the driver
information interface while you are adjusting
it.
1 Brightness Control
The brightness of the in strument panel will be
reduced when the followi ng conditions have been
met:
•The power mode is in ON.
•The parking lights are turned on.•The ambient lighting is low.
The brightness can be set differently for when the
exterior lights are on, and when they are off.
Control Knob
21 US ODYSSEY-31THR6310.book 215 ページ 2020年6月17日 水曜日 午後2時46分
Page 218 of 787

216
uuOperating the Switches Around the Steering Wheel uDriving Position Memory System*
Controls
Driving Position Memory System*
You can store two driver’s seat positions (except for power lumbar) and outside
mirror positions with the driv ing position memory system.
When you unlock and open the driver’s door with a remote, the seat and outside
mirrors adjust automatically to one of the two preset positions.
When you enter the vehicle, the driver in formation interface briefly shows you which
remote transmitter you used to unlock the vehicle.
• DRIVER 1 transmitter is linked to memory button 1.
• DRIVER 2 transmitter is linked to memory button 2.
The driver’s seat moves rearward depending
on the set seating position once you
•Stop the vehicle.
• Put the transmission in
(P.
• Set the power mode to VEHICLE OFF.
• Then open the driver’s door.
Once the power mode is in the ACCESSORY
position, the driver’s seat moves to the
DRIVER 1 or 2 preset position.
1Driving Position Memory System*
Using the audio/informati on screen, you can disable
the automatic seat and d oor mirrors adjustment
function.
2 Customized Features P. 465
The driver’s seat easy exit feature:
•Will move rearward to allow you to more easily exit
the vehicle.
•Can be turned on or off. 2Customized Features P. 465
System Operation
The system will not operate if:
•The vehicle speed is above 2 mph (3 km/h).
•Either memory button is pressed while the seat is in
motion.
•The seat position is adju sted while in operation.
•The memory 1 or 2 position is set fully to the rear.
DRIVER 1
DRIVER 2
* Not available on all models
21 US ODYSSEY-31THR6310.book 216 ページ 2020年6月17日 水曜日 午後2時46分
Page 219 of 787

217
uuOperating the Switches Around the Steering Wheel uDriving Position Memory System*
Controls
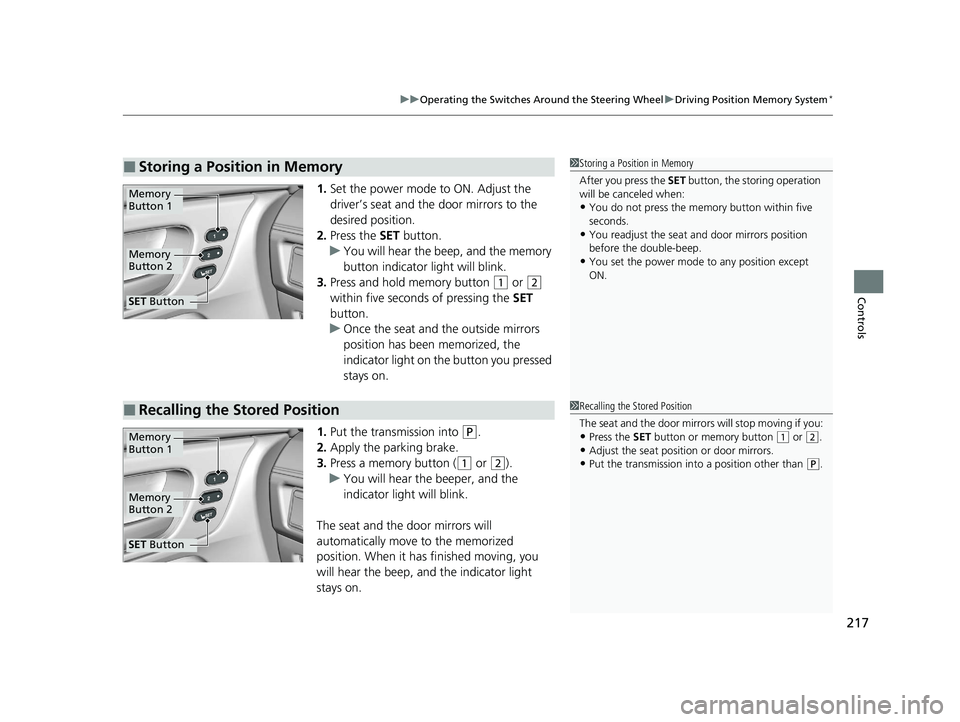
1. Set the power mode to ON. Adjust the
driver’s seat and the door mirrors to the
desired position.
2. Press the SET button.
u You will hear the beep, and the memory
button indicator light will blink.
3. Press and hold memory button
(1 or (2
within five seconds of pressing the SET
button.
u Once the seat and the outside mirrors
position has been memorized, the
indicator light on the button you pressed
stays on.
1. Put the transmission into
(P.
2. Apply the parking brake.
3. Press a memory button (
(1 or (2).
u You will hear the beeper, and the
indicator light will blink.
The seat and the door mirrors will
automatically move to the memorized
position. When it has finished moving, you
will hear the beep, and the indicator light
stays on.
■Storing a Position in Memory1 Storing a Position in Memory
After you press the SET button, the storing operation
will be canceled when:
•You do not press the memory button within five
seconds.
•You readjust the seat and door mirrors position
before the double-beep.
•You set the power mode to any position except
ON.
Memory
Button 1
Memory
Button 2
SET Button
■Recalling the Stored Position1 Recalling the Stored Position
The seat and the door mirrors will stop moving if you:
•Press the SET button or memory button (1 or (2.
•Adjust the seat position or door mirrors.•Put the transmission into a position other than (P.
Memory
Button 1
Memory
Button 2
SET Button
21 US ODYSSEY-31THR6310.book 217 ページ 2020年6月17日 水曜日 午後2時46分
Page 220 of 787

218
uuOperating the Switches Around the Steering Wheel uAdjusting the Steering Wheel
Controls
Adjusting the Steering Wheel
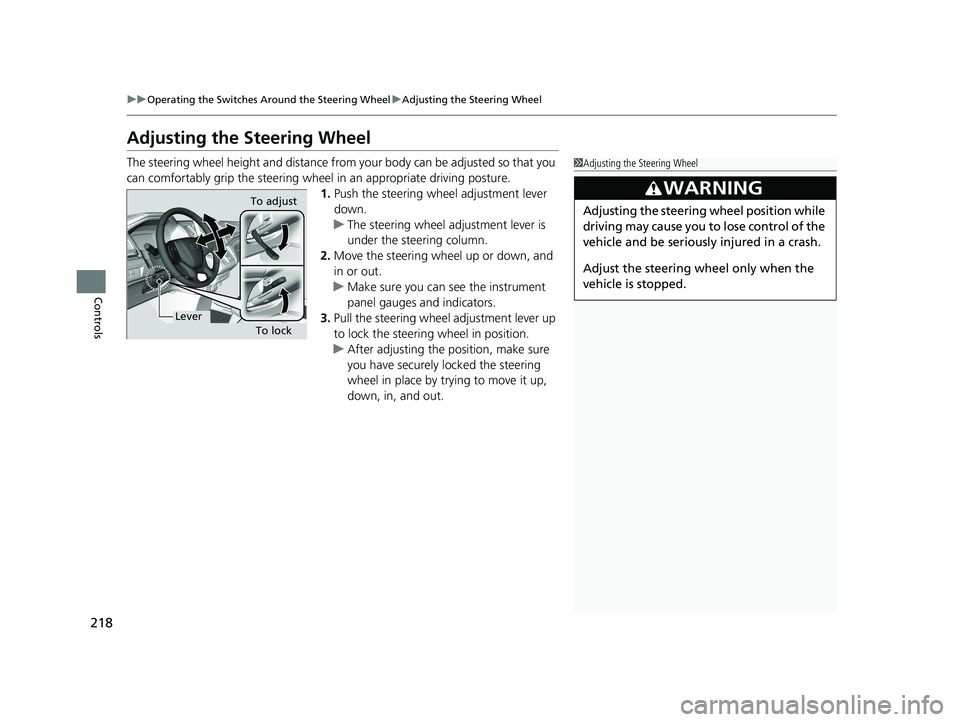
The steering wheel height and distance from your body can be adjusted so that you
can comfortably grip the steering wheel in an appropriate driving posture.
1.Push the steering wheel adjustment lever
down.
u The steering wheel adjustment lever is
under the steering column.
2. Move the steering wheel up or down, and
in or out.
u Make sure you can see the instrument
panel gauges and indicators.
3. Pull the steering wheel adjustment lever up
to lock the steerin g wheel in position.
u After adjusting the position, make sure
you have securely locked the steering
wheel in place by trying to move it up,
down, in, and out.1Adjusting the Steering Wheel
3WARNING
Adjusting the steering wheel position while
driving may cause you to lose control of the
vehicle and be seriously injured in a crash.
Adjust the steering wheel only when the
vehicle is stopped.To adjust
To lock
Lever
21 US ODYSSEY-31THR6310.book 218 ページ 2020年6月17日 水曜日 午後2時46分
Page 224 of 787

222
Controls
Seats
Front Seats
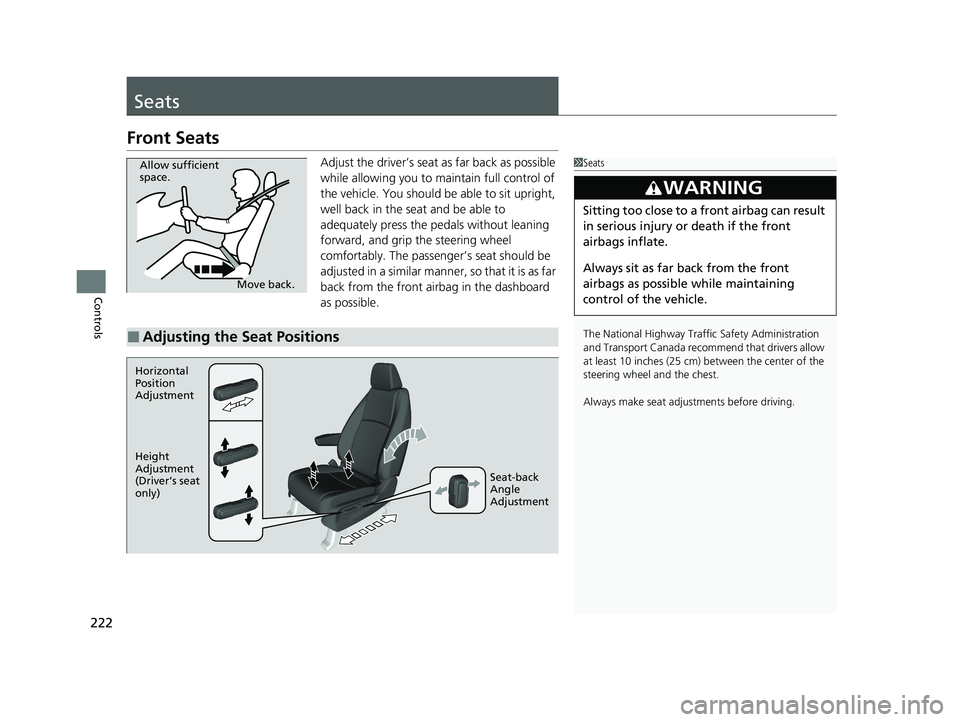
Adjust the driver’s seat as far back as possible
while allowing you to maintain full control of
the vehicle. You should be able to sit upright,
well back in the seat and be able to
adequately press the pedals without leaning
forward, and grip the steering wheel
comfortably. The passenger’s seat should be
adjusted in a similar manner, so that it is as far
back from the front airbag in the dashboard
as possible.1Seats
The National Highway Traffic Safety Administration
and Transport Cana da recommend that drivers allow
at least 10 inches (25 cm) between the center of the
steering wheel and the chest.
Always make seat adjustments before driving.
3WARNING
Sitting too close to a front airbag can result
in serious injury or death if the front
airbags inflate.
Always sit as far back from the front
airbags as possible while maintaining
control of the vehicle.
Move back.
Allow sufficient
space.
■Adjusting the Seat Positions
Horizontal
Position
Adjustment
Height
Adjustment
(Driver’s seat
only)
Seat-back
Angle
Adjustment
21 US ODYSSEY-31THR6310.book 222 ページ 2020年6月17日 水曜日 午後2時46分