Page 451 of 659
449
uuWhen Driving uTire Pressure Monitoring System (TPMS)
Driving
You can calibrate the system from the
customized feature on the audio/information
screen.
1. Set the power mode to ON.
2. Press the button.
3. Select Settings .
4. Select Vehicle .
5. Select TPMS Calibration .
6. Select Calibrate .
• If the Calibration Failed To Start.
message appears, repeat steps 5-6.
• The calibration process finishes
automatically.1TPMS Calibration
If the tire chains
* are installed, remove them before
calibrating the TPMS.
If the low tire pressure/TPMS indicator comes on even
when the properly inflated specified regular tires are
installed, have your vehi cle checked by a dealer.
We recommend that the tires be replaced with the
same brand, model, and size as the originals. Ask a
dealer for details.
* Not available on all models
Page 461 of 659

Continued459
uuHonda Sensing ®u Collision Mitigation Braking SystemTM (CMBSTM)
Driving
■When the system activates
You can change the distance ( Long/Normal /Short ) between vehicles at which the
system's earliest collision alert will come on through audio/information screen
setting options.
2 Customized Features P. 352
1When the system activates
The camera in the CMBS
TM is also designed to detect
pedestrians.
However, this pedestrian detection feature may not
activate or may not detect a pedestrian in front of
your vehicle under certain conditions.
Refer to the ones indicating the pedestrian detection
limitations from the list. 2 CMBS
TM Conditions and Limitations P. 462
The head-up warning uses a lens located at the front
end of the dashboard.
Do not cover the lens or spill any liquid on it.
Models with head-up display
Lens
The system provides visual and audible alerts of a possible collision, and stops if the
collision is avoided.
u Take appropriate action to prevent a collision (apply the brakes, change
lanes, etc.).
Beep Head-up
Warning
Lights
*
Visual Alerts
Audible Alert
* Not available on all models
Page 476 of 659

uuHonda Sensing ®u Adaptive Cruise Control (ACC) with Low Speed Follow
474
Driving
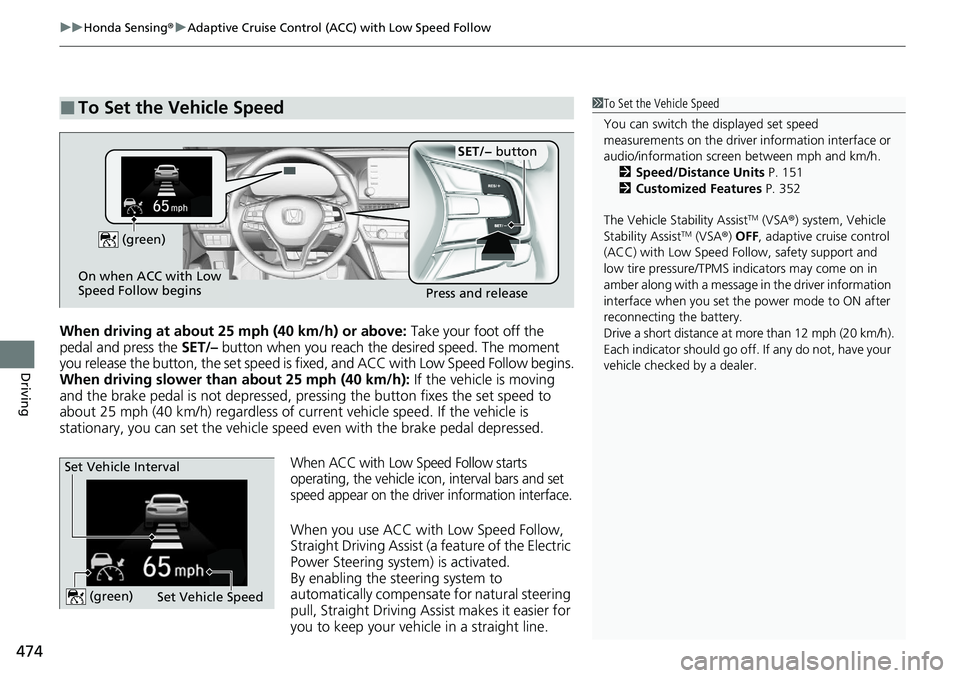
When driving at about 25 mph (40 km/h) or above: Take your foot off the
pedal and press the SET/– button when you reach the desired speed. The moment
you release the button, the set speed is fixed, and ACC with Low Speed Follow begins.
When driving slower than about 25 mph (40 km/h): If the vehicle is moving
and the brake pedal is not depressed, pressing the button fixes the set speed to
about 25 mph (40 km/h) regardless of current vehicle speed. If the vehicle is
stationary, you can set the vehicle speed even with the brake pedal depressed.
When ACC with Low Speed Follow starts
operating, the vehicle icon, interval bars and set
speed appear on the driver information interface.
When you use ACC with Low Speed Follow,
Straight Driving Assist (a feature of the Electric
Power Steering system) is activated.
By enabling the steering system to
automatically compensate for natural steering
pull, Straight Driving Assist makes it easier for
you to keep your vehicl e in a straight line.
■To Set the Vehicle Speed1To Set the Vehicle Speed
You can switch the displayed set speed
measurements on the driver information interface or
audio/information screen between mph and km/h. 2 Speed/Distance Units P. 151
2 Customized Features P. 352
The Vehicle Stability Assist
TM (VSA ®) system, Vehicle
Stability AssistTM (VSA ®) OFF, adaptive cruise control
(ACC) with Low Speed Follow, safety support and
low tire pressure/TPMS indicators may come on in
amber along with a message in the driver information
interface when you set the power mode to ON after
reconnecting the battery.
Drive a short distance at more than 12 mph (20 km/h).
Each indicator should go off. If any do not, have your
vehicle checked by a dealer.
On when ACC with Low
Speed Follow begins Press and release
SET/− button
(green)
Set Vehicle Speed
Set Vehicle Interval (green)
Page 483 of 659

Continued481
uuHonda Sensing ®u Adaptive Cruise Control (ACC) with Low Speed Follow
Driving
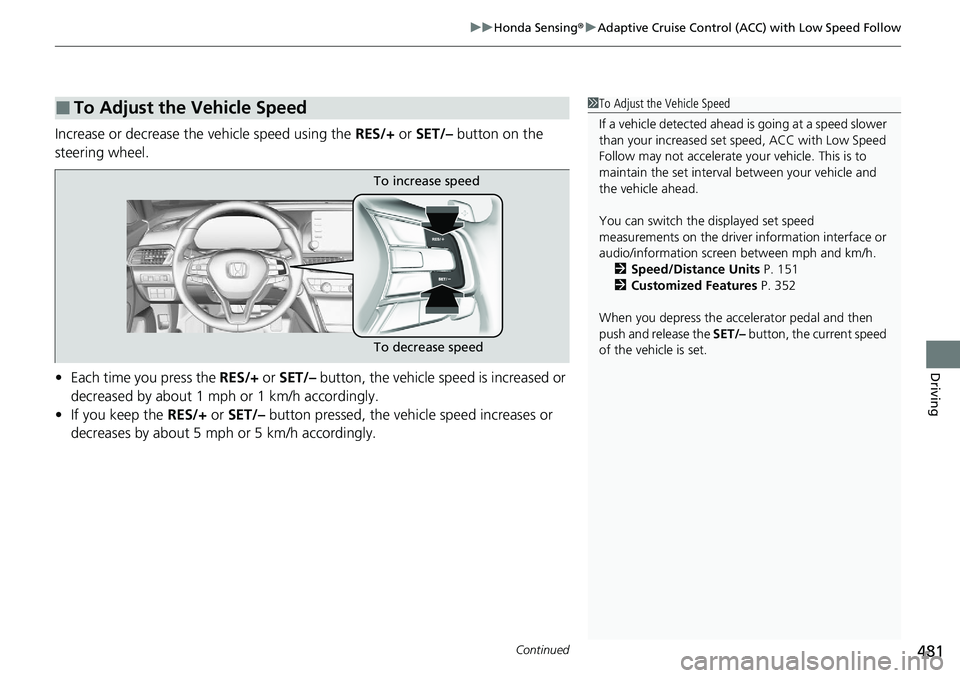
Increase or decrease the vehicle speed using the RES/+ or SET/– button on the
steering wheel.
• Each time you press the RES/+ or SET/– button, the vehicle speed is increased or
decreased by about 1 mph or 1 km/h accordingly.
• If you keep the RES/+ or SET/– button pressed, the vehi cle speed increases or
decreases by about 5 mph or 5 km/h accordingly.
■To Adjust the Vehicle Speed1 To Adjust the Vehicle Speed
If a vehicle detected ahead is going at a speed slower
than your increased set speed, ACC with Low Speed
Follow may not accelerate y our vehicle. This is to
maintain the set interval between your vehicle and
the vehicle ahead.
You can switch the displayed set speed
measurements on the driver information interface or
audio/information screen between mph and km/h. 2 Speed/Distance Units P. 151
2 Customized Features P. 352
When you depress the accelerator pedal and then
push and release the SET/– button, the current speed
of the vehicle is set.
To increase speed
To decrease speed
Page 488 of 659

uuHonda Sensing ®u Adaptive Cruise Control (ACC) with Low Speed Follow
486
Driving
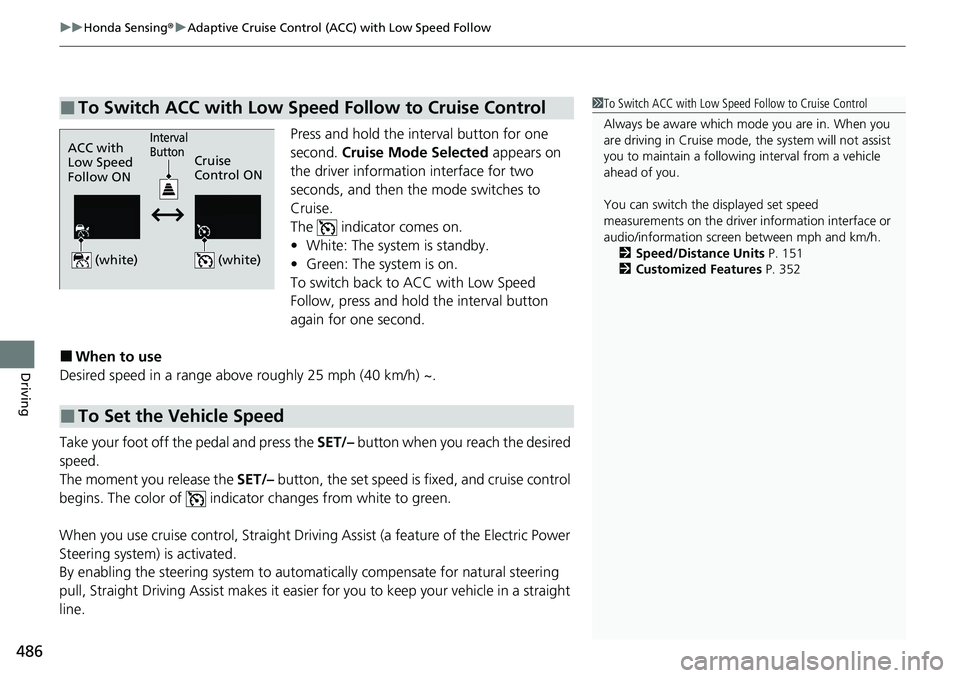
Press and hold the interval button for one
second. Cruise Mode Selected appears on
the driver information interface for two
seconds, and then the mode switches to
Cruise.
The indicator comes on.
• White: The system is standby.
• Green: The system is on.
To switch back to ACC with Low Speed
Follow, press and hold the interval button
again for one second.
■When to use
Desired speed in a range above roughly 25 mph (40 km/h) ~.
Take your foot off the pedal and press the SET/– button when you reach the desired
speed.
The moment you release the SET/– button, the set speed is fixed, and cruise control
begins. The color of indicator changes from white to green.
When you use cruise control, Straight Driving Assist (a feature of the Electric Power
Steering system) is activated.
By enabling the steering system to automa tically compensate for natural steering
pull, Straight Driving Assist makes it easier for you to keep your vehicle in a straight
line.
■To Switch ACC with Low Speed Follow to Cruise Control1 To Switch ACC with Low Speed Follow to Cruise Control
Always be aware which mode you are in. When you
are driving in Cruise mode, the system will not assist
you to maintain a followi ng interval from a vehicle
ahead of you.
You can switch the displayed set speed
measurements on the driver information interface or
audio/information screen between mph and km/h.
2 Speed/Distance Units P. 151
2 Customized Features P. 352
ACC with
Low Speed
Follow ON Cruise
Control ON
(white)
(white)
Interval
Button
■To Set the Vehicle Speed
Page 499 of 659

Continued497
uuHonda Sensing ®u Road Departure Mitigation (RDM) System
Driving
The system becomes ready to start sear ching for lane markings when all the
following conditions are met:
• The vehicle is traveling between about 45 and 90 mph (72 and 145 km/h).
• The vehicle is on a straight or slightly curved road.
• The turn signals are off.
• The brake pedal is not depressed.
• The wipers are not in high speed operation.
• The vehicle is not accelera ting or braking, and the steering wheel is not being
turned.
• The system makes a determination that th e driver is not actively accelerating,
braking or steering.
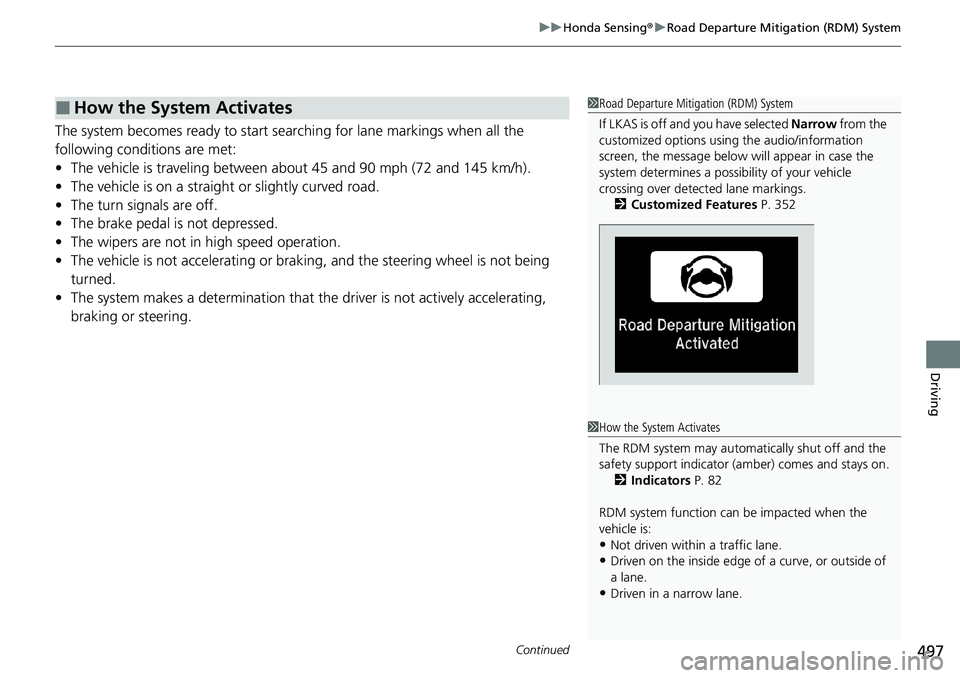
■How the System Activates1 Road Departure Mitigation (RDM) System
If LKAS is off and you have selected Narrow from the
customized options using the audio/information
screen, the message below will appear in case the
system determines a possibility of your vehicle
crossing over detect ed lane markings.
2 Customized Features P. 352
1How the System Activates
The RDM system may automa tically shut off and the
safety support indicator (a mber) comes and stays on.
2 Indicators P. 82
RDM system function can be impacted when the
vehicle is:
•Not driven within a traffic lane.
•Driven on the inside edge of a curve, or outside of
a lane.
•Driven in a narrow lane.
Page 500 of 659

uuHonda Sensing ®u Road Departure Mitigation (RDM) System
498
Driving
When you turn the RDM on and off, do the
following.
1. Press the safety support switch.
2. Roll the left selector wheel to the
symbol and push it.
u The message appears on the driver
information interface when the system
becomes on or off.
The RDM is in the previously selected ON or
OFF setting each time you start the engine.
The system may not properly detect lane markings and the position of your vehicle
under certain conditions. Some examples of these conditions are listed below.
■Environmental conditions
• Driving in bad weather (rain, fog, snow, etc.).
• Sudden changes between light and dark, such as an entrance or exit of a tunnel.
• There is little contrast between la ne lines and the roadway surface.
• Driving into low sunlight (e.g., at dawn or dusk).
• Strong light is reflected onto the roadway.
• Driving in the shadows of trees, buildings, etc.
• Shadows of adjacent objects are parallel to lane markings.
• Roadway objects or structures are misinterpreted as lane markers.
• Reflections on the interi or of the windshield.
• Driving at night or in a dark condition such as a tunnel.
■RDM On and Off1RDM On and Off
When you have selected Warning Only from the
customized options using the audio/information
screen, the system does not operate the steering
wheel and braking. 2 Customized Features P. 352
The Vehicle Stability Assist
TM (VSA ®) system, Vehicle
Stability AssistTM (VSA ®) OFF, adaptive cruise control
(ACC) with Low Speed Follow, safety support and
low tire pressure/TPMS indicators may come on in
amber along with a message in the driver information
interface when you set the power mode to ON after
reconnecting the battery.
Drive a short distance at more than 12 mph (20 km/h).
Each indicator should go off. If any do not, have your
vehicle checked by a dealer.
Safety Support Switch Left Selector Wheel
■RDM Conditions and Limitations
Page 524 of 659

522
uuParking Your Vehicle uParking Sensor System*
Driving
Parking Sensor System*
The corner and center sensors monitor obstacles around your vehicle, and the
beeper, driver information interface and audio/informatio n screen let you know the
approximate distance between your vehicle and the obstacle.
■The sensor location and range
1 Parking Sensor System*
Even when the system is on, always confirm if there is
no obstacle near your ve hicle before parking.
The system may not work properly when:
•The sensors are covered with snow, ice, mud or
dirt.
•The vehicle is on uneven su rface, such as grass,
bumps, or a hill.
•The vehicle has been out in hot or cold weather.•The system is affected by devices that emit
ultrasonic waves.
•Driving in bad weather.
The system may not sense:
•Thin or low objects.•Sonic-absorptive materials, such as snow, cotton,
or sponge.
•Objects directly under the bumper.
Do not put any accessories on or around the sensors.Within about 24 in (60 cm) or less
Front Corner Sensors
Rear Corner Sensors
Front*: Within about 39 in (100 cm) or less
Rear: Within about 43 in (110 cm) or less
Rear Center Sensors
Front Center Sensors*
* Not available on all models