Page 2 of 20
2
INSTRUMENT PANEL
Engine
Start/Stop Button
F
Cruise Control/ Forward Collision AlertF/Heated
Steering WheelF
Buttons
Electric Parking Brake
Switch
Power
Mirror
F/
Window Buttons Driver
Information Center
Controls
F/Voice
Recognition Buttons
Audio Volume
Control
(on back
of steering wheel)
Steering
Wheel
Adjustment Lever
(on steering column)
Audio Next/
Previous Favorite Station Controls (on back of
steering wheel)
Exterior/
Instrument
Panel/Cargo
Lamp Controls 4WD
Controls
F/
Traction Select Controls Turn Signal/
Windshield
Wipers Lever Range +/-
Gear Selection Buttons
(on shift lever)
Driver
Information Center
HUD ControlsF
(behind
steering wheel)
Low Fuel
Traction Control Off
Brake System
Cruise Control
StabiliTrak Active
StabiliTrak Off
Forward Collision Alert
Security
PARK Electric Parking Brake
Electric Parking Brake Service
Lights On Reminder
Airbag Readiness
Engine Oil Pressure
Check Engine
Lane Keep Assist
Symbols
Gasoline model shown
Page 8 of 20

8F Optional equipment
VEHICLE CUSTOMIZATIONF
Some features can be turned on/off or cus tomized using the Settings menus on the infotainment screen. The Settings
menus include System, Apps, and Vehicle.
1. Select Settings on the Home page.
2. Select the desired menu tab.
3. Select the desired feature and setting.
4. Press
BACK to exit each menu.
See Instruments and Controls in your Owner’s Manual.
CLIMATE CONTROLS/VEHICLE CONTROLSF
AUTO
Driver’s Temp. Control/
Automatic
Operation
F
SYNC
Passenger’s Temp.
Control/Syncronize
passenger’s setting to driver’s setting
F
AC/ Air Conditioning/
Recirculation Mode Fan Speed/ On/Off
Air Delivery
Modes: Defog Vent Floor
MA X/REAR Defrost Mode/Rear
Window-Heated
Outside Mirror Defog
F
Park
Assist
On/Off
F
Lane Keep Assist
On/Off
F
Hill
Descent Control
On/Off
F
Power
Assist Steps
On/Off
F
�$ Auto Engine Stop/Start Disable
On/Off Press to
lower the tailgate Cargo Box
Power Outlet On/Off
F
(Ignition
must be On)
Hazard
Warning
Flashers On/Off Traction
Control/
StabiliTrak On/Off
Dual automatic climate controlsF shown
See Introduction in your Owner’s Manual.
Page 12 of 20

12F Optional equipment
LIGHTING
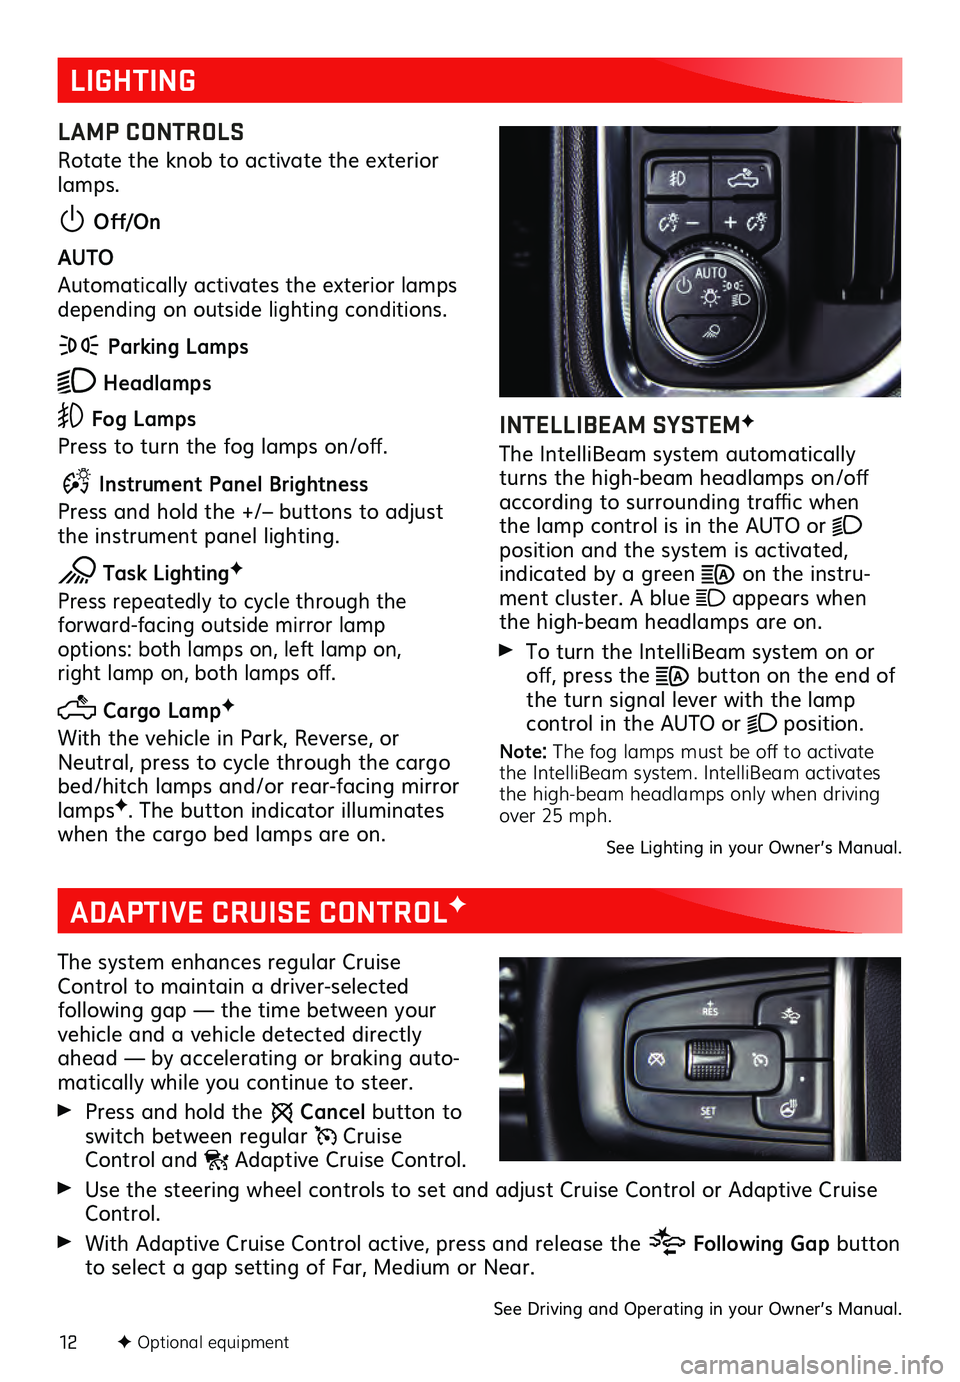
LAMP CONTROLS
Rotate the knob to activate the exterior
lamps.
Off/On
AUTO
Automatically activates the exterior lamps
depending on outside lighting conditions.
Parking Lamps
Headlamps
Fog Lamps
Press to turn the fog lamps on/off.
Instrument Panel Brightness
Press and hold the +/– buttons to adjust
the instrument panel lighting.
Task LightingF
Press repeatedly to cycle through the forward-facing outside mirror lamp options: both lamps on, left lamp on, right lamp on, both lamps off.
Cargo LampF
With the vehicle in Park, Reverse, or
Neutral, press to cycle through the cargo
bed/hitch lamps and/or rear-facing mirror
lamps
F. The button indicator illuminates
when the cargo bed lamps are on.
INTELLIBEAM SYSTEMF
The IntelliBeam system automatically
turns the high-beam headlamps on/off
according to surrounding traffic when
the lamp control is in the AUTO or
position and the system is activated, indicated by a green on the instru -
ment cluster. A blue appears when
the high-beam headlamps are on.
To turn the IntelliBeam s ystem on or off, press the button on the end of
the turn signal lever with the lamp
control in the AUTO or
position.
Note: The fog lamps must be off to activate
the IntelliBeam system. IntelliBeam activates
the high-beam headlamps only when driving
over 25 mph.
See Lighting in your Owner’s Manual.
ADAPTIVE CRUISE CONTROLF
The system enhances regular Cruise
Control to maintain a driver-selected
following gap — the time between your vehicle and a vehicle detected directly
ahead — by accelerating or braking auto -
matically while you continue to steer.
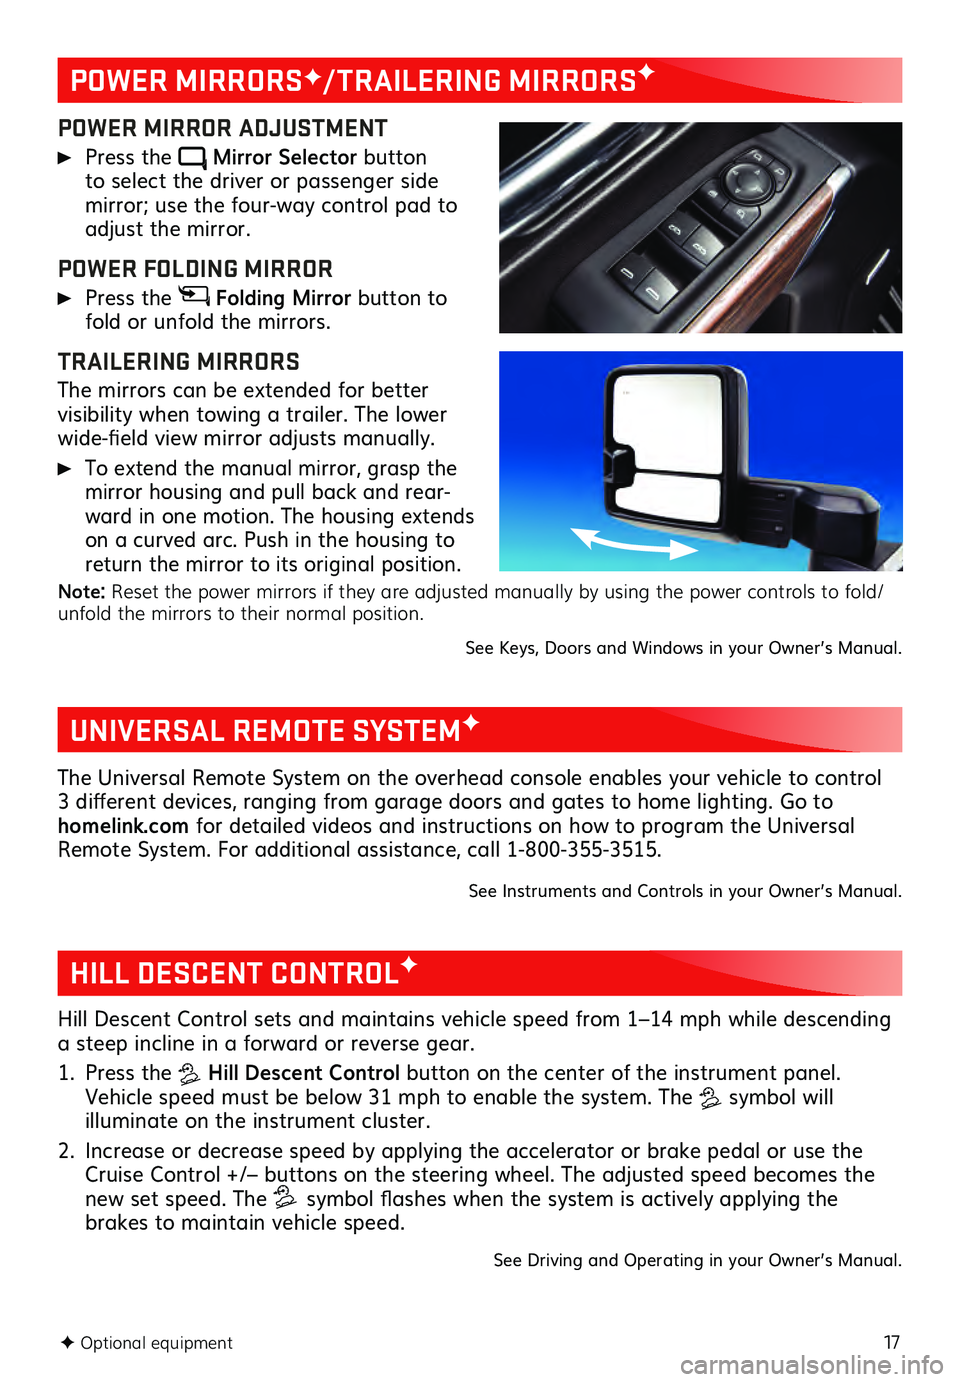
Press and hold the Cancel button to
switch between regular Cruise Control and Adaptive Cruise Control.
Use the steering wheel controls to set and adjust Cruise Control or Adaptive Cruise Control.
With Adaptive Cruise Control active, press and release the Following Gap button
to select a gap setting of Far, Medium or Near.
See Driving and Operating in your Owner’s Manual.
Page 17 of 20

17F Optional equipment
POWER MIRRORSF/TRAILERING MIRRORSF
POWER MIRROR ADJUSTMENT
Press the Mirror Selector button to select the driver or passenger side mirror; use the four-way control pad to adjust the mirror.
POWER FOLDING MIRROR
Press the Folding Mirror button to
fold or unfold the mirrors.
TRAILERING MIRRORS
The mirrors can be extended for better visibility when towing a trailer. The lower
wide-field view mirror adjusts manually.
To extend the manual mirror, grasp the
mirror housing and pull back and rear -
ward in one motion. The housing extends
on a curved arc. Push in the housing to
return the mirror to its original position.
Note: Reset the power mirrors if they are adjusted manually by using the power controls to fold/
unfold the mirrors to their normal position.
See Keys, Doors and Windows in your Owner’s Manual.
UNIVERSAL REMOTE SYSTEMF
The Universal Remote System on the overhead console enables your vehicle to control
3 different devices, ranging from garage doors and gates to home lighting. Go to
homelink.com for detailed videos and instructions on how to program the Universal
Remote System. For additional assistance, call 1-800-355-3515.
See Instruments and Controls in your Owner’s Manual.
HILL DESCENT CONTROLF
Hill Descent Control sets and maintains vehicle speed from 1–14 mph while descending
a steep incline in a forward or reverse gear.
1. Press the Hill Descent Control button on the center of the instrument panel.
Vehicle speed must be below 31 mph to enable the system. The
symbol will illuminate on the instrument cluster.
2. Increase or decrease speed by applying the accelerator or brake pedal or use the Cruise Control +/– buttons on the steering wheel. The adjusted speed becomes the
new set speed. The symbol flashes when the system is actively applying the
brakes to maintain vehicle speed.
See Driving and Operating in your Owner’s Manual.