Page 3 of 298

3
Table of contents
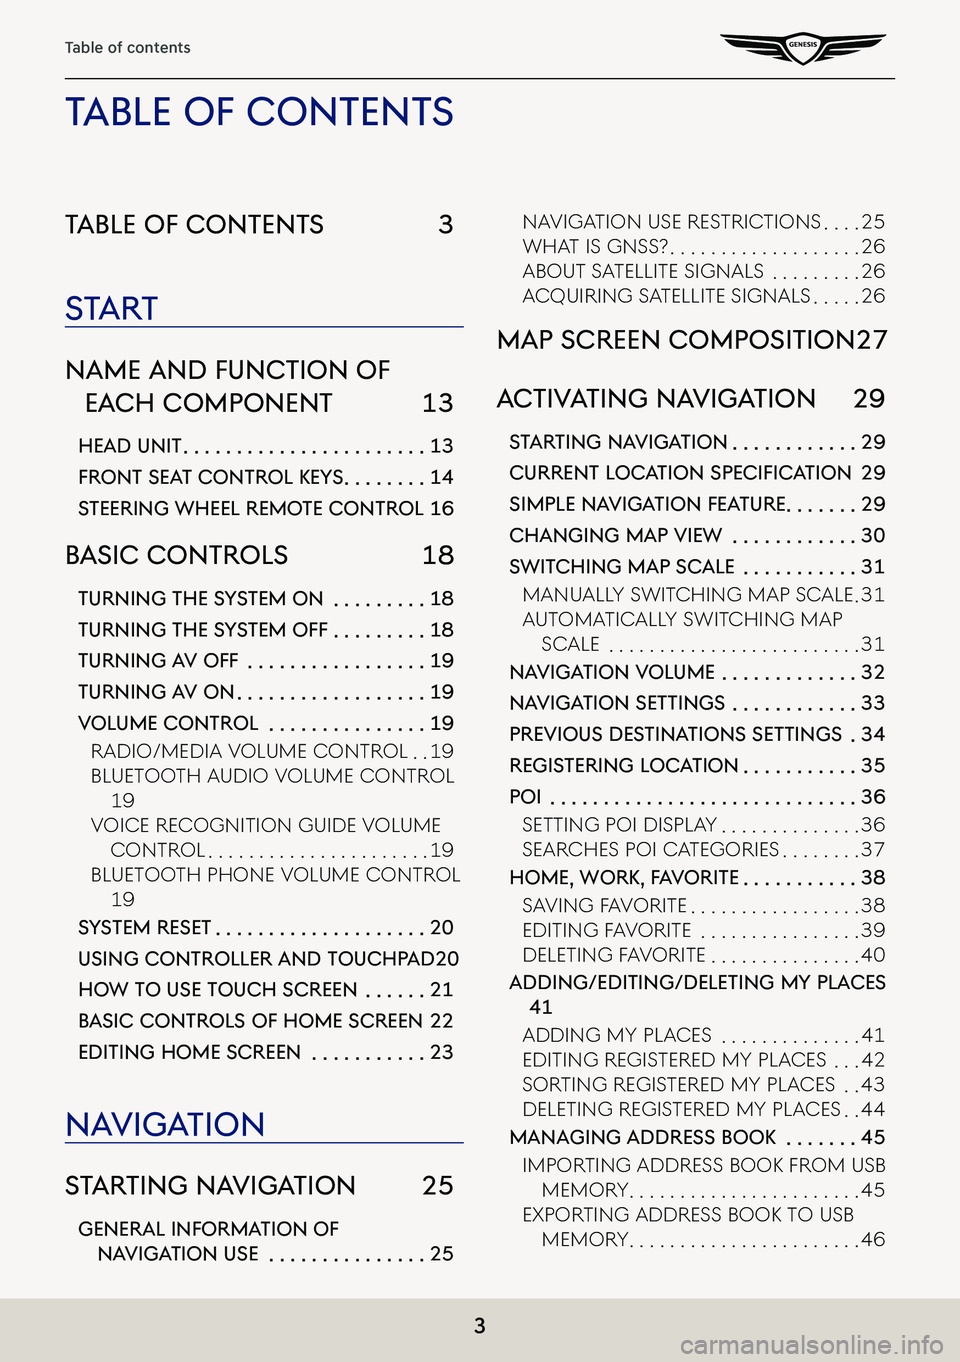
Table of conTenTs 3
sTa rT
name and func Tion of
each componenT 13
head uniT . . . . . . . . . . . . . . . . . . . . . . .13
fronT seaT conTrol KeY s . . . . . . . .14
sTeering wheel remo Te conTrol 16
basic conTrols 18
Turning The sYsTem on . . . . . . . . .18
Turning The sY sTem off . . . . . . . . .18
Turning a V off . . . . . . . . . . . . . . . . .19
Turning aV on . . . . . . . . . . . . . . . . . .19
Volume conTrol . . . . . . . . . . . . . . .19
Radio/Media VoluMe ContRol . .19
Bluetooth a udio VoluMe ContRol
19
VoiCe ReCognition guide VoluMe
ContRol . . . . . . . . . . . . . . . . . . . . . .19
Bluetooth phone VoluMe ContRol
19
sYsTem reseT . . . . . . . . . . . . . . . . . . . .20
using conTroller and Touchpad 20
how To use Touch screen . . . . . .21
b asic conTrols of home screen 22
ediTing home screen . . . . . . . . . . .23
na Viga Tion
sTar Ting na VigaTion 25
general informa Tion of
naViga Tion use . . . . . . . . . . . . . . .25
naVigation use RestRiC tions . . . .25
What is gnss? . . . . . . . . . . . . . . . . . . .26
aBout satellite signals . . . . . . . . .26
aCquiRing satellite signals . . . . .26
map screen composiTion 27
ac TiV aTing na VigaTion 29
sTar Ting na VigaTion . . . . . . . . . . . .29
Current LoC ation SpeCifiCation 29
simple na VigaTion fea Ture . . . . . . .29
changing map View . . . . . . . . . . . .30
swiT ching map scale . . . . . . . . . . .31
Manually sWit Ching Map sCale .31
autoMatiC ally sWitChing Map
sCale . . . . . . . . . . . . . . . . . . . . . . . . .31
na Viga Tion Volume . . . . . . . . . . . . .32
naViga Tion seTTings . . . . . . . . . . . .33
preVious des TinaTions seTTings .34
regis Tering loca Tion . . . . . . . . . . .35
poi . . . . . . . . . . . . . . . . . . . . . . . . . . . . .36
setting poi display . . . . . . . . . . . . . .36
seaRChes poi CategoRies . . . . . . . .37
home, worK, f aV oriTe . . . . . . . . . . .38
sa Ving Fa VoRite . . . . . . . . . . . . . . . . .38
editing Fa VoRite . . . . . . . . . . . . . . . .39
deleting Fa VoRite . . . . . . . . . . . . . . .40
adding/ediTing/deleTing mY places
41
adding My pla Ces . . . . . . . . . . . . . .41
editing RegisteRed My pla Ces . . .42
soRting RegisteRed My pla Ces . .43
deleting RegisteRed My pla Ces . .44
managing address booK . . . . . . .45
iMpoRting addRess Book FRoM usB
MeMoR y . . . . . . . . . . . . . . . . . . . . . . .45
expoRting addRess Book to usB
MeMoR y . . . . . . . . . . . . . . . . . . . . . . .46
Table of conTenT s
Page 45 of 298
45
Activating Navigation
managing address booK
imporTing address booK from usb memor Y
This feature is used to import address book saved in a USB memory.
1. Connect a USB memory to the USB port.
2. Press [Setup] > [Navigation] > [Others] > [User Data] > [Import Address Book/Previous
Destinations from USB Device] on the home screen.
3. Press [Yes].
4. Press [OK]. Press [View] to check the imported registered location.
Page 46 of 298
![GENESIS G80 2021 Premium Navigation Manual 46
Activating Navigation
exporTing address booK To usb memor Y
This feature is used to export address book to a USB memory.
1. Connect a USB memory to the USB port.
2. Press [Setup] > [Navigation] > [ GENESIS G80 2021 Premium Navigation Manual 46
Activating Navigation
exporTing address booK To usb memor Y
This feature is used to export address book to a USB memory.
1. Connect a USB memory to the USB port.
2. Press [Setup] > [Navigation] > [](/manual-img/46/35613/w960_35613-45.png)
46
Activating Navigation
exporTing address booK To usb memor Y
This feature is used to export address book to a USB memory.
1. Connect a USB memory to the USB port.
2. Press [Setup] > [Navigation] > [Others] > [User Data] > [Export Address Book/Previous
Destinations to USB Device] on the home screen.
3. Press [Yes].
,noTe
䠐The data amount to import from a USB memory is limited based on the number of
registered locations supported by the navigation device.
䠐If the data saved in the USB memory uses different coordinates from the ones used in
the current system, the coordinates of registered locations may change.
䠐Import feature may change previously saved registered locations as well as favorites in
the navigation device.
䠐Use after checking if the import feature has been normally performed is recommended.
䠐Import/Export feature may not be supported depending on the USB memory format
type.
䠐FAT16, FAT32, ex FAT and NTFS are supported.
䠐Some USB memories may not be supported due to compatibility issues.
Page 103 of 298
![GENESIS G80 2021 Premium Navigation Manual 103
Playing USB
plaYing usb Video
Connect a USB memory to USB connection terminal.
,noTe
䠐To play USB video while the other media is in play, press [MEDIA] button on the head
unit > [Menu] > [Medi GENESIS G80 2021 Premium Navigation Manual 103
Playing USB
plaYing usb Video
Connect a USB memory to USB connection terminal.
,noTe
䠐To play USB video while the other media is in play, press [MEDIA] button on the head
unit > [Menu] > [Medi](/manual-img/46/35613/w960_35613-102.png)
103
Playing USB
plaYing usb Video
Connect a USB memory to USB connection terminal.
,noTe
䠐To play USB video while the other media is in play, press [MEDIA] button on the head
unit > [Menu] > [Media Sources] > [USB Video].
䠐For the safety, the video is not supported and other partial features are restricted while
the vehicle is in driving condition. However, the audio is played.
䠐Even when the vehicle stops, if the gear is not in P position, the video is not supported.
pause/pla Y
Pause/Play a file.
LocationDetails
Front screen 䠐Touch [M] during play.
䠐Touch [d] during pause.
Controller 䠐Press controller during play.
䠐Press controller during pause.
swiT ching usb displa Y screen (basic mode screen/enTire screen)
LocationDetails
Front screenTouch the screen.
ControllerWhen controller is dragged to up or down or pressed on the entire screen, basic mode screen opens.
,noTe
䠐When no control within 5 seconds on basic mode screen, it automatically switches to
the entire screen.
䠐The entire screen opens by selecting [O] or [Menu] on the basic mode screen and
selecting [Full Screen] as well.
Page 107 of 298
107
Playing USB
fiLe inforMation
Shows the information on the name, size and play time of the file currently in play.
1. Press [Menu] > [File Information] on the playing screen.
2. Press [OK].
subTiTle seTTings
Available to use for a file supporting multiple-subtitles.
Selects the subtitle displayed on the screen.
1. Press [Menu] > [Subtitle Settings] on the playing screen.
2. Set the desired option.
䠐[View Subtitle]: Activates/clears the subtitle display.
䠐[Font Size]: Sets the font size for the subtitle displayed on the screen.
Page 108 of 298
108
Playing USB
displaY seTTings
Adjusts brightness/contrast/saturation for video play.
1. Press [Menu] > [Display Settings] on the playing screen.
2. For more details, refer to the "Display settings".
sound seTTings
1. Press [Menu] > [Sound settings] on the playing screen.
2. For more details, refer to the "Sound settings".
Voice seTTings
Available to use for a file supporting multiple voices.
1. Press [Menu] > [Voice Settings] on the playing screen.
2. Select a desired voice.
Page 142 of 298
142
Bluetooth
cauTions upon connec Ting blueTooTh phone
䠐Before connecting the head unit with the mobile phone, check to see that the mobile
phone supports Bluetooth features.
䠐If you do not want automatic connection with your Bluetooth device, turn the Bluetooth
feature off of the Bluetooth device.
䠐Park the vehicle when pairing the head unit with the mobile phone.
䠐Some Bluetooth features may occasionally not operate properly depending on the firmware
version of your mobile phone. If such features can be operated after receiving a S/W
upgrade from your mobile phone manufacturer, unpair all devices and pair again before
use.
䠐When pairing and the head unit with the iPhone for the first time while your iPhone
is connected to the USB port with iPhone cable, error message may be displayed on
your iPhone. But, this is intended operation. You may ignore it if your iPhone has been
connected to the head unit.
Page 192 of 298

192
Device Connection settings
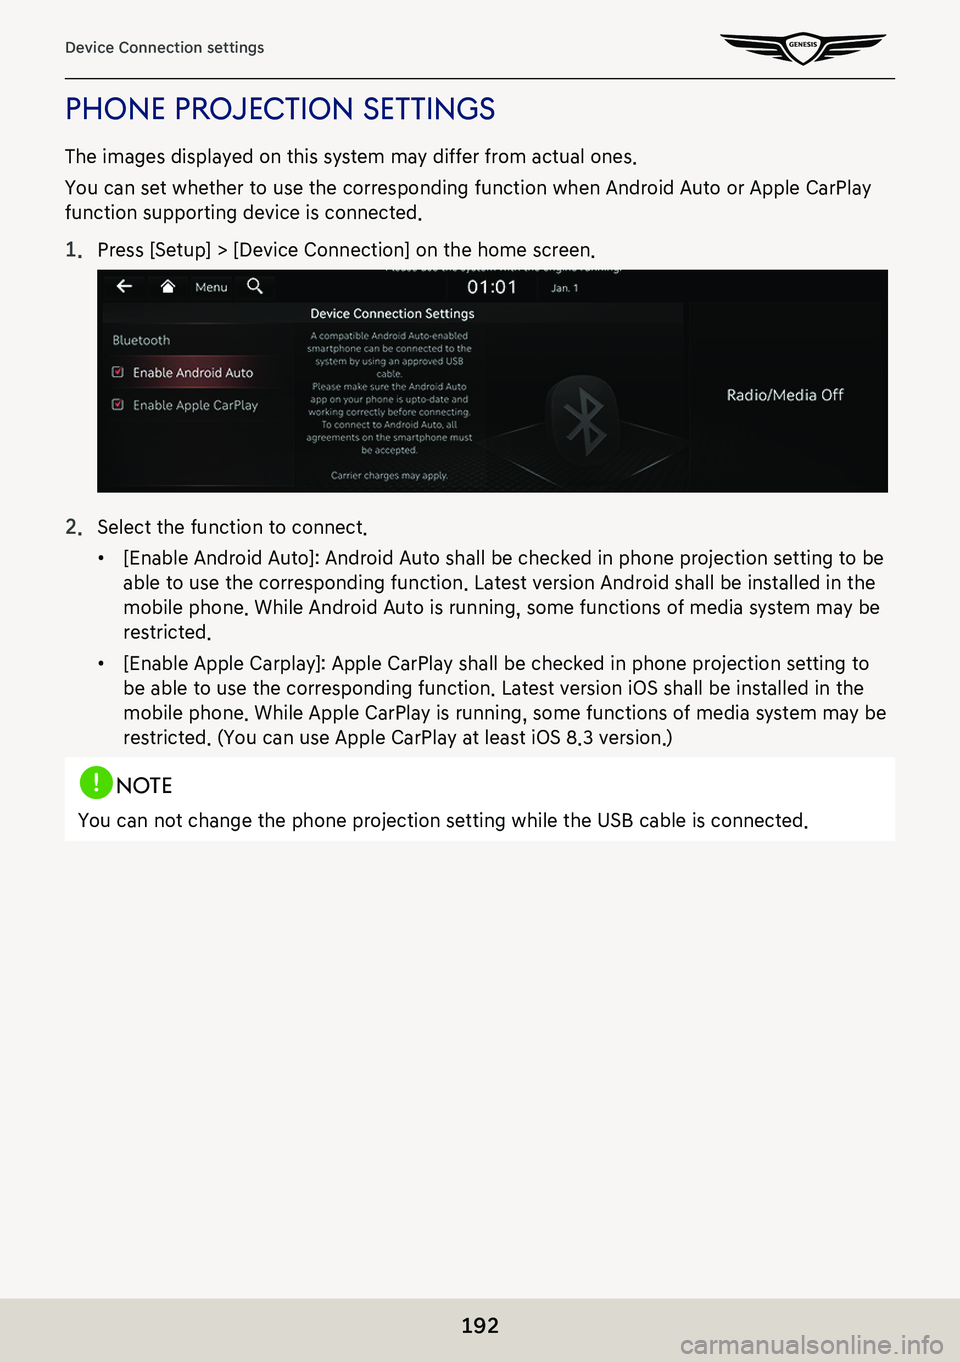
phone projecTion seTTings
The images displayed on this system may differ from actual ones.
You can set whether to use the corresponding function when Android Auto or Apple CarPlay
function supporting device is connected.
1. Press [Setup] > [Device Connection] on the home screen.
2. Select the function to connect.
䠐[Enable Android Auto]: Android Auto shall be checked in phone projection setting to be
able to use the corresponding function. Latest version Android shall be installed in the
mobile phone. While Android Auto is running, some functions of media system may be
restricted.
䠐[Enable Apple Carplay]: Apple CarPlay shall be checked in phone projection setting to
be able to use the corresponding function. Latest version iOS shall be installed in the
mobile phone. While Apple CarPlay is running, some functions of media system may be
restricted. (You can use Apple CarPlay at least iOS 8.3 version.)
,noTe
You can not change the phone projection setting while the USB cable is connected.