Page 406 of 604
Driver Assistance system
7-7 8
WARNING
When the system is temporarily
canceled, distance with the front
vehicle will not be maintained. Always
have your eyes on the road while
driving, and if necessary, depress the
brake pedal to reduce your driving
speed in order to maintain a safe
distance.
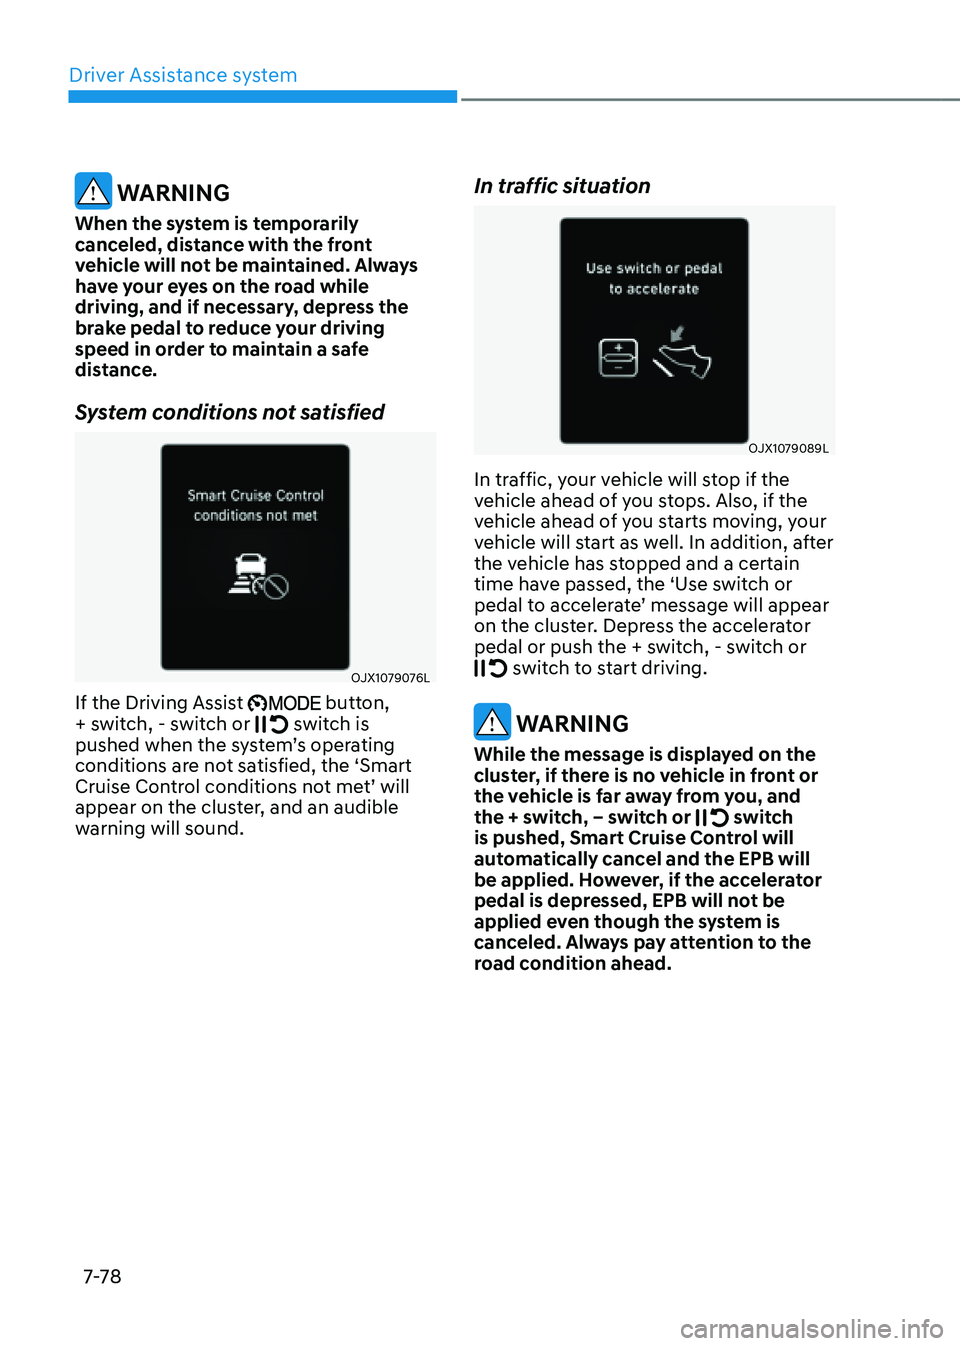
System conditions not satisfied
OJX1079076L
If the Driving Assist button,
+ switch, - switch or switch is pushed when the system’s operating
conditions are not satisfied, the ‘Smart
Cruise Control conditions not met’ will
appear on the cluster, and an audible
warning will sound.
In traffic situation
OJX1079089L
In traffic, your vehicle will stop if the
vehicle ahead of you stops. Also, if the
vehicle ahead of you starts moving, your
vehicle will start as well. In addition, after
the vehicle has stopped and a certain
time have passed, the ‘Use switch or
pedal to accelerate’ message will appear
on the cluster. Depress the accelerator
pedal or push the + switch, - switch or
switch to start driving.
WARNING
While the message is displayed on the
cluster, if there is no vehicle in front or
the vehicle is far away from you, and
the + switch, – switch or
switch is pushed, Smart Cruise Control will
automatically cancel and the EPB will
be applied. However, if the accelerator
pedal is depressed, EPB will not be
applied even though the system is
canceled. Always pay attention to the
road condition ahead.
Page 416 of 604
Driver Assistance system7-88
NAVIGATION-BASED SMART CRUISE CONTROL (NSCC) (IF
EQUIPPED)
Navigation-based Smart Cruise Control
will help automatically adjust vehicle
speed when driving on highways (or
motorways) by using road information
from the navigation system while Smart
Cruise Control is operating.
Information
• The Navigation-based Smart Cruise
Control system is available only on
controlled access road of certain
highways.
à Controlled access road indicates
roads with limited entrances and exits
that allow uninterrupted high speed
traffic flow. Only passenger cars and
motorcycles are allowed on controlled
access roads.
Available highway (Controlled access road)
USA Select Interstate Highway
and U.S. (Federal) and State Highways
Canada Select Provincial and Territorial
Highways
• Additional highways may be expanded
by future navigation updates.
Information
Navigation-based Smart Cruise Control
operates on main roads of highways (or
motorways), and does not operate on
interchanges or junctions.
Highway Curve Zone Auto Slowdown
If vehicle speed is high, Highway Curve
Zone Auto Slowdown function will
temporarily decelerate your vehicle
or limit acceleration to help you drive
safely on a curve based on the curve
information from the navigation.
Highway Set Speed Auto Change
Highway Set Speed Auto Change
function automatically changes Smart
Cruise Control set speed based on
the speed limit information from the
navigation.
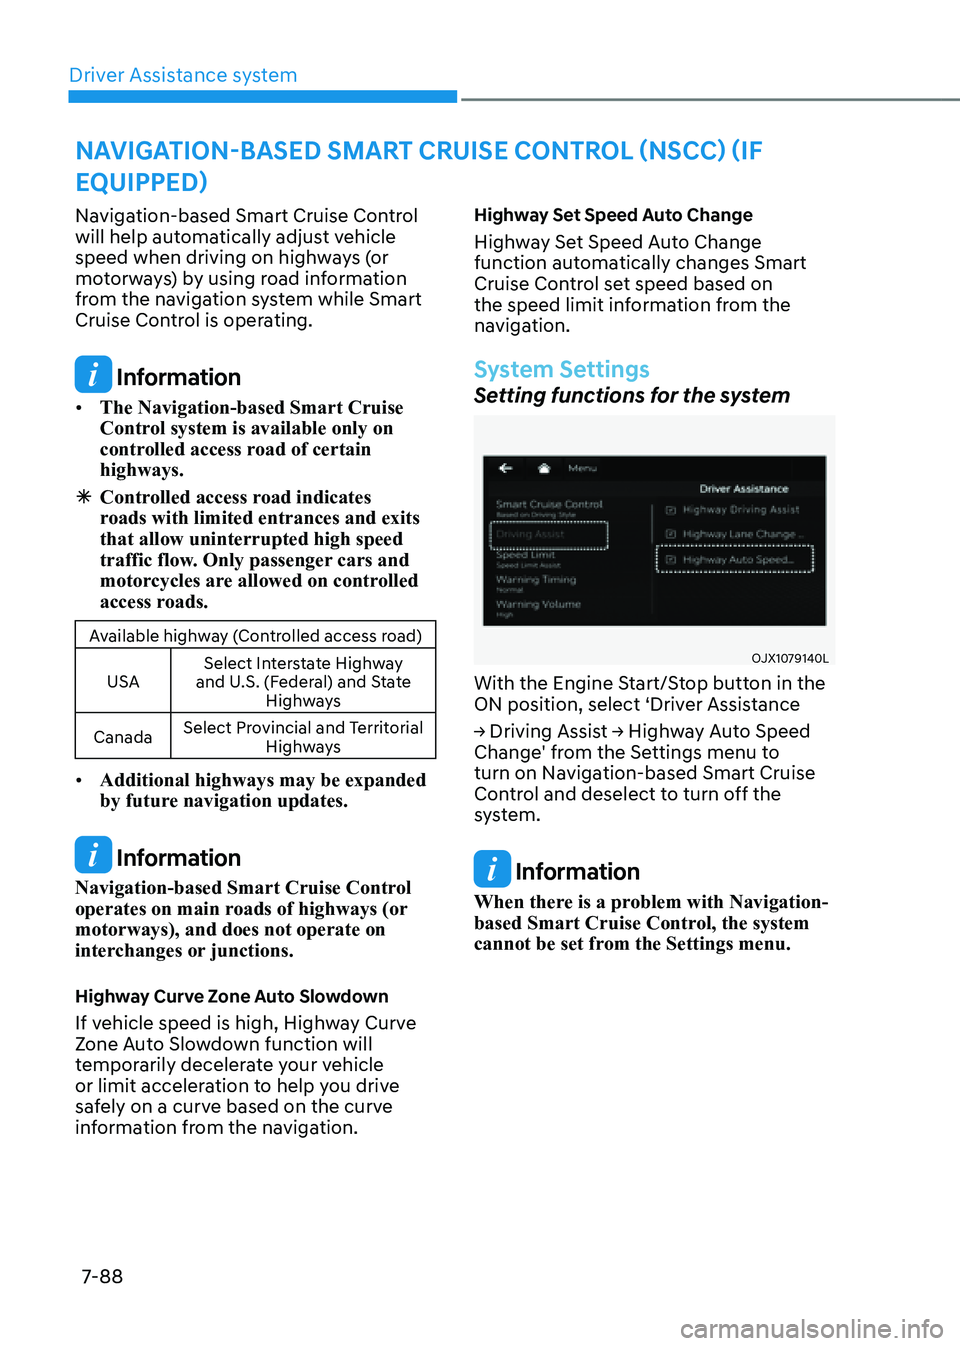
System Settings
Setting functions for the system
OJX1079140L
With the Engine Start/Stop button in the
ON position, select ‘Driver Assistance
→ Driving Assist → Highway Auto Speed
Change' from the Settings menu to
turn on Navigation-based Smart Cruise
Control and deselect to turn off the
system.
Information
When there is a problem with Navigation-
based Smart Cruise Control, the system
cannot be set from the Settings menu.
Page 423 of 604
07
7-95
LANE FOLLOWING ASSIST (LFA)
Lane Following Assist is designed to help
detect lane markings and/or vehicles on
the road, and assists the driver’s steering
to help keep the vehicle between lanes.
Detecting sensor
ORG3070161 [1]: Front view camera
The front view camera is used as a
detecting sensor to detect lane markings
and front vehicles.
Refer to the picture above for the
detailed location of the detecting sensor.
CAUTION
For more details on the precautions
of the front view camera, refer to
“Forward Collision-Avoidance Assist
(FCA)” section in chapter 7.
System Settings
Setting functions for the system
ORG3070056
Turning the system ON/OFF
With the Engine Start/Stop button in
the ON position, shortly press the Lane
Driving Assist button located on the
steering wheel to turn on Lane Following
Assist. The white or green
indicator light will illuminate on the cluster.
Press the button again to turn off the
system.
Page 424 of 604
Driver Assistance system
7-96
OJX1079246L
Warning Volume
With the Engine Start/Stop button in the
ON position, select ‘Driver Assistance →
Warning Volume’ from the Settings menu
to change the Warning Volume to ‘High’,
‘Medium’, ‘Low’ or ‘Off’ for Hands-off
warning.
However, even if ‘Off’ is selected, the
Hands-off Warning Volume will not turn
off but the volume will sound as ‘Low’.
If you change the Warning Volume,
the Warning Volume of other Driver
Assistance systems may change.
System Operation
Warning and control
ORG3070121N
Lane Following Assist
If the vehicle ahead and/or both lane
markings are detected and your vehicle
speed is below 120 mph (200 km/h), the
green
indicator light will illuminate on the cluster, and the system will help
the vehicle stay in lane by assisting the
steering wheel.
CAUTION
When the steering wheel is not assisted,
the green indicator light will blink and change to white.
Page 428 of 604
Driver Assistance system7-100
Detecting sensor
ORG3070161
ORG3070162
ORG3070163[1] : Front view camera, [2]: Front radar,
[3] : Front corner radar (if equipped),
[4] : Rear corner radar (if equipped)
Refer to the picture above for the
detailed location of the detecting
sensors.
CAUTION
For more details on the precautions of
the detecting sensors, refer to “Forward
Collision-Avoidance Assist (FCA)”
section in chapter 7.
System Settings
Setting functions for the system
OJX1079158L
Basic function
With the Engine Start/Stop button in the
ON position, select or deselect ‘Driver
Assistance → Driving Assist’ from the
Settings menu to set whether or not to
use each function.
- If ‘Highway Driving Assist’ is selected,
it helps maintain distance from the
vehicle ahead, maintain the set speed,
and keep the vehicle between lanes.
Highway Lane Change Assist (if equipped)
- If ‘Highway Lane Change Assist’ is
selected, it helps the driver change
lanes.
Page 429 of 604
07
7-101
Information
• When ‘Highway Driving Assist’ is
deselected, the setting for ‘Highway
Lane Change Assist’ cannot be
changed.
• If there is a problem with the functions,
the settings cannot be changed. Have
the system inspected by an authorized
retailer of Genesis Branded products.
• If the engine is restarted, the functions
will maintain the last setting.
WARNING
For your safety, change the Settings
after parking the vehicle at a safe
location.
OJX1079246L
Warning Volume
With the Engine Start/Stop button in the
ON position, select ‘Driver Assistance →
Warning Volume’ from the Settings menu
to change the Warning Volume to ‘High’,
‘Medium’, ‘Low’ or ‘Off’ for Highway
Driving Assist system.
However, even if ‘Off’ is selected, the
Hands-off Warning Volume will not turn
off but the volume will sound as ‘Low’.
If you change the Warning Volume,
the Warning Volume of other Driver
Assistance systems may change.
System Operation
Basic function
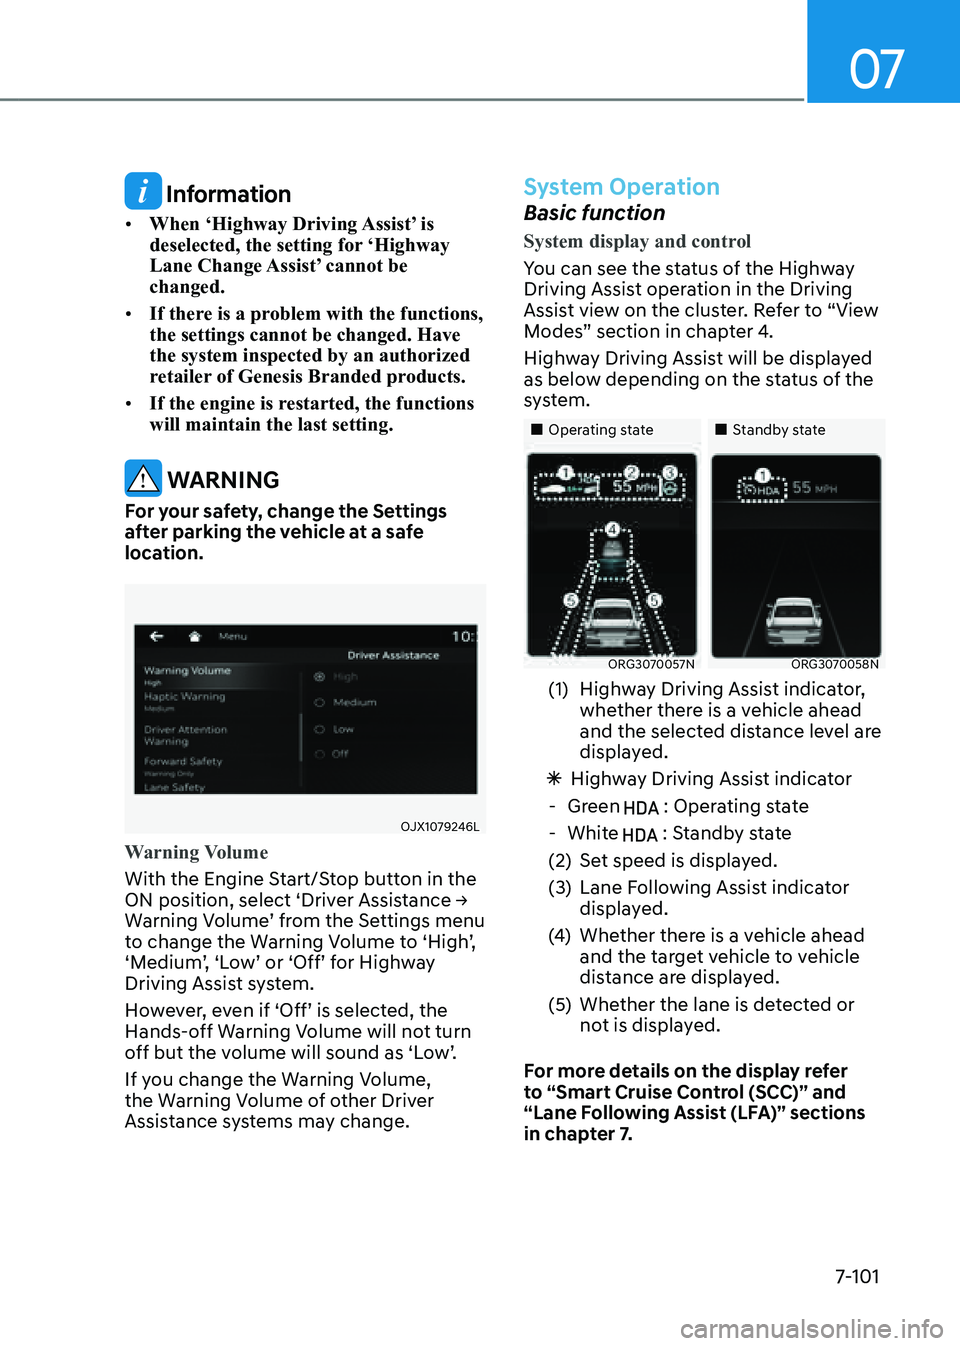
System display and control
You can see the status of the Highway
Driving Assist operation in the Driving
Assist view on the cluster. Refer to “View
Modes” section in chapter 4.
Highway Driving Assist will be displayed
as below depending on the status of the
system.
„„Operating state„„Standby state
ORG3070057NORG3070058N
(1) Highway Driving Assist indicator,
whether there is a vehicle ahead
and the selected distance level are
displayed.
ÃHighway Driving Assist indicator
-Green : Operating state
-White : Standby state
(2) Set speed is displayed.
(3) Lane Following Assist indicator
displayed.
(4) Whether there is a vehicle ahead
and the target vehicle to vehicle
distance are displayed.
(5) Whether the lane is detected or
not is displayed.
For more details on the display refer
to “Smart Cruise Control (SCC)” and
“Lane Following Assist (LFA)” sections
in chapter 7.
Page 440 of 604
Driver Assistance system
7-112
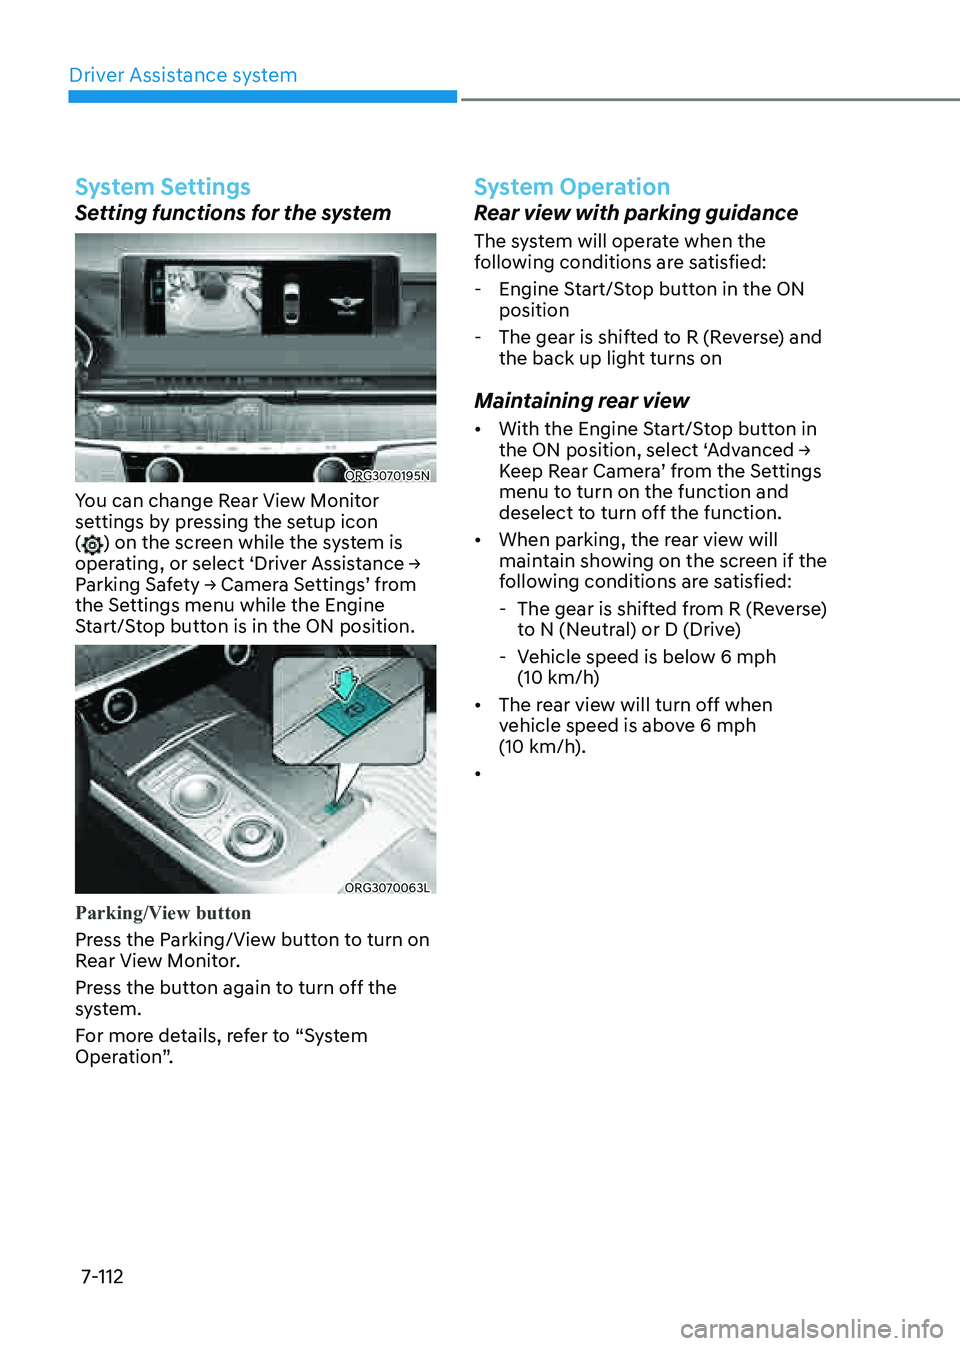
System Settings
Setting functions for the system
ORG3070195N
You can change Rear View Monitor
settings by pressing the setup icon
(
) on the screen while the system is
operating, or select ‘Driver Assistance →
Parking Safety → Camera Settings’ from
the Settings menu while the Engine
Start/Stop button is in the ON position.
ORG3070063L
Parking/View button
Press the Parking/View button to turn on
Rear View Monitor.
Press the button again to turn off the
system.
For more details, refer to “System
Operation”.
System Operation
Rear view with parking guidance
The system will operate when the
following conditions are satisfied:
- Engine Start/Stop button in the ON
position
-The gear is shifted to R (Reverse) and
the back up light turns on
Maintaining rear view
• With the Engine Start/Stop button in
the ON position, select ‘Advanced →
Keep Rear Camera’ from the Settings
menu to turn on the function and
deselect to turn off the function.
• When parking, the rear view will
maintain showing on the screen if the
following conditions are satisfied:
-The gear is shifted from R (Reverse)
to N (Neutral) or D (Drive)
-Vehicle speed is below 6 mph
(10 km/h)
• The rear view will turn off when
vehicle speed is above 6 mph
(10 km/h).
•
Page 442 of 604
Driver Assistance system
7-114
CAUTION
Surround View Monitor is designed to
be used on a flat surface. Therefore, if
used on roads with different heights
such as curbs and speed bumps, the
image in the screen my not look correct.
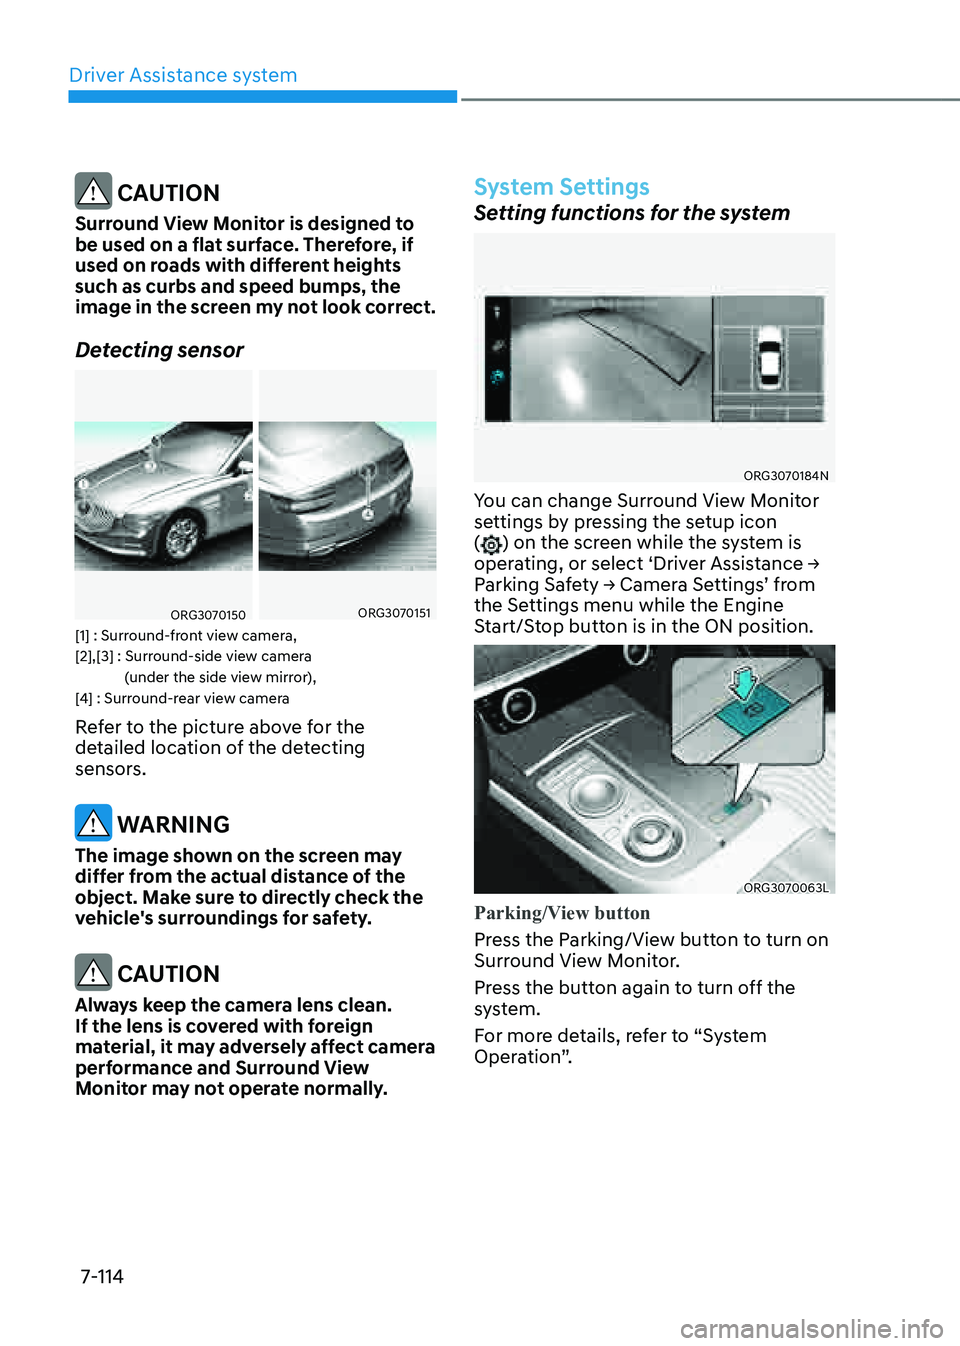
Detecting sensor
ORG3070150 ORG3070151
[1] : Surround-front view camera,
[2],[3] : Surround-side view camera (under the side view mirror),
[4] : Surround-rear view camera
Refer to the picture above for the
detailed location of the detecting
sensors.
WARNING
The image shown on the screen may
differ from the actual distance of the
object. Make sure to directly check the
vehicle's surroundings for safety.
CAUTION
Always keep the camera lens clean.
If the lens is covered with foreign
material, it may adversely affect camera
performance and Surround View
Monitor may not operate normally.
System Settings
Setting functions for the system
ORG3070184N
You can change Surround View Monitor
settings by pressing the setup icon
(
) on the screen while the system is
operating, or select ‘Driver Assistance →
Parking Safety → Camera Settings’ from
the Settings menu while the Engine
Start/Stop button is in the ON position.
ORG3070063L
Parking/View button
Press the Parking/View button to turn on
Surround View Monitor.
Press the button again to turn off the
system.
For more details, refer to “System
Operation”.