2021 GENESIS G70 ECO mode
[x] Cancel search: ECO modePage 222 of 516

3-137
Convenient features of your vehicle
3
Adjusting the driver and passenger
side temperature equally
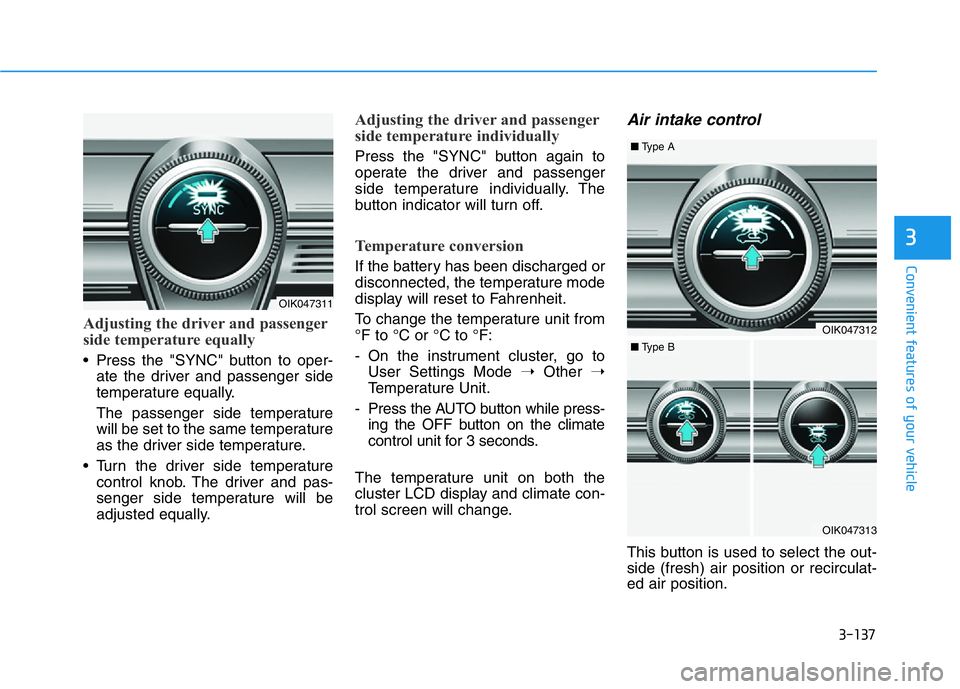
• Press the "SYNC" button to oper-
ate the driver and passenger side
temperature equally.
The passenger side temperature
will be set to the same temperature
as the driver side temperature.
• Turn the driver side temperature
control knob. The driver and pas-
senger side temperature will be
adjusted equally.
Adjusting the driver and passenger
side temperature individually
Press the "SYNC" button again to
operate the driver and passenger
side temperature individually. The
button indicator will turn off.
Temperature conversion
If the battery has been discharged or
disconnected, the temperature mode
display will reset to Fahrenheit.
To change the temperature unit from
°F to °C or °C to °F:
- On the instrument cluster, go to
User Settings Mode ➝Other ➝
Temperature Unit.
- Press the AUTO button while press-
ing the OFF button on the climate
control unit for 3 seconds.
The temperature unit on both the
cluster LCD display and climate con-
trol screen will change.
Air intake control
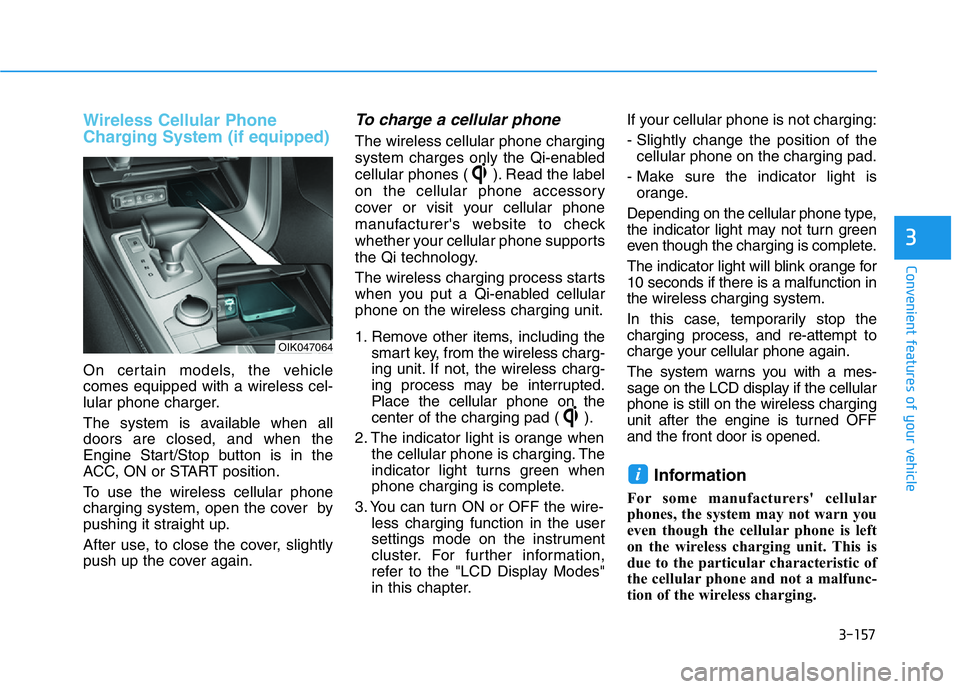
This button is used to select the out-
side (fresh) air position or recirculat-
ed air position.
OIK047311
OIK047312
■Type A
OIK047313
■Type B
Page 229 of 516

3-144
Convenient features of your vehicle
• For maximum defrosting, set the
temperature control to the extreme
right/hot position and the fan speed
control to the highest speed.
• If warm air to the floor is desired
while defrosting or defogging, set the
mode to the floor-defrost position.
• Before driving, clear all snow and
ice from the windshield, rear win-
dow, side view mirrors, and all side
windows.
• Clear all snow and ice from the
hood and air inlet in the cowl grill to
improve heater and defroster effi-
ciency and to reduce the probability
of fogging up the inside of the wind-
shield.
If the engine temperature is still
cold after starting, then a brief
engine warm up period may be
required for the vented air flow to
become warm or hot.
To Defog Inside Windshield
1. Select the desired fan speed.
2. Select the desired temperature.
3. Press the defroster button ( ).
4. The outside (fresh) air position will
be selected automatically.
If the outside (fresh) air position is
not selected automatically, adjust the
corresponding button manually.
If the position is selected, lower
fan speed is adjusted to a higher fan
speed.
NOTICE
WWINDSHIELD DEFROSTING AND DEFOGGING
Windshield heating
Do not use the or posi-
tion during cooling operation in
extremely humid weather. The
difference between the temper-
ature of the outside air and that
of the windshield could cause
the outer surface of the wind-
shield to fog up, causing loss of
visibility could cause an acci-
dent resulting in serious injury
or death. In this case, set the
mode selection knob or button
to the position and fan
speed control knob or button to
a lower speed.
WARNING
OIK047318
• Type A
• Type B
Page 231 of 516

3-146
Convenient features of your vehicle
Auto Defogging System
(if equipped)
Auto defogging helps reduce the pos-
sibility of fogging up the inside of the
windshield by automatically sensing
the moisture on inside the windshield.
The auto defogging system operates
when the heater or air conditioning is
on.
Information
The auto defogging system may not
operate normally, when the outside
temperature is below 14 °F (-10 °C).When the Auto Defogging
System operates, the indi-
cator will illuminate.
If a high amount of humidity is
detected in the vehicle, the Auto
Defogging System will be enabled.
The following steps will be performed
automatically:
Step 1) The air intake control will
change to Fresh mode and
the A/C button will turn ON.
Step 2) The mode will be changed to
defrost to direct airflow to the
windshield.
Step 3) The fan speed will be set to
MAX.
If the air conditioning is off or recircu-
lated air position is manually selected
while Auto Defogging System is ON,
the Auto Defogging System Indicator
will blink 3 times to signal that the
manual operation has been canceled.
To cancel the auto defogging system
1. Press the Engine Start/Stop but-
ton to the ON position.
2. Press the front defroster button
over 3 seconds.
3. The front defroster button indicator
will blink 3 times and then ADS
OFF will illuminate on the climate
control information screen when
the auto defogging system is can-
celed.
i
OIK047321N
Page 234 of 516

3-149
Convenient features of your vehicle
3
Sunroof Inside Air
Recirculation (if equipped)
When the sunroof is opened, outside
(fresh) air will be automatically
selected. At this time, if you press the
air intake control button, recirculated
air position will be selected but will
change back to outside (fresh) air
after 3 minutes. When the sunroof is
closed, the air intake position will
return to the original position that
was selected.
Automatic Ventilation
(if equipped)
When the Engine Start/Stop button
is in the ON position or when the
engine is running and temperature is
below 59°F (15°C) with the recircu-
lated air position selected more than
five minutes, the air intake position
will automatically change to the out-
side (fresh) air position.
To cancel or reset the Automatic
Ventilation
When the air conditioning system is
on, select Face Level mode and
while pressing the A/C button, press
the recirculated air position button
five times within three seconds.
When the automatic ventilation is set,
the air intake control button (recircu-
lated air position) indicator will blink 6
times. When canceled, the air intake
control button (recirculated air posi-
tion) indicator will blink 3 times.
Smart Ventilation (if equipped)
The smart ventilation system helps
maintain pleasant/fresh air condition
inside the passenger compartment
by automatically detecting/controlling
the temperature, humidity, etc., when
you drive the vehicle with the climate
control system in the OFF position.
When the smart ventilation system
starts to operate, the message,
"SMART VENTILATION ON" appears
for 5 seconds.
CLIMATE CONTROL ADDITIONAL FEATURES (IF EQUIPPED)
OIK047113L
Page 242 of 516

3-157
Convenient features of your vehicle
3
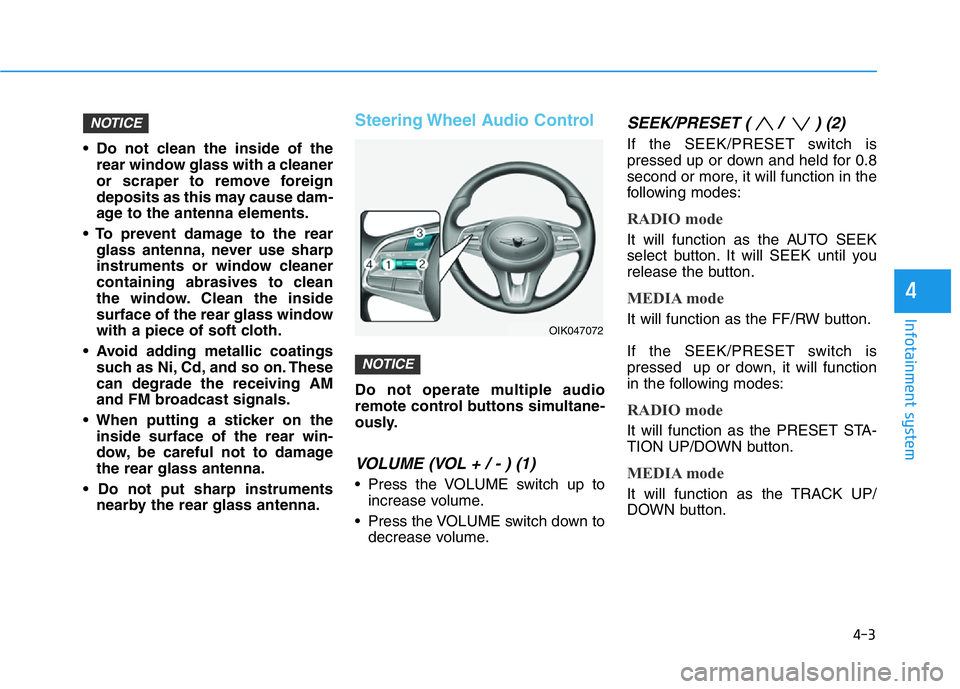
Wireless Cellular Phone
Charging System (if equipped)
On certain models, the vehicle
comes equipped with a wireless cel-
lular phone charger.
The system is available when all
doors are closed, and when the
Engine Start/Stop button is in the
ACC, ON or START position.
To use the wireless cellular phone
charging system, open the cover by
pushing it straight up.
After use, to close the cover, slightly
push up the cover again.
To charge a cellular phone
The wireless cellular phone charging
system charges only the Qi-enabled
cellular phones ( ). Read the label
on the cellular phone accessory
cover or visit your cellular phone
manufacturer's website to check
whether your cellular phone supports
the Qi technology.
The wireless charging process starts
when you put a Qi-enabled cellular
phone on the wireless charging unit.
1. Remove other items, including the
smart key, from the wireless charg-
ing unit. If not, the wireless charg-
ing process may be interrupted.
Place the cellular phone on the
center of the charging pad ( ).
2. The indicator light is orange when
the cellular phone is charging. The
indicator light turns green when
phone charging is complete.
3. You can turn ON or OFF the wire-
less charging function in the user
settings mode on the instrument
cluster. For further information,
refer to the "LCD Display Modes"
in this chapter.If your cellular phone is not charging:
- Slightly change the position of the
cellular phone on the charging pad.
- Make sure the indicator light is
orange.
Depending on the cellular phone type,
the indicator light may not turn green
even though the charging is complete.
The indicator light will blink orange for
10 seconds if there is a malfunction in
the wireless charging system.
In this case, temporarily stop the
charging process, and re-attempt to
charge your cellular phone again.
The system warns you with a mes-
sage on the LCD display if the cellular
phone is still on the wireless charging
unit after the engine is turned OFF
and the front door is opened.
Information
For some manufacturers' cellular
phones, the system may not warn you
even though the cellular phone is left
on the wireless charging unit. This is
due to the particular characteristic of
the cellular phone and not a malfunc-
tion of the wireless charging.
i
OIK047064
Page 248 of 516

4-3
Infotainment system
4
• Do not clean the inside of the
rear window glass with a cleaner
or scraper to remove foreign
deposits as this may cause dam-
age to the antenna elements.
• To prevent damage to the rear
glass antenna, never use sharp
instruments or window cleaner
containing abrasives to clean
the window. Clean the inside
surface of the rear glass window
with a piece of soft cloth.
• Avoid adding metallic coatings
such as Ni, Cd, and so on. These
can degrade the receiving AM
and FM broadcast signals.
• When putting a sticker on the
inside surface of the rear win-
dow, be careful not to damage
the rear glass antenna.
• Do not put sharp instruments
nearby the rear glass antenna.
Steering Wheel Audio Control
Do not operate multiple audio
remote control buttons simultane-
ously.
VOLUME (VOL + / - ) (1)
• Press the VOLUME switch up to
increase volume.
• Press the VOLUME switch down to
decrease volume.
SEEK/PRESET ( / ) (2)
If the SEEK/PRESET switch is
pressed up or down and held for 0.8
second or more, it will function in the
following modes:
RADIO mode
It will function as the AUTO SEEK
select button. It will SEEK until you
release the button.
MEDIA mode
It will function as the FF/RW button.
If the SEEK/PRESET switch is
pressed up or down, it will function
in the following modes:
RADIO mode
It will function as the PRESET STA-
TION UP/DOWN button.
MEDIA mode
It will function as the TRACK UP/
DOWN button.
NOTICE
NOTICE
OIK047072
Page 250 of 516

Driving your vehicle
5
Before Driving ........................................................5-4
Before Entering the Vehicle ...........................................5-4
Before Starting ..................................................................5-4
Engine Start/Stop Button .....................................5-6
Engine Start/Stop button positions ..............................5-7
Starting the Engine ...........................................................5-9
Turning Off the Engine..................................................5-11
Manual Transmission ...........................................5-12
Manual Transmission Operation ..................................5-12
Good Driving Practices ..................................................5-15
Automatic Transmission ......................................5-16
Automatic Transmission Operation .............................5-16
Paddle Shifter (Manual Shift Mode) ..........................5-21
LCD Display Messages ...................................................5-22
Good Driving Practices ..................................................5-26
Braking System ....................................................5-28
Power Brakes ...................................................................5-28
High Performance Brake...............................................5-29
Disc Brakes Wear Indicator ..........................................5-29
Parking Brake...................................................................5-30
Electronic Parking Brake (EPB)...................................5-33
Auto Hold ..........................................................................5-38
Anti-lock Brake System (ABS) ....................................5-41
Electronic Stability Control (ESC)................................5-43
Vehicle Stability Management (VSM).........................5-47Hill-Start Assist Control (HAC) ....................................5-48
Good Braking Practices .................................................5-48
All Wheel Drive (AWD) ........................................5-49
Using All Wheel Drive (AWD) .......................................5-49
Emergency precautions .................................................5-51
Limited slip differential .......................................5-53
Electronic Control Suspension (ECS) ................5-54
Launch Control .....................................................5-55
Prerequisite for Activation ...........................................5-55
Launch Control Activation.............................................5-55
Limited Use of Launch Control ....................................5-56
ECO Coasting ........................................................5-57
ECO Coasting Activation Condition .............................5-57
ECO Coasting Deactivation Condition.........................5-58
Setting ECO Coasting Function....................................5-58
ECO Coasting Activation Indicator ..............................5-59
ISG (Idle Stop and Go) System ..........................5-60
To Activate the ISG System ..........................................5-60
To Deactivate the ISG System......................................5-63
ISG System Malfunction ................................................5-63
The Battery Sensor Deactivation ................................5-64
Drive Mode Integrated Control System ............5-65
Drive Mode (with Manual Transmission)...................5-65
Drive Mode (with Automatic Transmission)..............5-68
Smart shift on trip computer .......................................5-72
Page 259 of 516

5-10
Vehicle with automatic transmission :
1. Always carry the smart key with
you.
2. Make sure the parking brake is
applied.
3. Make sure the vehicle is shifted to
P (Park).
4. Depress the brake pedal.
5. Press the Engine Start/Stop but-
ton.
Information
• Do not wait for the engine to warm
up while the vehicle remains station-
ary. Start driving at moderate
engine speeds. (Aggressive accelerat-
ing and decelerating should be
avoided.)
• Always start the vehicle with your
foot on the brake pedal. Do not
depress the accelerator while start-
ing the vehicle. Do not rev the
engine while warming it up.To prevent damage to the vehicle:
• If the engine stalls while you are
in motion, do not attempt to shift
to the P (Park) position.
If traffic and road conditions
permit, you may put the shift
lever in the N (Neutral) position
while the vehicle is still moving
and press the Engine Start/Stop
button in an attempt to restart
the engine.
• Do not push or tow your vehicle
to start the engine.To prevent damage to the vehicle:
When the stop lamp switch fuse is
blown, you can't start the engine
normally. Replace the fuse with a
new one. If you are not able to
replace the fuse, you can start the
engine by pressing and holding
the Engine Start/Stop button for
10 seconds with the Engine Start/
Stop button in the ACC position.
Do not press the Engine Start/Stop
button for more than 10 seconds
except when the stop lamp switch
fuse is blown.
For your safety always depress
the brake and/or clutch pedal
before starting the engine.
NOTICENOTICE
i
Driving your vehicle