2021 FORD F650/750 key
[x] Cancel search: keyPage 99 of 390
Your vehicle may be equipped with a cold
weather starting strategy that prevents
severe engine damage by assisting in
engine lubrication warm-up. In extremely
cold ambient temperatures, this strategy
activates and prevents the accelerator
pedal use for 30 seconds after starting
your vehicle. A message appears in the
information display as your vehicle warms
up. By not allowing the accelerator pedal
use, the engine oil can properly lubricate
the bearings preventing engine damage
due to lack of proper lubrication. After the
30-second warm-up period, the
accelerator pedal is operational again and
a message appears informing you that your
vehicle is ok to drive.
When starting the engine in extremely cold
temperatures, for example -15°F (-26°C),
we recommend you allow the engine to
idle for several minutes before driving your
vehicle. Illuminates when you switch the
ignition on as part of the
pre-starting system.
1. Turn the key to the on position without
turning the key to the start position. Do
not start the engine until the wait to
start indicator turns off.
2. When the wait to start indicator turns off, turn the key to the start position
and release the key as soon as the
engine starts. After starting the engine,
the glow plugs may remain on for a
period. If you do not start the engine
before the glow plug activation time
ends, you need to reset the glow plugs
by turning the key to the off position.
3. After the engine starts, allow it to idle for about 15 seconds. This is to protect
the engine. Do not increase engine
speed until the oil pressure gauge
indicates normal pressure. SWITCHING OFF THE ENGINE
Allow the engine to idle for three to five
minutes before shutting it down. The larger
the engine, the greater the need is for this
idling period.
Note:
Try to limit engine idle to 10 minutes.
Excessive idling reduces fuel economy.
ENGINE IDLE SHUTDOWN
(IF
EQUIPPED) WARNING:
In the event of engine
shutdown, make sure your vehicle is
safely off the road and the problem is
resolved before returning to the road.
Failure to do so may result in a crash,
serious injury or death.
This feature automatically shuts down the
engine when it has been idling in park (P)
or neutral (N) for an extended period,
depending on the setting.
When the engine idle shutdown process
has started:
• A chime sounds and a message
appears in the information display
showing a timer counting down from
30 seconds.
• You can reset the timer by pressing the
brake pedal, accelerator pedal, or by
shifting into another gear.
• If you do not intervene within 30
seconds, the engine shuts down and a
message appears in the information
display alerting you that the engine has
shut down.
96
F650750 (TBC) , enUSA, Edition date: 202010, Second-Printing Starting and Stopping the Engine
Page 100 of 390

•
Shortly after the engine has shut down,
the electrical system simulates a key
off and even though the ignition is still
on, the electrical system simulates a
normal accessory delay period before
shutting down.
• You must switch the ignition off to
reset the system before restarting your
vehicle.
The engine idle shutdown timer does not
start if:
• The engine is operating in battery
charge protect or power take-off mode.
• The exhaust emission control device is
regenerating.
ENGINE BLOCK HEATER (IF
EQUIPPED) WARNING:
Failure to follow engine
block heater instructions could result in
property damage or serious personal
injury. WARNING: Do not use your heater
with ungrounded electrical systems or
two-pronged adapters. There is a risk of
electrical shock.
Note: The heater is most effective when
outdoor temperatures are below
0°F
(-18°C).
The heater acts as a starting aid by
warming the engine coolant. This allows
the climate control system to respond
quickly. The equipment includes a heater
element (installed in the engine block) and
a wire harness. You can connect the
system to a grounded 120-volt AC
electrical source. We recommend that you do the following
for a safe and correct operation:
•
Use a 16-gauge outdoor extension cord
that is product certified by
Underwriter ’s Laboratory (UL) or
Canadian Standards Association
(CSA). This extension cord must be
suitable for use outdoors, in cold
temperatures, and be clearly marked
Suitable for Use with Outdoor
Appliances. Do not use an indoor
extension cord outdoors. This could
result in an electric shock or become a
fire hazard.
• Use as short an extension cord as
possible.
• Do not use multiple extension cords.
• Make sure that when in operation, the
extension cord plug and heater cord
plug connections are free and clear of
water. This could cause an electric
shock or fire.
• Make sure your vehicle is parked in a
clean area, clear of combustibles.
• Make sure the heater, heater cord and
extension cord are firmly connected.
• Check for heat anywhere in the
electrical hookup once the system has
been operating for approximately 30
minutes.
• Make sure the system is unplugged and
properly stowed before starting and
driving your vehicle. Make sure the
protective cover seals the prongs of the
block heater cord plug when not in use.
• Make sure the heater system is
checked for proper operation before
winter.
Using the Engine Block Heater
Make sure the receptacle terminals are
clean and dry prior to use. Clean them with
a dry cloth if necessary.
97
F650750 (TBC) , enUSA, Edition date: 202010, Second-Printing Starting and Stopping the Engine
Page 107 of 390
If your vehicle runs out of fuel:
•
Normally adding 4–5 gal (15– 19 L) of
fuel is enough to restart the engine. If
your vehicle is out of fuel and on a
steep grade, more than
5 gal (19 L)
may be required.
• You must purge trapped air from the
system before restarting the engine.
Purging Air From the System
Switch the ignition on for 30 seconds and
then switch the ignition off. Repeat this
operation six times in a row to purge any
trapped air from the fuel system.
Any remaining air in the system self-purges
when the engine starts. The engine may
run rough or produce white smoke when
air remains in the fuel system. This is
normal and stops after a short period. If
the engine continues to run rough, have
your vehicle checked as soon as possible.
Starting the Engine
Do not crank the engine for more than 10
seconds as starter damage may occur. If
the engine fails to start, switch the ignition
off and wait 30 seconds before cranking
the engine again. See
Starting a Diesel
Engine (page 95).
RUNNING OUT OF FUEL -
GASOLINE
Avoid running out of fuel because this
situation may have an adverse effect on
powertrain components. If you run out of fuel:
•
You may need to switch the ignition
from off to on several times after
refueling to allow the fuel system to
pump the fuel from the tank to the
engine. When restarting, cranking time
takes a few seconds longer than
normal. With keyless ignition, just start
the engine. Crank time will be longer
than usual.
• Normally, adding 1 gal (3.8 L) of fuel is
enough to restart the engine. If the
vehicle is out of fuel and on a steep
grade, more than
1 gal (3.8 L) may be
required.
• The service engine soon indicator may
come on. See
Warning Lamps and
Indicators (page 66).
REFUELING - DIESEL
An engine that suddenly becomes noisy or
operates poorly after a fuel fill could be
using substandard fuel. We recommend
that you purchase diesel fuel from a
reputable fuel station.
Use only clean, approved containers that
will prevent the entry of dirt or water
whenever you store diesel fuel.
Do not store diesel fuel in a galvanized
container. The fuel dissolves the zinc in the
galvanized container. The zinc will then
remain in the fuel. If you run the
contaminated fuel through the engine, the
zinc damages the fuel injectors. Engine
damage caused may not be covered by
the vehicle Warranty.
104
F650750 (TBC) , enUSA, Edition date: 202010, Second-Printing Fuel and Refueling
Page 115 of 390
Your vehicle may not pass the I/M test if
the service engine soon indicator is on or
not working properly (bulb is burned out),
or if the OBD-II system has determined
that some of the emission control systems
have not been properly checked. In this
case, the vehicle is not ready for I/M
testing.
If the vehicle
’s engine or transmission has
just been serviced, or the battery has
recently run down or been replaced, the
OBD-II system may indicate that the
vehicle is not ready for I/M testing. To
determine if the vehicle is ready for I/M
testing, turn the ignition key to the on
position for 15 seconds without cranking
the engine. If the service engine soon
indicator blinks eight times, it means that
the vehicle is not ready for I/M testing; if
the service engine soon indicator stays on
solid, it means that your vehicle is ready
for I/M testing.
The OBD-II system checks the emission
control system during normal driving. A
complete check may take several days.
If the vehicle is not ready for I/M testing,
you can perform the following driving cycle
consisting of mixed city and highway
driving:
1. 15 minutes of steady driving on an expressway or highway followed by 20
minutes of stop-and-go driving with at
least four 30-second idle periods.
2. Allow your vehicle to sit for at least eight hours with the ignition off. Then,
start the vehicle and complete the
above driving cycle. The vehicle must
warm up to its normal operating
temperature. Once started, do not turn
off the vehicle until the above driving
cycle is complete.
If the vehicle is still not ready for I/M
testing, you need to repeat the above
driving cycle. SELECTIVE CATALYTIC
REDUCTANT SYSTEM - DIESEL
Your vehicle may have a selective catalytic
reduction system. The system helps reduce
emission levels of oxides of nitrogen from
the exhaust system. The system
automatically injects diesel exhaust fluid
into the exhaust system to enable correct
selective catalytic reduction system
function.
Note:
Selective catalytic reduction systems
are not fitted to vehicles in markets where
only high-sulfur diesel fuel is available.
Diesel Exhaust Fluid Level
In order for the system to operate correctly
you must maintain the diesel exhaust fluid
level.
The system has a sensor to monitor fluid
level and quality/concentration. A warning
message appears in the information
display when the diesel exhaust fluid level
is low. If a warning message appears, refill
the diesel exhaust fluid tank as soon as
possible. See Information Messages
(page 73).
Filling the Diesel Exhaust Fluid
Tank WARNING:
Keep diesel exhaust
fluid out of reach of children. Avoid
contact with skin, eyes or clothing. In
case of contact with your eyes, flush
immediately with water and get prompt
medical attention. In case of contact
with your skin, clean immediately with
soap and water. If you swallow any
diesel exhaust fluid, drink plenty of
water, call a physician immediately.
112
F650750 (TBC) , enUSA, Edition date: 202010, Second-Printing Engine Emission Control
Page 125 of 390
AUTOMATIC TRANSMISSION
WARNING: Apply the parking
brake, shift into park (P), switch the
ignition off and remove the key before
you leave your vehicle. Failure to follow
this instruction could result in personal
injury or death.
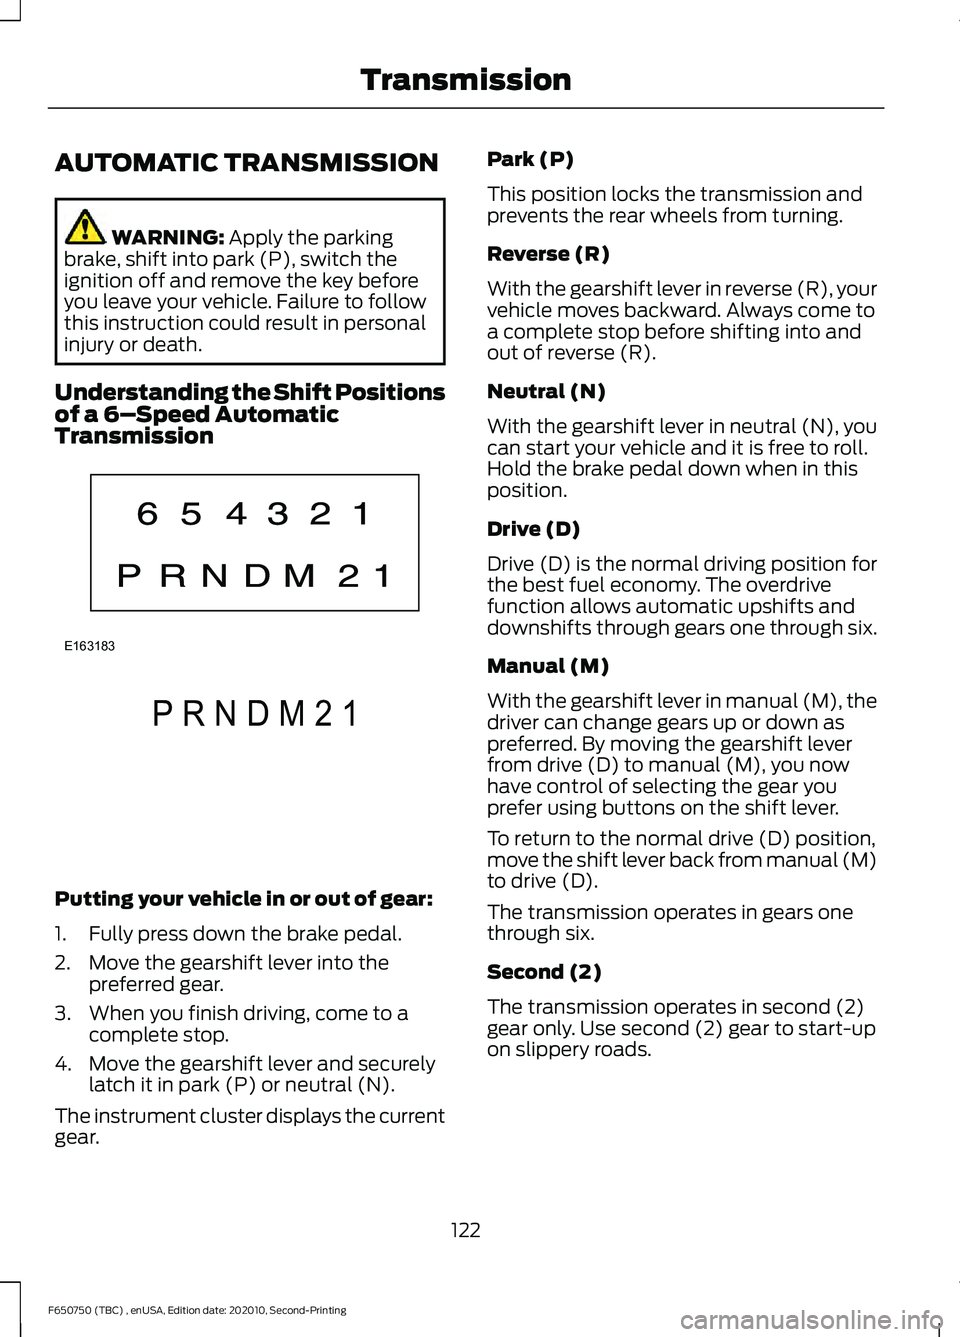
Understanding the Shift Positions
of a 6– Speed Automatic
Transmission Putting your vehicle in or out of gear:
1. Fully press down the brake pedal.
2. Move the gearshift lever into the
preferred gear.
3. When you finish driving, come to a complete stop.
4. Move the gearshift lever and securely latch it in park (P) or neutral (N).
The instrument cluster displays the current
gear. Park (P)
This position locks the transmission and
prevents the rear wheels from turning.
Reverse (R)
With the gearshift lever in reverse (R), your
vehicle moves backward. Always come to
a complete stop before shifting into and
out of reverse (R).
Neutral (N)
With the gearshift lever in neutral (N), you
can start your vehicle and it is free to roll.
Hold the brake pedal down when in this
position.
Drive (D)
Drive (D) is the normal driving position for
the best fuel economy. The overdrive
function allows automatic upshifts and
downshifts through gears one through six.
Manual (M)
With the gearshift lever in manual (M), the
driver can change gears up or down as
preferred. By moving the gearshift lever
from drive (D) to manual (M), you now
have control of selecting the gear you
prefer using buttons on the shift lever.
To return to the normal drive (D) position,
move the shift lever back from manual (M)
to drive (D).
The transmission operates in gears one
through six.
Second (2)
The transmission operates in second (2)
gear only. Use second (2) gear to start-up
on slippery roads.
122
F650750 (TBC) , enUSA, Edition date: 202010, Second-Printing TransmissionE163183 P R N D M 2 1E307627
Page 129 of 390

If you do not have a blown fuse and the
brake lamps are properly working, the
following procedure allows you to move
the gearshift lever from park (P):
1. Apply the parking brake. Switch the
ignition key to off, then remove the key.
2. Move the steering column to the full down and full rearward position,
toward the driver seat.
3. Remove the gearshift lever boot.
4. Place your fingers into the hole where you removed the gearshift lever boot
and pull the top half of the shroud up
and forward to separate it from the
lower half of the shroud. There is a
hinge at the forward edge of the top of
the shroud. Roll the top half of the
shroud upward on the hinge point, then
pull straight rearward toward the driver
seat to remove.
5. Remove the top half of the shroud.
6. Remove the three fasteners under the column that secure the lower shroud
half to the column. 7.
Pull the lock lever into the full unlocked
position and remove the lower shroud
cover by pulling the lever handle
through the slot in the cover.
8. Apply the brake. Gently lift the override
disk and move the gearshift lever into
neutral (N). 9. Start your vehicle.
Perform Steps 4 through 8 in reverse order,
making sure to engage the hinge pivots
between the upper and lower halves of the
shroud. Keep slight pressure in the forward
direction as you rotate the halves together.
If Your Vehicle Gets Stuck in Mud
or Snow
If your vehicle is stuck in mud or snow, you
could rock it out by shifting between
forward and reverse gears, stopping
between shifts in a steady pattern. Press
lightly on the accelerator in each gear.
Note:
Do not rock your vehicle if the engine
is not at normal operating temperature or
damage to the transmission could occur.
Note: Do not rock your vehicle for more
than a minute or damage to the
transmission and tires could occur, or the
engine could overheat.
POWER TAKE-OFF (IF EQUIPPED)
Auxiliary equipment called power take-off,
or PTO, is often added to the engine or
transmission to operate utility equipment.
Examples include a wheel-lift for tow
trucks, cranes, tools for construction or tire
service and pumping fluids. PTO
applications draw auxiliary horsepower
from the powertrain, often while the
126
F650750 (TBC) , enUSA, Edition date: 202010, Second-Printing TransmissionE163185 E163186
Page 159 of 390
DRIVER ALERT (IF EQUIPPED)
WARNING: You are responsible for
controlling your vehicle at all times. The
system is designed to be an aid and does
not relieve you of your responsibility to
drive with due care and attention. Failure
to follow this instruction could result in
the loss of control of your vehicle,
personal injury or death. WARNING:
The system may not
function if the sensor is blocked. WARNING:
Take regular rest
breaks if you feel tired. Do not wait for
the system to warn you. WARNING:
Certain driving styles
may result in the system warning you
even if you are not feeling tired. WARNING:
In cold and severe
weather conditions the system may not
function. Rain, snow and spray can all
limit sensor performance. WARNING:
The system will not
operate if the sensor cannot track the
road lane markings. WARNING:
If damage occurs in the
immediate area surrounding the sensor,
have your vehicle checked as soon as
possible. WARNING:
The system may not
correctly operate if your vehicle is fitted
with a suspension kit not approved by
us.
Note: Keep the windshield free from
obstructions. For example, bird droppings,
insects and snow or ice. Note:
If you have a blocked camera or
damaged windshield, the system may not
function.
Note: The system remembers the last
setting when you start your vehicle, unless
it detects a MyKey ™.
Note: If enabled in the menu, the system
activates at speeds above
40 mph
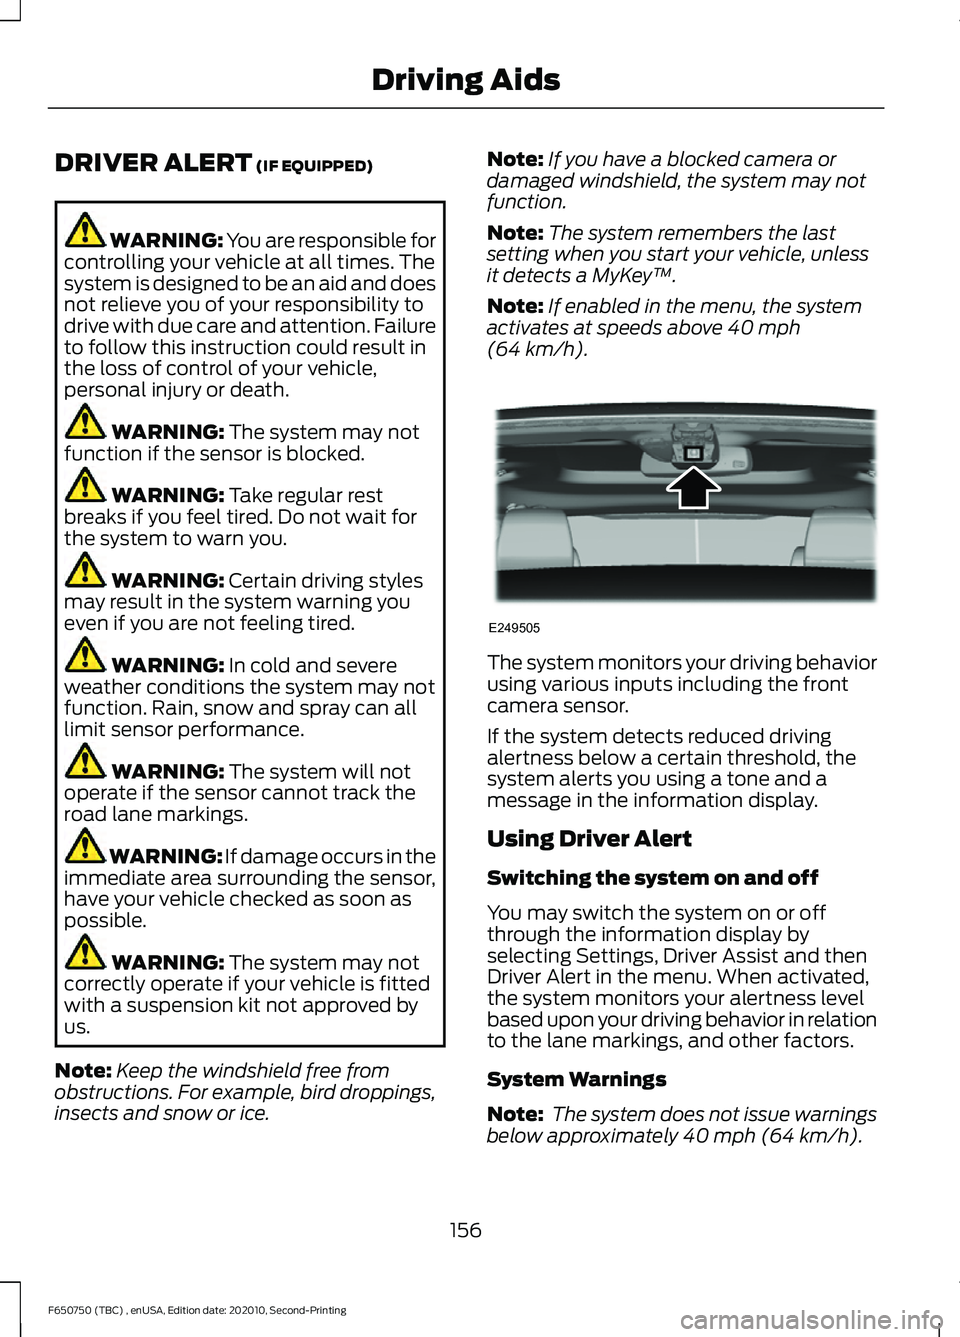
(64 km/h). The system monitors your driving behavior
using various inputs including the front
camera sensor.
If the system detects reduced driving
alertness below a certain threshold, the
system alerts you using a tone and a
message in the information display.
Using Driver Alert
Switching the system on and off
You may switch the system on or off
through the information display by
selecting Settings, Driver Assist and then
Driver Alert in the menu. When activated,
the system monitors your alertness level
based upon your driving behavior in relation
to the lane markings, and other factors.
System Warnings
Note:
The system does not issue warnings
below approximately
40 mph (64 km/h).
156
F650750 (TBC) , enUSA, Edition date: 202010, Second-Printing Driving AidsE249505
Page 161 of 390
When you switch the system on and it
detects an unintentional drift out of your
lane is likely to occur, the system notifies
or assists you to stay in your lane through
the steering system and information
display. The system provides a warning by
an audible tone.
Switching the System On and Off
Note:
The system on or off setting is stored
until it is manually changed, unless a MyKey
is detected. If the system detects a MyKey,
it defaults to on and the mode is set to alert.
Note: If a MyKey is detected, pressing the
button does not affect the on or off status
of the system. You can only change the
mode and sensitivity settings. Press the button to switch the
system on or off. The button is
above the audio unit or on the
center console.
System Settings
The system sensitivity and intensity can
be adjusted through the display screen.
The system remembers the last selection.
You do not need to readjust the setting
each time you turn on your vehicle.
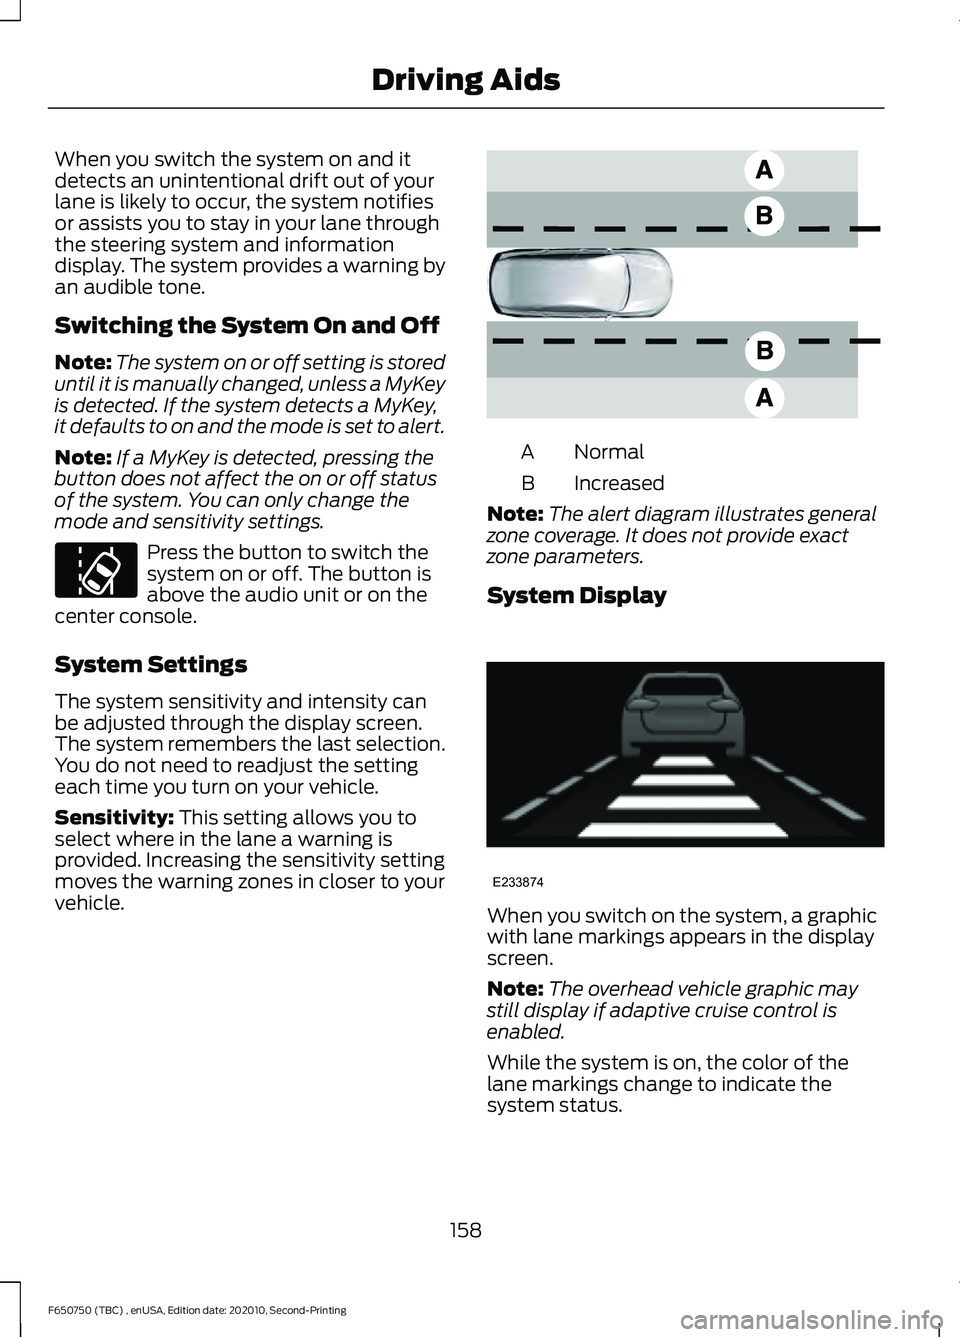
Sensitivity: This setting allows you to
select where in the lane a warning is
provided. Increasing the sensitivity setting
moves the warning zones in closer to your
vehicle. Normal
A
Increased
B
Note: The alert diagram illustrates general
zone coverage. It does not provide exact
zone parameters.
System Display When you switch on the system, a graphic
with lane markings appears in the display
screen.
Note:
The overhead vehicle graphic may
still display if adaptive cruise control is
enabled.
While the system is on, the color of the
lane markings change to indicate the
system status.
158
F650750 (TBC) , enUSA, Edition date: 202010, Second-Printing Driving AidsE173233 E165517 E233874