2021 FORD F650/750 stop start
[x] Cancel search: stop startPage 100 of 390

•
Shortly after the engine has shut down,
the electrical system simulates a key
off and even though the ignition is still
on, the electrical system simulates a
normal accessory delay period before
shutting down.
• You must switch the ignition off to
reset the system before restarting your
vehicle.
The engine idle shutdown timer does not
start if:
• The engine is operating in battery
charge protect or power take-off mode.
• The exhaust emission control device is
regenerating.
ENGINE BLOCK HEATER (IF
EQUIPPED) WARNING:
Failure to follow engine
block heater instructions could result in
property damage or serious personal
injury. WARNING: Do not use your heater
with ungrounded electrical systems or
two-pronged adapters. There is a risk of
electrical shock.
Note: The heater is most effective when
outdoor temperatures are below
0°F
(-18°C).
The heater acts as a starting aid by
warming the engine coolant. This allows
the climate control system to respond
quickly. The equipment includes a heater
element (installed in the engine block) and
a wire harness. You can connect the
system to a grounded 120-volt AC
electrical source. We recommend that you do the following
for a safe and correct operation:
•
Use a 16-gauge outdoor extension cord
that is product certified by
Underwriter ’s Laboratory (UL) or
Canadian Standards Association
(CSA). This extension cord must be
suitable for use outdoors, in cold
temperatures, and be clearly marked
Suitable for Use with Outdoor
Appliances. Do not use an indoor
extension cord outdoors. This could
result in an electric shock or become a
fire hazard.
• Use as short an extension cord as
possible.
• Do not use multiple extension cords.
• Make sure that when in operation, the
extension cord plug and heater cord
plug connections are free and clear of
water. This could cause an electric
shock or fire.
• Make sure your vehicle is parked in a
clean area, clear of combustibles.
• Make sure the heater, heater cord and
extension cord are firmly connected.
• Check for heat anywhere in the
electrical hookup once the system has
been operating for approximately 30
minutes.
• Make sure the system is unplugged and
properly stowed before starting and
driving your vehicle. Make sure the
protective cover seals the prongs of the
block heater cord plug when not in use.
• Make sure the heater system is
checked for proper operation before
winter.
Using the Engine Block Heater
Make sure the receptacle terminals are
clean and dry prior to use. Clean them with
a dry cloth if necessary.
97
F650750 (TBC) , enUSA, Edition date: 202010, Second-Printing Starting and Stopping the Engine
Page 101 of 390
The heater uses 0.4 to 1.0 kilowatt-hours
of energy per hour of use. The system does
not have a thermostat. It achieves
maximum temperature after
approximately three hours of operation.
Using the heater longer than three hours
does not improve system performance and
unnecessarily uses electricity.
98
F650750 (TBC) , enUSA, Edition date: 202010, Second-Printing Starting and Stopping the Engine
Page 107 of 390
If your vehicle runs out of fuel:
•
Normally adding 4–5 gal (15– 19 L) of
fuel is enough to restart the engine. If
your vehicle is out of fuel and on a
steep grade, more than
5 gal (19 L)
may be required.
• You must purge trapped air from the
system before restarting the engine.
Purging Air From the System
Switch the ignition on for 30 seconds and
then switch the ignition off. Repeat this
operation six times in a row to purge any
trapped air from the fuel system.
Any remaining air in the system self-purges
when the engine starts. The engine may
run rough or produce white smoke when
air remains in the fuel system. This is
normal and stops after a short period. If
the engine continues to run rough, have
your vehicle checked as soon as possible.
Starting the Engine
Do not crank the engine for more than 10
seconds as starter damage may occur. If
the engine fails to start, switch the ignition
off and wait 30 seconds before cranking
the engine again. See
Starting a Diesel
Engine (page 95).
RUNNING OUT OF FUEL -
GASOLINE
Avoid running out of fuel because this
situation may have an adverse effect on
powertrain components. If you run out of fuel:
•
You may need to switch the ignition
from off to on several times after
refueling to allow the fuel system to
pump the fuel from the tank to the
engine. When restarting, cranking time
takes a few seconds longer than
normal. With keyless ignition, just start
the engine. Crank time will be longer
than usual.
• Normally, adding 1 gal (3.8 L) of fuel is
enough to restart the engine. If the
vehicle is out of fuel and on a steep
grade, more than
1 gal (3.8 L) may be
required.
• The service engine soon indicator may
come on. See
Warning Lamps and
Indicators (page 66).
REFUELING - DIESEL
An engine that suddenly becomes noisy or
operates poorly after a fuel fill could be
using substandard fuel. We recommend
that you purchase diesel fuel from a
reputable fuel station.
Use only clean, approved containers that
will prevent the entry of dirt or water
whenever you store diesel fuel.
Do not store diesel fuel in a galvanized
container. The fuel dissolves the zinc in the
galvanized container. The zinc will then
remain in the fuel. If you run the
contaminated fuel through the engine, the
zinc damages the fuel injectors. Engine
damage caused may not be covered by
the vehicle Warranty.
104
F650750 (TBC) , enUSA, Edition date: 202010, Second-Printing Fuel and Refueling
Page 109 of 390
WARNING: Do not remove the fuel
pump nozzle from its fully inserted
position when refueling.
Use the following guidelines to avoid
electrostatic charge build-up when filling
an ungrounded fuel container:
• Place approved fuel container on the
ground.
• Do not fill a fuel container while it is in
the vehicle (including the cargo area).
• Keep the fuel pump nozzle in contact
with the fuel container while filling.
• Do not use a device that would hold
the fuel pump handle in the fill position.
Fuel Filler Cap WARNING: The fuel system may
be under pressure. If you hear a hissing
sound near the fuel filler inlet, do not
refuel until the sound stops. Otherwise,
fuel may spray out, which could cause
serious personal injury. WARNING:
If you do not use the
correct fuel filler cap, excessive pressure
or vacuum in the fuel tank may damage
the fuel system or cause the fuel cap to
disengage in a crash. Failure to follow
this warning could result in serious
personal injury.
The fuel tank has a threaded fuel filler cap.
Note: If you must replace the fuel filler cap,
replace it with a fuel filler cap that is
designed for your vehicle. The vehicle
Warranty may be void for any damage to
the fuel tank or fuel system if the correct
genuine Ford, Motorcraft or other certified
fuel filler cap is not used.
When refueling the vehicle fuel tank do the
following. 1. When your vehicle has stopped, shift
into neutral (N) or park (P).
2. Apply the parking brake and switch the
ignition off.
3. Turn the fuel filler cap counterclockwise and remove it.
4. Refuel your vehicle as required.
5. Replace the fuel filler cap, turn it clockwise until you feel a strong
resistance.
If the fuel cap warning lamp or a warning
message appears in the instrument cluster,
you may not have installed the fuel filler
cap correctly.
If the fuel cap warning lamp remains on,
at the next opportunity, safely pull off of
the road, remove the fuel filler cap, align
the cap properly and reinstall it. The check
fuel cap warning lamp or warning message
may not reset immediately. It may take
several driving cycles for the indicators to
turn off. A driving cycle consists of an
engine start-up (after four or more hours
with the engine off) followed by normal
city and highway driving.
FUEL CONSUMPTION
The advertised capacity is the maximum
amount of fuel that you can add to the fuel
tank after running out of fuel. Included in
the advertised capacity is an empty
reserve. The empty reserve is an
unspecified amount of fuel that remains
in the fuel tank when the fuel gauge
indicates empty.
Note: The amount of fuel in the empty
reserve varies and should not be relied upon
to increase driving range.
106
F650750 (TBC) , enUSA, Edition date: 202010, Second-Printing Fuel and Refueling
Page 115 of 390
Your vehicle may not pass the I/M test if
the service engine soon indicator is on or
not working properly (bulb is burned out),
or if the OBD-II system has determined
that some of the emission control systems
have not been properly checked. In this
case, the vehicle is not ready for I/M
testing.
If the vehicle
’s engine or transmission has
just been serviced, or the battery has
recently run down or been replaced, the
OBD-II system may indicate that the
vehicle is not ready for I/M testing. To
determine if the vehicle is ready for I/M
testing, turn the ignition key to the on
position for 15 seconds without cranking
the engine. If the service engine soon
indicator blinks eight times, it means that
the vehicle is not ready for I/M testing; if
the service engine soon indicator stays on
solid, it means that your vehicle is ready
for I/M testing.
The OBD-II system checks the emission
control system during normal driving. A
complete check may take several days.
If the vehicle is not ready for I/M testing,
you can perform the following driving cycle
consisting of mixed city and highway
driving:
1. 15 minutes of steady driving on an expressway or highway followed by 20
minutes of stop-and-go driving with at
least four 30-second idle periods.
2. Allow your vehicle to sit for at least eight hours with the ignition off. Then,
start the vehicle and complete the
above driving cycle. The vehicle must
warm up to its normal operating
temperature. Once started, do not turn
off the vehicle until the above driving
cycle is complete.
If the vehicle is still not ready for I/M
testing, you need to repeat the above
driving cycle. SELECTIVE CATALYTIC
REDUCTANT SYSTEM - DIESEL
Your vehicle may have a selective catalytic
reduction system. The system helps reduce
emission levels of oxides of nitrogen from
the exhaust system. The system
automatically injects diesel exhaust fluid
into the exhaust system to enable correct
selective catalytic reduction system
function.
Note:
Selective catalytic reduction systems
are not fitted to vehicles in markets where
only high-sulfur diesel fuel is available.
Diesel Exhaust Fluid Level
In order for the system to operate correctly
you must maintain the diesel exhaust fluid
level.
The system has a sensor to monitor fluid
level and quality/concentration. A warning
message appears in the information
display when the diesel exhaust fluid level
is low. If a warning message appears, refill
the diesel exhaust fluid tank as soon as
possible. See Information Messages
(page 73).
Filling the Diesel Exhaust Fluid
Tank WARNING:
Keep diesel exhaust
fluid out of reach of children. Avoid
contact with skin, eyes or clothing. In
case of contact with your eyes, flush
immediately with water and get prompt
medical attention. In case of contact
with your skin, clean immediately with
soap and water. If you swallow any
diesel exhaust fluid, drink plenty of
water, call a physician immediately.
112
F650750 (TBC) , enUSA, Edition date: 202010, Second-Printing Engine Emission Control
Page 125 of 390
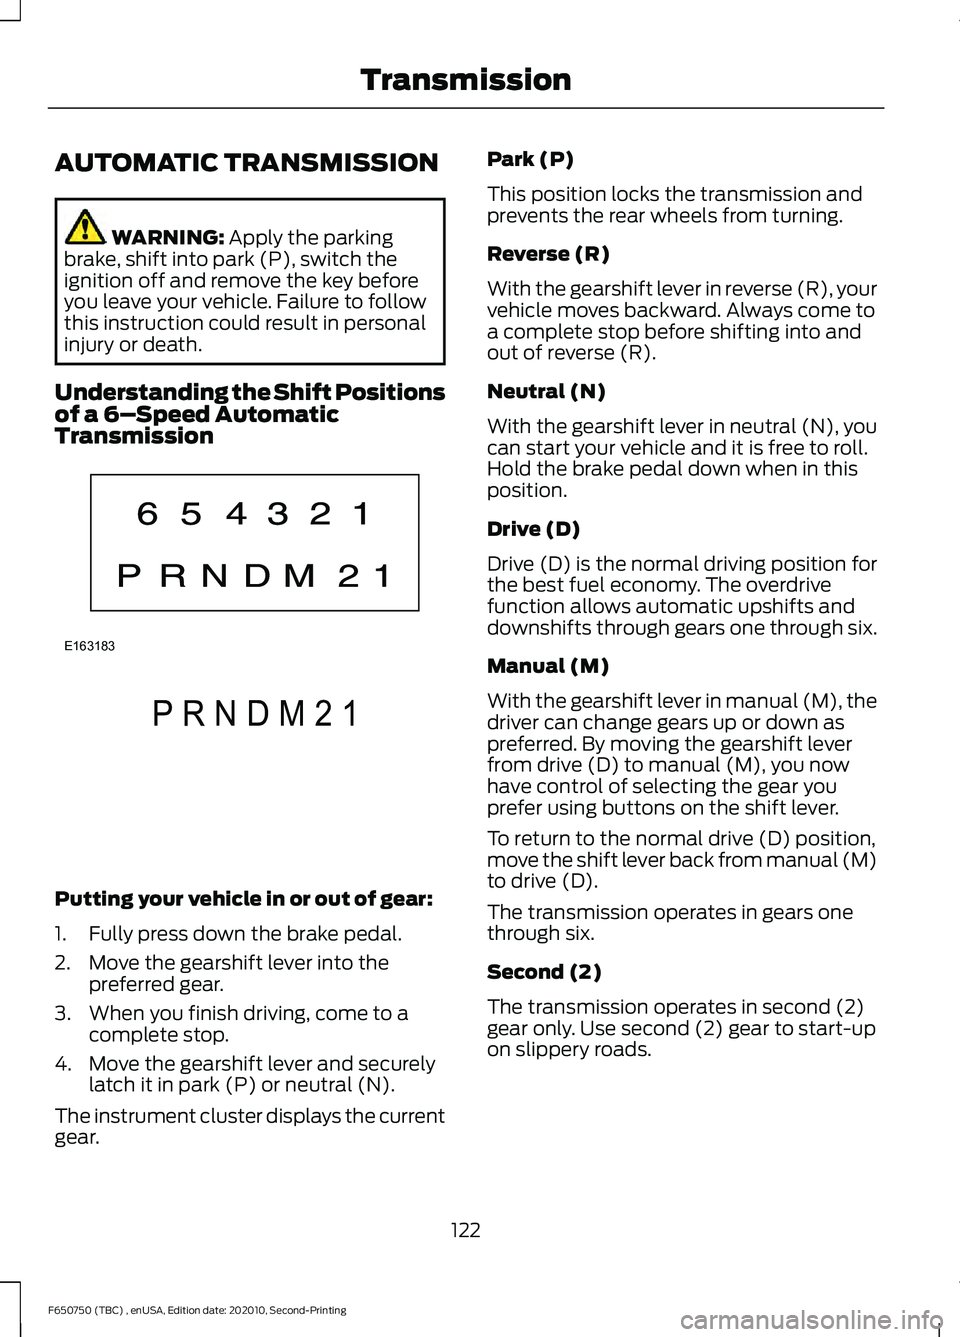
AUTOMATIC TRANSMISSION
WARNING: Apply the parking
brake, shift into park (P), switch the
ignition off and remove the key before
you leave your vehicle. Failure to follow
this instruction could result in personal
injury or death.
Understanding the Shift Positions
of a 6– Speed Automatic
Transmission Putting your vehicle in or out of gear:
1. Fully press down the brake pedal.
2. Move the gearshift lever into the
preferred gear.
3. When you finish driving, come to a complete stop.
4. Move the gearshift lever and securely latch it in park (P) or neutral (N).
The instrument cluster displays the current
gear. Park (P)
This position locks the transmission and
prevents the rear wheels from turning.
Reverse (R)
With the gearshift lever in reverse (R), your
vehicle moves backward. Always come to
a complete stop before shifting into and
out of reverse (R).
Neutral (N)
With the gearshift lever in neutral (N), you
can start your vehicle and it is free to roll.
Hold the brake pedal down when in this
position.
Drive (D)
Drive (D) is the normal driving position for
the best fuel economy. The overdrive
function allows automatic upshifts and
downshifts through gears one through six.
Manual (M)
With the gearshift lever in manual (M), the
driver can change gears up or down as
preferred. By moving the gearshift lever
from drive (D) to manual (M), you now
have control of selecting the gear you
prefer using buttons on the shift lever.
To return to the normal drive (D) position,
move the shift lever back from manual (M)
to drive (D).
The transmission operates in gears one
through six.
Second (2)
The transmission operates in second (2)
gear only. Use second (2) gear to start-up
on slippery roads.
122
F650750 (TBC) , enUSA, Edition date: 202010, Second-Printing TransmissionE163183 P R N D M 2 1E307627
Page 129 of 390

If you do not have a blown fuse and the
brake lamps are properly working, the
following procedure allows you to move
the gearshift lever from park (P):
1. Apply the parking brake. Switch the
ignition key to off, then remove the key.
2. Move the steering column to the full down and full rearward position,
toward the driver seat.
3. Remove the gearshift lever boot.
4. Place your fingers into the hole where you removed the gearshift lever boot
and pull the top half of the shroud up
and forward to separate it from the
lower half of the shroud. There is a
hinge at the forward edge of the top of
the shroud. Roll the top half of the
shroud upward on the hinge point, then
pull straight rearward toward the driver
seat to remove.
5. Remove the top half of the shroud.
6. Remove the three fasteners under the column that secure the lower shroud
half to the column. 7.
Pull the lock lever into the full unlocked
position and remove the lower shroud
cover by pulling the lever handle
through the slot in the cover.
8. Apply the brake. Gently lift the override
disk and move the gearshift lever into
neutral (N). 9. Start your vehicle.
Perform Steps 4 through 8 in reverse order,
making sure to engage the hinge pivots
between the upper and lower halves of the
shroud. Keep slight pressure in the forward
direction as you rotate the halves together.
If Your Vehicle Gets Stuck in Mud
or Snow
If your vehicle is stuck in mud or snow, you
could rock it out by shifting between
forward and reverse gears, stopping
between shifts in a steady pattern. Press
lightly on the accelerator in each gear.
Note:
Do not rock your vehicle if the engine
is not at normal operating temperature or
damage to the transmission could occur.
Note: Do not rock your vehicle for more
than a minute or damage to the
transmission and tires could occur, or the
engine could overheat.
POWER TAKE-OFF (IF EQUIPPED)
Auxiliary equipment called power take-off,
or PTO, is often added to the engine or
transmission to operate utility equipment.
Examples include a wheel-lift for tow
trucks, cranes, tools for construction or tire
service and pumping fluids. PTO
applications draw auxiliary horsepower
from the powertrain, often while the
126
F650750 (TBC) , enUSA, Edition date: 202010, Second-Printing TransmissionE163185 E163186
Page 131 of 390

GENERAL INFORMATION
WARNING: Exceeding these ratings
by overloading can cause component
failure resulting in property damage,
personal injury or death.
Fluid Temperature
If the operating temperature exceeds
250°F (121°C), the rate of axle lubrication
oxidation increases and shortens the life
of the lubricant and seals, requiring axle
lubrication changes to become more
frequent to preserve the axle. Do not
consistently run extreme pressure (EP)
lubricants above
250°F (121°C).
Axle Conversions WARNING:
When operating a
loaded vehicle, the driver must keep all
adjustable axles on the ground at all
times, supporting their share of the
vehicle ’s load. Failure to do so can
overload other axles, tires, wheels,
springs, steering components, brakes
and frames, resulting in early component
failure, loss of vehicle control, possible
property damage and personal injury.
We do not recommend, or approve,
performing axle conversions. However, we
understand that, on occasion, others install
aftermarket add-on axles on the truck
chassis that allow operator control for
weight transfer from other axles (such as
air lift axles). ELECTRONIC LOCKING
DIFFERENTIAL
(IF EQUIPPED)
Driver-Controlled Electronic
Locking Differential
Note: Never use the differential lock at
vehicle speeds above
25 mph (40 km/h).
Some drive axles have a driver-controlled
differential lock. The differential lock can
lock or unlock the differential when your
vehicle is moving or stopped. When you
require extra traction, the differential lock
provides full power to both wheels.
When you lock the differential, your
vehicle ’s turning radius increases
(under-steer).
Take care to avoid sudden accelerations
when both drive wheels are on a slippery
surface. WARNING:
Sudden acceleration
on slippery surfaces could cause the
wheels to spin, the vehicle to turn
sideways on a crowned road surface or
in a turn, possibly resulting in loss of
vehicle control and personal injury.
Activating the Electronic Locking
Differential
You can lock and unlock the differential
when your vehicle is moving at a constant
speed of less than 25 mph (40 km/h) and
while the wheels are not slipping. Do not
lock the differential when your vehicle is
traveling down steep grades and when
traction is minimal.
The differential lock and differential lock
light automatically disengage at speeds
above
25 mph (40 km/h). The differential
lock remains off until either you restart your
vehicle, or you turn the differential lock
switch off then back on.
128
F650750 (TBC) , enUSA, Edition date: 202010, Second-Printing Rear Axle