2021 FORD F650/750 manual transmission
[x] Cancel search: manual transmissionPage 138 of 390

Vehicles with Automatic Transmission
You cannot turn the system on or off.
When you switch the ignition on, the
system automatically turns on.
AIR BRAKES (IF EQUIPPED)
WARNING: Do not drive or continue
to drive if the low air pressure buzzer is
sounding or the brake warning light is lit.
These warnings indicate that air pressure
is not to normal operating level.
Continued use of the vehicle could result
in loss of braking ability. WARNING:
Avoid repeated light
application of the brake pedal. This
depletes air pressure faster and could
result in loss of braking capability. WARNING:
Do not move the
vehicle when the air pressure is
insufficient because the brake system
may be inoperative.
After starting the engine, give the air
compressor time to build up the air
pressure to
60 psi (414 kPa) before moving
your vehicle. Periodically check the air pressure gauge
while driving. Pressure should range
between approximately 100 psi (690 kPa)
to
130 psi (896 kPa). The air compressor
governor cut-in and cutout pressure
settings are set at the factory and are not
adjustable. When air pressure is insufficient
(below
60 psi (414 kPa)), a
warning light illuminates and a
buzzer sounds when the ignition is in the
on position. This may happen because
excessive brake applications are depleting
the system air pressure. If this condition
occurs, stop driving your vehicle until the
compressor has fully recharged the air
system.
Select a gear ratio to help slow your vehicle
before descending grades. Supplementing
with brakes, as required, help to safely slow
the vehicle and avoids overspeeding the
engine.
Air Chamber Stroke Indication
Air chamber push rods have orange stroke
indicator markers that warn when the
braking system requires adjustment or
repair. The painted orange indicator is on
the air chamber push rod at the slack
adjuster stroke dimension that requires
service when visible during brake
application.
A qualified service technician should
perform air brake inspection and
adjustment or repairs keeping to the
instructions in the service manual.
135
F650750 (TBC) , enUSA, Edition date: 202010, Second-Printing BrakesE210336 E206772
Page 139 of 390

Cam Brakes - Automatic Slack
Adjusters
WARNING: Do not manually adjust
the automatic slack adjusters to correct
excessive push rod stroke as it may result
in reduced brake effectiveness and a
vehicle crash. Excessive push rod stroke
indicates that a problem exists with the
automatic adjuster, with the installation
of the adjuster, or with foundation brake
components that manual adjustment
does not remedy. Seek service from a
qualified facility for excessive push rod
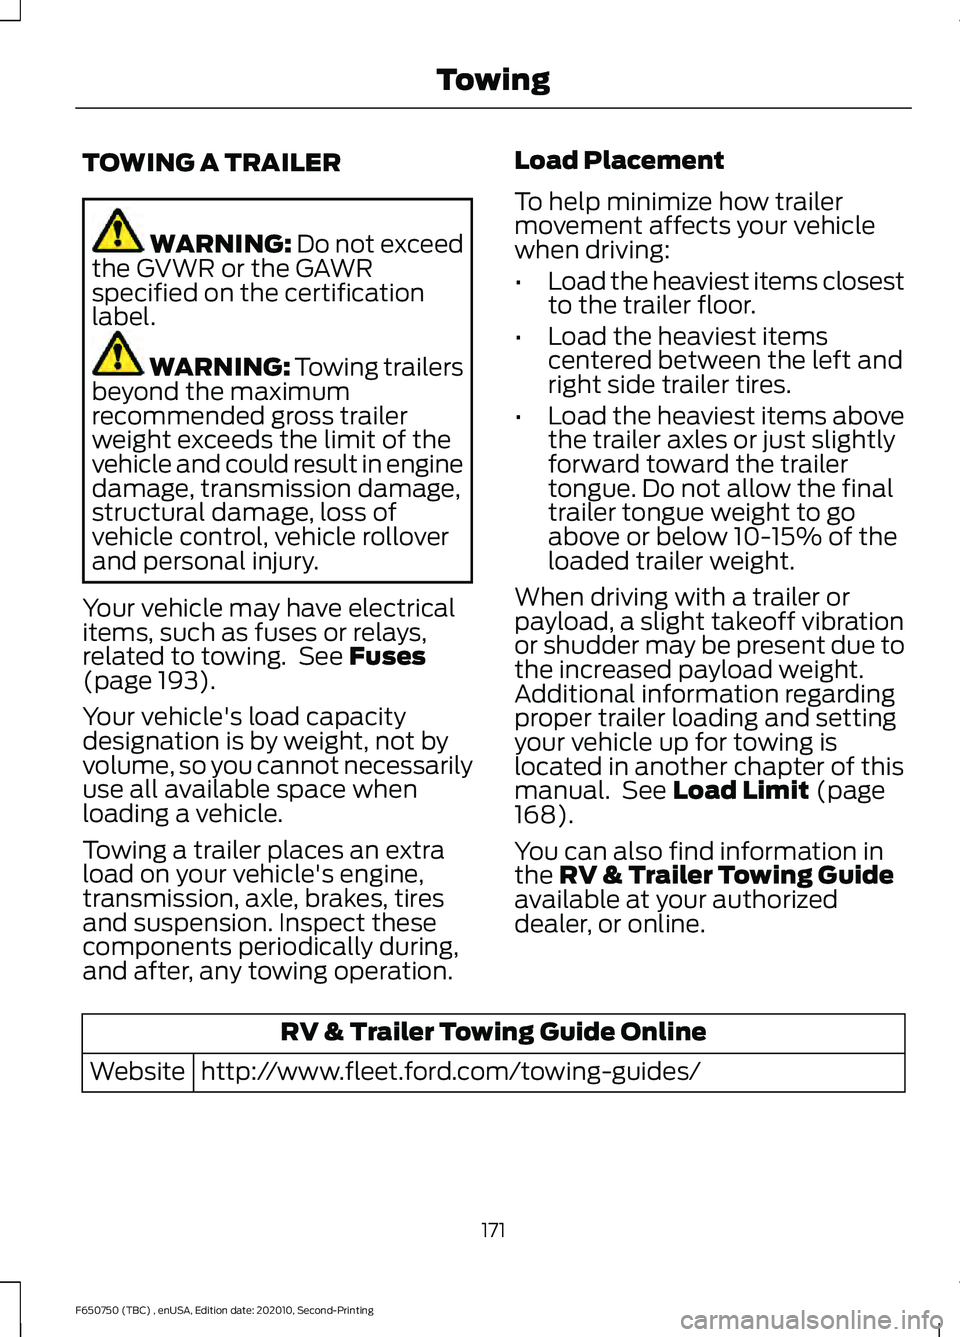
stroke. Standard air brakes (cam) are equipped
with automatic brake adjusters. Automatic
adjustment occurs during brake
applications. Inspect brakes for proper
adjustment at the specified intervals. See
Scheduled Maintenance (page 319).
Emergency Air Brake WARNING:
Do not continue to
operate the vehicle with a failure of one
of the brake systems. Take the vehicle
to your dealer for service immediately. All vehicles are equipped with a dual brake
system. In the unlikely event of a failure of
one system, the second system functions
for emergency stopping. The brake pedal
controls all these systems in the same
manner as for normal stops.
EXHAUST BRAKE
(IF EQUIPPED)
WARNING:
Do not use tow/haul
when the road surface is slippery. Failure
to follow this instruction could result in
the loss of control of your vehicle. WARNING:
Do not use diesel
engine exhaust braking when the road
surface is slippery. Failure to follow this
instruction could result in the loss of
control of your vehicle.
Note: Installing an exhaust or auxiliary
brake does not necessarily protect the
engine from exceeding the maximum
governed speed. Use the primary brakes to
make sure the engine never exceeds the
maximum governed speed under any
circumstance.
Note: Before starting the engine, make sure
that the exhaust brake is off. Do not switch
the exhaust brake on until the engine has
reached normal operating temperature.
Note: Engine speed has a major influence
on limiting performance. When engine
speed stays at the maximum allowable
level, the exhaust brake operates at peak
performance.
Note: Exhaust brakes operate effectively
with automatic transmissions. However,
performance varies with engine speed and
the gear selected by the transmission.
136
F650750 (TBC) , enUSA, Edition date: 202010, Second-Printing BrakesE210337
Page 174 of 390

TOWING A TRAILER
WARNING: Do not exceed
the GVWR or the GAWR
specified on the certification
label. WARNING:
Towing trailers
beyond the maximum
recommended gross trailer
weight exceeds the limit of the
vehicle and could result in engine
damage, transmission damage,
structural damage, loss of
vehicle control, vehicle rollover
and personal injury.
Your vehicle may have electrical
items, such as fuses or relays,
related to towing. See
Fuses
(page 193).
Your vehicle's load capacity
designation is by weight, not by
volume, so you cannot necessarily
use all available space when
loading a vehicle.
Towing a trailer places an extra
load on your vehicle's engine,
transmission, axle, brakes, tires
and suspension. Inspect these
components periodically during,
and after, any towing operation. Load Placement
To help minimize how trailer
movement affects your vehicle
when driving:
•
Load the heaviest items closest
to the trailer floor.
• Load the heaviest items
centered between the left and
right side trailer tires.
• Load the heaviest items above
the trailer axles or just slightly
forward toward the trailer
tongue. Do not allow the final
trailer tongue weight to go
above or below 10-15% of the
loaded trailer weight.
When driving with a trailer or
payload, a slight takeoff vibration
or shudder may be present due to
the increased payload weight.
Additional information regarding
proper trailer loading and setting
your vehicle up for towing is
located in another chapter of this
manual. See
Load Limit (page
168).
You can also find information in
the
RV & Trailer Towing Guide
available at your authorized
dealer, or online. RV & Trailer Towing Guide Online
http://www.fleet.ford.com/towing-guides/
Website
171
F650750 (TBC) , enUSA, Edition date: 202010, Second-Printing Towing
Page 176 of 390

ESSENTIAL TOWING CHECKS
See Load limits in the Load Carrying
chapter for load specification terms found
on the tire label and Safety Compliance
label and instructions on calculating your
vehicle's load.
Remember to account for the trailer
tongue weight as part of your vehicle load
when calculating the total vehicle weight.
Hitches
Do not use a hitch that either clamps onto
the bumper or attaches to the axle. You
must distribute the load in your trailer so
that 10-15% of the total weight of the
trailer is on the tongue.
Safety Chains
Note: Do not attach safety chains to the
bumper.
Always connect the safety chains to the
frame or hook retainers of your vehicle
hitch.
To connect the safety chains, cross the
chains under the trailer tongue and allow
enough slack for turning tight corners. Do
not allow the chains to drag on the ground.
Trailer Brakes WARNING:
Do not connect a
trailer's hydraulic brake system directly
to your vehicle's brake system. Your
vehicle may not have enough braking
power and your chances of having a
collision greatly increase.
Electric brakes and manual, automatic or
surge-type trailer brakes are safe if you
install them properly and adjust them to
the manufacturer's specifications. The
trailer brakes must meet local and federal
regulations. The rating for the tow vehicle's braking
system operation is at the gross vehicle
weight rating, not the gross combined
weight rating.
Trailer Lamps
WARNING:
Never connect any
trailer lamp wiring to the vehicle's tail
lamp wiring; this may damage the
electrical system resulting in fire. Contact
your authorized dealer as soon as
possible for assistance in proper trailer
tow wiring installation. Additional
electrical equipment may be required.
Trailer lamps are required on most towed
vehicles. Make sure all running lights, brake
lights, turn signals and hazard lights are
working.
Before Towing a Trailer
Practice turning, stopping and backing up
to get the feel of your vehicle-trailer
combination before starting on a trip.
When turning, make wider turns so the
trailer wheels clear curbs and other
obstacles.
When Towing a Trailer
• Check your hitch, electrical connections
and trailer wheel lug nuts thoroughly
after you have traveled
50 mph
(80 km/h).
• When stopped in congested or heavy
traffic during hot weather, place the
transmission in park (P) or neutral (N)
to aid engine and transmission cooling
and to help air conditioning
performance.
• Turn off the speed control with heavy
loads or in hilly terrain. The speed
control may turn off automatically
when you are towing on long, steep
grades.
173
F650750 (TBC) , enUSA, Edition date: 202010, Second-Printing Towing
Page 250 of 390

2. Reconnect the fuel lines.
3. Switch the ignition on for 30 seconds
and then switch the ignition off.
Repeat this operation six times in a row
to purge any trapped air from the fuel
system.
ELECTRICAL SYSTEM
INSPECTION
Periodically inspect electrical connectors
on the outside of the cab and on the engine
and frame for corrosion and tightness.
Exposed terminals, such as the fuel sender,
cranking motor, alternator and
feed-through studs, should be cleaned and
re-coated with a lubricant sealing grease
such as Motorcraft Silicone Brake Caliper
Grease and Dielectric Compound XG-3, or
equivalent. This should include the ground
cable connector for batteries, engine and
cab as well as the jump-starting stud.
Accessory Feed Connections
Vehicle electrical systems are complex and
often include powertrain components,
such as engine and transmission controls,
instrument panels and ABS. While most
systems operate on battery voltage (12
volts), some systems can be as high as 90
volts or as low as five volts. See the
Electrical Circuit Diagram Manuals,
available from your vehicle ’s manufacturer,
to make sure that any extra body lights and
accessory connections to circuits are both
appropriate and not overloaded. Do not
make modifications to any vehicle control
system without first contacting an
authorized dealer. AIR INDUCTION SYSTEM
INSPECTION WARNING: When performing
maintenance to any turbocharged engine
with engine air inlet piping disconnected,
keep loose clothing, jewelry and long hair
away from the engine air inlet piping. A
turbocharger compressor air inlet
protective shield should be installed over
the turbocharger air inlet to reduce the
risk of personal injury or death.
Perform a complete inspection of the air
induction system annually.
In areas where road salt is used,
disassemble the joints of each aluminum
component and inspect for salt build-up
and presence of chlorine that can cause
aluminum particles to flake off and enter
the engine combustion chambers. If
evidence of corrosion is found (usually at
the pipe connections), use a wire brush to
clean the inside of the pipes and inside the
rubber hoses.
If pitting is evident at the joint ends of the
intake pipes, use Motorcraft Silicone
Gasket and Sealant TA-30 to seal the
joints. Make sure no excess material, which
can pull into the engine, is on the inside of
the pipes. If the service condition of the
pipes, hoses or clamps is questionable,
replace the defective part(s).
Make sure to clean all dust and debris out
of the pipes and couplings with a clean,
damp rag before reassembly.
Chassis-mounted Charge Air
Cooler
Visually inspect the core assembly for
debris and clogging of external fins with
the engine off.
247
F650750 (TBC) , enUSA, Edition date: 202010, Second-Printing Maintenance
Page 380 of 390

2
2-Speed Rear Axle.......................................129
Axle Shifting......................................................... 129
A
A/C See: Climate Control........................................... 79
About This Manual
...........................................7
Diesel Engine Information................................... 8
Minor Troubleshooting Guide............................ 9
Warnings.................................................................... 8
ABS See: Brakes........................................................... 130
ABS driving hints See: Hints on Driving With Anti-Lock
Brakes.................................................................. 131
Accessories.....................................................315
Accessories See: Replacement Parts
Recommendation............................................. 17
ACC See: Using Adaptive Cruise Control............148
Adjusting the Headlamps........................240 Horizontal Aim Adjustment............................ 241
Vertical Aim Adjustment................................ 240
Adjusting the Steering Wheel
....................52
Air Brakes.........................................................135
Air Chamber Stroke Indication...................... 135
Cam Brakes - Automatic Slack Adjusters........................................................... 136
Emergency Air Brake......................................... 136
Air Conditioning See: Climate Control........................................... 79
Air Filter See: Changing the Engine Air Filter - 6.7L
Diesel.................................................................. 221
See: Changing the Engine Air Filter - 7.3L...................................................................... 223
Air Induction System Inspection............247 Chassis-mounted Charge Air Cooler..........247
Air Suspension
..............................................169
Air Suspension Dump Button........................ 169
Connecting and Disconnecting a Trailer with Air Suspension and Air Suspension
Dump Button.................................................. 169
Suspension Conversions................................. 169System Indicator Light.....................................
169
Appendices....................................................348
At a Glance
........................................................22
Audible Warnings and Indicators.............69 Headlamps On Warning Chime..................... 69
Key in Ignition Warning Chime........................ 69
Parking Brake On Warning Chime.................69
Audio System
................................................307
General Information......................................... 307
Audio Unit
.......................................................307
Accessing the Sound Settings..................... 308
Accessing the System Settings................... 308
Adjusting the Volume...................................... 308
Changing Radio Stations............................... 308
Pausing or Playing Media............................... 308
Returning to the Previous Screen...............308
Scrolling Through the Menu Options........308
Selecting a Menu Option............................... 309
Selecting Media................................................. 308
Selecting the Radio.......................................... 309
Setting a Memory Preset............................... 309
Switching the Audio Unit On and Off........309
Using a Cell Phone........................................... 309
Using Seek, Fast Forward and Reverse............................................................. 309
Autolamps........................................................56 Windshield Wiper Activated
Headlamps........................................................ 56
Automatic High Beam Control..................57 Automatic High Beam Indicator..................... 58
Switching the System On and Off.................57
Automatic Transmission............................122 Brake-Shift Interlock......................................... 125
If Your Vehicle Gets Stuck in Mud or Snow................................................................... 126
Progressive Range Selection - PRS.............125
Understanding the Shift Positions of a 6– Speed Automatic Transmission.........122
Understanding Your SelectShift™ Automatic Transmission............................. 123
Automatic Transmission Fluid Check............................................................236
Transmission Fluid Level................................. 236
Auxiliary Power Points
.................................89
110 Volt AC Power Point.................................... 89
12 Volt DC Power Point...................................... 89
Locations................................................................ 89
377
F650750 (TBC) , enUSA, Edition date: 202010, Second-Printing Index
Page 386 of 390

Lug Nuts
See: Changing a Road Wheel........................ 277
M
Maintenance...................................................212 General Information........................................... 212
Manual Climate Control..............................79 Directing the Air..................................................... 79
Setting the Blower Motor Speed.................... 79
Setting the Temperature................................... 79
Switching Defrost On and Off......................... 79
Switching Maximum Air Conditioning On and Off................................................................ 80
Switching Recirculated Air On and Off........................................................................\
80
Switching the Air Conditioning On and Off........................................................................\
. 79
Switching the Climate Control On and Off........................................................................\
. 79
Manual Seats..................................................84 Manual Lumbar ................................................... 85
Moving the Seat Backward and Forward.............................................................. 84
Recline Adjustment............................................ 84
Tilting the Seatback Forward (Two-Passenger Bench Seat)................... 85
Message Center See: Information Displays................................. 70
Mirrors See: Windows and Mirrors................................ 59
Mobile Communications Equipment......19
Motorcraft Parts - 6.7L Diesel.................283
Motorcraft Parts - 7.3L...............................285
N
Noise Pollution Control.................................21 Air Intake System................................................... 21
Body........................................................................\
.... 21
Cooling System...................................................... 21
Engine........................................................................\
21
Exhaust System..................................................... 21
Transmission Enclosure...................................... 21
Normal Scheduled Maintenance...........323 Intelligent Oil-Life Monitor™ - Diesel Engine
Only.................................................................... 323
Normal Maintenance Intervals..................... 324O
Oil Change Indicator Reset......................220
Base Cluster......................................................... 220
High Series Cluster............................................ 220
Oil Check See: Engine Oil Check - 6.7L Diesel.............218
See: Engine Oil Check - 7.3L............................ 217
Opening and Closing the Hood...............213 Closing the Hood................................................ 214
Opening the Hood.............................................. 214
Ordering Additional Owner's Literature.......................................................191
Obtaining a French Owner ’s Manual...........191
Overhead Console
.........................................92
P
Parking Brake
..................................................131
Air Brakes............................................................... 132
Hydraulic Brakes.................................................. 131
Passive Anti-Theft System..........................51 SecuriLock®............................................................ 51
PATS See: Passive Anti-Theft System...................... 51
Perchlorate.........................................................17
Playing Media From a USB Device
.........313
Selecting the USB Device................................ 313
Supported Audio File Formats....................... 313
Power Door Locks See: Locking and Unlocking............................. 49
Power Seats
.....................................................85
Air-Ride Seat......................................................... 85
Power Steering Fluid Check.....................238
Power Take-Off
.............................................126
Power Windows..............................................59
Bounce-Back......................................................... 59
One-Touch Up or Down..................................... 59
Window Lock......................................................... 59
Pre-Collision Assist - Vehicles With: Air Brakes.............................................................161
Blocked Sensors................................................. 162
Pre-Collision Assist Settings.......................... 162
Using the Pre-Collision Assist System........161
Pre-Collision Assist - Vehicles With: Hydraulic Brakes
........................................163
Adjusting the Pre-Collision Assist
Settings............................................................. 165
383
F650750 (TBC) , enUSA, Edition date: 202010, Second-Printing Index