2021 FORD F650/750 heating
[x] Cancel search: heatingPage 64 of 390
Note:
If you repeatedly fold and unfold the
mirrors several times within one minute, the
system may disable to protect the motors
from overheating. It resets to normal
function automatically within three to five
minutes.
You can also fold a mirror manually by
pushing it toward the door window glass.
After you manually adjust the mirror, you
need to reset it.
To reset the power –folding mirror system
and return it to its normal function:
• Fold the mirror manually by pushing it
toward the door window glass.
• Use the power –fold control to fold and
unfold the mirror two or three times.
The mirror makes a sound as it resets.
Heated Exterior Mirrors (If Equipped)
See
Heated Exterior Mirrors (page 81).
Signal Indicator Mirrors
(If Equipped)
The outer portion of the appropriate mirror
housing blinks when you use the direction
indicator.
Clearance Lamps
(If Equipped)
The lower, outer part of the mirror housings
light when you switch on the headlamps
or parking lamps. Telescoping Mirrors
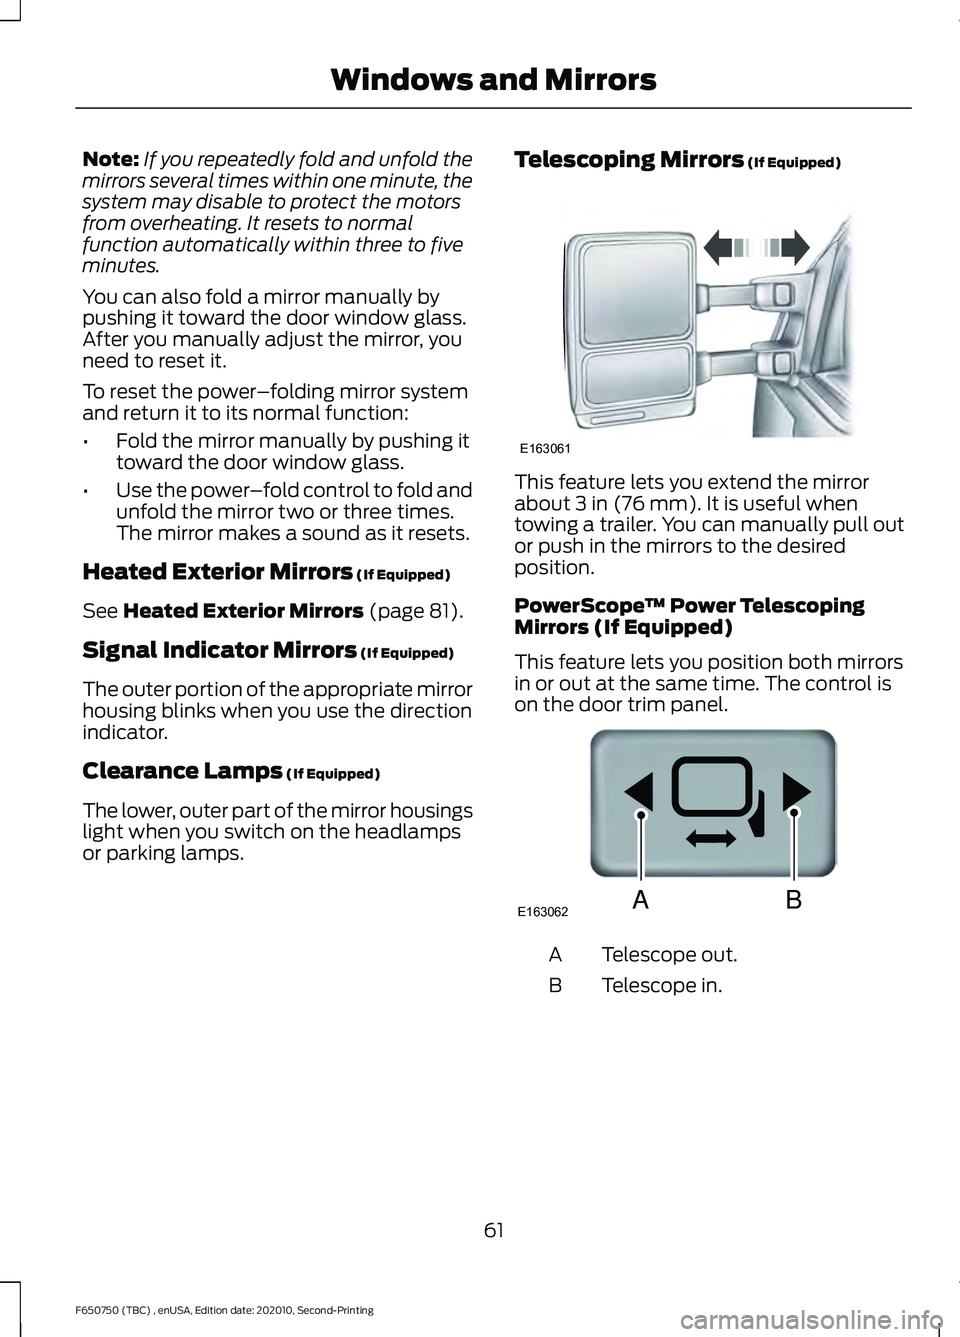
(If Equipped) This feature lets you extend the mirror
about
3 in (76 mm). It is useful when
towing a trailer. You can manually pull out
or push in the mirrors to the desired
position.
PowerScope ™ Power Telescoping
Mirrors (If Equipped)
This feature lets you position both mirrors
in or out at the same time. The control is
on the door trim panel. Telescope out.
A
Telescope in.
B
61
F650750 (TBC) , enUSA, Edition date: 202010, Second-Printing Windows and MirrorsE163061 E163062BA
Page 65 of 390
To adjust the mirrors:
•
Press and hold the control.
• When you position the mirrors in or out,
the motors run as long as you hold the
control. The running motors allow you
to make adjustments as needed.
• After positioning the mirrors, return the
control to the center position to help
protect the motors from overheating.
INTERIOR MIRROR (IF EQUIPPED) WARNING: Do not adjust the mirror
when your vehicle is moving.
Note: Do not clean the housing or glass of
any mirror with harsh abrasives, fuel or other
petroleum or ammonia-based cleaning
products
You can adjust the interior mirror to your
preference. Some mirrors also have a
second pivot point. This lets you move the
mirror head up or down and from side to
side.
Pull the tab below the mirror toward you
to reduce glare at night. SUN VISORS
Slide-on-rod
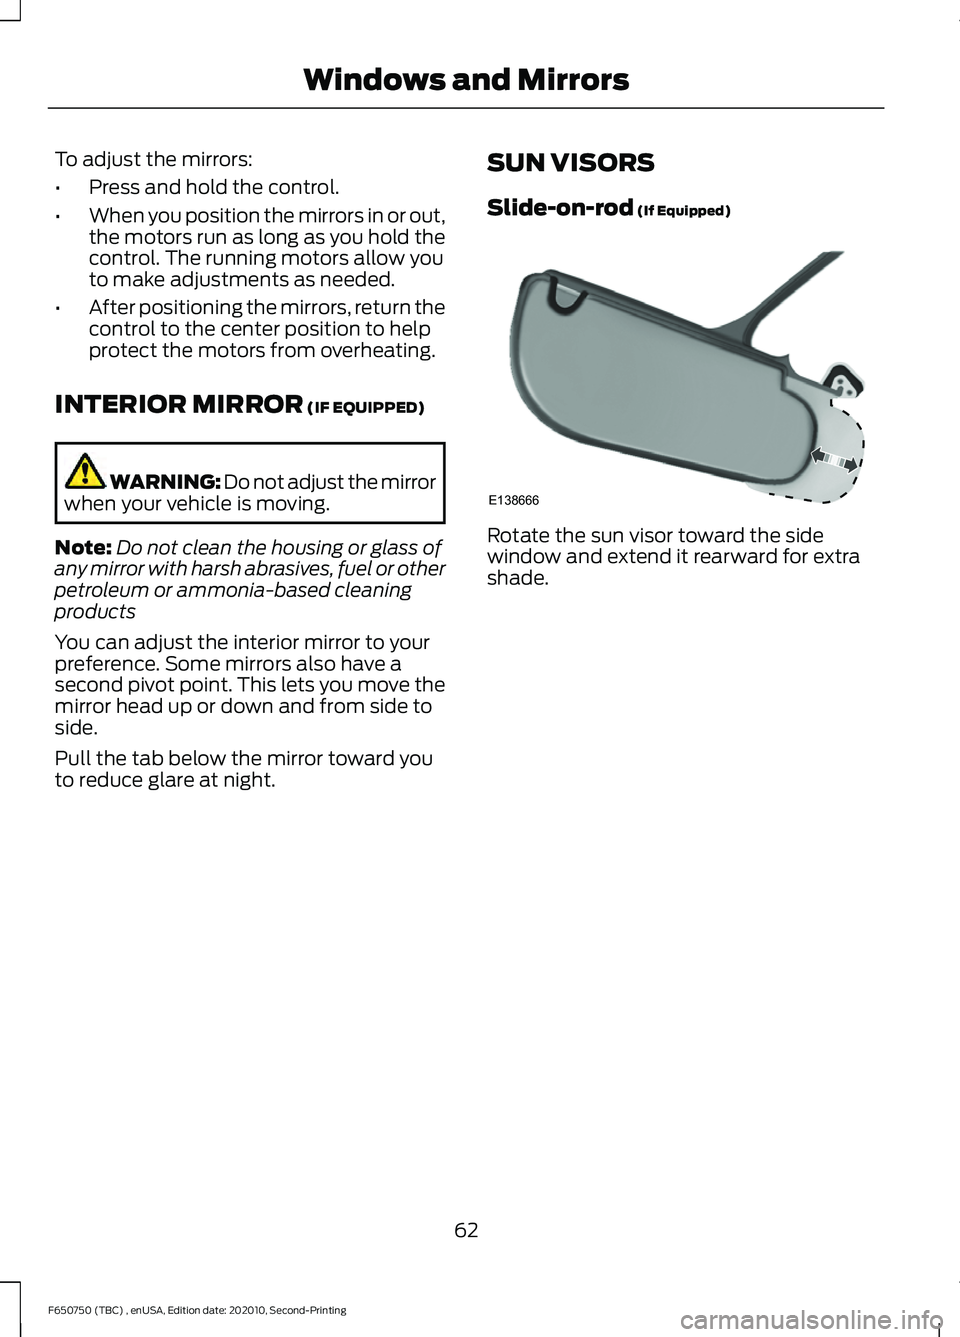
(If Equipped) Rotate the sun visor toward the side
window and extend it rearward for extra
shade.
62
F650750 (TBC) , enUSA, Edition date: 202010, Second-Printing Windows and MirrorsE138666
Page 70 of 390

Door Ajar
Displays when the ignition is on
and any door is not completely
closed.
Electronic Locking Differential (If
Equipped) Illuminates when using the
electronic locking differential.
Engine Coolant Temperature If it illuminates when your vehicle
is moving, this indicates that the
engine is overheating. Stop your
vehicle as soon as it is safe to do so and
switch the engine off. Have your vehicle
checked as soon as possible. See Engine
Coolant Check
(page 226). idk
Engine Oil Pressure If it illuminates with the engine
running, or when you are driving,
this indicates a malfunction.
Stop your vehicle as soon as it is safe to
do so and switch off the engine. Check the
engine oil level.
Note: Do not resume your journey if it
illuminates despite the level being correct.
Have the system checked as soon as
possible.
Exhaust Brake On
(If Equipped) The exhaust brake indicator light
illuminates when you switch the
exhaust brake on.
Fasten Seatbelt Illuminates and a tone sounds
to remind you to fasten your
seatbelt. High Beam Illuminates when you switch on
the high beam headlamps. It
flashes when you use the
headlamp flasher.
Hydromax Illuminates to indicate normal
hydromax booster reserve
system activation when the
engine is off and the service brake pedal is
applied. This light may also illuminate
momentarily if the engine is running and
the driver turns the steering wheel fully in
one direction while braking. If the light
remains on while the engine is running, this
indicates inadequate hydraulic booster
pressure or reserve pump system failure.
Stop the vehicle as soon as possible and
seek service immediately by your
authorized dealer.
Parking Lamps Illuminates when you switch the
parking lamps on.
Low Fuel Level
(If Equipped) Illuminates when the fuel level
is low or the fuel tank is nearly
empty. Refuel as soon as
possible.
Parking Brake Warning Illuminates briefly when you
switch the ignition to the on
position, with the engine off. It
also illuminates when you apply the
parking brake. If the park brake lamp does
not illuminate at these times, seek service
immediately. Vehicles with the power
parking brake option: If the park brake
warning lamp begins to blink after setting
67
F650750 (TBC) , enUSA, Edition date: 202010, Second-Printing Instrument Cluster E163170 E171217 E71880 E146190 E208810
Page 83 of 390
Air directed to the instrument panel and
footwell air vents turns off. You can also
use this setting to defog and clear the
windshield of a thin covering of ice.
Switching Maximum Air
Conditioning On and Off
Press and release the button for
maximum cooling.
The left-hand and right-hand settings set
to LO, recirculated air flows through the
instrument panel air vents, air conditioning
turns on and the blower motor adjusts to
the highest speed.
Switching Recirculated Air On and
Off Press and release the button to
switch between outside air and
recirculated air.
The air currently in the passenger
compartment recirculates. This may
reduce the time needed to cool the interior
(when used with A/C) and reduce
unwanted odors from entering your vehicle.
Note: Recirculated air may turn off (or
prevent you from switching on) in all air flow
modes except MAX A/C to reduce the risk
of fogging. Recirculation may also turn on
and off in various air distribution control
combinations during hot weather in order
to improve cooling efficiency.
HINTS ON CONTROLLING THE
INTERIOR CLIMATE
General Hints
Note: Prolonged use of recirculated air may
cause the windows to fog up.
Note: You may feel a small amount of air
from the footwell air vents regardless of the
air distribution setting. Note:
To reduce humidity build-up inside
your vehicle, do not drive with the system
switched off or with recirculated air always
switched on.
Note: Do not place objects under the front
seats as this may interfere with the airflow
to the rear seats.
Note: Remove any snow, ice or leaves from
the air intake area at the base of the
windshield.
Note: To improve the time to reach a
comfortable temperature in hot weather,
drive with the windows open until you feel
cold air through the air vents.
Quickly Heating the Interior
1. Adjust the blower motor speed to the highest speed setting.
2. Adjust the temperature control to the highest setting.
3. Direct air to the footwell air vents.
Recommended Settings for
Heating
1. Adjust the blower motor speed to the center setting.
2. Adjust the temperature control to the midway point of the hot settings.
3. Direct air to the footwell air vents.
Quickly Cooling the Interior
1. Select MAX A/C.
2. Drive with the windows open for a short
period of time.
Recommended Settings for
Cooling
1. Adjust the blower motor speed to the center setting.
2. Adjust the temperature control to the midway point of the cold settings.
80
F650750 (TBC) , enUSA, Edition date: 202010, Second-Printing Climate Control
Page 104 of 390
We recommend the use of Top Tier Diesel
fuel where available to help minimize
engine deposits and maintain optimal
vehicle and engine performance. Look for
the Top Tier logo at the station. For
additional information, visit
www
.t op tier g a s. c om .
Note: The vehicle Warranty does not cover
damage caused by using an improper type
of fuel or fuel additive.
Note: Do not blend used engine oil with
diesel fuel under any circumstances.
Blending used oil with the fuel significantly
increases exhaust emissions and reduces
engine life due to increased internal wear. Using low sulfur diesel fuel with
16-500 ppm or high sulfur diesel
fuel with greater than 500 ppm
in your diesel engine will cause certain
emission components to malfunction,
which could also cause the service engine
soon light to illuminate, indicating an
emissions-related concern.
Diesel fuel is adjusted seasonally for cold
temperature. For best results at
temperatures below 19°F (-7°C), it is
recommended to use a diesel fuel which
has been seasonally adjusted for the
ambient conditions.
Fuel Requirements - Choosing The
Right Fuel: Vehicles Operated
Where Ultra Low Sulfur Diesel Fuel
Is Not Required
For the engine to operate reliably on
low-sulfur or high-sulfur diesel fuel, the
engine must be a factory built high-sulfur
engine, available as a dealer order option
for select markets, or an ultra low sulfur
diesel fuel configured engine that has been
retrofitted for high-sulfur diesel fuel using
authorized dealer service parts. Failure to use retrofit components other than those
available through your authorized dealer
will result in coolant system damage,
engine overheating, selective catalyst
reduction system or diesel particulate filter
damage and possible base engine damage.
Use only a diesel engine configured for use
with high sulfur diesel fuel in markets with
diesel fuel that has sulfur content greater
than 15 ppm. Using low sulfur diesel fuel
with 16–500 ppm or high sulfur diesel fuel
with greater than 500 ppm in a diesel
engine requiring only Ultra Low Sulfur
Diesel fuel could result in damage to
engine emission control devices and the
aftertreatment system, potentially
rendering the vehicle inoperable.
Vehicles with engines configured for use
with high sulfur diesel fuel are only
available for sale in countries where ultra
low sulfur diesel fuel is generally not
available or mandated by the government.
Vehicles originally sold in a ultra low sulfur
diesel fuel market that are subsequently
exported to non- ultra low sulfur diesel fuel
markets will need to be retrofitted at the
customer
’s expense using authorized
dealer service parts in order to be reliably
operated on non- ultra low sulfur diesel
fuel.
Biodiesel WARNING:
Do not mix diesel with
gasoline, gasohol or alcohol. This could
cause an explosion.
Biodiesel fuel is a chemically converted
product from renewable fuel sources, such
as vegetable oils, animal fats and waste
cooking greases.
101
F650750 (TBC) , enUSA, Edition date: 202010, Second-Printing Fuel and Refueling
Page 105 of 390
To help achieve acceptable engine
performance and durability when using
biodiesel in your vehicle:
•
Confirm the biodiesel content of the
fuel to be 20% biodiesel or less, also
known as B20.
• Only use biodiesel fuel of good quality
that complies with industry standards.
• Follow the recommended service
maintenance intervals. See
Scheduled Maintenance (page 319).
• Do not store biodiesel fuel in the fuel
tank for more than 1 month.
• Consider changing brands or reducing
biodiesel content if you have cold
temperature fuel gelling issues or a
frequent LOW FUEL PRESSURE
message appearing.
Note: Do not use home heating oil,
agricultural fuel, raw fats and oils, waste
cooking greases, biodiesel fuels greater than
20% or any diesel fuel not intended for
highway use. Red dye is used to identify
fuels intended for agricultural and
non-highway use. Damage to the fuel
injection system, engine and exhaust
catalyst can occur if an improper fuel is
used.
Use of biodiesel in concentrations greater
than 20% could cause damage to your
vehicle, including engine and/or exhaust
catalyst and particulate filter failures.
Concentrations greater than 20% can also
cause fuel filter restrictions that could
result in a lack of power or damage to fuel
system components, including fuel pump
and fuel injector failures.
SAE 5W-40 or SAE 15W-40 oil is
recommended for fuels with greater than
5% biodiesel, also known as B5. Follow
the recommended oil change intervals and
other maintenance when operating on
biodiesel. See
Special Operating
Conditions Scheduled Maintenance
(page
329). Look for a label on the fuel pump to
confirm the amount of biodiesel contained
in a diesel fuel. Biodiesel content is often
indicated with the letter B followed by the
percent of biodiesel in the fuel. For
example, B20 indicates a fuel containing
20% biodiesel. Ask the service station
attendant to confirm the biodiesel content
of a diesel fuel if you do not see a label on
the fuel pump.
Note:
Biodiesel fuels degrade more easily
than diesel fuels not containing biodiesel.
Degraded or oxidized biodiesel can damage
fuel system seals and plastics and corrode
steel parts. If you plan to park or store your
vehicle for more than 1 month, empty your
vehicle fuel tank of biodiesel fuel. Fill the
tank with a pure petroleum-based diesel
fuel and run your vehicle for a minimum of
30 minutes.
During cold weather, if you have problems
operating on biodiesel, you may need to
use a diesel fuel with lower biodiesel
content, try another brand, or discontinue
the use of biodiesel.
Diesel Fuel Additives
It should not be necessary to add any
aftermarket additives to your fuel if you
use a high quality diesel fuel that conforms
to ASTM industry specifications.
Aftermarket additives can damage the fuel
injector system or engine.
Use Motorcraft® cetane booster or an
equivalent cetane booster additive if you
suspect fuel has low cetane. Use
Motorcraft® anti-gel & performance
improver or an equivalent additive if there
is fuel gelling.
Do not use alcohol-based additives to
improve cetane quality, to prevent fuel
gelling or any other use. The use of alcohol
additives may result in damage to the fuel
injectors and system. See Capacities and
Specifications (page 288).
102
F650750 (TBC) , enUSA, Edition date: 202010, Second-Printing Fuel and Refueling
Page 117 of 390
1. Remove the diesel exhaust fluid
container cap. Place the spout on to
the container and tighten it until you
feel a strong resistance.
2. Remove the diesel exhaust fluid tank filler cap.
3. Insert the spout into the filler neck until
the seal on the spout seats on to the
filler neck. Pour the fluid into the tank.
When the tank is full the fluid stops. In
case of direct fill tank, the spout does
not seal against the fill tank interface
and does not stop the flowing
automatically.
4. Return the container to the vertical position slightly below the diesel
exhaust fluid filler neck. Allow any fluid
remaining in the spout to drain back in
to the container.
5. Remove the spout from the diesel exhaust fluid filler neck. Replace the
diesel exhaust fluid tank cap.
6. Remove the spout from the diesel exhaust fluid container and replace the
cap.
Note: If there is diesel exhaust fluid left in
the container retain it for later use. The
spout is re-useable. Wash the spout with
clean water prior to storage. Do not use the
diesel exhaust fluid spout with any other
fluid.
Filling the Diesel Exhaust Fluid Tank in
Cold Climates
Diesel exhaust fluid freezes if the ambient
temperature is below 12°F (-11°C). Your
vehicle has a preheating system which
allows diesel exhaust fluid to operate
below
12°F (-11°C). If you do not use your
vehicle for an extended period when the
ambient temperature is below 12°F (-11°C),
the fluid in the tank freezes. If the tank is
overfilled and the fluid freezes it may
damage the tank. This is not covered by
the vehicle warranty. Diesel Exhaust Fluid Warning
Messages and Vehicle Operations WARNING:
Diesel exhaust fluid
must be refilled when low or replaced
when contaminated or your vehicle
speed becomes limited to
50 mph
(80 km/h). In these conditions, drive with
caution and refill diesel exhaust fluid
immediately. If the diesel exhaust fluid
becomes empty or contaminated and
fluid is not replaced, your vehicle
becomes limited to engine idle only once
stopped. In these conditions, be cautious
where you stop your vehicle because you
may not be able to drive long distances
or maintain highway speeds until you
refill or replace the diesel exhaust fluid.
Note: Diluted diesel exhaust fluid must be
drained and replaced. WARNING:
Tampering with or
disabling the selective catalytic
reduction system results in severe
vehicle performance limitation including
eventual speed limiting to
5 mph
(8 km/h).
The information display shows a series of
messages about the amount of diesel
exhaust fluid available. A systems check
displays messages indicating the amount
of diesel exhaust fluid available or displays
a warning message indicating the
approximate distance remaining as the
fluid in the diesel exhaust fluid tank nears
empty. See
Information Messages
(page 73).
114
F650750 (TBC) , enUSA, Edition date: 202010, Second-Printing Engine Emission Control
Page 154 of 390

The set speed does not erase.
Resuming the Set Speed
Press and release the button.
Your vehicle speed returns to the
previously set speed and gap setting. The
set speed displays continuously in the
information display when the system is
active.
Note: Only use resume if you are aware of
the set speed and intend to return to it.
Automatic Cancellation
The system is not functional at vehicle
speeds below 12 mph (20 km/h). The
information display indicates low engine
speed, an audible alarm sounds and the
automatic braking releases if the vehicle
drops below this speed.
Automatic cancellation can also occur
when:
• The tires lose traction.
• You apply the parking brake.
Note: If the engine speed drops too low, an
audible warning sounds and a message
appears in the information display.
Automatic braking releases.
Hilly Condition and Trailer Tow
Usage
You should select a lower gear when the
system is active in situations such as
prolonged downhill driving on steep
grades, for example in mountainous areas.
The system needs additional engine
braking in these situations to reduce the
load on the vehicle ’s regular brake system
to prevent it from overheating. Note:
An audible alarm sounds and the
system shuts down if it applies brakes for
an extended period of time. This allows the
brakes to cool. The system functions
normally again after the brakes cool.
Note: When towing with adaptive cruise
control, switch on Tow/Haul Mode and
Diesel Engine Brake.
Switching Adaptive Cruise Control
Off Press and release the button
when the system is in standby
mode, or switch the ignition off.
Note: You erase the set speed and gap
setting when you switch the system off.
Detection Issues WARNING: On rare occasions,
detection issues can occur due to the
road infrastructures, for example bridges,
tunnels and safety barriers. In these
cases, the system may brake late or
unexpectedly. At all times, you are
responsible for controlling your vehicle,
supervising the system and intervening,
if required. WARNING:
If the system
malfunctions, have your vehicle checked
as soon as possible.
The radar sensor has a limited field of
view. It may not detect vehicles at all or
detect a vehicle later than expected in
some situations. The lead vehicle graphic
does not illuminate if the system does not
detect a vehicle in front of you.
151
F650750 (TBC) , enUSA, Edition date: 202010, Second-Printing Cruise Control - Vehicles With: Adaptive Cruise Control E265297