2021 FORD F-600 instrument panel
[x] Cancel search: instrument panelPage 351 of 666
GENERAL INFORMATION
Have your vehicle serviced regularly to help
maintain its roadworthiness and resale
value. There is a large network of
authorized dealers that are there to help
you with their professional servicing
expertise. We believe that their specially
trained technicians are best qualified to
service your vehicle properly and expertly.
They are supported by a wide range of
highly specialized tools developed
specifically for servicing your vehicle.
If your vehicle requires professional service,
an authorized dealer can provide the
necessary parts and service. Check your
warranty information to find out which
parts and services are covered.
Use only recommended fuels, lubricants,
fluids and service parts conforming to
specifications. Motorcraft® parts are
designed and built to provide the best
performance in your vehicle.
Precautions
•
Do not work on a hot engine.
• Make sure that nothing gets caught in
moving parts.
• Do not work on a vehicle with the
engine running in an enclosed space,
unless you are sure you have enough
ventilation.
• Keep all open flames and other burning
material (such as cigarettes) away
from the battery and all fuel related
parts.
Working with the Engine Off
1. Set the parking brake and shift the transmission to park (P).
2. Switch off the engine.
3. Block the wheels. Working with the Engine On WARNING: To reduce the risk of
vehicle damage and personal burn
injuries, do not start your engine with the
air cleaner removed and do not remove
it while the engine is running.
1. Set the parking brake and shift the transmission to park (P).
2. Block the wheels.
OPENING AND CLOSING THE
HOOD
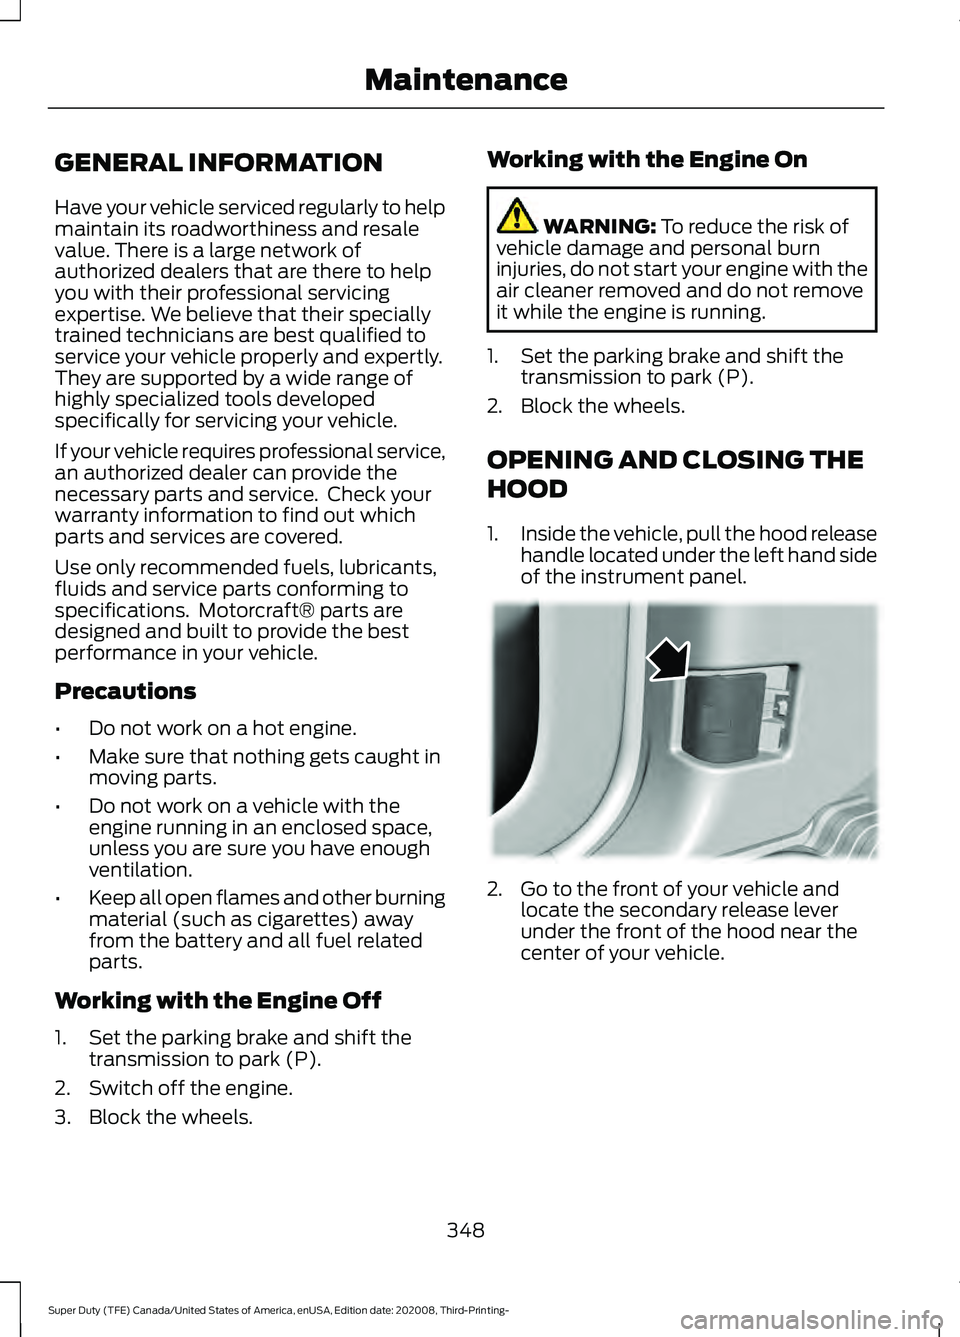
1. Inside the vehicle, pull the hood release
handle located under the left hand side
of the instrument panel. 2. Go to the front of your vehicle and
locate the secondary release lever
under the front of the hood near the
center of your vehicle.
348
Super Duty (TFE) Canada/United States of America, enUSA, Edition date: 202008, Third-Printing- Maintenance E166491
Page 398 of 666
To clean the windshield and wiper blades:
•
Clean the windshield with a
non-abrasive glass cleaner. When
cleaning the interior of the windshield,
avoid getting any glass cleaner on the
instrument panel or door panels. Wipe
any glass cleaner off these surfaces
immediately.
• For windshields contaminated with
tree sap, chemicals, wax or bugs, clean
the entire windshield using steel wool
(no greater than 0000 grade) in a
circular motion and rinse with water.
• Clean the wiper blades with isopropyl
rubbing alcohol or windshield washer
concentrate.
Note: Do not use razor blades or other
sharp objects to clean or remove decals
from the inside of the heated rear window.
The vehicle warranty does not cover
damage caused to the heated rear window
grid lines.
CLEANING THE INTERIOR WARNING: Do not use cleaning
solvents, bleach or dye on the vehicle's
seatbelts, as these actions may weaken
the belt webbing. WARNING:
On vehicles equipped
with seat-mounted airbags, do not use
chemical solvents or strong detergents.
Such products could contaminate the
side airbag system and affect
performance of the side airbag in a crash. For fabric, carpets, cloth seats and seats
equipped with side airbags:
•
Remove dust and loose dirt with a
vacuum cleaner.
• Remove light stains and soil with
Motorcraft Professional Strength
Carpet & Upholstery Cleaner.
• If grease or tar is present on the
material, spot-clean the area first with
Motorcraft Spot and Stain Remover. In
Canada, use Motorcraft Multi-Purpose
Cleaner.
• If a ring forms on the fabric after spot
cleaning, clean the entire area
immediately (but do not oversaturate)
or the ring will set.
• Do not use household cleaning
products or glass cleaners, which can
stain and discolor the fabric and affect
the flame retardant abilities of the seat
materials.
Note: Cashmere and microfiber cloth fabric
is made of polyester microfiber with
micro-porous polyurethane. Using
commercially available fabric cleaners can
cause permanent damage.
Note: Do not use commercially available
leather and vinyl cleaning products on
cashmere or microfiber cloth fabric.
Note: Your vehicle may have cashmere or
microfiber cloth fabric on the seats,
headliner, floor mats and door panels.
Depending on the type of stain, use water,
lemon juice or pure ethyl alcohol when
cleaning. For cleaning microfiber cloth,
refer to the following chart:
395
Super Duty (TFE) Canada/United States of America, enUSA, Edition date: 202008, Third-Printing- Vehicle Care
Page 400 of 666
CLEANING THE INSTRUMENT
PANEL AND INSTRUMENT
CLUSTER LENS
WARNING: Do not use chemical
solvents or strong detergents when
cleaning the steering wheel or
instrument panel to avoid contamination
of the airbag system.
Note: Follow the same procedure as
cleaning leather seats for cleaning leather
instrument panels and leather interior trim
surfaces. See
Cleaning Leather Seats
(page 397).
Clean the instrument panel and cluster
lens with a clean, damp and soft cloth,
then use a clean, dry and soft cloth to dry
these areas.
• Avoid cleaners or polishes that increase
the gloss of the upper portion of the
instrument panel. The dull finish in this
area helps protect you from
undesirable windshield reflection.
• Do not use any household cleaning
products or glass cleaners as these
may damage the finish of the
instrument panel, interior trim and
cluster lens.
• Wash or wipe your hands clean if you
have been in contact with certain
products such as insect repellent and
suntan lotion to avoid possible damage
to the interior painted surfaces.
• Do not allow air fresheners and hand
sanitizers to spill onto interior surfaces.
If a spill occurs, wipe off immediately.
Your warranty may not cover these
damages.
If a staining liquid like coffee or juice has
been spilled on the instrument panel or on
interior trim surfaces: 1. Wipe up spilled liquid using a clean,
soft cloth as quickly as possible.
2. Use Motorcraft Premium Leather and Vinyl Cleaner or a commercially
available leather cleaning product for
automotive interiors. Test any cleaner
or stain remover on an inconspicuous
area.
3. Alternatively, wipe the surface with a clean, soft cloth and a mild soap and
water solution. Dry the area with a
clean, soft cloth.
4. If necessary, apply more soap and water solution or cleaning product to
a clean, soft cloth and press it onto the
soiled area. Allow this to set at room
temperature for 30 minutes.
5. Remove the soaked cloth, then with a clean, damp cloth, use a rubbing
motion for 60 seconds on the soiled
area.
6. Dry the area with a clean, soft cloth.
CLEANING LEATHER SEATS
(IF
EQUIPPED)
Without King Ranch Edition
Note: Follow the same procedure as
cleaning leather seats for cleaning leather
instrument panels and leather interior trim
surfaces.
For routine cleaning, wipe the surface with
a soft, damp cloth and a mild soap and
water solution. Dry the area with a clean,
soft cloth.
For cleaning and removing spots and stains
such as dye transfer, use Motorcraft
Premium Leather and Vinyl Cleaner or a
commercially available leather cleaning
product for automotive interiors.
Note: Test any cleaner or stain remover on
an inconspicuous area.
397
Super Duty (TFE) Canada/United States of America, enUSA, Edition date: 202008, Third-Printing- Vehicle Care
Page 476 of 666
VEHICLE IDENTIFICATION
NUMBER
Locating the Vehicle Identification
Number
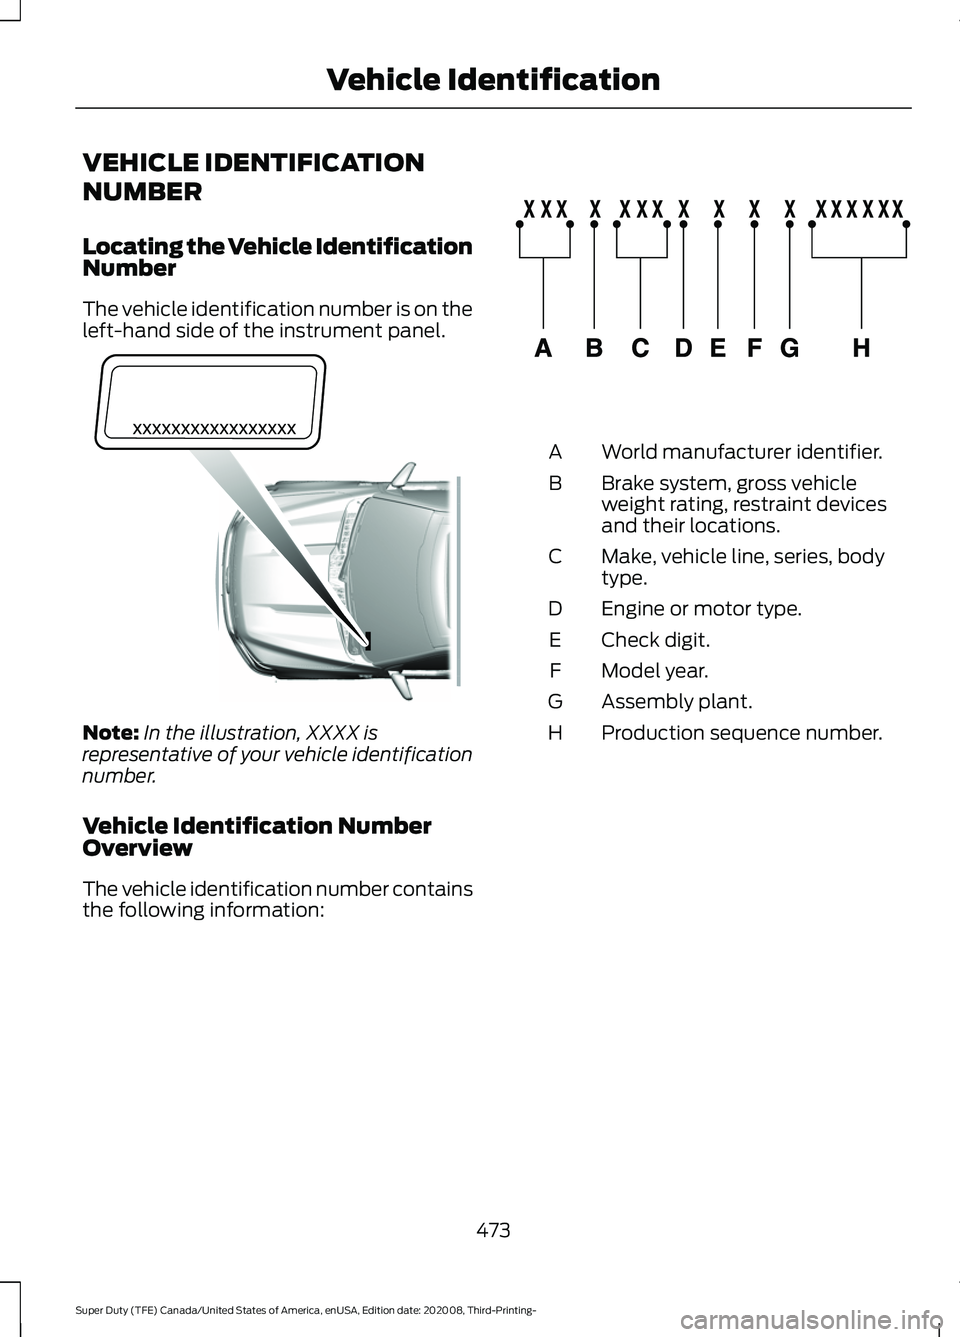
The vehicle identification number is on the
left-hand side of the instrument panel.
Note:
In the illustration, XXXX is
representative of your vehicle identification
number.
Vehicle Identification Number
Overview
The vehicle identification number contains
the following information: World manufacturer identifier.
A
Brake system, gross vehicle
weight rating, restraint devices
and their locations.
B
Make, vehicle line, series, body
type.
C
Engine or motor type.
D
Check digit.
E
Model year.
F
Assembly plant.
G
Production sequence number.
H
473
Super Duty (TFE) Canada/United States of America, enUSA, Edition date: 202008, Third-Printing- Vehicle IdentificationE311767 E142477
Page 490 of 666
USB PORT
WARNING: Driving while distracted
can result in loss of vehicle control, crash
and injury. We strongly recommend that
you use extreme caution when using any
device that may take your focus off the
road. Your primary responsibility is the
safe operation of your vehicle. We
recommend against the use of any
hand-held device while driving and
encourage the use of voice-operated
systems when possible. Make sure you
are aware of all applicable local laws
that may affect the use of electronic
devices while driving.
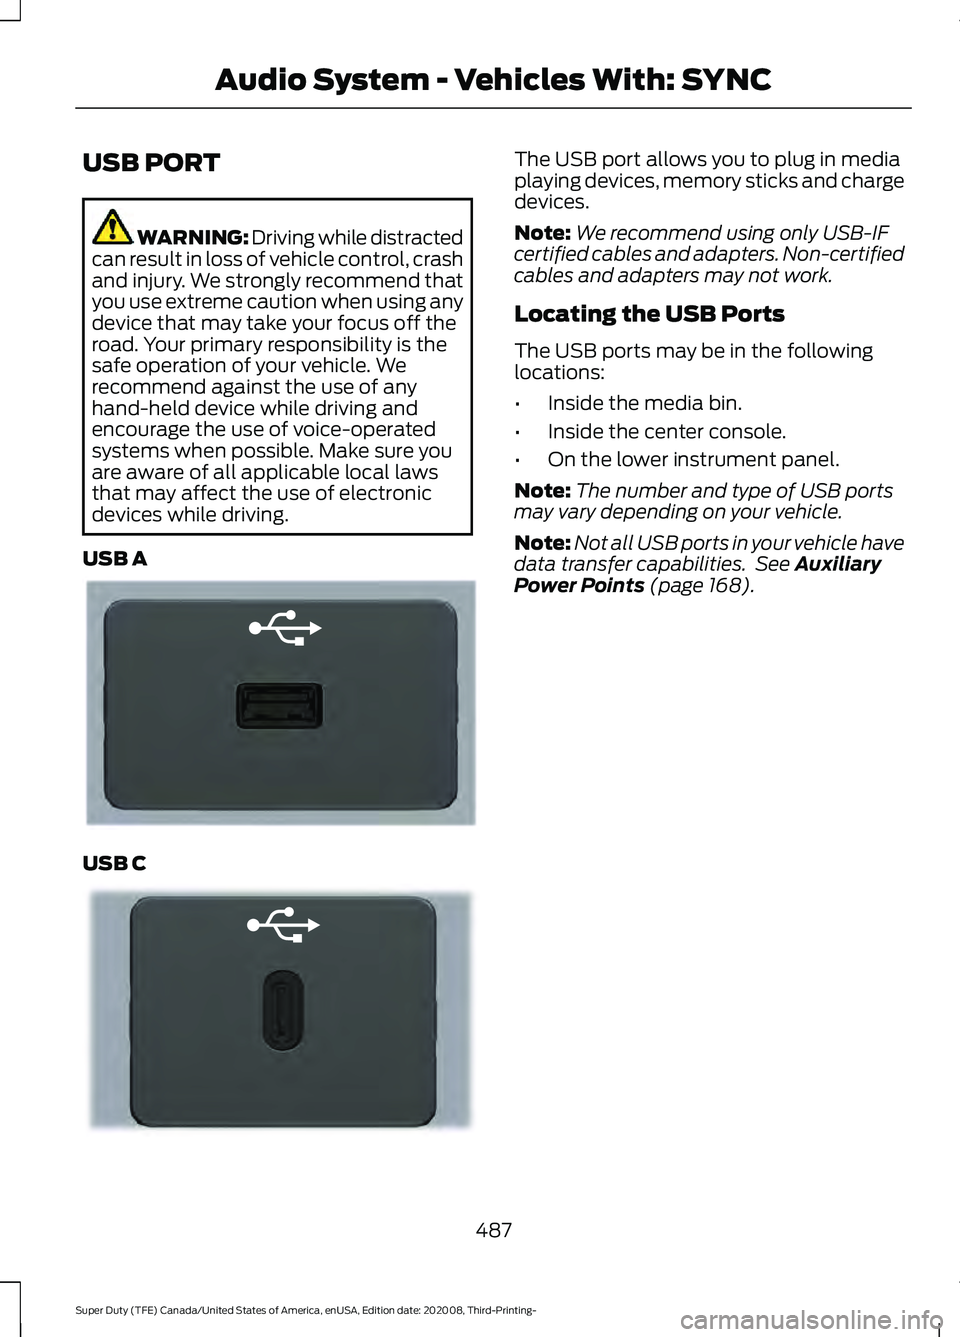
USB A USB C The USB port allows you to plug in media
playing devices, memory sticks and charge
devices.
Note:
We recommend using only USB-IF
certified cables and adapters. Non-certified
cables and adapters may not work.
Locating the USB Ports
The USB ports may be in the following
locations:
• Inside the media bin.
• Inside the center console.
• On the lower instrument panel.
Note: The number and type of USB ports
may vary depending on your vehicle.
Note: Not all USB ports in your vehicle have
data transfer capabilities. See Auxiliary
Power Points (page 168).
487
Super Duty (TFE) Canada/United States of America, enUSA, Edition date: 202008, Third-Printing- Audio System - Vehicles With: SYNCE201595 E301114
Page 498 of 666
USB PORT
WARNING: Driving while distracted
can result in loss of vehicle control, crash
and injury. We strongly recommend that
you use extreme caution when using any
device that may take your focus off the
road. Your primary responsibility is the
safe operation of your vehicle. We
recommend against the use of any
hand-held device while driving and
encourage the use of voice-operated
systems when possible. Make sure you
are aware of all applicable local laws
that may affect the use of electronic
devices while driving.
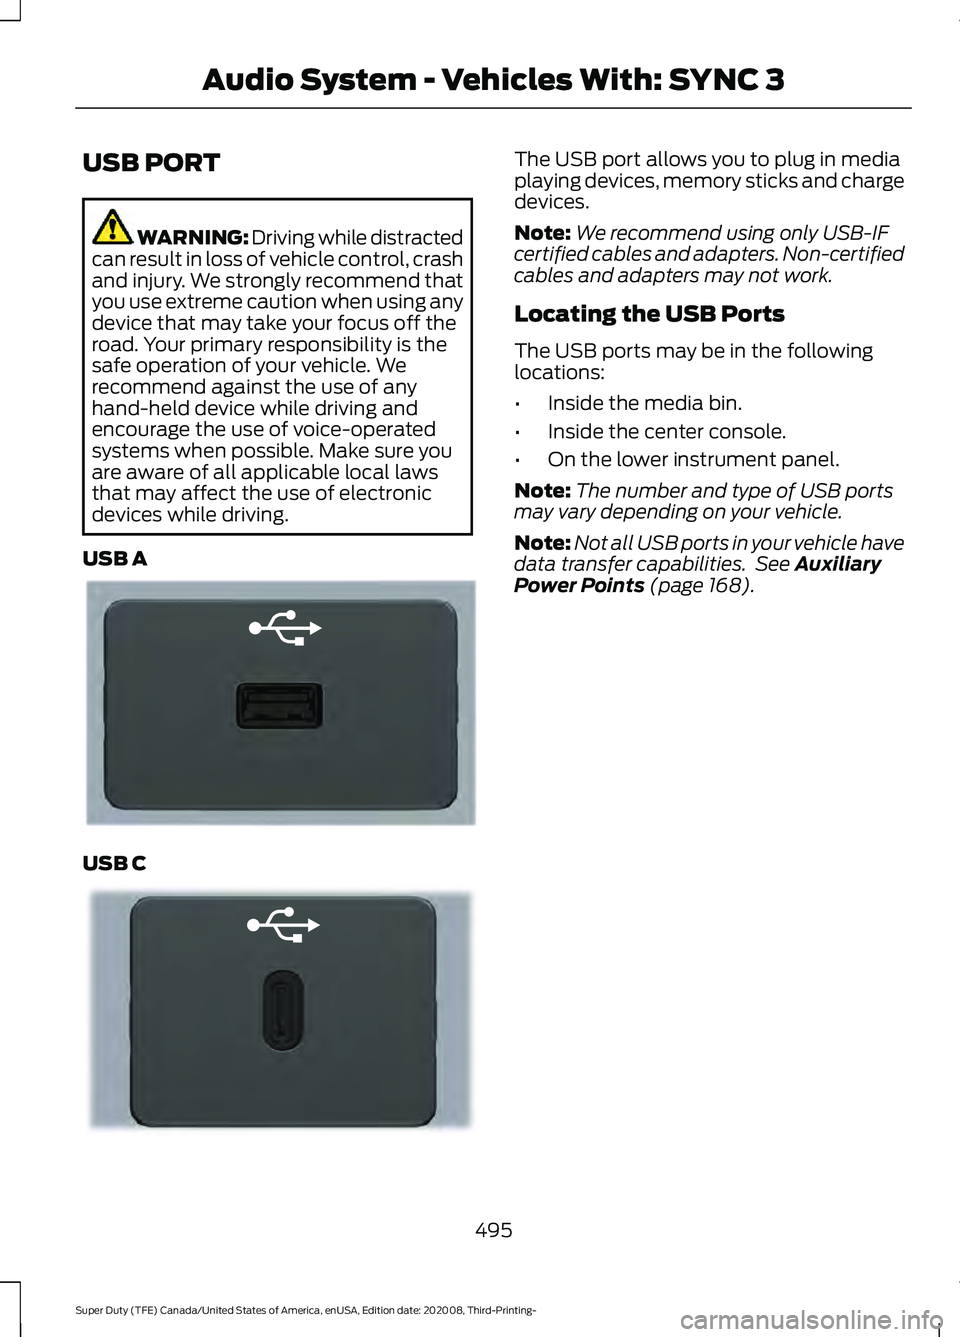
USB A USB C The USB port allows you to plug in media
playing devices, memory sticks and charge
devices.
Note:
We recommend using only USB-IF
certified cables and adapters. Non-certified
cables and adapters may not work.
Locating the USB Ports
The USB ports may be in the following
locations:
• Inside the media bin.
• Inside the center console.
• On the lower instrument panel.
Note: The number and type of USB ports
may vary depending on your vehicle.
Note: Not all USB ports in your vehicle have
data transfer capabilities. See Auxiliary
Power Points (page 168).
495
Super Duty (TFE) Canada/United States of America, enUSA, Edition date: 202008, Third-Printing- Audio System - Vehicles With: SYNC 3E201595 E301114
Page 533 of 666
Function
Button
Playlists
Artist
Albums
Songs
Genres
Podcasts
Audio books
Composers
This button allows you to choose a specific
letter to view within the category you are
browsing.
A-Z Jump
If available, this allows you to browse the
folders and files on your USB device.
Explore Device
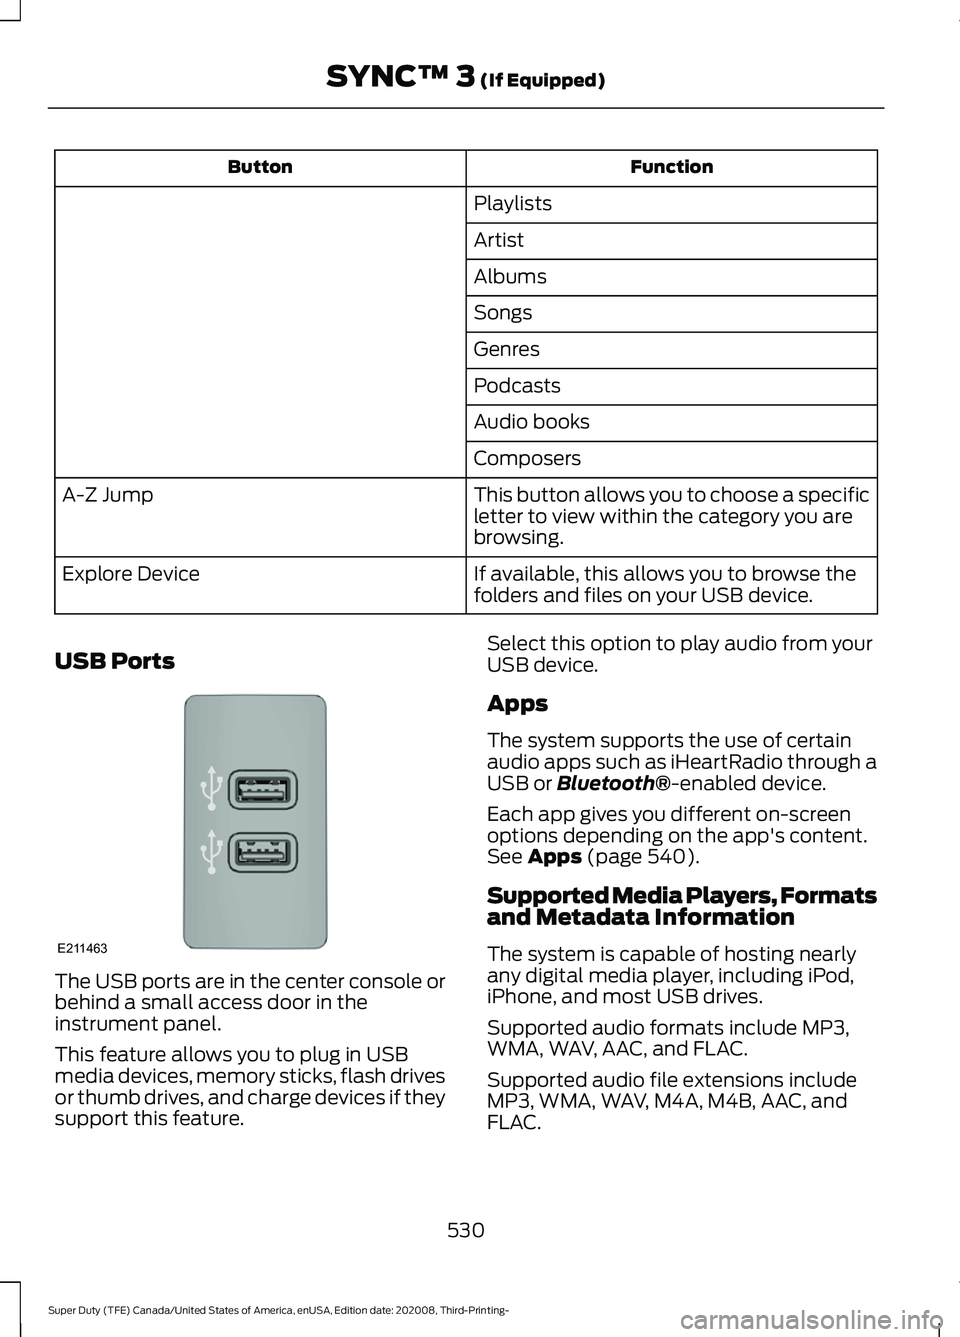
USB Ports The USB ports are in the center console or
behind a small access door in the
instrument panel.
This feature allows you to plug in USB
media devices, memory sticks, flash drives
or thumb drives, and charge devices if they
support this feature. Select this option to play audio from your
USB device.
Apps
The system supports the use of certain
audio apps such as iHeartRadio through a
USB or Bluetooth®-enabled device.
Each app gives you different on-screen
options depending on the app's content.
See
Apps (page 540).
Supported Media Players, Formats
and Metadata Information
The system is capable of hosting nearly
any digital media player, including iPod,
iPhone, and most USB drives.
Supported audio formats include MP3,
WMA, WAV, AAC, and FLAC.
Supported audio file extensions include
MP3, WMA, WAV, M4A, M4B, AAC, and
FLAC.
530
Super Duty (TFE) Canada/United States of America, enUSA, Edition date: 202008, Third-Printing- SYNC™ 3
(If Equipped)E211463
Page 534 of 666
Supported USB file systems include: FAT,
exFAT, and NTFS.
SYNC 3 is also able to organize the media
from your USB device by metadata tags.
Metadata tags, which are descriptive
software identifiers embedded in the
media files, provide information about the
file.
If your indexed media files contain no
information embedded in these metadata
tags, SYNC 3 may classify the empty
metadata tags as unknown.
SYNC 3 is capable of indexing up to
50,000 songs per USB device, for up to 10
devices.
CLIMATE
Touch the climate button on the
touchscreen to access your climate control
features.
Note:
You can switch temperature units
between Fahrenheit and Celsius. See
Settings (page 543).
Accessing the Climate Control
Menu Touch the button to access
additional controls for the front
climate system.
Directing the Airflow Touch the button to direct
airflow to the windshield air
vents and de-mister.
Touch the button to direct
airflow to the instrument panel
air vents.
Touch the button to direct
airflow to the footwell air vents. You can direct air through any combination
of these air vents.
Setting the Blower Motor Speed Touch up or down to increase or
decrease the volume of air that
circulates in your vehicle.
Setting the Temperature
Touch up or down on the left-hand
temperature control to set the left-hand
temperature.
Note: This control also adjusts the
right-hand side temperature when you
switch off dual zone mode.
Touch up or down on the right-hand
temperature control to set the right-hand
temperature.
Switching Auto Mode On and Off Touch the button to switch on
automatic operation, then set
the temperature.
The system adjusts the blower motor
speed, air distribution, air conditioning
operation, and outside or recirculated air
to reach and maintain the temperature you
have set.
Switching the Air Conditioning On
and Off A pop-up appears on the screen
to display the air conditioning
options.
MAX A/C:
Touch the button to activate
and maximize cooling. The driver and
passenger temperatures are set to LO,
recirculated air flows through the
instrument panel vents, air conditioning
automatically turns on and the fan
automatically adjusts to the highest speed.
531
Super Duty (TFE) Canada/United States of America, enUSA, Edition date: 202008, Third-Printing- SYNC™ 3
(If Equipped)E265038 E244097