2021 FORD F-600 instrument panel
[x] Cancel search: instrument panelPage 148 of 666
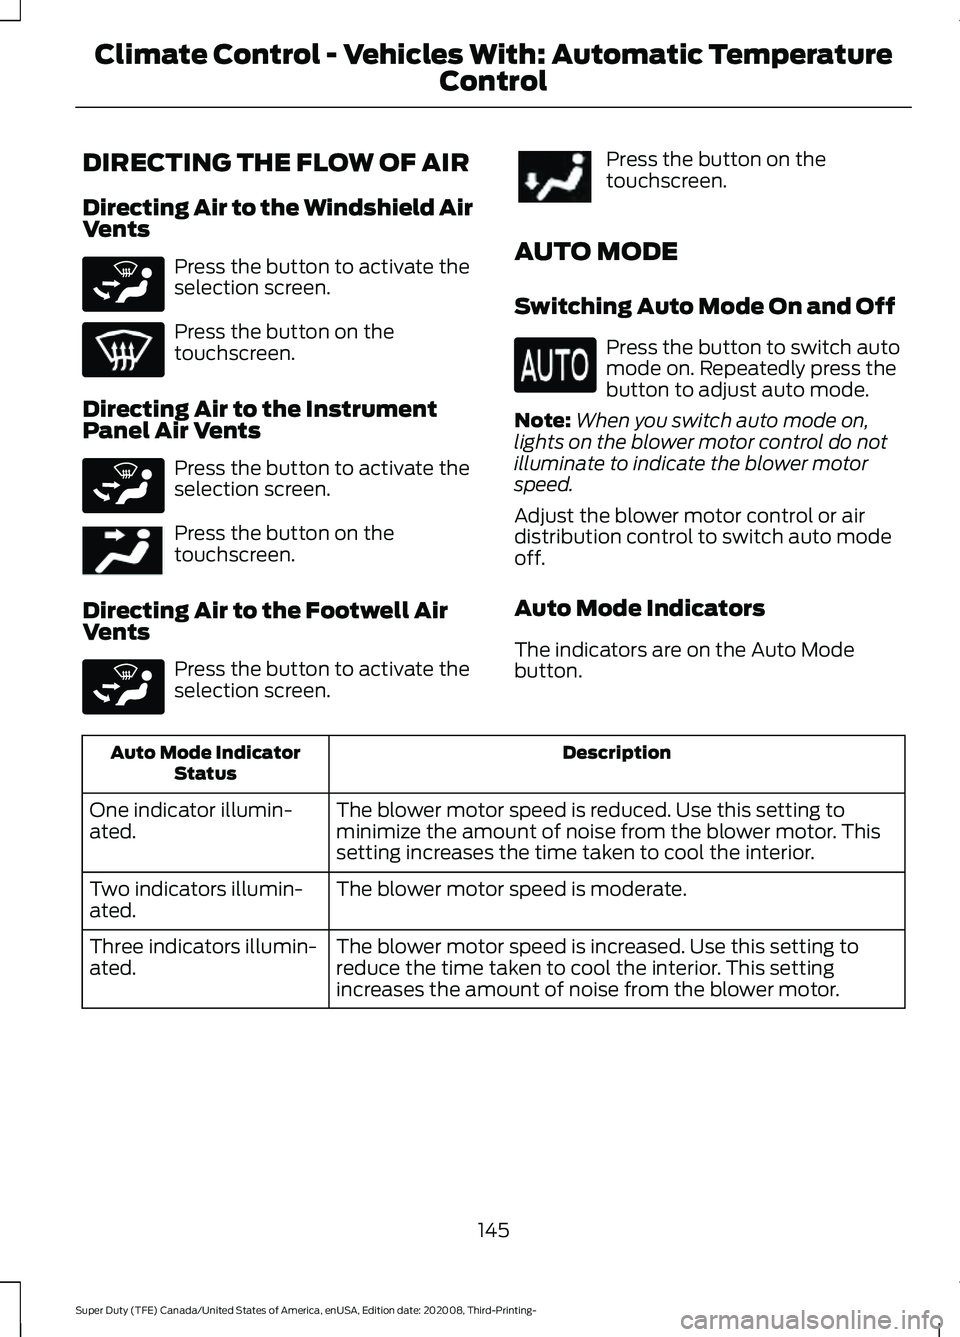
DIRECTING THE FLOW OF AIR
Directing Air to the Windshield Air
Vents
Press the button to activate the
selection screen.
Press the button on the
touchscreen.
Directing Air to the Instrument
Panel Air Vents Press the button to activate the
selection screen.
Press the button on the
touchscreen.
Directing Air to the Footwell Air
Vents Press the button to activate the
selection screen. Press the button on the
touchscreen.
AUTO MODE
Switching Auto Mode On and Off Press the button to switch auto
mode on. Repeatedly press the
button to adjust auto mode.
Note: When you switch auto mode on,
lights on the blower motor control do not
illuminate to indicate the blower motor
speed.
Adjust the blower motor control or air
distribution control to switch auto mode
off.
Auto Mode Indicators
The indicators are on the Auto Mode
button. Description
Auto Mode Indicator
Status
The blower motor speed is reduced. Use this setting to
minimize the amount of noise from the blower motor. This
setting increases the time taken to cool the interior.
One indicator illumin-
ated.
The blower motor speed is moderate.
Two indicators illumin-
ated.
The blower motor speed is increased. Use this setting to
reduce the time taken to cool the interior. This setting
increases the amount of noise from the blower motor.
Three indicators illumin-
ated.
145
Super Duty (TFE) Canada/United States of America, enUSA, Edition date: 202008, Third-Printing- Climate Control - Vehicles With: Automatic Temperature
ControlE265283 E265283 E244097 E265283
Page 149 of 666
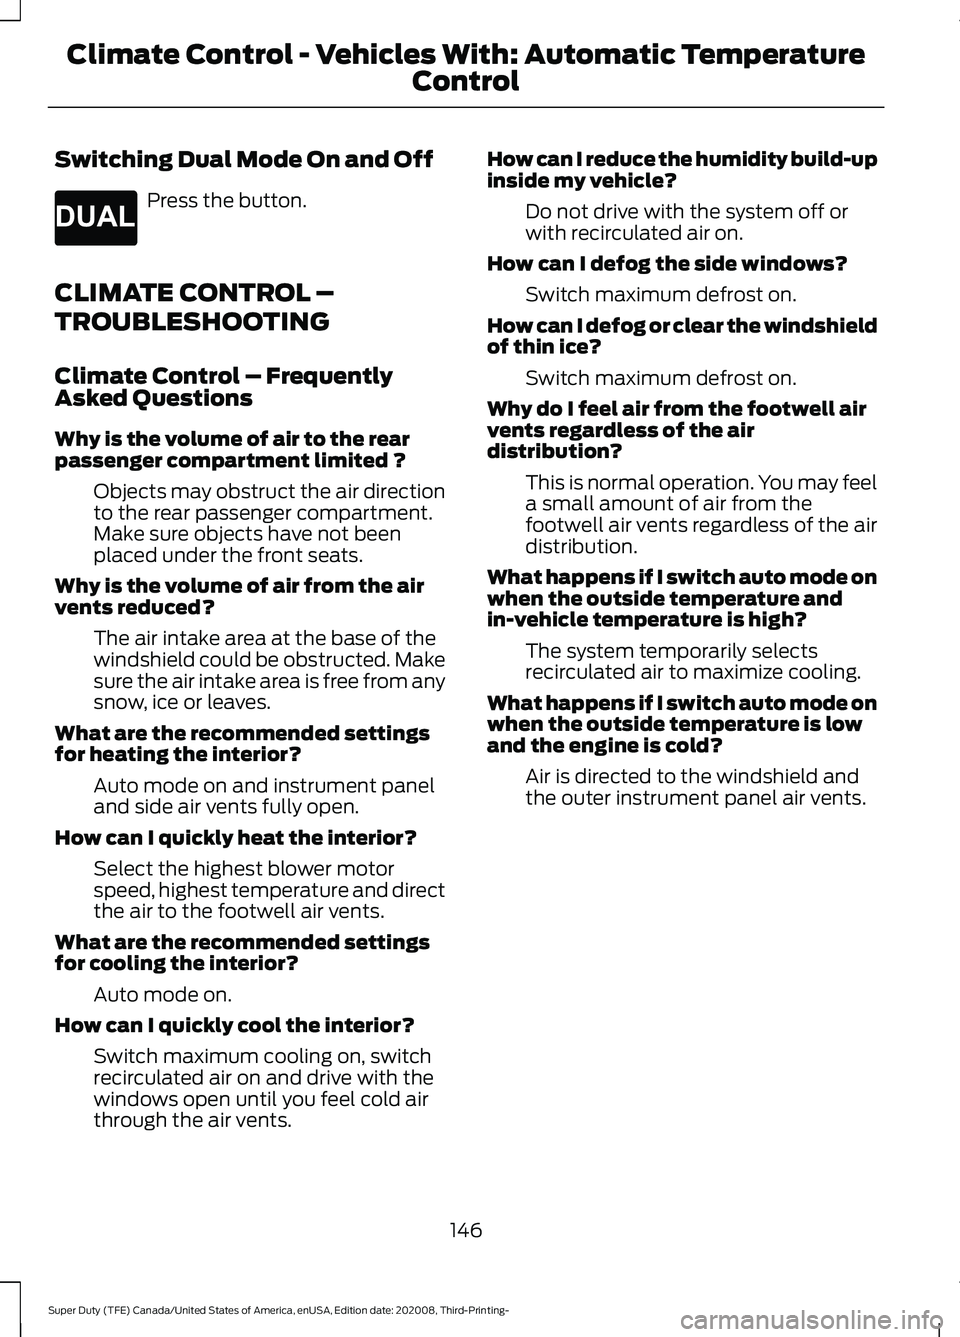
Switching Dual Mode On and Off
Press the button.
CLIMATE CONTROL –
TROUBLESHOOTING
Climate Control – Frequently
Asked Questions
Why is the volume of air to the rear
passenger compartment limited ? Objects may obstruct the air direction
to the rear passenger compartment.
Make sure objects have not been
placed under the front seats.
Why is the volume of air from the air
vents reduced? The air intake area at the base of the
windshield could be obstructed. Make
sure the air intake area is free from any
snow, ice or leaves.
What are the recommended settings
for heating the interior? Auto mode on and instrument panel
and side air vents fully open.
How can I quickly heat the interior? Select the highest blower motor
speed, highest temperature and direct
the air to the footwell air vents.
What are the recommended settings
for cooling the interior? Auto mode on.
How can I quickly cool the interior? Switch maximum cooling on, switch
recirculated air on and drive with the
windows open until you feel cold air
through the air vents. How can I reduce the humidity build-up
inside my vehicle?
Do not drive with the system off or
with recirculated air on.
How can I defog the side windows? Switch maximum defrost on.
How can I defog or clear the windshield
of thin ice? Switch maximum defrost on.
Why do I feel air from the footwell air
vents regardless of the air
distribution? This is normal operation. You may feel
a small amount of air from the
footwell air vents regardless of the air
distribution.
What happens if I switch auto mode on
when the outside temperature and
in-vehicle temperature is high? The system temporarily selects
recirculated air to maximize cooling.
What happens if I switch auto mode on
when the outside temperature is low
and the engine is cold? Air is directed to the windshield and
the outer instrument panel air vents.
146
Super Duty (TFE) Canada/United States of America, enUSA, Edition date: 202008, Third-Printing- Climate Control - Vehicles With: Automatic Temperature
ControlE265280
Page 150 of 666
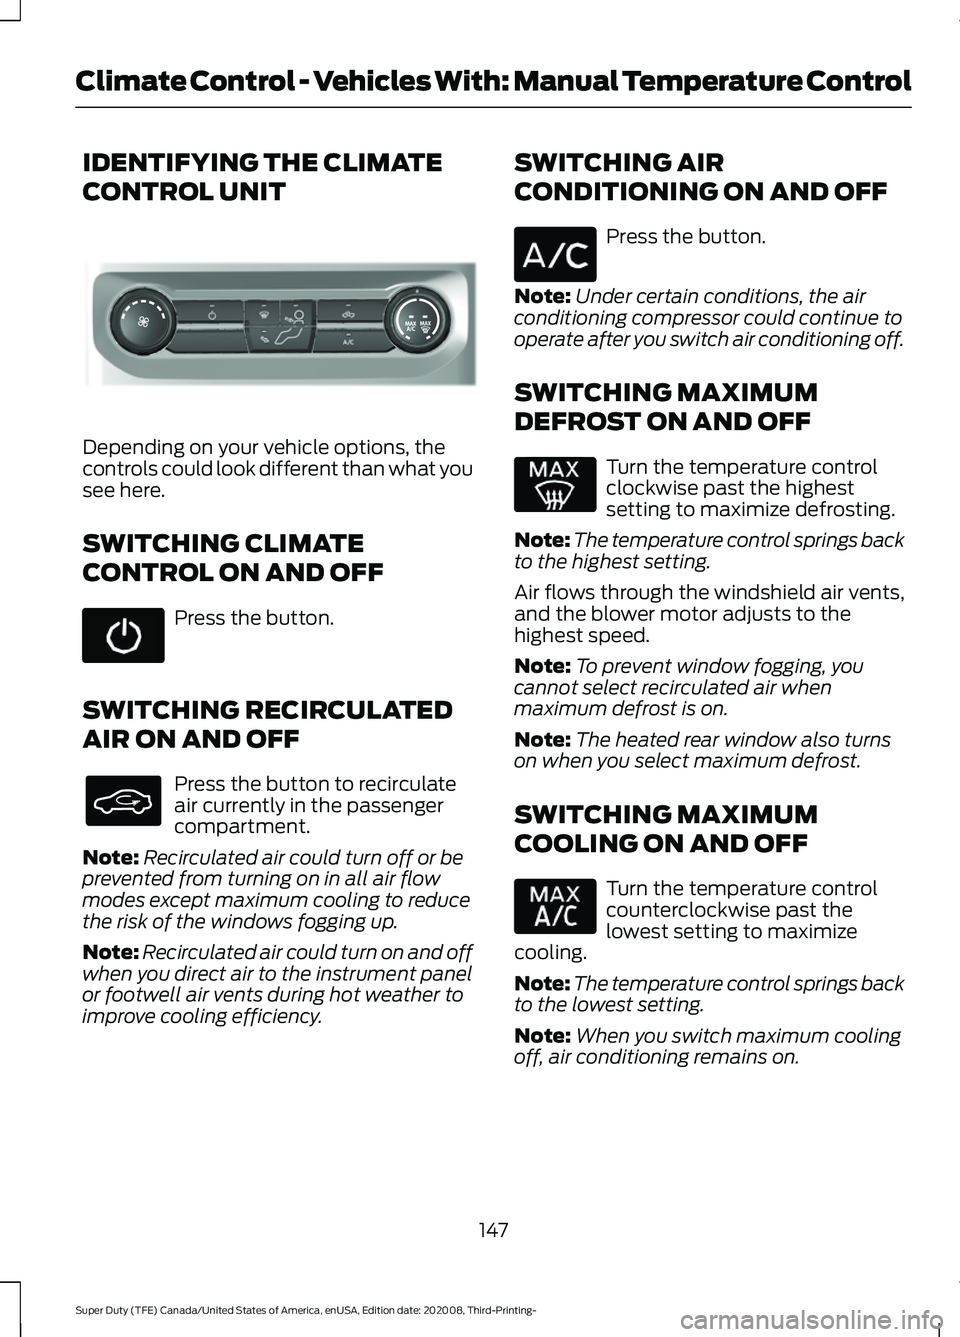
IDENTIFYING THE CLIMATE
CONTROL UNIT
Depending on your vehicle options, the
controls could look different than what you
see here.
SWITCHING CLIMATE
CONTROL ON AND OFF
Press the button.
SWITCHING RECIRCULATED
AIR ON AND OFF Press the button to recirculate
air currently in the passenger
compartment.
Note: Recirculated air could turn off or be
prevented from turning on in all air flow
modes except maximum cooling to reduce
the risk of the windows fogging up.
Note: Recirculated air could turn on and off
when you direct air to the instrument panel
or footwell air vents during hot weather to
improve cooling efficiency. SWITCHING AIR
CONDITIONING ON AND OFF Press the button.
Note: Under certain conditions, the air
conditioning compressor could continue to
operate after you switch air conditioning off.
SWITCHING MAXIMUM
DEFROST ON AND OFF Turn the temperature control
clockwise past the highest
setting to maximize defrosting.
Note: The temperature control springs back
to the highest setting.
Air flows through the windshield air vents,
and the blower motor adjusts to the
highest speed.
Note: To prevent window fogging, you
cannot select recirculated air when
maximum defrost is on.
Note: The heated rear window also turns
on when you select maximum defrost.
SWITCHING MAXIMUM
COOLING ON AND OFF Turn the temperature control
counterclockwise past the
lowest setting to maximize
cooling.
Note: The temperature control springs back
to the lowest setting.
Note: When you switch maximum cooling
off, air conditioning remains on.
147
Super Duty (TFE) Canada/United States of America, enUSA, Edition date: 202008, Third-Printing- Climate Control - Vehicles With: Manual Temperature ControlE308141
Page 151 of 666
SWITCHING THE HEATED
REAR WINDOW ON AND OFF (IF
EQUIPPED)
Press the button to clear the rear
window of thin ice and fog. The
heated rear window turns off
after a short period of time.
Note: Do not use harsh chemicals, razor
blades or other sharp objects to clean or
remove decals from the inside of the heated
rear window as this could cause damage to
the heated rear window grid lines not
covered by the vehicle Warranty.
SWITCHING THE HEATED
MIRRORS ON AND OFF (IF
EQUIPPED) Press the button.
SETTING THE BLOWER MOTOR
SPEED Note:
Lights on the control illuminate to
indicate the blower motor speed.
Note: When you switch the blower motor
off, air conditioning turns off and the
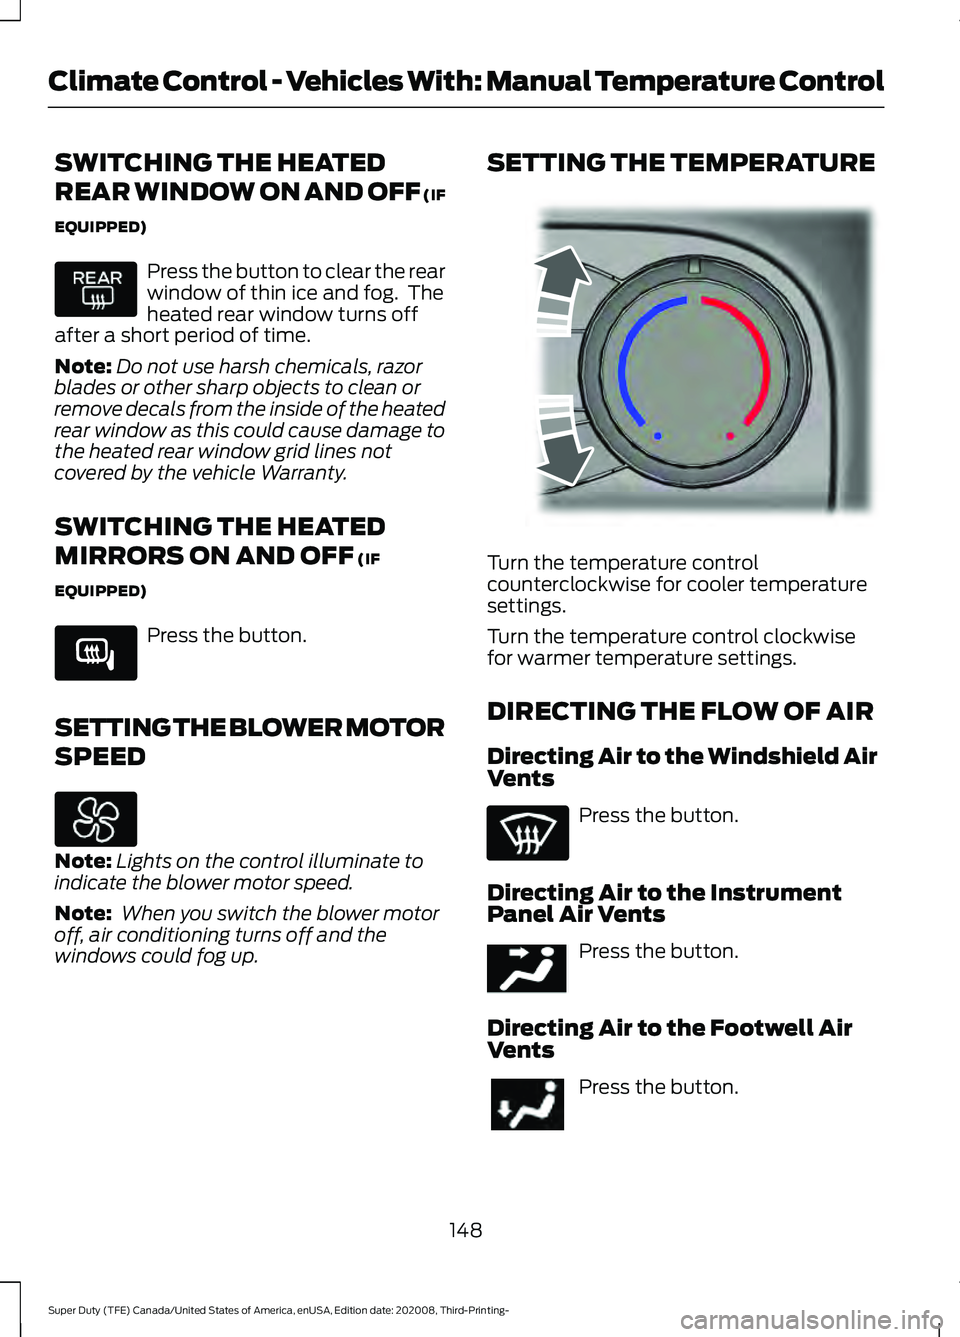
windows could fog up. SETTING THE TEMPERATURE
Turn the temperature control
counterclockwise for cooler temperature
settings.
Turn the temperature control clockwise
for warmer temperature settings.
DIRECTING THE FLOW OF AIR
Directing Air to the Windshield Air
Vents
Press the button.
Directing Air to the Instrument
Panel Air Vents Press the button.
Directing Air to the Footwell Air
Vents Press the button.
148
Super Duty (TFE) Canada/United States of America, enUSA, Edition date: 202008, Third-Printing- Climate Control - Vehicles With: Manual Temperature Control E266189 E244106 E244097
Page 160 of 666
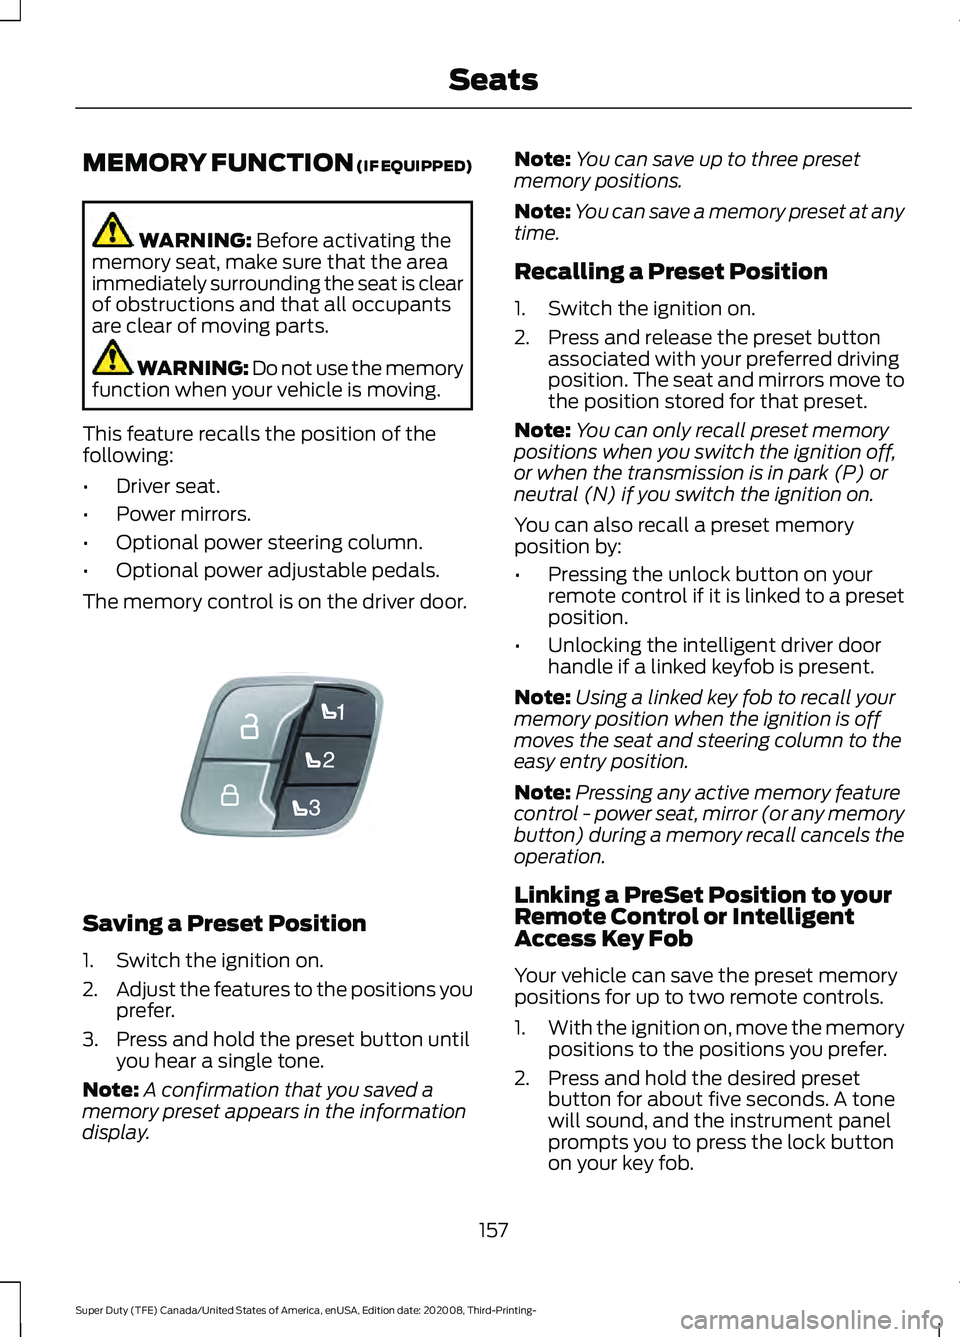
MEMORY FUNCTION (IF EQUIPPED)
WARNING:
Before activating the
memory seat, make sure that the area
immediately surrounding the seat is clear
of obstructions and that all occupants
are clear of moving parts. WARNING:
Do not use the memory
function when your vehicle is moving.
This feature recalls the position of the
following:
• Driver seat.
• Power mirrors.
• Optional power steering column.
• Optional power adjustable pedals.
The memory control is on the driver door. Saving a Preset Position
1. Switch the ignition on.
2.
Adjust the features to the positions you
prefer.
3. Press and hold the preset button until you hear a single tone.
Note: A confirmation that you saved a
memory preset appears in the information
display. Note:
You can save up to three preset
memory positions.
Note: You can save a memory preset at any
time.
Recalling a Preset Position
1. Switch the ignition on.
2. Press and release the preset button associated with your preferred driving
position. The seat and mirrors move to
the position stored for that preset.
Note: You can only recall preset memory
positions when you switch the ignition off,
or when the transmission is in park (P) or
neutral (N) if you switch the ignition on.
You can also recall a preset memory
position by:
• Pressing the unlock button on your
remote control if it is linked to a preset
position.
• Unlocking the intelligent driver door
handle if a linked keyfob is present.
Note: Using a linked key fob to recall your
memory position when the ignition is off
moves the seat and steering column to the
easy entry position.
Note: Pressing any active memory feature
control - power seat, mirror (or any memory
button) during a memory recall cancels the
operation.
Linking a PreSet Position to your
Remote Control or Intelligent
Access Key Fob
Your vehicle can save the preset memory
positions for up to two remote controls.
1. With the ignition on, move the memory
positions to the positions you prefer.
2. Press and hold the desired preset button for about five seconds. A tone
will sound, and the instrument panel
prompts you to press the lock button
on your key fob.
157
Super Duty (TFE) Canada/United States of America, enUSA, Edition date: 202008, Third-Printing- SeatsE307868
Page 161 of 666
3. Within ten seconds, press the lock
button on the remote control you are
linking. The instrument panel indicates
a successful link.
To unlink a remote control, follow the
same procedure – except in step 3, press
the unlock button on the remote control.
Note: If more than one linked remote
control or intelligent access key is in range,
the memory function moves to the settings
of the first key to initiate a memory recall.
Easy Entry and Exit Feature (If
Equipped)
If you enable the easy entry and exit
feature, it moves the driver seat rearward
up to
2 in (5 cm) when you put the
transmission in park (P) and remove the
key from the ignition.
The driver seat returns to the previous
position when you put the key in the
ignition.
You can enable or disable this feature
through the information display. See
Information Displays
(page 110).
REAR SEATS
(IF EQUIPPED)
Folding Up the Rear Seat Cushion
If your vehicle has a 60/40 rear seat, you
can flip each cushion up into a vertical
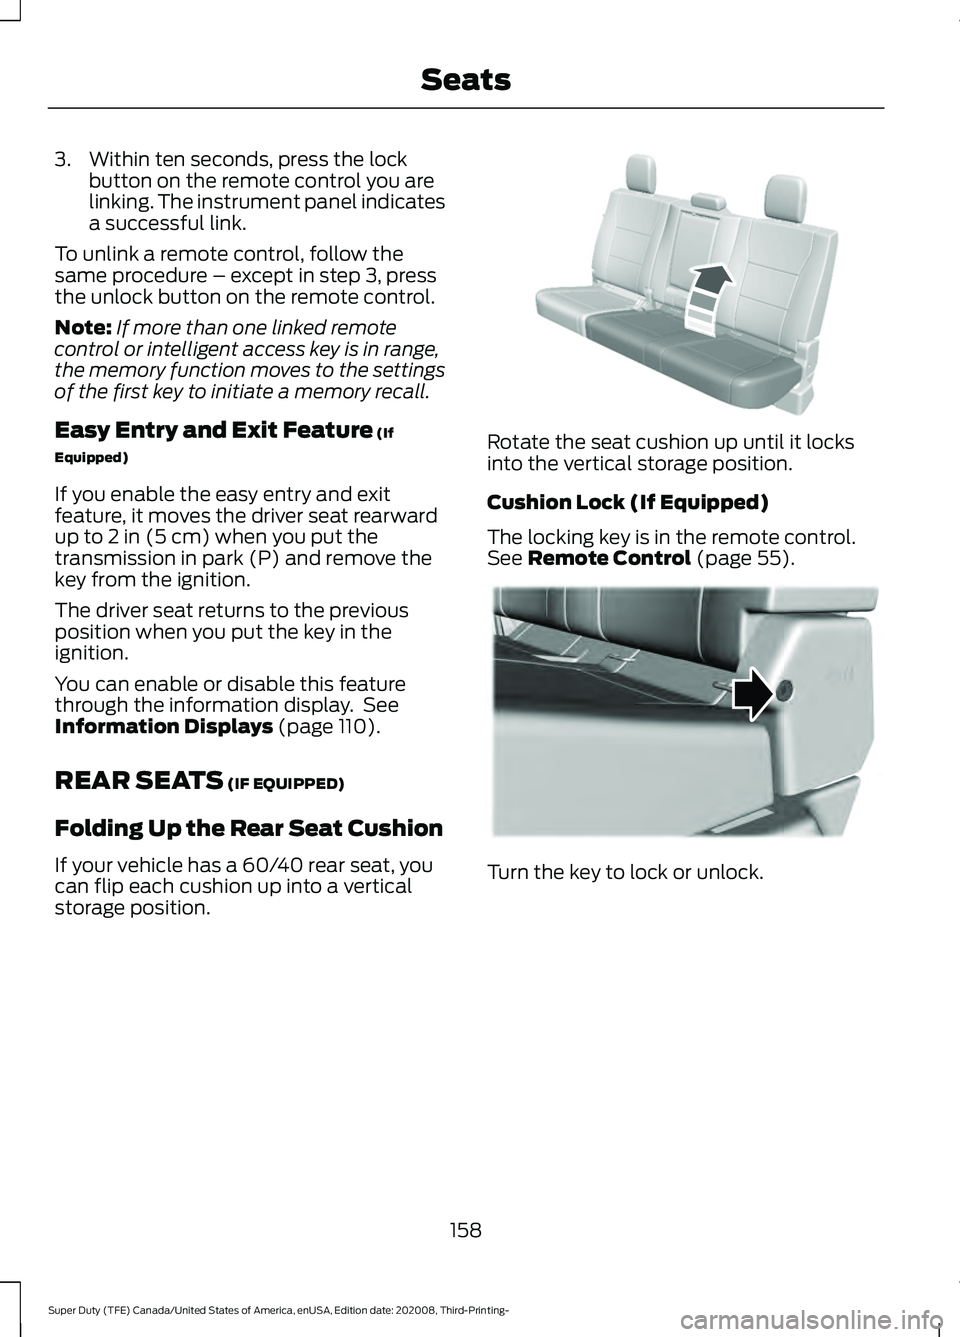
storage position. Rotate the seat cushion up until it locks
into the vertical storage position.
Cushion Lock (If Equipped)
The locking key is in the remote control.
See
Remote Control (page 55).
Turn the key to lock or unlock.
158
Super Duty (TFE) Canada/United States of America, enUSA, Edition date: 202008, Third-Printing- SeatsE310192 E310192 E224956
Page 171 of 666
12 V DC Power Point
WARNING: Do not plug optional
electrical accessories into the cigar
lighter socket. Incorrect use of the cigar
lighter can cause damage not covered
by the vehicle warranty, and can result
in fire or serious injury.
Note: When you switch the ignition on, you
can use the socket to power
12 V appliances
with a maximum current rating of 20 A20
amps.
Note: Do not plug in any device that
supplies power to the vehicle through the
power points, this may result in damage to
vehicle systems.
Note: Do not hang any accessory from the
accessory plug.
Note: Do not use the power point over the
vehicle capacity of 12 V DC 240 W or a fuse
may blow.
Note: Always keep the power point caps
closed when not in use.
Do not insert objects other than an
accessory plug into the power point. This
damages the power point and may blow
the fuse.
Run the vehicle for full capacity use of the
power point.
To prevent the battery from running out of
charge:
• Do not use the power point longer than
necessary when the engine is off.
• Do not leave devices plugged in
overnight or when you park your vehicle
for extended periods. 110 V 400 Watt AC Power Point
(If
Equipped) WARNING:
Do not keep electrical
devices plugged in the power point
whenever the device is not in use. Do not
use any extension cord with the 110 volt
AC power point, since it will defeat the
safety protection design. Doing so may
cause the power point to overload due
to powering multiple devices that can
reach beyond the 400 watt load limit
and could result in fire or serious injury.
Note: This feature works only when you
have the ignition switched on.
Note: This feature has a maximum output
of 400 watts when the vehicle is in park (P).
Note: While in drive (D), the maximum
outlet output is 300 watts.
Note: When powering electric devices that
require more than 10 watts in vehicles
equipped with keyless start, the engine must
remain running. If the engine is turned off or
you switch the ignition to accessory mode,
plugged in devices will not be charged.
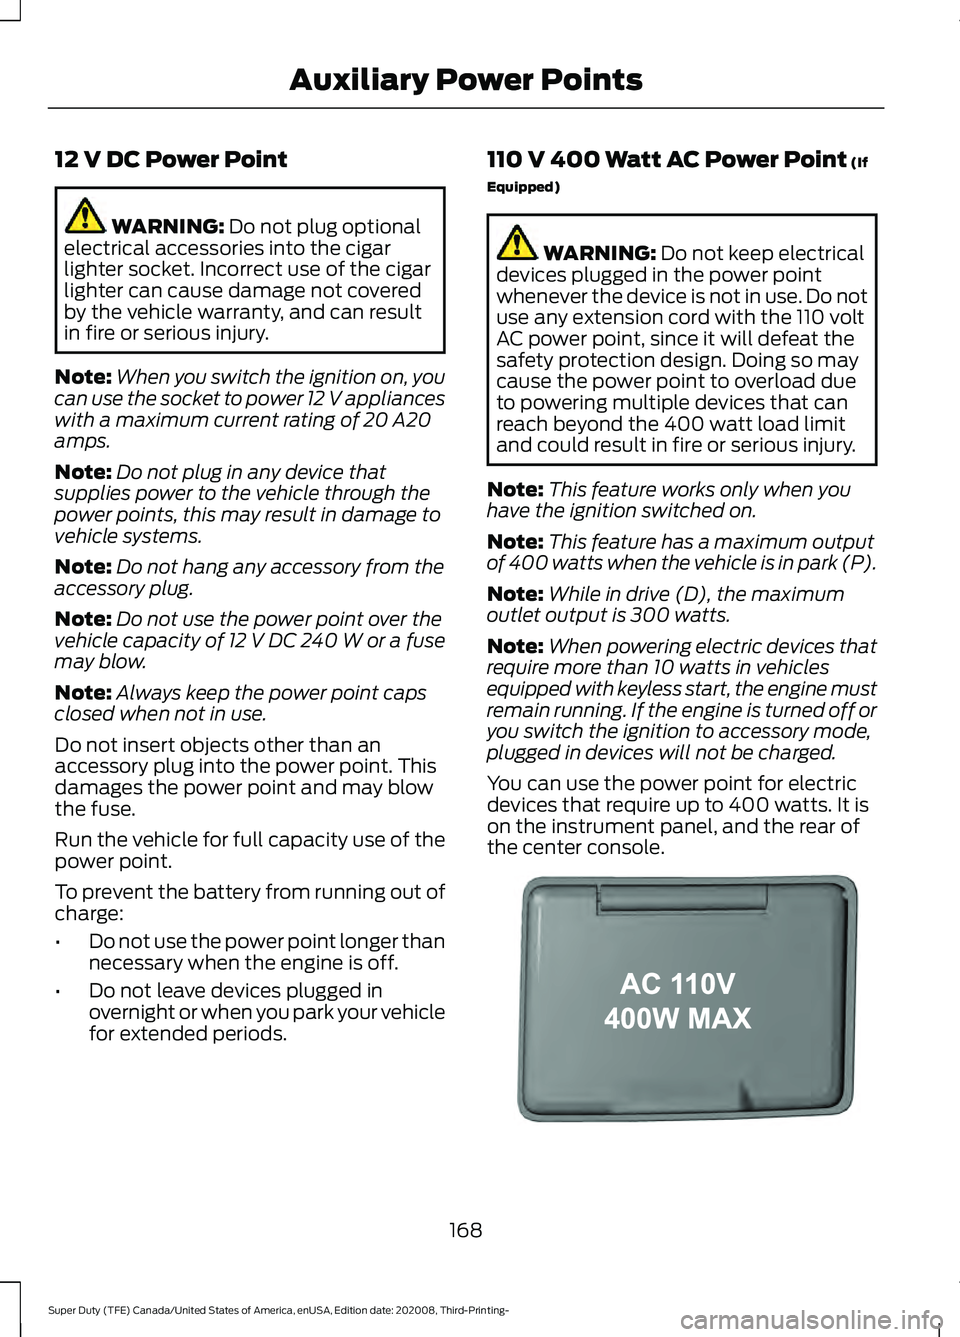
You can use the power point for electric
devices that require up to 400 watts. It is
on the instrument panel, and the rear of
the center console. 168
Super Duty (TFE) Canada/United States of America, enUSA, Edition date: 202008, Third-Printing- Auxiliary Power PointsE191617
Page 172 of 666

When the indicator light on the power point
is:
•
On: The power point is working, the
ignition is on and a device is plugged
in.
• Off: The power point is off, the ignition
is off or no device is plugged in.
• Flashing: The power point is in fault
mode.
The power outlet temporarily turns off
power when in fault mode if the device
exceeds the 400 watt limit. Unplug your
device and switch the ignition off. Switch
the ignition back on, but do not plug your
device back in. Let the system cool off and
switch the ignition off to reset the fault
mode. Switch the ignition back on and
make sure the indicator light remains on.
You can use the 400 watt power outlet for
these types of electric devices:
• Electric hand drills.
• Rechargeable power tools.
• Video games.
• Laptops.
• Televisions.
Note: Max 400W - when the vehicle is
parked and 300W - when the vehicle is
driving.
Do not use the power point for certain
electric devices, including:
• Cathode-ray, tube-type televisions.
• Motor loads, such as vacuum cleaners,
electric saws and other electric power
tools or compressor-driven
refrigerators.
• Measuring devices, which process
precise data, such as medical
equipment or measuring equipment.
• Other appliances requiring an
extremely stable power supply such as
microcomputer-controlled electric
blankets or touch-sensor lamps. Locations
Note:
Timed power points remain on for 30
minutes if the vehicle is in accessory mode.
If you switch the vehicle off, the timed
power points remain on for 75 minutes.
Power points may be in the following
locations:
• On the instrument panel.
• Inside the center console.
• On the rear of the center console.
• In the seat bin.
WIRELESS ACCESSORY
CHARGER (IF EQUIPPED) WARNING:
Wireless charging
devices can affect the operation of
implanted medical devices, including
cardiac pacemakers. If you have any
implanted medical devices, we
recommend that you consult with your
physician.
Tests on this equipment show that it
complies with part 18 of the FCC Rules.
• This equipment generates, uses and
can radiate radio frequency energy and
may cause harmful interference to
radio communications. There is no
guarantee that the interference will not
occur in a particular installation. If this
equipment does cause harmful
interference to radio or television
reception, please consult the dealer.
• This product is not end-user
serviceable.
169
Super Duty (TFE) Canada/United States of America, enUSA, Edition date: 202008, Third-Printing- Auxiliary Power Points