2021 FORD EXPLORER warning
[x] Cancel search: warningPage 92 of 577
DAYTIME RUNNING LAMPS -
VEHICLES WITH:
CONFIGURABLE DAYTIME
RUNNING LAMPS
WARNING: The daytime running
lamps system does not activate the rear
lamps and may not provide adequate
lighting during low visibility driving
conditions. Make sure you switch the
headlamps on, as appropriate, during all
low visibility conditions. Failure to do so
may result in a crash.
Switch the daytime running lamps on or
off using the touchscreen:
1. Select
Settings. See Settings (page
464).
2. Select
Vehicle.
3. Select
Lighting.
The daytime running lamps turn on when:
1. The lamps are on in the information display.
2. You switch the ignition on.
3. The transmission is not in park (P) for vehicles with automatic transmissions
or you release the parking brake for
vehicles with manual transmissions.
4. The lighting control is in the autolamps
position.
5. The headlamps are off.
The other lighting control switch positions
do not turn on the daytime running lamps.
If the daytime running lamps are off in the
information display, the lamps stay off in
all switch positions. DAYTIME RUNNING LAMPS -
VEHICLES WITH: DAYTIME
RUNNING LAMPS (DRL) WARNING:
The daytime running
lamps system does not activate the rear
lamps and may not provide adequate
lighting during low visibility driving
conditions. Make sure you switch the
headlamps on, as appropriate, during all
low visibility conditions. Failure to do so
may result in a crash.
The system turns the lamps on in daylight
conditions.
To switch the system on, switch the
lighting control to any position except
headlamps.
FRONT FOG LAMPS
(IF EQUIPPED)
Switching the Front Fog Lamps On
or Off
Only switch the front fog lamps on during
reduced visibility.
You can switch the front fog lamps on if
any of the following occur:
• You set the lighting control to the
parking lamps position.
• You set the lighting control to the
headlamps position.
• You set the lighting control to the
autolamps position and the headlamps
are on.
The front fog lamp button is on the lighting
control. Press the button to switch the
front fog lamps on or off.
89
Explorer (CTW), enUSA, Edition date: 202007, Second-Printing Lighting
Page 97 of 577
WHAT IS AUTOMATIC HIGH
BEAM CONTROL
The system turns on high beams if it is dark
enough and no other traffic is present. If it
detects an approaching vehicle
’s
headlamps or tail lamps, or street lighting
ahead, the system turns the high beams
off. Low beams remain on.
A camera sensor, centrally mounted
behind the windshield of your vehicle,
continuously monitors conditions to turn
the high beams on and off.
SWITCHING AUTOMATIC HIGH
BEAM CONTROL ON AND OFF WARNING: Do not use the system
in poor visibility, for example fog, heavy
rain, spray or snow.
1. Press
Settings on the touchscreen.
2. Press
Vehicle.
3. Press
Lighting.
Activating the Automatic High
Beam Control Switch the lighting control to the
autolamps position. See
Autolamps
(page 88).
Note: The lighting control defaults to
autolamps each time you switch your
vehicle on.
When active, the high beams turn on if:
• The ambient light level is low enough.
• There is no traffic in front of your
vehicle.
• The vehicle speed is greater than
approximately
32 mph (51 km/h). When active, the high beams turn off if:
•
The ambient light level is high enough
that high beams are not required.
• The system detects an approaching
vehicle's headlamps or tail lamps.
• The system detects severe rain, snow
or fog.
• The camera is blocked.
• The vehicle speed falls below
approximately
27 mph (44 km/h).
Note: The deactivation speed is lower on
curves.
Note: High beam reactivation may be
delayed in certain curvy road situations.
Note: The system may not operate properly
if the sensor is blocked. Keep the windshield
free from obstruction or damage.
Note: The system may not operate properly
in cold or inclement conditions. You can
switch on the high beams by overriding the
system.
Note: If the system detects a blockage, for
example bird droppings, bug splatter, snow
or ice, the system goes into low beam mode
until you clear the blockage. A message may
appear in the information display if the
camera is blocked.
Note: Using much larger tires or equipping
vehicle accessories such as snowplows can
modify your vehicle's ride height and
degrade automatic high beam control
performance.
AUTOMATIC HIGH BEAM
CONTROL INDICATORS The indicator illuminates to
confirm when the system is
ready to assist.
94
Explorer (CTW), enUSA, Edition date: 202007, Second-Printing Automatic High Beam ControlE281240
Page 98 of 577
OVERRIDING AUTOMATIC
HIGH BEAM CONTROL
WARNING: The system does not
relieve you of your responsibility to drive
with due care and attention. You may
need to override the system if it does not
turn the high beams on or off. WARNING:
You may need to
override the system when approaching
other road users. WARNING:
You may need to
override the system during inclement
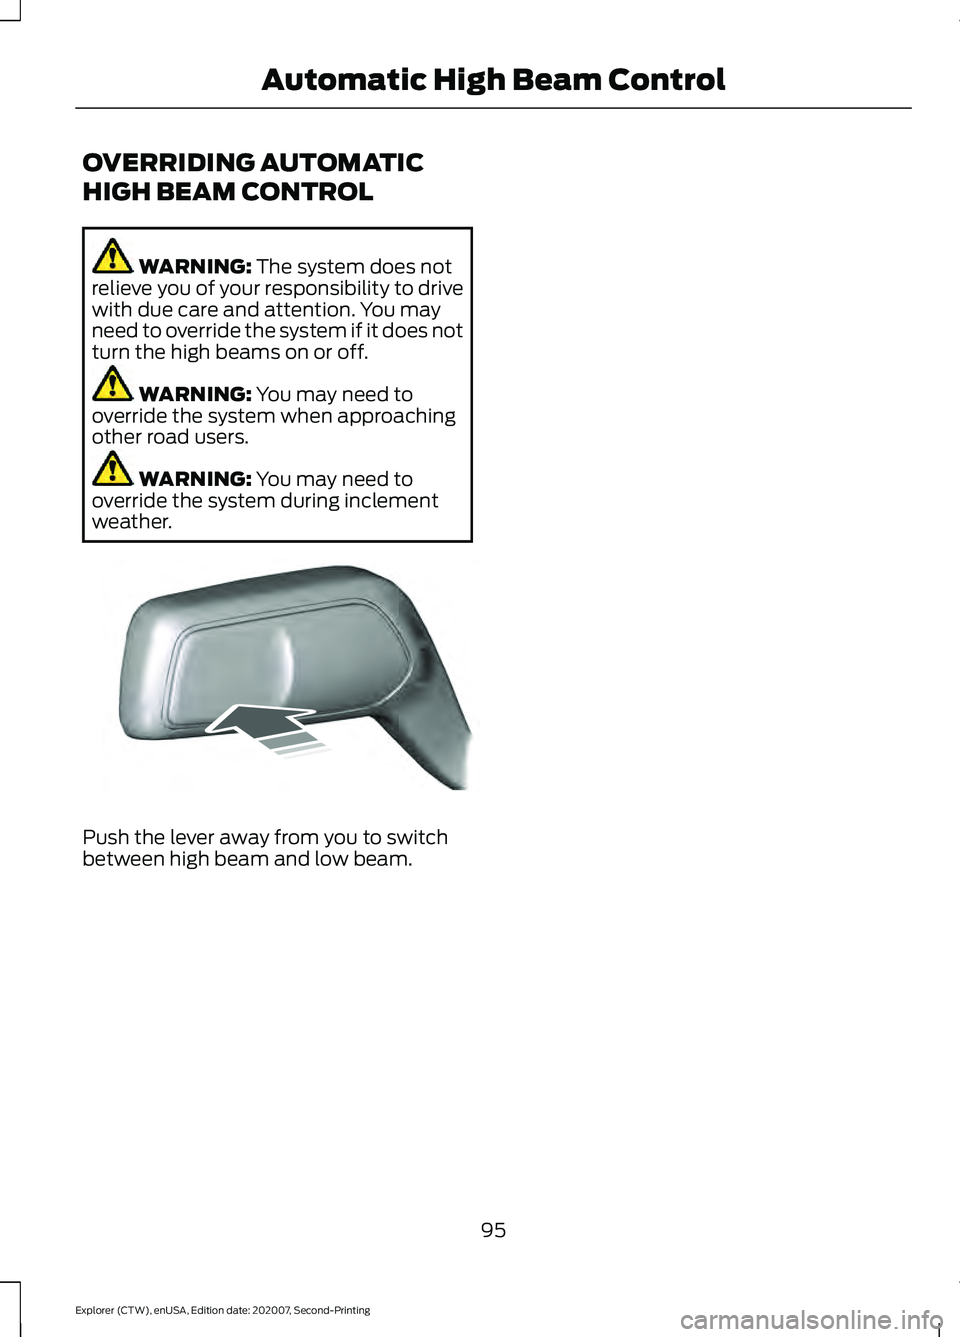
weather. Push the lever away from you to switch
between high beam and low beam.
95
Explorer (CTW), enUSA, Edition date: 202007, Second-Printing Automatic High Beam ControlE248603
Page 99 of 577
POWER WINDOWS
WARNING: Do not leave children
unattended in your vehicle and do not
let them play with the power windows.
Failure to follow this instruction could
result in personal injury. WARNING:
When closing the
power windows, verify they are free of
obstruction and make sure that children
and pets are not in the proximity of the
window openings. Press the control to open the
window. Lift the control to close
the window.
Note: If you hear a pulsing noise when just
one of the windows is open. Lower the
opposite window slightly to reduce this
noise.
One-Touch Down
Note: One-touch down applies to the front
windows only.
Fully press the switch and release it. Press
again or lift it to stop the window.
One-Touch Up
Note: One-touch up applies to the front
windows only.
Fully lift the switch and release it. Press or
lift it again to stop the window.
Resetting One-Touch Up
Start the engine.
1. Lift and hold the window switch until you fully close the door window.
Continue to hold the switch for a few
seconds after you close the window.
2. Release the window switch. 3.
Press and hold the window switch until
you fully open the door window.
4. Release the window switch.
5. Lift and hold the window switch until you fully close the window.
6. Test for correct window operation by carrying out the one-touch down and
one-touch up features.
Bounce-Back
The window stops when closing. It reverses
some distance if there is an obstacle in the
way.
Overriding the Bounce-Back Feature WARNING:
If you override
bounce-back, the window does not
reverse if it detects an obstacle. Take
care when closing the windows to avoid
personal injury or damage to your
vehicle.
The window stops if you release the switch
before the window fully closes. Pull up the
window switch and hold within a few
seconds of the window reaching the
bounce-back position. The window travels
up with no bounce-back protection.
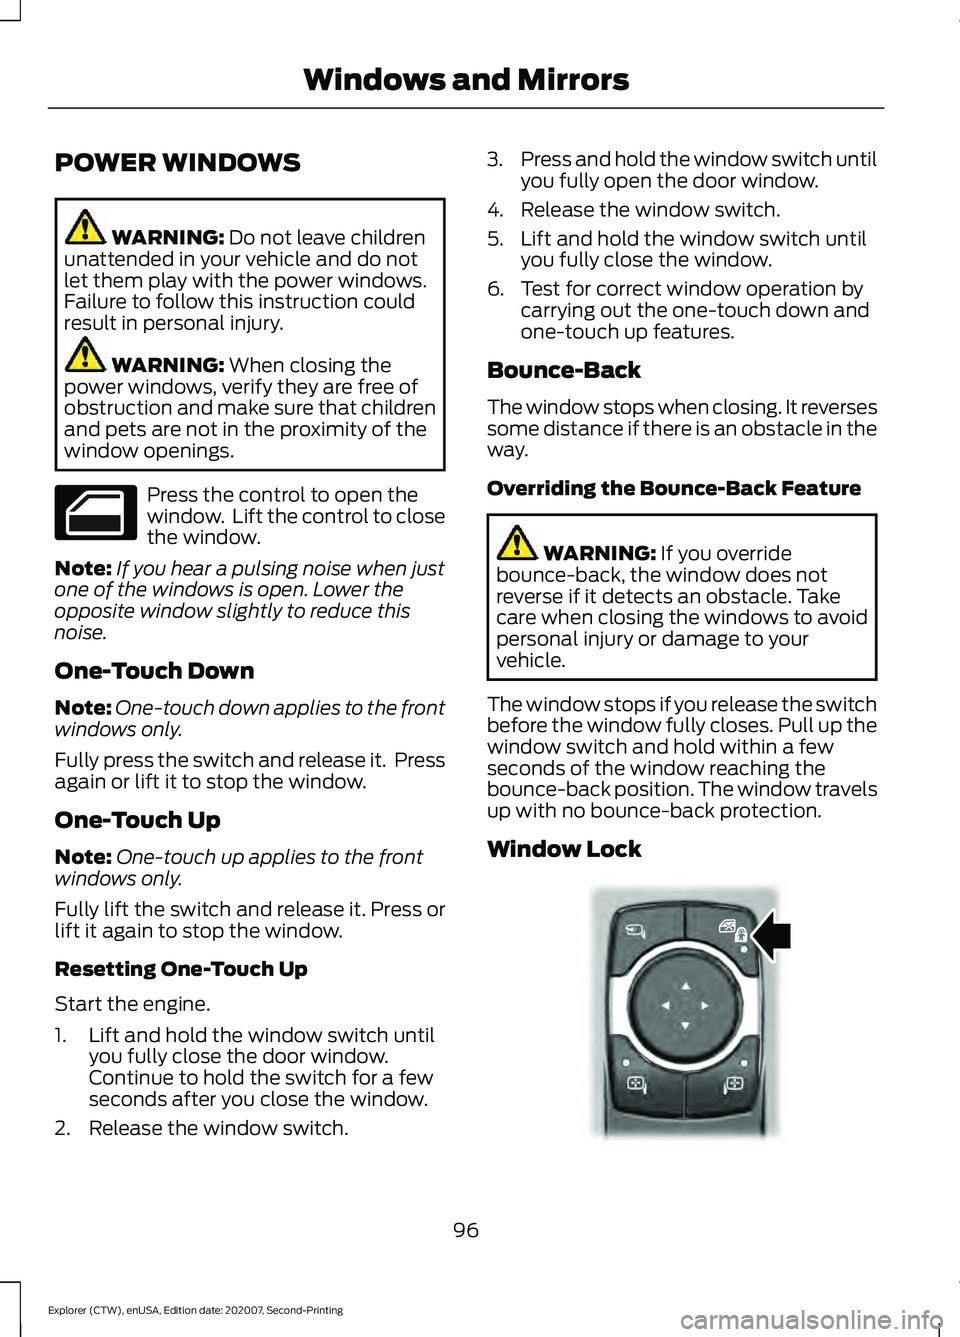
Window Lock 96
Explorer (CTW), enUSA, Edition date: 202007, Second-Printing Windows and Mirrors E295318
Page 100 of 577
Press the control to lock or unlock the rear
window controls. It illuminates when you
lock the rear window controls.
Accessory Delay
You can use the window switches for
several minutes after you switch the
ignition off or until you open either front
door.
GLOBAL OPENING
You can use the remote control to open
the windows with the ignition off.
Note:
You can enable or disable this feature
in the information display, or see an
authorized dealer. See General
Information (page 117).
Note: To operate this feature, accessory
delay must not be active.
Remote Control Front Windows
After you unlock your vehicle with the
remote control, you can open the windows
for a short period of time. Press and hold
the remote control unlock button to open
the windows. Release the button once
movement starts. Press the lock or unlock
button to stop movement.
EXTERIOR MIRRORS -
EXCLUDING: ST
Power Exterior Mirrors WARNING:
Do not adjust the
mirrors when your vehicle is moving. This
could result in the loss of control of your
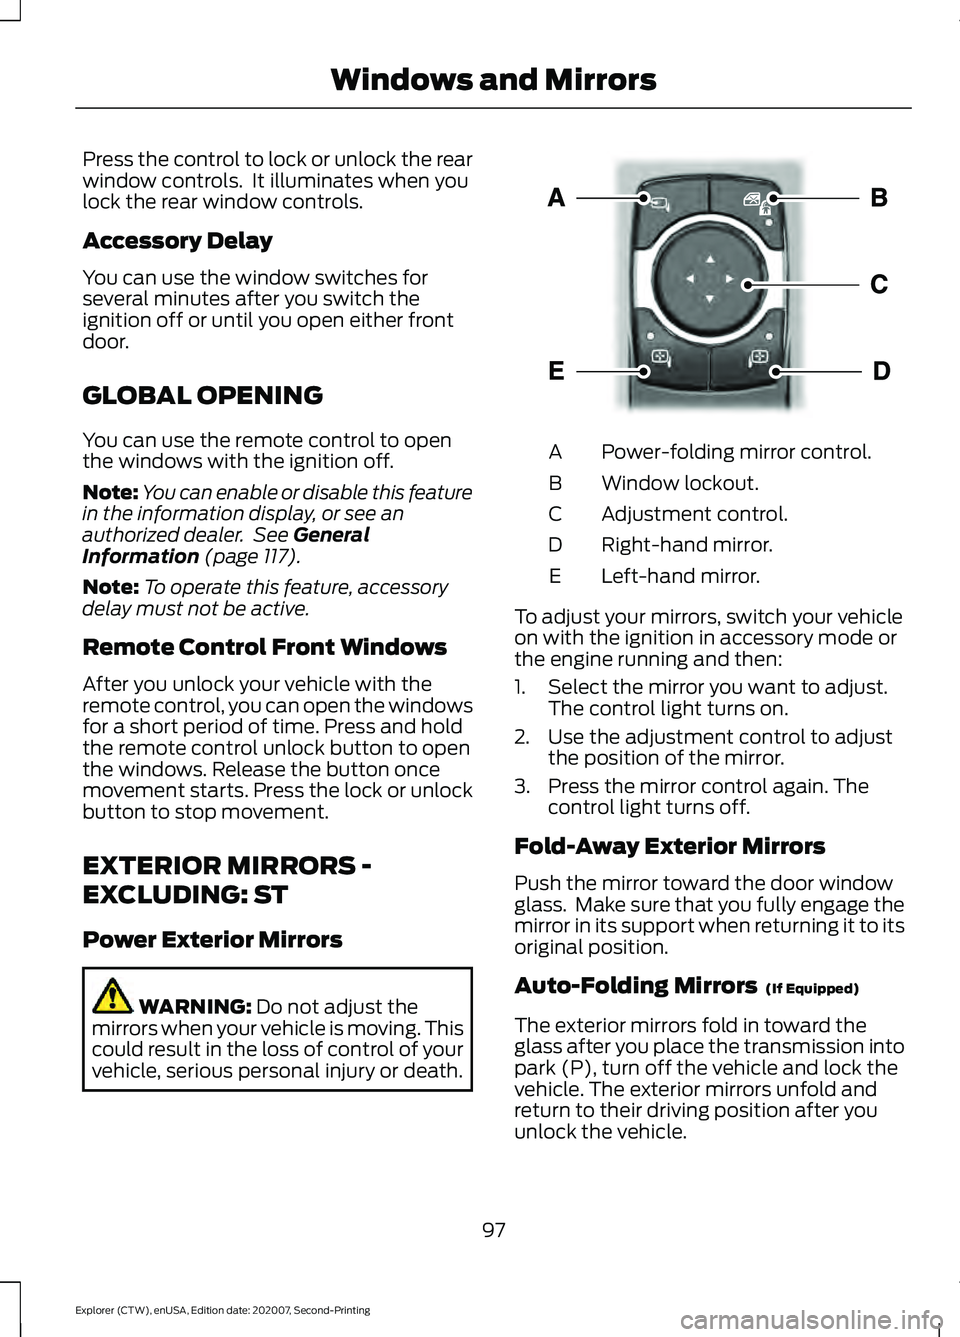
vehicle, serious personal injury or death. Power-folding mirror control.
A
Window lockout.
B
Adjustment control.
C
Right-hand mirror.
D
Left-hand mirror.
E
To adjust your mirrors, switch your vehicle
on with the ignition in accessory mode or
the engine running and then:
1. Select the mirror you want to adjust. The control light turns on.
2. Use the adjustment control to adjust the position of the mirror.
3. Press the mirror control again. The control light turns off.
Fold-Away Exterior Mirrors
Push the mirror toward the door window
glass. Make sure that you fully engage the
mirror in its support when returning it to its
original position.
Auto-Folding Mirrors (If Equipped)
The exterior mirrors fold in toward the
glass after you place the transmission into
park (P), turn off the vehicle and lock the
vehicle. The exterior mirrors unfold and
return to their driving position after you
unlock the vehicle.
97
Explorer (CTW), enUSA, Edition date: 202007, Second-Printing Windows and MirrorsE295322
Page 101 of 577
You can switch this feature on and off
through the information display. See
General Information (page 117).
You can fold the mirrors on demand by
pressing the power-folding mirror control
on the door. The control lights and the
mirrors fold in toward the glass. Press the
control again to unfold the mirrors. The
control light turns off.
Note: If you use the power-folding control
to fold the mirrors on demand with the auto
fold feature on, you must use the control
again to unfold them.
Loose Mirror
If you manually fold your power-folding
mirrors, they may not work properly even
after you re-position them. You need to
reset them if:
• The mirrors vibrate when you drive.
• The mirrors feel loose.
• The mirrors do not stay in the folded or
unfolded position.
• One of the mirrors is not in its normal
driving position.
To reset the power-fold feature, use the
power-folding mirror control to fold and
unfold the mirrors. You may hear a loud
noise as you reset the power-folding
mirrors. This sound is normal. Repeat this
process as needed each time you manually
fold the mirrors.
Heated Exterior Mirrors
(If Equipped)
See
Heated Exterior Mirrors (page 144).
Memory Mirrors
(If Equipped)
You can save and recall the mirror
positions through the memory function.
See
Memory Function (page 152). Auto-dimming Feature
(If Equipped)
The driver exterior mirror dims when the
interior auto-dimming mirror turns on.
Direction Indicator Mirrors (If Equipped)
When the vehicle is running, the
forward-facing portion of the appropriate
mirror housing blinks when you switch on
the direction indicator.
Puddle Lamps
(If Equipped)
The lamps on the bottom part of the mirror
housing light when you use your
transmitter to unlock the doors or when
you open a door.
360-Degree Camera
(If Equipped)
See
360 Degree Camera (page 241).
Blind Spot Information System
See
Blind Spot Information System
(page 264).
EXTERIOR MIRRORS - ST
Power Exterior Mirrors WARNING:
Do not adjust the
mirrors when your vehicle is moving. This
could result in the loss of control of your
vehicle, serious personal injury or death.
98
Explorer (CTW), enUSA, Edition date: 202007, Second-Printing Windows and Mirrors
Page 103 of 577
Heated Exterior Mirrors
See Heated Exterior Mirrors (page 144).
Memory Mirrors
You can save and recall the mirror
positions through the memory function.
See
Memory Function (page 152).
Auto-dimming Feature
The driver exterior mirror dims when the
interior auto-dimming mirror turns on.
Direction Indicator Mirrors
When the vehicle is running, the
forward-facing portion of the appropriate
mirror housing blinks when you switch on
the direction indicator.
Puddle Lamps
The lamps on the bottom part of the mirror
housing light when you use your
transmitter to unlock the doors or when
you open a door.
Blind Spot Information System
See
Blind Spot Information System
(page 264).
INTERIOR MIRROR WARNING:
Do not adjust the
mirrors when your vehicle is moving. This
could result in the loss of control of your
vehicle, serious personal injury or death.
Note: Do not clean the mirror housing or
glass with harsh abrasives, fuel or other
petroleum-based cleaning products. You can adjust the interior mirror to your
preference. Some mirrors also have a
second pivot point. This lets you move the
mirror head up or down and from side to
side.
Manual Dimming Mirror
Pull the tab below the mirror toward you
to reduce the effect of bright light from
behind.
Automatic Dimming Mirror (If Equipped)
Note:
Do not block the sensors on the front
and back of the mirror. A rear center
passenger or raised rear center head
restraint may also block light from reaching
the sensor.
The mirror dims to reduce the effect of
bright light from behind. It returns to
normal when the bright light from behind
is no longer present or if you shift into
reverse (R).
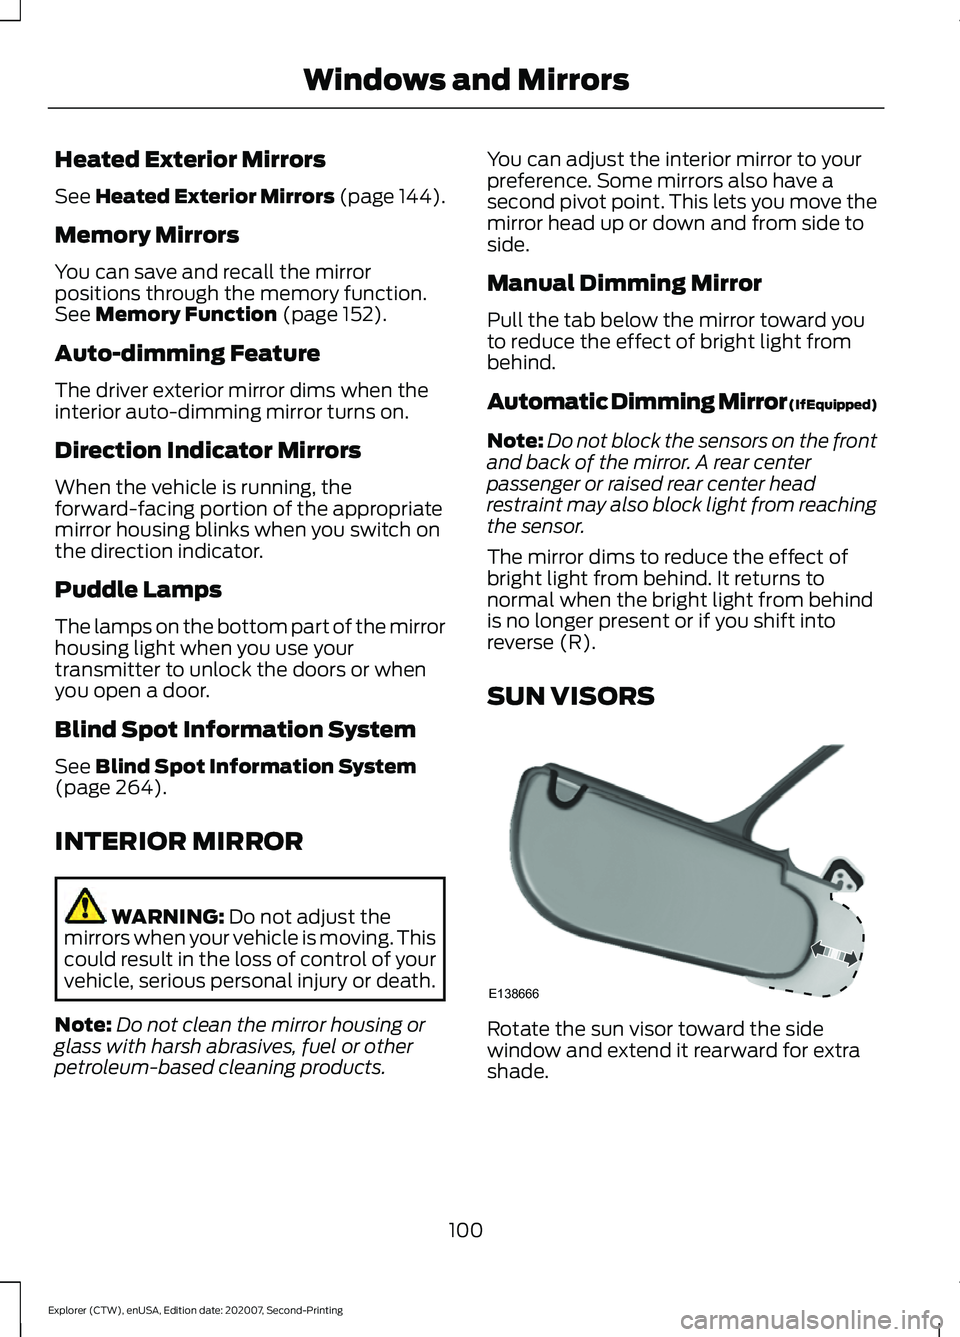
SUN VISORS Rotate the sun visor toward the side
window and extend it rearward for extra
shade.
100
Explorer (CTW), enUSA, Edition date: 202007, Second-Printing Windows and MirrorsE138666
Page 104 of 577
Illuminated Vanity Mirror
Lift the cover to switch the lamp on.
MOONROOF (IF EQUIPPED)
WARNING:
Do not leave children
unattended in your vehicle and do not
let them play with the moonroof. Failure
to follow this instruction could result in
personal injury. WARNING:
When closing the
moonroof, verify that it is free of
obstruction and make sure that children
and pets are not in the proximity of the
roof opening.
The moonroof controls are on the
overhead console and have a one-touch
open and close feature. To stop it during
one-touch operation, press the control a
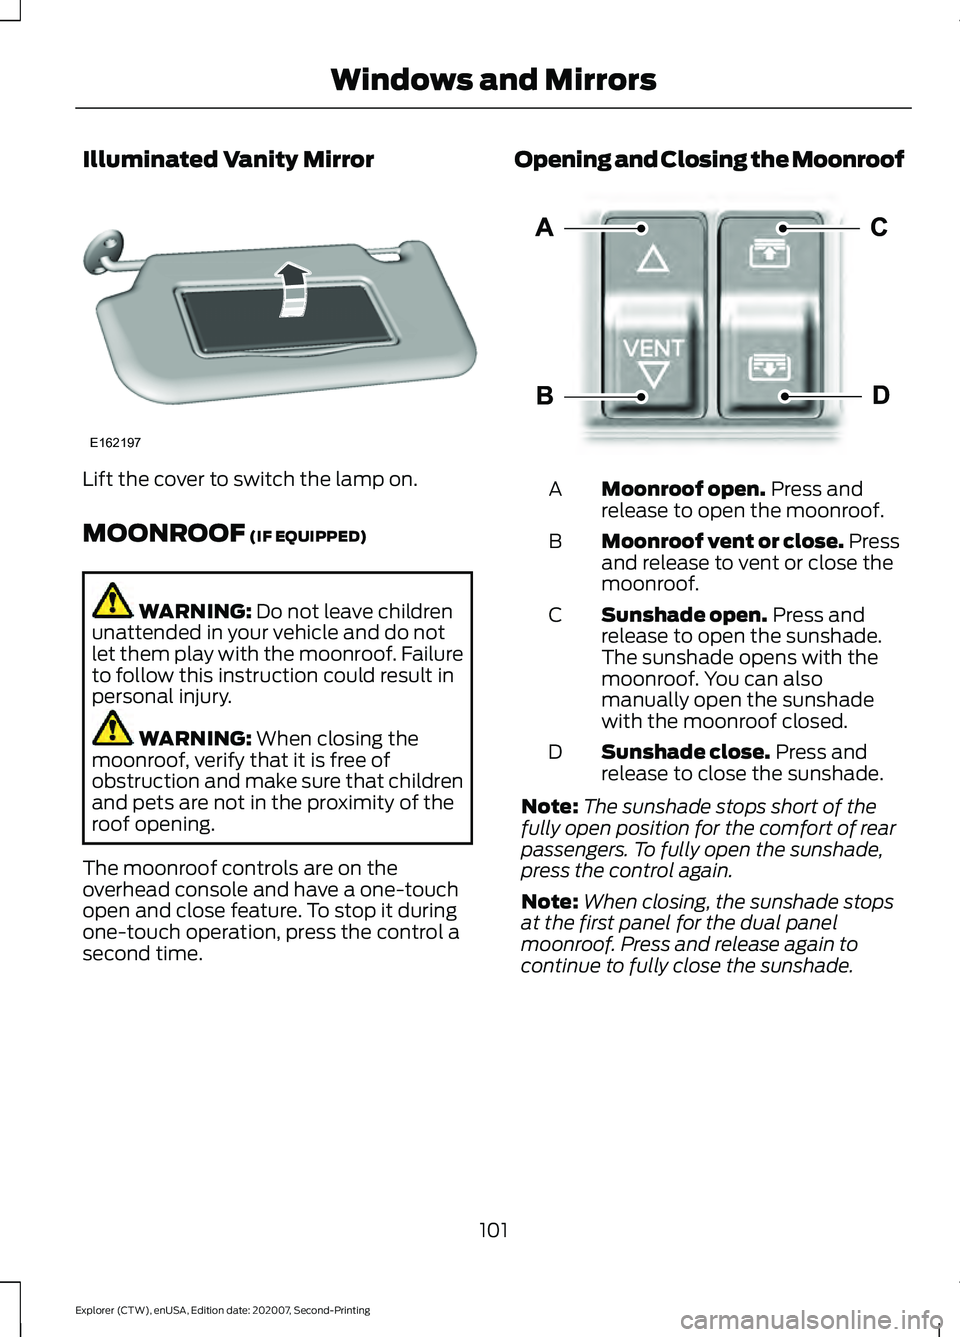
second time. Opening and Closing the Moonroof
Moonroof open.
Press and
release to open the moonroof.
A
Moonroof vent or close. Press
and release to vent or close the
moonroof.
B
Sunshade open.
Press and
release to open the sunshade.
The sunshade opens with the
moonroof. You can also
manually open the sunshade
with the moonroof closed.
C
Sunshade close.
Press and
release to close the sunshade.
D
Note: The sunshade stops short of the
fully open position for the comfort of rear
passengers. To fully open the sunshade,
press the control again.
Note: When closing, the sunshade stops
at the first panel for the dual panel
moonroof. Press and release again to
continue to fully close the sunshade.
101
Explorer (CTW), enUSA, Edition date: 202007, Second-Printing Windows and MirrorsE162197 E295253