2021 FORD EXPLORER remote start
[x] Cancel search: remote startPage 70 of 577

Number of MyKeys
Indicates the number of MyKeys you have
programmed to your vehicle. Use this
feature to detect how many MyKeys you
have for your vehicle and determine when
you have deleted all MyKeys.
Number of Admin Keys
Indicates how many admin keys you have
programmed to your vehicle. Use this
feature to determine how many admin
keys you have for your vehicle, and detect
if an additional MyKey has been
programmed.
USING MYKEY WITH REMOTE
START SYSTEMS
MyKey is not compatible with non
Ford-approved, aftermarket remote start
systems. If you choose to install a remote
start system, see an authorized dealer for
a Ford-approved remote start system.
MYKEY – TROUBLESHOOTING Potential Causes
Condition
The key or transmitter used to start the vehicle
does not have admin privileges.
I cannot create a MyKey.
Vehicles with keyless start: Make sure you place
the transmitter into the backup slot. See
Passive Anti-Theft System (page 78).
The key or transmitter used to start the vehicle
is the only admin key. There always has to be
at least one admin key.
The passive anti-theft system is disabled or in
unlimited mode.
The transmitter used to start your vehicle does
not have admin privileges.
I cannot program the configurable
settings.
There are no MyKeys programmed to the
vehicle.
See Creating a MyKey (page 65).
The key or transmitter used to start the vehicle
does not have admin privileges.
I cannot clear the MyKeys.
No MyKeys are created.
See Creating a MyKey
(page 65).
Purchase a new key or transmitter from an
authorized dealer.
I lost the only admin key.
67
Explorer (CTW), enUSA, Edition date: 202007, Second-Printing MyKey
™
Page 72 of 577

LOCKING AND UNLOCKING
You can use the power door lock control
or the remote control to lock and unlock
your vehicle.
Note:
Do not use the door latch assembly
to attach any accessory, such as handles or
steps, as this can cause damage to your
vehicle.
Power Door Locks
The power door lock control is on the driver
and front passenger door panels. Unlock.
A
Lock.
B
Remote Control
You can use the remote control at any
time.
Unlocking the Doors Press the button to unlock the
driver door.
Press the button again within
three seconds to unlock all doors. The
direction indicators flash.
Press and hold both the lock and unlock
buttons on the remote control for three
seconds to change between driver door or
all doors unlock mode. The direction
indicators will flash twice to indicate a
change to the unlocking mode. Driver door mode only unlocks the driver door when
you press the unlock button once. All door
mode unlocks all doors when you press
the unlock button once. The unlocking
mode applies to the remote control,
keyless entry keypad and intelligent
access.
Locking the Doors
Press the button to lock all
doors. The direction indicators
will flash.
Press the button again within three
seconds to confirm that all the doors
close. The doors lock again, the horn
sounds and the direction indicators flash
if all the doors and the liftgate close.
Note: If any door or the liftgate is open, or
if the hood is open on vehicles with an
anti-theft alarm or remote start, the horn
sounds twice and the direction indicators
do not flash.
Locking and Unlocking the Doors
with the Key Blade
Locking with the Key
Turn the top of the key toward the front of
your vehicle.
Unlocking with the Key
Turn the top of the key toward the rear of
your vehicle.
Note: If the child safety locks are on and
you pull the interior handle, you only turn off
the emergency locking, not the child safety
lock. You can only open the doors using the
external door handle.
69
Explorer (CTW), enUSA, Edition date: 202007, Second-Printing Doors and LocksE138628 E138629 E138623
Page 81 of 577
PASSIVE ANTI-THEFT
SYSTEM
Note:
The system is not compatible with
non-Ford aftermarket remote start systems.
Use of these systems could result in vehicle
starting problems and a loss of security
protection.
Note: Metallic objects, electronic devices
or a second coded key on the same key
chain could cause vehicle starting problems
if they are too close to the key when starting
the engine. Prevent these objects from
touching the coded key while starting the
engine. Switch the ignition off, move all
objects on the key chain away from the
coded key and restart the engine if a
problem occurs.
Note: Do not leave a duplicate coded key
in the vehicle. Always take your keys and
lock all doors when leaving the vehicle.
SecuriLock®
The system is an engine immobilization
system. It helps to prevent anyone from
starting the engine without using a coded
key programmed to your vehicle. Using the
wrong key could prevent the engine from
starting. A message may appear in the
information display.
If you are unable to start the engine with a
correctly coded key, there is a problem with
the system and a message could appear
in the information display.
Automatic Arming
The vehicle arms immediately after you
switch the ignition off.
Automatic Disarming
Switching the ignition on with a coded key
disarms the vehicle. Replacement Keys
Note:
Your vehicle comes with two
integrated keyhead transmitters or two
intelligent access keys.
The integrated keyhead transmitter
functions as a programmed ignition key
that operates all the locks and starts the
vehicle, as well as a remote control.
The intelligent access key functions as a
programmed key that operates the driver
door lock and activates the intelligent
access with push button start system, as
well as a remote control.
If your programmed transmitters or
standard SecuriLock coded keys
(integrated keyhead transmitters only) are
lost or stolen and you do not have an extra
coded key, you will need to have your
vehicle towed to an authorized dealer. You
need to erase the key codes from your
vehicle and program new coded keys.
Store an extra programmed key away from
the vehicle in a safe place to help prevent
any inconveniences. See your authorized
dealer to purchase additional spare or
replacement keys.
Programming a Spare Intelligent
Access Key (If Equipped)
See your authorized dealer to have
additional keys programmed to your
vehicle.
ANTI-THEFT ALARM
(IF EQUIPPED)
The system will warn you of an
unauthorized entry to your vehicle. It will
be triggered if any door, the luggage
compartment or the hood is opened
without using the key, remote control or
keyless entry keypad.
The direction indicators will flash and the
horn will sound if unauthorized entry is
attempted while the alarm is armed.
78
Explorer (CTW), enUSA, Edition date: 202007, Second-Printing Security
Page 82 of 577
Take all remote controls to an authorized
dealer if there is any potential alarm
problem with your vehicle.
Arming the Alarm
The alarm is ready to arm when there is
not a key in your vehicle. Electronically lock
your vehicle to arm the alarm.
Disarming the Alarm
Disarm the alarm by any of the following
actions:
•
Unlock the doors or luggage
compartment with the remote control
or keyless entry keypad.
• Switch your vehicle on or start your
vehicle.
• Use a key in the driver door to unlock
your vehicle, then switch your vehicle
on within 12 seconds.
Note: Pressing the panic button on the
remote control will stop the horn and signal
indicators, but will not disarm the system.
79
Explorer (CTW), enUSA, Edition date: 202007, Second-Printing Security
Page 100 of 577
Press the control to lock or unlock the rear
window controls. It illuminates when you
lock the rear window controls.
Accessory Delay
You can use the window switches for
several minutes after you switch the
ignition off or until you open either front
door.
GLOBAL OPENING
You can use the remote control to open
the windows with the ignition off.
Note:
You can enable or disable this feature
in the information display, or see an
authorized dealer. See General
Information (page 117).
Note: To operate this feature, accessory
delay must not be active.
Remote Control Front Windows
After you unlock your vehicle with the
remote control, you can open the windows
for a short period of time. Press and hold
the remote control unlock button to open
the windows. Release the button once
movement starts. Press the lock or unlock
button to stop movement.
EXTERIOR MIRRORS -
EXCLUDING: ST
Power Exterior Mirrors WARNING:
Do not adjust the
mirrors when your vehicle is moving. This
could result in the loss of control of your
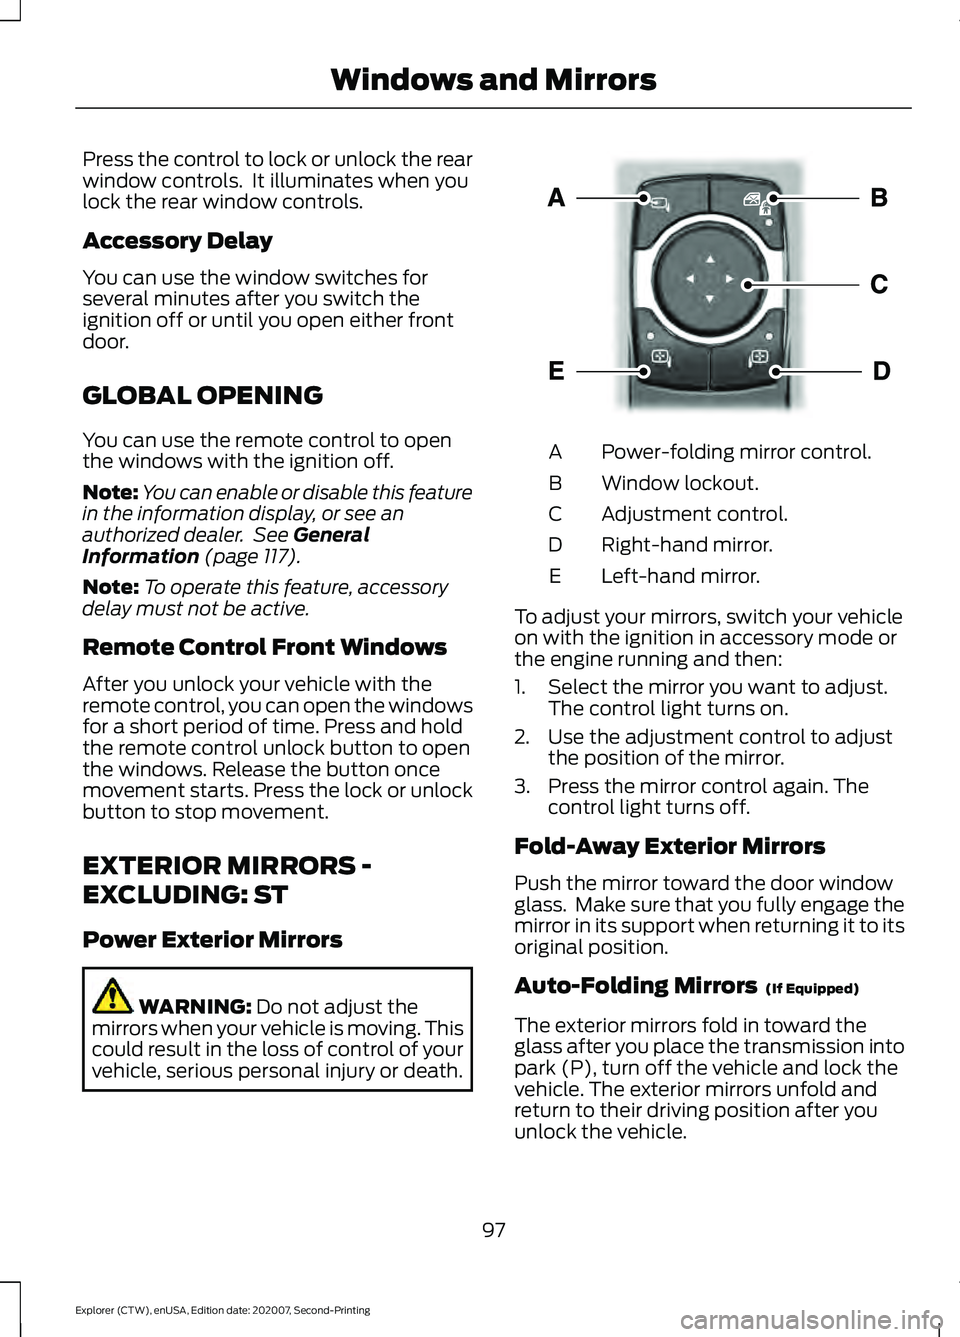
vehicle, serious personal injury or death. Power-folding mirror control.
A
Window lockout.
B
Adjustment control.
C
Right-hand mirror.
D
Left-hand mirror.
E
To adjust your mirrors, switch your vehicle
on with the ignition in accessory mode or
the engine running and then:
1. Select the mirror you want to adjust. The control light turns on.
2. Use the adjustment control to adjust the position of the mirror.
3. Press the mirror control again. The control light turns off.
Fold-Away Exterior Mirrors
Push the mirror toward the door window
glass. Make sure that you fully engage the
mirror in its support when returning it to its
original position.
Auto-Folding Mirrors (If Equipped)
The exterior mirrors fold in toward the
glass after you place the transmission into
park (P), turn off the vehicle and lock the
vehicle. The exterior mirrors unfold and
return to their driving position after you
unlock the vehicle.
97
Explorer (CTW), enUSA, Edition date: 202007, Second-Printing Windows and MirrorsE295322
Page 136 of 577
Power Steering
Action
Message
The power steering system has detected a condition that requiresservice. Have the system checked as soon as possible.
Steering Fault
Service Now
The power steering system is not working. Stop your vehicle in asafe place. Have the system checked as soon as possible.
Steering Loss Stop
Safely
The power steering system has detected a condition within the
power steering system or passive entry or passive start system that requires service. Have the system checked as soon as possible.
Steering Assist
Fault Service Required
The steering lock system has detected a condition that requiresservice. Have the system checked as soon as possible.
Steering Lock
Malfunction
Service Now
Pre-Collision Assist Action
Message
You have a blocked sensor due to inclement weather, ice, mud or
water in front of the radar sensor. You can typically clean the sensor
to resolve.
Pre-Collision
Assist Not Avail- able SensorBlocked
A fault with the system has occurred. Have the system checked as
soon as possible.
Pre-Collision
Assist Not Avail- able
Remote Start Action
Message
Displays as a reminder to apply the brake and push the gear shiftbutton to drive the vehicle after a remote start.
To Drive: Press
Brake and Gear Shift Button
133
Explorer (CTW), enUSA, Edition date: 202007, Second-Printing Information Displays
Page 147 of 577

HEATED REAR WINDOW
Press the button to clear the rear
window of thin ice and fog. The
heated rear window turns off
after a short period of time.
Note: Do not use harsh chemicals, razor
blades or other sharp objects to clean or
remove decals from the inside of the heated
rear window. The vehicle warranty may not
cover damage to the heated rear window
grid lines.
HEATED EXTERIOR MIRRORS
(IF EQUIPPED)
When you switch the heated rear window
on, the heated exterior mirrors turn on.
Note: Do not remove ice from the mirrors
with a scraper or adjust the mirror glass
when it is frozen in place.
Note: Do not clean the mirror housing or
glass with harsh abrasives, fuel or other
petroleum-based cleaning products. The
vehicle warranty may not cover damage
caused to the mirror housing or glass.
REMOTE START (IF EQUIPPED)
The climate control system adjusts the
interior temperature during remote start.
You can switch this feature on or off and
adjust the settings using the touchscreen.
See
Settings (page 464).
You cannot adjust the climate control
setting during remote start operation.
Switch the ignition on to make
adjustments. Based on your remote start settings, the
following vehicle-dependent features may
or may not remain on after remote starting
your vehicle:
•
Climate controlled seats.
• Heated steering wheel.
• Heated mirrors.
• Heated rear window.
• Windshield wiper de-icer.
Note: For dual zone climate controlled
seats, the passenger seat setting defaults
to match the driver seat during remote start.
Automatic Settings
If
Auto is on, the system sets the interior
temperature to 72°F (22°C) and heats or
cools the vehicle interior as required to
achieve comfort.
Note: In cold weather, the heated rear
window and heated mirrors turn on.
Last Settings
If
Last Settings is on, the system uses the
settings last selected before you turned
off the vehicle.
Heated and Cooled Features
In Auto mode, certain heated features may
switch on during cold weather, and cooled
features during hot weather.
144
Explorer (CTW), enUSA, Edition date: 202007, Second-Printing Climate ControlE184884
Page 162 of 577
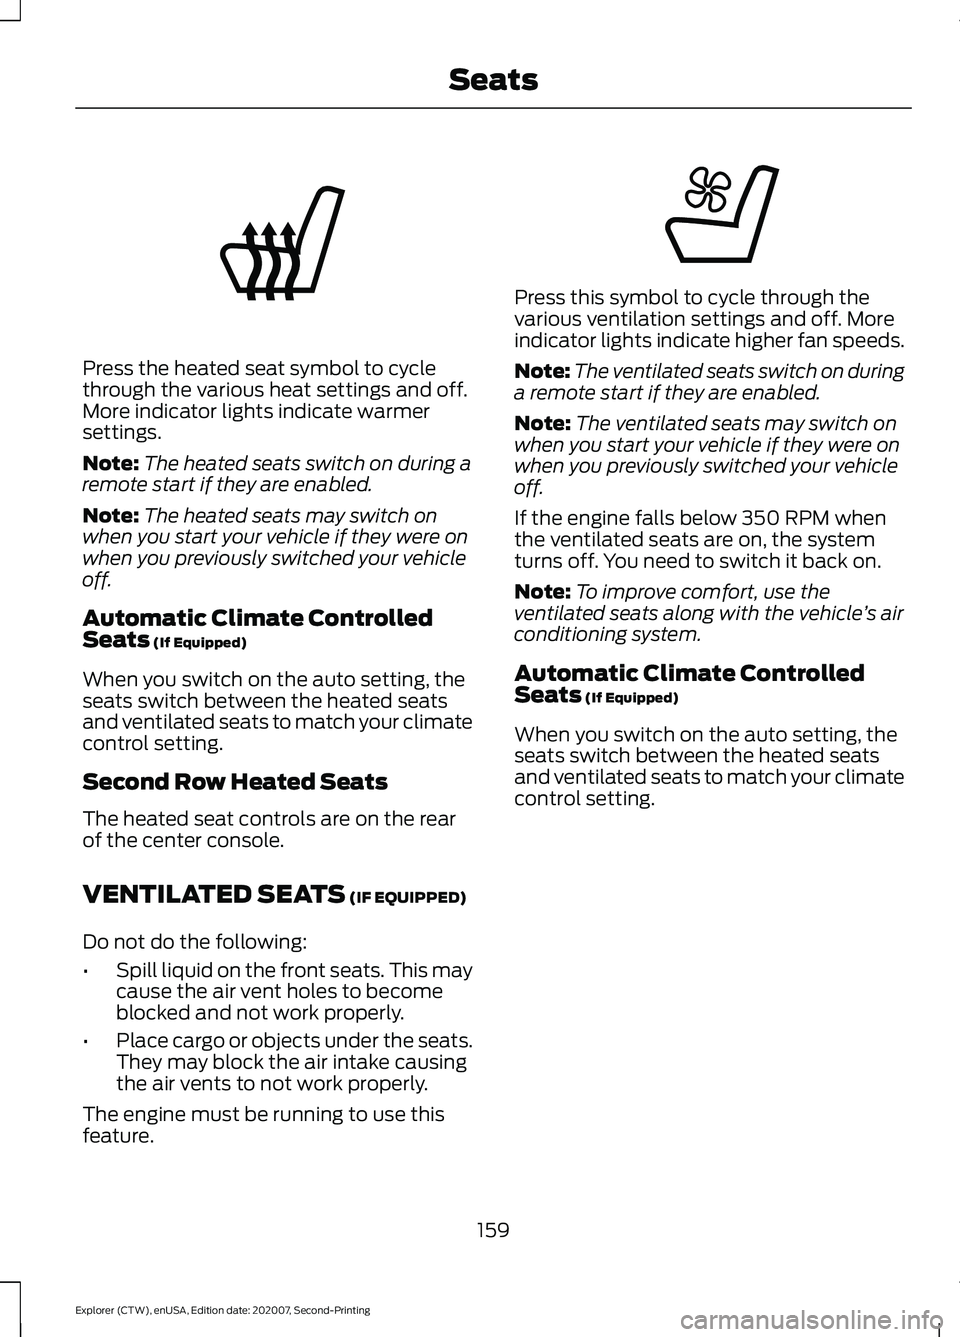
Press the heated seat symbol to cycle
through the various heat settings and off.
More indicator lights indicate warmer
settings.
Note:
The heated seats switch on during a
remote start if they are enabled.
Note: The heated seats may switch on
when you start your vehicle if they were on
when you previously switched your vehicle
off.
Automatic Climate Controlled
Seats (If Equipped)
When you switch on the auto setting, the
seats switch between the heated seats
and ventilated seats to match your climate
control setting.
Second Row Heated Seats
The heated seat controls are on the rear
of the center console.
VENTILATED SEATS
(IF EQUIPPED)
Do not do the following:
• Spill liquid on the front seats. This may
cause the air vent holes to become
blocked and not work properly.
• Place cargo or objects under the seats.
They may block the air intake causing
the air vents to not work properly.
The engine must be running to use this
feature. Press this symbol to cycle through the
various ventilation settings and off. More
indicator lights indicate higher fan speeds.
Note:
The ventilated seats switch on during
a remote start if they are enabled.
Note: The ventilated seats may switch on
when you start your vehicle if they were on
when you previously switched your vehicle
off.
If the engine falls below 350 RPM when
the ventilated seats are on, the system
turns off. You need to switch it back on.
Note: To improve comfort, use the
ventilated seats along with the vehicle ’s air
conditioning system.
Automatic Climate Controlled
Seats
(If Equipped)
When you switch on the auto setting, the
seats switch between the heated seats
and ventilated seats to match your climate
control setting.
159
Explorer (CTW), enUSA, Edition date: 202007, Second-Printing SeatsE146322 E224689