2021 DODGE CHALLENGER radio controls
[x] Cancel search: radio controlsPage 7 of 328

5
TRAILER TOWING ............................................... 111 Common Towing Definitions ......................... 111Trailer Hitch Classification ............................ 113
Trailer Towing Weights (Maximum Trailer
Weight Ratings) ............................................. 113
Trailer And Tongue Weight ........................... 114
Towing Requirements ................................... 114Towing Tips ................................................... 116
RECREATIONAL TOWING
(BEHIND MOTORHOME) ..................................... 117
DRIVING TIPS ....................................................... 117
Driving On Slippery Surfaces ........................ 117
Driving Through Water ................................. 118
MULTIMEDIA
UCONNECT SYSTEMS ......................................... 119
CYBERSECURITY ................................................. 119
UCONNECT SETTINGS ........................................ 120Customer Programmable Features .............. 120
UCONNECT INTRODUCTION................................ 135
System Overview .......................................... 135
Drag & Drop Menu Bar ................................. 138Safety And General Information ................... 138
UCONNECT MODES ............................................. 139
Steering Wheel Audio Controls ..................... 139
Radio Mode .................................................. 140
Media Mode .................................................. 148
Phone Mode ................................................. 150 ANDROID AUTO™ & APPLE CARPLAY® —
IF EQUIPPED ........................................................ 161
Android Auto™ .............................................. 161
Apple CarPlay® ............................................. 163Android Auto™ And Apple CarPlay®
Tips And Tricks .............................................. 165
PERFORMANCE PAGES...................................... 165
Home.............................................................. 166
Timers ............................................................ 168
Gauges ........................................................... 170
G-Force........................................................... 171
Engine ............................................................ 172
Dynamometer (Dyno) .................................... 172
DODGE DRIVE MODES — IF EQUIPPED ............ 173
Performance Control — If Equipped ............. 173
RADIO OPERATION AND MOBILE PHONES ..... 177
Regulatory And Safety Information .............. 177
SAFETY
SAFETY FEATURES .............................................. 178 Anti-Lock Brake System (ABS) ..................... 178
Electronic Brake Control (EBC) System ...... 179
AUXILIARY DRIVING SYSTEMS.......................... 184
Blind Spot Monitoring (BSM) —
If Equipped..................................................... 184Forward Collision Warning (FCW) Operation —
If Equipped..................................................... 187Tire Pressure Monitoring System (TPMS) .... 189 OCCUPANT RESTRAINT SYSTEMS ................... 192
Occupant Restraint Systems Features ....... 192
Important Safety Precautions ...................... 192
Seat Belt Systems ........................................ 193
Supplemental Restraint Systems (SRS) ...... 199Child Restraints ............................................ 208
SAFETY TIPS ........................................................ 223
Transporting Passengers.............................. 223
Transporting Pets ......................................... 223
Safety Checks You Should Make Inside
The Vehicle ................................................... 223
Periodic Safety Checks You Should Make
Outside The Vehicle ...................................... 225
Exhaust Gas................................................... 225
Carbon Monoxide Warnings ......................... 225
IN CASE OF EMERGENCY
HAZARD WARNING FLASHERS ......................... 226
ASSIST AND SOS MIRROR — IF EQUIPPED...... 226
JACKING AND TIRE CHANGING ......................... 229 Preparations For Jacking .............................. 230
Jack Location/Spare Tire Stowage ............. 230
Jacking And Changing A Tire ....................... 231
TIRE SERVICE KIT — IF EQUIPPED ..................... 234
Tire Service Kit Storage ................................ 234
Tire Service Kit Components And Operation ...234
Tire Service Kit Usage Precautions .............. 235
Sealing A Tire With Tire Service Kit .............. 236
21_LA_OM_EN_USC_t.book Page 5
Page 34 of 328

32GETTING TO KNOW YOUR VEHICLE
Easy Entry/Exit Seat — If Equipped
This feature provides automatic driver seat
positioning to enhance driver mobility when
entering and exiting the vehicle.
The distance the driver seat moves depends on
where you have the driver seat positioned when
you place the vehicle’s ignition in the OFF position.
When you place the vehicle’s ignition in the OFF
position, the driver seat will move about
2.4 inches (6.1 cm) rearward if the driver seat
position is greater than or equal to 2.7 inches
(6.8 cm) forward of the rear stop. The seat will
return to its previously set position when you
place the vehicle’s ignition in the ACC or RUN
position.
The Easy Entry/Easy Exit feature is disabled
when the driver seat position is less than 0.9 of
an inch (2.3 cm) forward of the rear stop. At this
position, there is no benefit to the driver by
moving the seat for Easy Exit or Easy Entry.
When enabled in Uconnect Settings, Easy Entry
and Easy Exit positions are stored in each memory
setting profile Ú page 27.
NOTE:The Easy Entry/Exit feature is enabled or disabled
through the programmable features in the
Uconnect system Ú page 120.
HEATED SEATS — IF EQUIPPED
On some models, the front seats may be equipped
with heaters located in the seat cushions and
seatbacks.
Front Heated Seats
The front heated seats control buttons are located
within the Uconnect system. You can gain access
to the control buttons through the climate screen
and the controls screen. You can choose from HI, LO, or OFF heat settings.
The indicator arrows in touchscreen buttons
indicate the level of heat in use. Two indicator
arrows will illuminate for HI, and one for LO.
Turning the heating elements off will return the
user to the radio screen.
Press the heated seat button once to turn
the HI setting on.
Press the heated seat button a second time
to turn the LO setting on.
Press the heated seat button a third time to
turn the heating elements off.
NOTE:
Once a heat setting is selected, heat will be felt
within two to five minutes.
The engine must be running for the heated
seats to operate.
If the HI-level setting is selected, the system will
automatically switch to LO-level after approxi-
mately 60 minutes of continuous operation. At
that time, the display will change from HI to LO,
indicating the change. The LO-level setting will
turn off automatically after approximately
45 minutes.
For information on use with the Remote Start
system, see Ú page 19.
WARNING!
Persons who are unable to feel pain to the
skin because of advanced age, chronic illness,
diabetes, spinal cord injury, medication,
alcohol use, exhaustion or other physical
condition must exercise care when using the
seat heater. It may cause burns even at low
temperatures, especially if used for long
periods of time.
Do not place anything on the seat or seatback
that insulates against heat, such as a blanket
or cushion. This may cause the seat heater to
overheat. Sitting in a seat that has been over -
heated could cause serious burns due to the
increased surface temperature of the seat.
21_LA_OM_EN_USC_t.book Page 32
Page 48 of 328

46GETTING TO KNOW YOUR VEHICLE
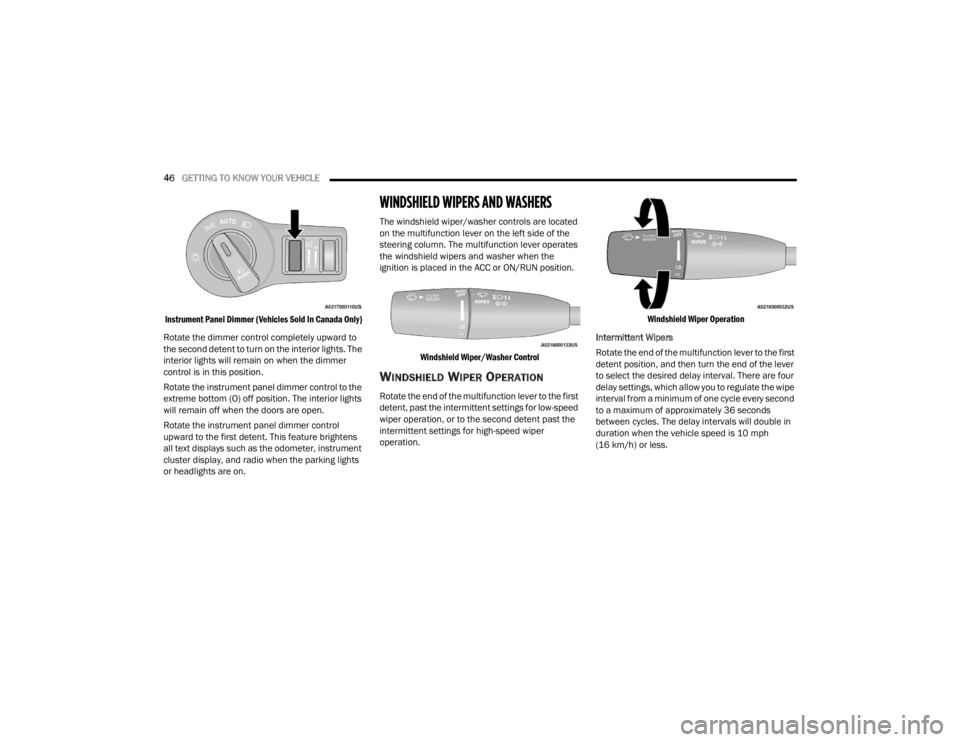
Instrument Panel Dimmer (Vehicles Sold In Canada Only)
Rotate the dimmer control completely upward to
the second detent to turn on the interior lights. The
interior lights will remain on when the dimmer
control is in this position.
Rotate the instrument panel dimmer control to the
extreme bottom (O) off position. The interior lights
will remain off when the doors are open.
Rotate the instrument panel dimmer control
upward to the first detent. This feature brightens
all text displays such as the odometer, instrument
cluster display, and radio when the parking lights
or headlights are on.
WINDSHIELD WIPERS AND WASHERS
The windshield wiper/washer controls are located
on the multifunction lever on the left side of the
steering column. The multifunction lever operates
the windshield wipers and washer when the
ignition is placed in the ACC or ON/RUN position.
Windshield Wiper/Washer Control
WINDSHIELD WIPER OPERATION
Rotate the end of the multifunction lever to the first
detent, past the intermittent settings for low-speed
wiper operation, or to the second detent past the
intermittent settings for high-speed wiper
operation.
Windshield Wiper Operation
Intermittent Wipers
Rotate the end of the multifunction lever to the first
detent position, and then turn the end of the lever
to select the desired delay interval. There are four
delay settings, which allow you to regulate the wipe
interval from a minimum of one cycle every second
to a maximum of approximately 36 seconds
between cycles. The delay intervals will double in
duration when the vehicle speed is 10 mph
(16 km/h) or less.
21_LA_OM_EN_USC_t.book Page 46
Page 50 of 328

48GETTING TO KNOW YOUR VEHICLE
The Rain Sensing system has protection features
for the wiper blades and arms, and will not operate
under the following conditions:
Low Ambient Temperature — When the ignition
is first placed in the ON position, the Rain
Sensing system will not operate until the wiper
switch is moved, vehicle speed is greater than
0 mph (0 km/h), or the outside temperature is
greater than 32°F (0°C).
Transmission In NEUTRAL Position — When the
ignition is ON, and the transmission is in the
NEUTRAL position, the Rain Sensing system will
not operate until the wiper switch is moved,
vehicle speed is greater than 3 mph (5 km/h),
or the gear selector is moved out of the
NEUTRAL position.
Remote Start Mode Inhibit — On vehicles
equipped with Remote Start system, Rain
Sensing wipers are not operational when the
vehicle is in the Remote Start mode.
CLIMATE CONTROLS
The Climate Control system allows you to regulate
the temperature, air flow, and direction of air
circulating throughout the vehicle. The controls are
located on the touchscreen (if equipped) and on
the instrument panel below the radio.
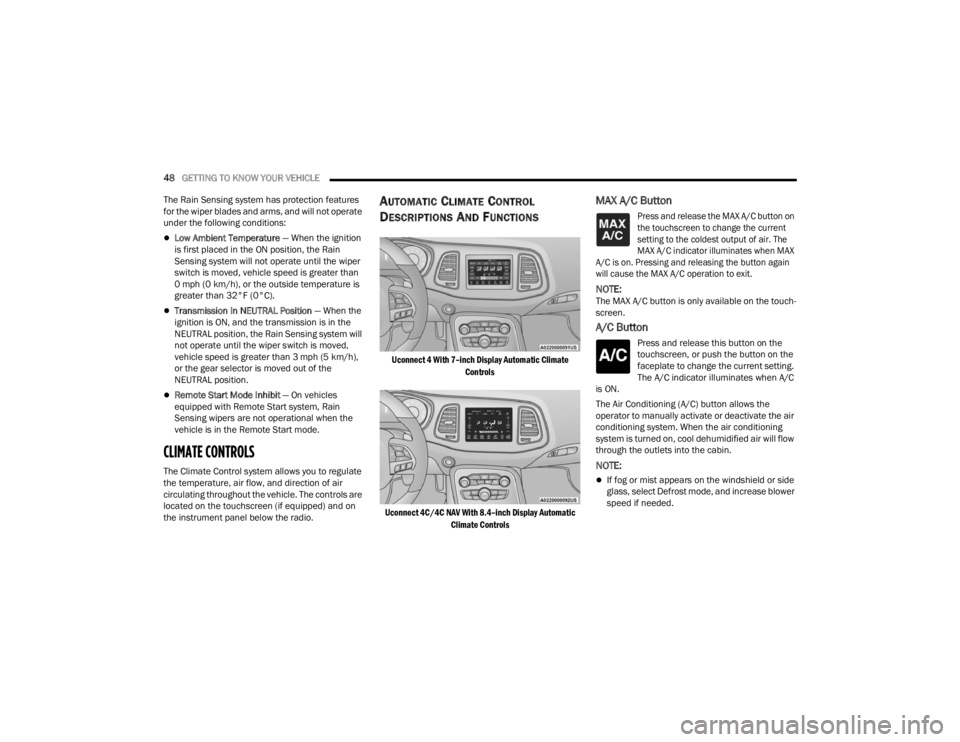
AUTOMATIC CLIMATE CONTROL
D
ESCRIPTIONS AND FUNCTIONS
Uconnect 4 With 7–inch Display Automatic Climate
Controls
Uconnect 4C/4C NAV With 8.4–inch Display Automatic Climate Controls
MAX A/C Button
Press and release the MAX A/C button on
the touchscreen to change the current
setting to the coldest output of air. The
MAX A/C indicator illuminates when MAX
A/C is on. Pressing and releasing the button again
will cause the MAX A/C operation to exit.
NOTE:The MAX A/C button is only available on the touch -
screen.
A/C Button
Press and release this button on the
touchscreen, or push the button on the
faceplate to change the current setting.
The A/C indicator illuminates when A/C
is ON.
The Air Conditioning (A/C) button allows the
operator to manually activate or deactivate the air
conditioning system. When the air conditioning
system is turned on, cool dehumidified air will flow
through the outlets into the cabin.
NOTE:
If fog or mist appears on the windshield or side
glass, select Defrost mode, and increase blower
speed if needed.
21_LA_OM_EN_USC_t.book Page 48
Page 137 of 328

MULTIMEDIA135
UCONNECT INTRODUCTION
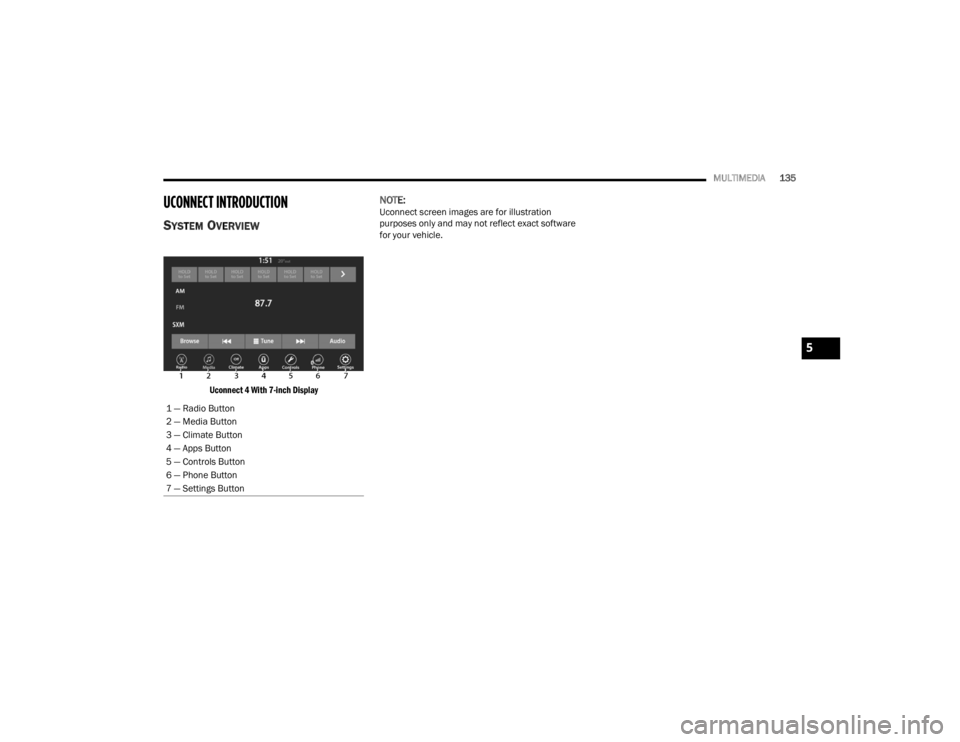
SYSTEM OVERVIEW
Uconnect 4 With 7-inch Display
NOTE:Uconnect screen images are for illustration
purposes only and may not reflect exact software
for your vehicle.
1 — Radio Button
2 — Media Button
3 — Climate Button
4 — Apps Button
5 — Controls Button
6 — Phone Button
7 — Settings Button
5
21_LA_OM_EN_USC_t.book Page 135
Page 139 of 328

MULTIMEDIA137
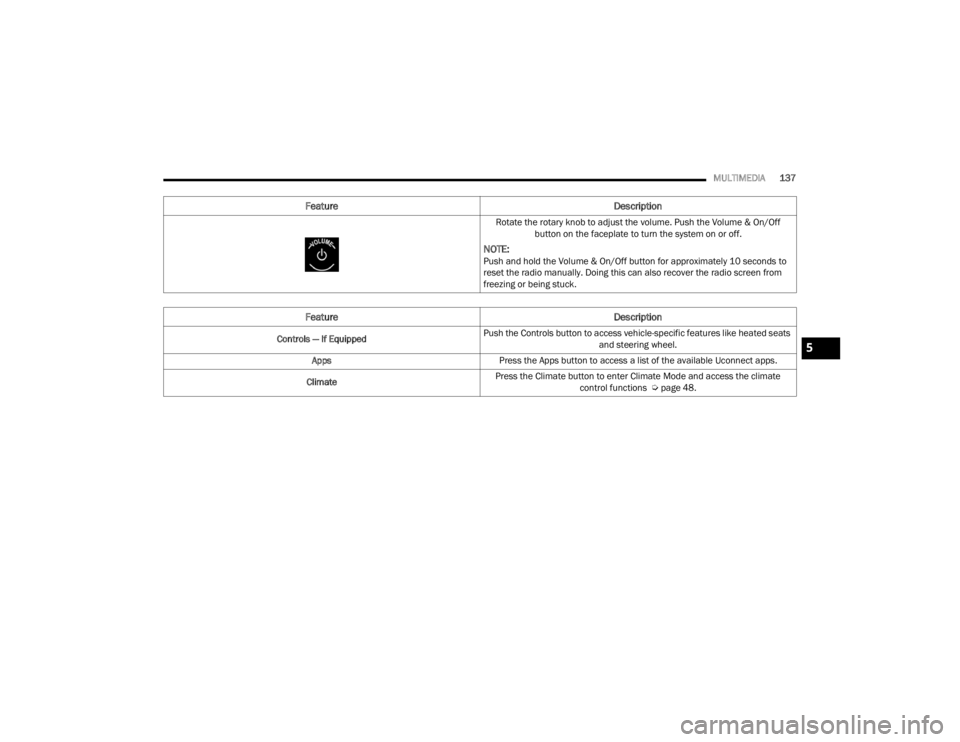
Rotate the rotary knob to adjust the volume. Push the Volume & On/Off button on the faceplate to turn the system on or off.
NOTE:Push and hold the Volume & On/Off button for approximately 10 seconds to
reset the radio manually. Doing this can also recover the radio screen from
freezing or being stuck.
Feature Description
Controls — If EquippedPush the Controls button to access vehicle-specific features like heated seats
and steering wheel.
Apps Press the Apps button to access a list of the available Uconnect apps.
Climate Press the Climate button to enter Climate Mode and access the climate
control functions Úpage 48.
Feature Description
5
21_LA_OM_EN_USC_t.book Page 137
Page 141 of 328

MULTIMEDIA139
Care And Maintenance
Do not press the touchscreen with any hard or
sharp objects (pen, USB stick, jewelry, etc.),
which could scratch the surface.
Do not spray any liquid or chemicals directly on
the screen! Use a clean and dry microfiber lens
cleaning cloth in order to clean the touchscreen.
If necessary, use a lint-free cloth dampened
with a cleaning solution, such as isopropyl
alcohol or an isopropyl alcohol and water solu -
tion ratio of 50:50. Be sure to follow the solvent
manufacturer's precautions and directions
Ú page 311.
UCONNECT MODES
STEERING WHEEL AUDIO CONTROLS
The remote sound system controls are located on
the rear surface of the steering wheel at the three
and nine o’clock positions.
Remote Sound System Controls
The right-hand control is a rocker-type switch with
a push button in the center and controls the
volume and mode of the sound system. Pushing
the top of the rocker switch will increase the
volume, and pushing the bottom of the rocker
switch will decrease the volume.
Pushing the center button will make the radio
switch between the various modes available
(AM/FM/SXM or Media, etc.).
The left-hand control is a rocker-type switch with a
push button in the center. The function of the
left-hand control is different depending on which
mode you are in. The following describes the left-hand control
operation in each mode:
Radio Operation
Pushing the top of the switch will Seek Up for the
next available station and pushing the bottom of
the switch will Seek Down for the next available
station.
The button located in the center of the left-hand
control will tune to the next preset station that you
have programmed in the radio presets.
Media Mode
Pushing the top of the switch skips to the next
track on the selected media (AUX/USB/
Bluetooth®). Pushing the switch up twice will go
forward two tracks. Pushing the bottom switch
goes to the beginning of the current track, or the
beginning of the previous track if it is within eight
seconds after the current track begins to play.
Double pressing the bottom button switch will skip
to the previous track if it is after eight seconds into
the current track.5
21_LA_OM_EN_USC_t.book Page 139
Page 142 of 328

140MULTIMEDIA
RADIO MODE
Radio Controls
Uconnect 4 With 7-inch Display
The radio is equipped with the following modes:
AM
FM
SiriusXM® Satellite Radio (if equipped)
Press the Radio button on the touchscreen to enter
the Radio Mode. The different tuner modes, AM,
FM, and SXM, can then be selected by pressing the
corresponding buttons in Radio Mode.
Volume & On/Off Control
Push the Volume & On/Off control knob to turn on
and off the Uconnect system.
The electronic volume control turns continuously
(360 degrees) in either direction, without stopping.
Turning the Volume & On/Off control knob
clockwise increases the volume, and
counterclockwise decreases it.
When the audio system is turned on, the sound will
be set at the same volume level as last played.
Mute Button
Push the Mute button to mute or unmute the
system.
Tune/Scroll Control
Turn the rotary Tune/Scroll control knob clockwise
to increase or counterclockwise to decrease the
radio station frequency. Push the Enter/Browse
button to choose a selection. Seek
The Seek Up and Down functions are activated by
pressing the double arrow buttons on the
touchscreen to the right and left of the radio
station display or by pushing the left steering wheel
audio control button up or down.
Seek Up
and Seek Down
Press and release the Seek Up or Seek Down
button to tune the radio to the next available station
or channel. During a Seek Up/Down function, if the
radio reaches the starting station after passing
through the entire band two times, the radio will stop
at the station where it began.
Fast Seek Up and Fast Seek Down
Press and hold, and then release the Seek Up
or Seek Down button to advance the radio
through the available stations or channels at a
faster rate. The radio stops at the next available
station or channel when the button on the
touchscreen is released.
NOTE:
Pressing and holding either the Seek Up or
Seek Down button will scan the different
frequency bands at a slower rate.
1 — Radio Bands
2 — Preset Radio Stations
3 — View Next Preset Radio Stations
4 — Status Bar
5 — Browse Button
6 — Seek Down
7 — Tune Button
8 — Seek Up
9 — Audio Settings
10 — Bottom Bar
21_LA_OM_EN_USC_t.book Page 140